
Summary of Contents for St. Michel Bliss Wall 900
- Page 1 Information for your Installer Bliss Furniture Range Version : 2.0 Date : 1st November 2012...
-
Page 2: Table Of Contents
Contents 1 - Message to Homeowner Message to Homeowner 2 - Product Selector - Identify product to be installed Product Selector 3 - Installation Location - Your Special Installation Instructions - Clearance Guideline Installation Location 4 - Site Preparation Site Preparation 5 - General Installation Information - Product Installation... -
Page 3: Message To Homeowner
Message to Homeowner IMPORTANT PLEASE READ THIS IF YOU ARE THE HOMEOWNER Thank you for choosing St Michel bathroom furniture. We are here to help you to achieve the outcomes you want so we’d like to offer you some guidance around the installation process. Planning this and ensuring the correct guidelines are followed is not only vital to ensuring you’re happy with the end result and that the bathroom is properly functional and will stand the test of time. - Page 4 Message to Homeowner IMPORTANT PLEASE READ THIS IF YOU ARE THE HOMEOWNER Guideline Overview Section 2 Product Selector Tick your chosen furniture. Give this section to your installer so they know what product you have selected and its exact specifications. Section 3 Installation Location Identifying the installation location sounds simple, but in homes with multiple bathrooms it...
-
Page 5: Product Selector
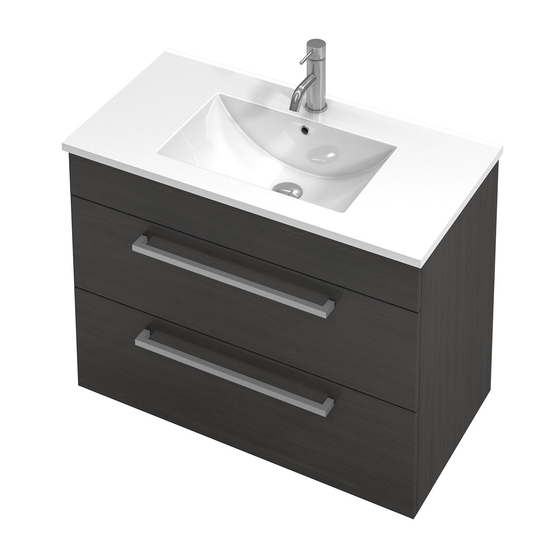
Product Selector Bliss Bliss Product Selector Use the following charts to identify what product you intend to install. This will help your installer in the planning phase. - Page 6 Product Selector Bliss Identify which cabinet you chose Bliss Wall 900 - 1 Drawer Bliss Wall 900 - 2 Drawer Bliss Floor 900 - 2 Drawer Quartz W 900 H 418 D 465 Quartz W 900 H 668 D 465...
-
Page 7: Installation Location
Installation Location Identify the room your product should be installed Identify Room here Your Special Instructions to the installer SOME EXAMPLES OF SPECIAL INSTRUCTIONS YOU MAY WANT TO CONSIDER Vanities Side Furniture Mirrors and Lighting State preferred height of wall mounted Consider finished height of low furniture. -
Page 8: Clearance Guideline
Installation Location Clearance Guidelines The following guide will assist you in planning your new bathroom • These Bathroom Clearance Guidelines will help you create a practical working space that maximises the potential of the room you have to work with. By using these measurements you can determine the best furniture, shower, bath and fixture combination for your bathroom. Mirror Cabinet Mirror Mirror Dimension Dimension Dimension 700mm high 740mm high 900mm high 1050mm 1150mm 1200mm Average fixing heights are supplied, adjust for personal preference CAUTION: Mirror Cabinet doors need to clear tapware, consider if mounting lower. - Page 9 Installation Location Clearance Wall to Toilet Pan Edge of Bath/Vanity to Centre Toilet Pan Clearance Wall to Basin/Vanity - 750mm to 1200mm - 400mm to 500mm - 750mm to 900mm - 900mm most practical - 500mm most practical - 900mm most practical Clearance Wall to Centre Pan - 400mm to 500mm - 500mm most practical...
-
Page 10: Site Preparation
Site Preparation PLANNING : SITE PREPARATION AND PLUMBING IMPORTANT: PLEASE READ PRIOR TO INSTALLATION POSITIONING FURNITURE POSITION IS IMPORTANT When deciding on the position of the furniture, be sure to H - 50mm to 150mm arrange the product at least 150mm from any wet areas I - 150mm to 300mm such as baths, spas and showers. -
Page 11: General Installation Information
General Installation Information INSTALLATION INSTRUCTIONS IMPORTANT: PLEASE READ PRIOR TO INSTALLATION We recommend that a qualified, licensed tradesperson install this vanity and we would expect the installation to be undertaken in a tradesman like manner and finished to a tradesman standard. This product carries a full warranty against faulty workmanship and materials. -
Page 12: Hinge Adjustment
General Installation Information INSTALLATION INSTRUCTIONS IMPORTANT: PLEASE READ PRIOR TO INSTALLATION WASTE FITTING WASTE CORRECTLY In a ceramic basin, hand tighten the waste - do not overtighten or the basin may be damaged. Use suitable overflow waste and align the slots with the internal holes in the basin and ensure that no excess silicone or putty is obstructing the water flow. - Page 13 General Installation Information BLISS Please note: With wall hung vanities, we suggest you adjust the measurements to suit your individual height preference. 1dr / 1d1dr Wall Hung 2dr / 1d2dr Wall Hung Floor Finished Floor Level Description Basin (Basin Top) (Cabinet Height) Bliss...
- Page 14 General Installation Information CERAMIC QUARTZ “ICE BASIN” WASTE (AS SEEN ON BLISS) PLUMBING CAUTION Mushroom Plug Special Note: As the Ceramic Quartz basins are free formed, no two basins are the same and because of Washer this it is possible that the Dome/Mushroom plug A may touch the side of the basin and Extra Washer...
- Page 15 General Installation Information STAINLESS SHROUD INSTALLATION INSTRUCTIONS (AS SEEN ON BLISS FURNITURE) LEVEL CABINET 1. Ensure that the adjustable legs are pre-set at 150mm before installation begins. Measurements are taken from the underside of the cabinet to the floor. 2. Level the cabinet by adjusting the four corner legs and ensure that the minimum height from the underside of the cabinet to the floor is no less than 150mm.
- Page 16 General Installation Information HINGE ADJUSTMENTS St Michel use clip hinges which require only light finger pressure to clip into place and allow the doors to be easily removed for access to plumbing fittings. DOOR ALIGNMENT Your doors have been adjusted in the factory on a level surface to achieve matching height, equal gap and surface alignment.
-
Page 17: Product Specifications
Product Specifications ICE BASIN CERAMIC QUARTZ CONSOLE BASIN Ice Basin Description Ice 900 Ice 1200 1200 (Bowl length) (Bowl Width) Standard Tap Size 35 mm Standard Waste Size 32 mm Basin Depth 100 mm Depth to Overflow All dimensions are in millimetres nominal. 11/12 St Michel Industries Limited, PO Box 21 122, Henderson, Auckland. - Page 18 Product Specifications BLISS Bliss Description Bliss Wall 900 1dr Bliss Wall 900 2dr Bliss Floor 900 2dr Bliss Wall 1200 1d 1dr 1200 1192 Bliss Wall 1200 1d 2dr 1200 1192 Bliss Floor 1200 1d 2dr 1200 1192 ( 1dr...
- Page 19 Product Specifications BLISS STORAGE Bliss Storage Description Bliss Tower 255 2d 1740 Bliss Tower 340 2d 1740 Front View Front View Side View 255 2d 340 2d 11/12 All dimensions are in millimetres nominal. St Michel Industries Limited, PO Box 21 122, Henderson, Auckland. Phone 09 837 4276. Fax 09 837 4325...
Need help?
Do you have a question about the Bliss Wall 900 and is the answer not in the manual?
Questions and answers