Table of Contents
Advertisement
YR SERIES ICEMAKER END-USER MANUAL
YR140-AP-161 / YR280-AP-161 / YR450-AP-161 / YR800-AP-161
In order to provide the best
service, Atosa requests that
you register your warranty at
www.atosausa.com
Please clean the filter frequently
Please clean the filter frequently
DO NOT OVERLOAD
DO NOT OVERLOAD
For any service issues, please
contact us at:
Email: service@atosausa.com
or call us Toll Free:
1-855-855-0399
Advertisement
Table of Contents

Related Manuals for Atosa YR140-AP-161

Summary of Contents for Atosa YR140-AP-161
- Page 1 YR SERIES ICEMAKER END-USER MANUAL YR140-AP-161 / YR280-AP-161 / YR450-AP-161 / YR800-AP-161 In order to provide the best For any service issues, please service, Atosa requests that contact us at: you register your warranty at Email: service@atosausa.com www.atosausa.com or call us Toll Free: 1-855-855-0399 Please clean the filter frequently...
-
Page 2: Table Of Contents
Content Summary ........................... 2 Model ..........................2 Ice production ........................3 Safety Notices..........................4 Installation ..........................5 III. Power supply ........................5 Construction ........................6 Accessories ........................7 Ice bin installation ......................7 Ice machine head installation ................... 7 Obstruction panel installation(no in the self-contained machine) ......8 Connect the water inlet hose and drain hose .............. -
Page 3: Summary
Summary The following data are for reference only 1. Model Model YR140-AP-161 YR280-AP-161 YR450-AP-161 YR800-AP-261 Cooling style Power supply 110-120V/ 110-120V/ 110-120V 220-240V 60Hz 60Hz /60Hz /60Hz Power(W) 1700 140lb 280lb 450lb 800lb production(IBS/24hr) Dimension(mm) 601*725*981 601*725*981 765*610*557 765*610*801 Weight(kg) -
Page 4: Ice Production
2. Ice production YR140-AP-161 Ice production : Ambient Ice production(Ibs/24hr) Temp. Water 70F(21℃) 90F(32℃) 100F(38℃) Temp. 70F(21℃) YR280-AP-161 Ice production : Ambient Ice production(Ibs/24hr) Temp. Water 70F(21℃) 90F(32℃) 100F(38℃) Temp. 70F(21℃) YR450-AP-161 Ice production : Ambient Ice production(Ibs/24hr) Temp. Water 70F(21℃) -
Page 5: Safety Notices
Safety Notices Please read this manual carefully before proceeding, otherwise, can result in death, serious injury or damage to the equipment. • Caution Read this manual thoroughly before operating, installing or performing maintenance on the equipment. Failure to follow instructions in this manual can cause property damage, injury or death. -
Page 6: Installation
4) the ice maker starts with the maximum load and the maximum allowable voltage fluctuates by +/- 10%; 5) check that the socket is securely fastened before starting. Match fuse or breaker and machine circuit current Model YR140-AP-161 YR280-AP-161 YR450-AP-161 YR800-AP-261 V/P/F... -
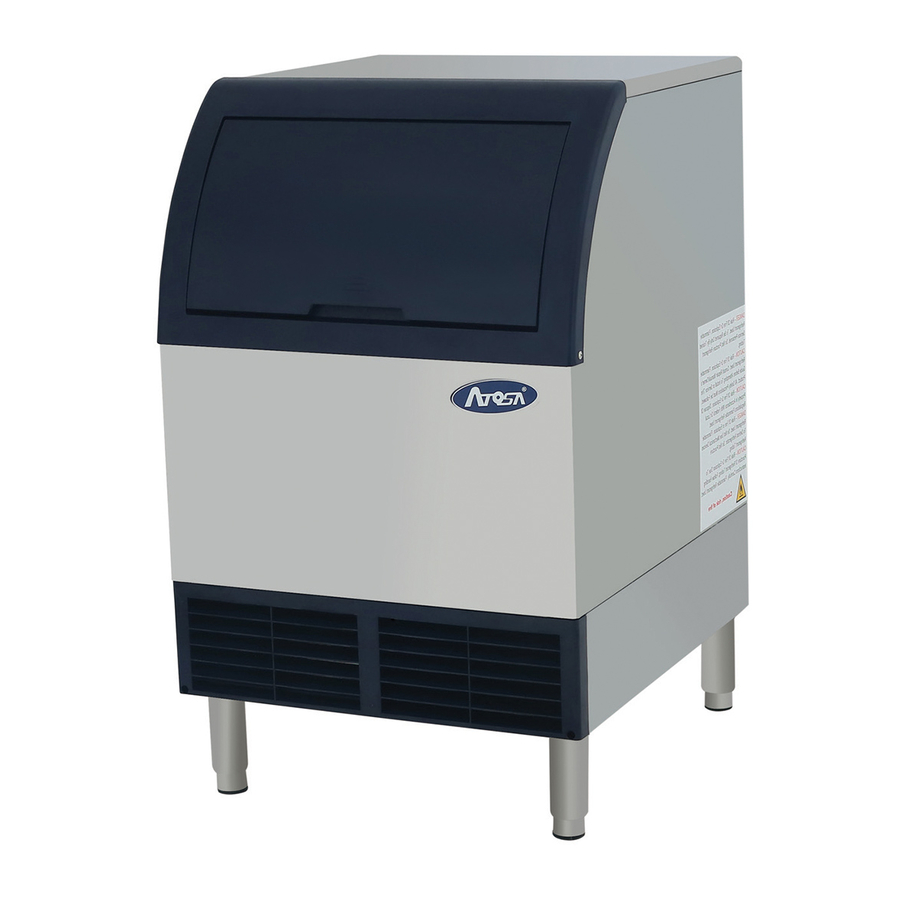
Page 7: Construction
current 2. Construction Ice machine head outside view Top cover Right side panel Front door Bin door Ice bin storage Adjustable foot Self-contained ice machine construction Back panel Top cover door Front panel Switch filter Adjustable foot 6 / 22... -
Page 8: Accessories
3. Accessories Use manual Water inlet hose Drain hose Obstruction panel User manual Water inlet hose Ice scoop Ice scoop Air baffle(No in Drain hose the self-contained machine) 4. Ice bin installation • Caution Adjustive foot must be tightened; otherwise the ice machine will be instable. 2) carefully place the ice bin storage on the rear side. -
Page 9: Obstruction Panel Installation(No In The Self-Contained Machine
6. Obstruction panel installation ( no in the self-contained machine) • Caution Air baffle must be installed, or affect heat reject. 1) Unscrew the two fixed screws; 2) put the air baffle as the picture Fixed screws shows; 7. Connect the water inlet hose and drain hose 8 / 22... -
Page 10: Installation Location
Ice machine head connection diagram Water inlet hose Self- contained machine Water inlet hose installation Drain hose The floor drain Water inlet hose • Notice The water entering the ice maker must meet the drinking water standard if there is no water filter system, please connect the water inlet hose as diagram shows;... -
Page 11: Operation
Do not put things in the air inlet and outlet of the ice maker to prevent ventilation and heat reject. Do not install ice machine in direct sunlight. the ice machine should be installed horizontally; the ambient temperature should be 10~43C(50—110F) and the water inlet temperature is 1~32 C(33—90F);... -
Page 12: Ice Weight Per Batch
Ice full:when the magnet switch opens beyond 30s in harvest cycle, the ice machine stops, mean the ice is full. 3. Ice weight per batch YR140-AP-161 YR280-AP-161 YR450-AP-161 YR800-AP-261 Ice Weight per 690—840... -
Page 13: Maintenance
Maintenance Clean and sanitize Cleaning and Sanitizing GENERAL You are responsible for maintaining the ice machine in accordance with the instructions in this manual. Maintenance procedures are not covered by the warranty. Clean and sanitize the ice machine every three months for efficient operation. If the ice machine requires more frequent cleaning and sanitizing, consult a qualified service company to test the water quality and recommend appropriate water treatment. - Page 14 Step 3 Toggle the switch on “clean” position. Water will flow through the water dump valve and down the drain. Wait until the water trough refills (approximately 1 minute), then add the proper amount of ice machine cleaner. Model Amount of cleaner(Kay delimer) YR140-AP-161 2 pack YR280-AP-161 2 pack YR450-AP-161...
- Page 15 Wait until the water trough refills (approximately 1 minute), then add the proper amount of ice machine sanitizer Model Amount of sanitizer(Kay 5) YR140-AP-161 1 pack YR280-AP-161 1 pack YR450-AP-161...
-
Page 16: Condenser Air-Filter Wash
Unscrew the two thumb screws, remove the Thumb screw water curtain remove the water trough For Model YR140-AP-161, YR280-AP-161 remove the water curtain Unscrew the two thumb screws, remove the water curtain remove the water dispense panel... -
Page 17: Service
• Notice Clean air-filter once a month Service • Important Technicians must have the correlative certificate of service 16 / 22... -
Page 18: Diagram
1. Diagram 2. Safety protection E1:Long freeze cycle, freeze cycle reaches 40min for 3 times, stop. E2:Long harvest cycle, harvest cycle reaches 4.5min for 3 times, stop. E3:High pressure protection,discharge pressure reaches 450psi, stop. E4:water lack protection, water probe can’t touch water for 5min in freeze cycle, stop. -
Page 19: Failures Analysis
D7 off——switch on “off” position。 D8 blue led:water level indicator D8 flash slow——1s on 1s off,E3,water lack protection. D8 Illuminate——water probe touch the water D8 off——water probe not touch the water D9 red led:Harvest cycle indicator/ harvest probe D9 flash fast——0.3s on 0.3s off,E1,long freeze protection D9 flash slow——0.7s on 0.7s off, E2,long harvest protection D9 Illuminate——harvest probe not touch the water D9 off——harvest probe touch the water... -
Page 20: Customer Support
5. Customer Support Checklist If a problem arises during operation of your ice machine, follow the checklist below before calling service. Routine adjustments and maintenance procedures are not covered by the warranty. Problem Possible Cause To Correct No electrical power to the ice Replace the fuse/reset the machine machine and/or condensing unit... -
Page 21: Waste Disposal
Water curtain must be installed Water curtain off or stuck open. and swinging freely Ice machine is not turned on. Put the switch in the ice "position" machine stops, and Safety protection feature stopping Refer to “Safety protection ” on the can be the ice machine. - Page 22 respect to the compressor shall apply for an additional twelve months, excluding all labor charges. The obligation of the manufactory under this warranty is limited to the repair or replacement of parts, components, or assemblies that in the opinion of the manufactory are defective. This warranty is further limited to the cost of parts, components or assemblies and standard straight time labor charges at the servicing location.
Need help?
Do you have a question about the YR140-AP-161 and is the answer not in the manual?
Questions and answers