Advertisement
Quick Links
Advertisement

Related Manuals for August Doorbell Cam


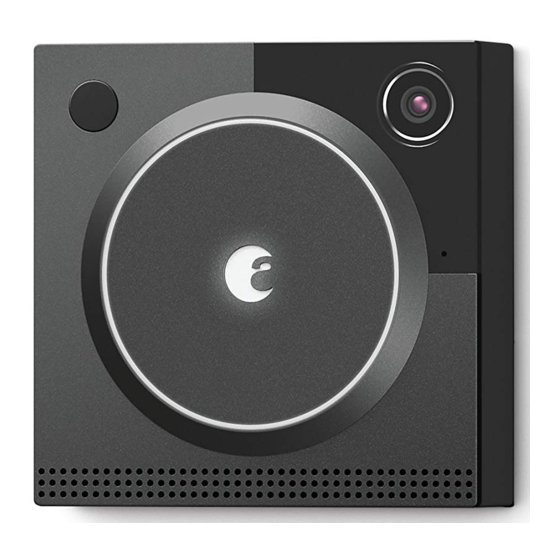
Summary of Contents for August Doorbell Cam
- Page 1 August Doorbell Cam Installation Guide...
-
Page 2: Inside The Box
Inside the Box Wedge August Doorbell Cam Mounting Plate and Spacer Six (6) 1” Screws Six (6) 1” Anchors Smart Keypad Spacer Hex Key Four (4) Dolphin Connectors Putty What you need Drill w/ drill bit set Hammer Tape Measure... - Page 3 You'll need to ensure that your doorbell is getting 16-24V from the transformer. Allow time for charging doorbell cam As part of the installation and setup process, you’ll be asked to charge the Doorbell Cam’s internal battery for 30 minutes after you’ve mounted it to your doorbell wiring. Please...
- Page 4 Wi-Fi access point is on the same floor and as close to your Doorbell Cam as possible. If it is too far, the Doorbell Cam will not get a proper signal. Multiple stories or brick/stone walls within your home may also contribute to signal interference.
- Page 5 Determine your drill bit size If you’d prefer to have someone come and help you out, we partner with: Hellotech: https://www.hellotech.com/august Pro.com: https://pro.com/augusthomes...
-
Page 6: Turn Off Power
1. Test your current doorbell Confirm that your existing doorbell works by pressing it. This might sound obvious, but it never hurts to double check! August Doorbell Cam will only work properly when installed onto a working 12-24 volt wired doorbell system. - Page 7 3. Remove current doorbell Loosen the screws holding your existing doorbell in place and gently remove it from the wall. Next, unfasten any wires attached to your existing doorbell. You should be left with two exposed wires coming from the wall. Remove any spare paint, adhesive or other debris near your doorbell so that your surface is as flat as possible.
- Page 8 4. Remove the spacer from the mounting plate The wedge adjusts the angle of your Doorbell Cam for a clear view of your guests’ faces. In order to use it, remove the three screws that hold the mounting plate to the spacer and set the screws to the side (you’ll need them again later).
- Page 9 Take the mounting plate and place it over wedge, aligning the same holes to the gold screw holes. Run the wiring through the large-middle hole of the wedge. Note the “UP” arrow, it should face upwards. Then take two of the three screws that you set aside earlier and use them to attach the mounting plate to the wedge.
-
Page 10: Drill The Holes
7. Drill the holes Drill holes into the four spots you marked on your surface. Use the drill bit type and size given to you in the Installation Checklist. A full chart is provided below for reference. (Anchor only step, otherwise skip to #9) 8. - Page 11 9. Attach wiring using blue dolphin connectors Press the end of one of your existing doorbell wires (either doorbell wire is fine) against one of the wires from the mounting plate. Make sure the wires are flush and pointing in the same direction.
- Page 12 10. Apply duct seal putty Tear open the small bag containing the duct seal putty. Press some or all of the putty over and around the hole in your wall that your wiring is coming out of, so that the putty is flat against the wall and the hole is completely covered.
- Page 13 Wedge Mounting Plate 13. Mount the doorbell cam Examine the front of the mounting plate and make sure the security screw is correctly aligned. If the screw is sticking out of the bottom of the mounting plate, use the included hex wrench to adjust it.
- Page 14 After you've checked the security screw, align the Doorbell Cam over the top lip of the mounting plate/wedge, then push the bottom of the Doorbell Cam firmly. Wedge Mounting Plate 14. Restore power to doorbell You should now restore power to your doorbell.
- Page 15 You should eventually see a pulsing green bell-shaped light on the front of your Doorbell Cam. Press the large circular button on the front of the device - if everything is wired correctly, you should hear your interior doorbell chime.
- Page 16 18. Use the August app to complete setup To set up your Doorbell Cam, select “Set Up a Doorbell Cam” (iOS) or "Set up a new Device" (Android) from the main menu of the August app and follow the instructions.
- Page 17 20. Secure your doorbell cam To secure your doorbell cam, insert the included hex wrench into the small hole on the anti- bottom of the Doorbell Cam. Gently turn to your left 2-3 full revolutions to tighten...
- Page 18 Help Call 844-AUGUST1 (284-8781) or visit: august.com/support for answers. 01.18-R2...
Need help?
Do you have a question about the Doorbell Cam and is the answer not in the manual?
Questions and answers