Advertisement
Quick Links
AVOIDING WATER ENTRY
Zipper must be fully closed and
protected by the flap:
1- Logo should be at the back.
2- Close zipper sliders all the way,
until they touch at the back of the
carrier.
3- Use carrier full if possible, to
keep zipper flap pointing down.
4- If carrier is not full, make sure
the zipper flap points down along
all 3 sides.
AVOIDING WATER ENTRY INTO
THE CAR
No-rack installation: over-tight
straps may deform the door seal
and allow rainwater into the car.
Loosen straps slightly when driving
through rain and loosen them
completely when leaving car
parked in the rain.
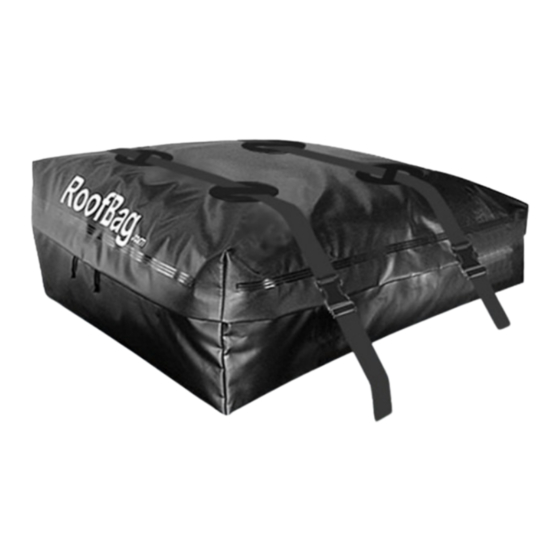
Car Top Carriers
... or WITHOUT rack
Tips for Trouble-free Enjoyment of Your Carrier
FILLING THE CARRIER
1- Use carrier full if possible to
avoid fabric damage caused by
wind flapping and to avoid water
entry through the zipper.
2- Cushion hard or sharp objects
inside bag with towels or blankets.
3- Distribute the weight evenly in-
side carrier to avoid denting the
roof.
LOOSE CREASES
Loose fabric creases cause noise,
lower gas mileage and damage the
fabric. Hold down loose creases
with straps. Use extra straps if nec-
essary.
STRAP ATTACHMENT
Rack installation: straps should be
attached only to strong side rails or
cross bars. Don't attach straps to
rain gutter, roof edge, open hooks
or anything not intended to sup-
port heavy loads. Also, don't attach
straps to RoofBag's strap guides.
RoofBag's versatile
design fits cars
WITH rack ...
STRAP TENSION
Straps should be snug but not over-
tight. Over-tight straps can dent a
thin roof or damage the paint at
roof's edge. Check strap tension dur-
ing travel.
STRAP ANGLES
Follow the "Correct Strap Angles"
diagrams for optimum stability.
STRAP NOISE
If a strap whistles or
rumbles: unbuckle,
twist and re-buckle.
To avoid strap flapping
noise: wrap the free
end and tuck the tip
under the last turn.
COLD WEATHER
Fabric can get stiff at cold tempera-
tures. To facilitate zipper operation:
Lubricate zipper ahead of time with
silicone spray or gel and flip up the
flap corners when opening or clos-
ing the zipper.
Installation
Booklet
RB2017
Advertisement

Summary of Contents for RoofBag Cross Country
- Page 1 Lubricate zipper ahead of time with or anything not intended to sup- silicone spray or gel and flip up the port heavy loads. Also, don’t attach flap corners when opening or clos- straps to RoofBag’s strap guides. ing the zipper.
- Page 2 OVERVIEW Page 2 Prepare carrier 1. Place carrier on a clean roof and (preferably) on a Protective Mat (sold separately). 2. Logo should face the back of the car. 3. Front of carrier should be at least 8 inches behind front edge of roof. 4.
-
Page 3: Side Rails
Side Rails or Cross Bars Page 3 Each strap has 3 sections: Top Strap, Rack Short Strap, Rack Long Strap. 1. Slide a Top Strap under 2 strap guides, left-right for side rails or front-back for cross bars. 2. Repeat for the other Top Strap. 3. - Page 4 Side Rails or Cross Bars (cont.) Page 4 Cross Bars Very Close Together Use Pass-Through Straps (No-Rack Straps) as shown, in- stead of Rack Straps.
- Page 5 Car or Van WITHOUT Rack Page 5 Each strap has 2 sections: Top Strap (shorter) and Inside Strap (longer). 1. Slide a Top Strap under 2 strap guides, left-to-right. 2. Open the front doors of the car, run the Inside Strap across the interior, and connect buck- les to the Top Strap until they click.
- Page 6 Van WITHOUT Rack Page 6 Standard Installation: Vans with side doors Install straps through front doors and side doors. Check for interfer- ence with the side door closing mechanism. Each strap is 142” long (Top Strap + In- side Strap). Alternative #1: Vans with rear windows that open...
- Page 7 Hook Straps (Sold Separately) Page 7 Each strap has 3 sections: Top Strap, Hook Short Strap, Hook Long Strap. 1. Slide a Top Strap under 2 strap guides, left-to-right. 2. Open the car’s doors and at- tach one of the hooks onto a hard ridge or lip about ½”...
-
Page 8: Warranty And Returns
The manufacturer is not liable for any loss or damage caused by the carrier or its use, or for any indi- rect, incidental or consequential damages resulting from the use or the fall of a RoofBag carrier, whether the car- rier was defective or not.
Need help?
Do you have a question about the Cross Country and is the answer not in the manual?
Questions and answers