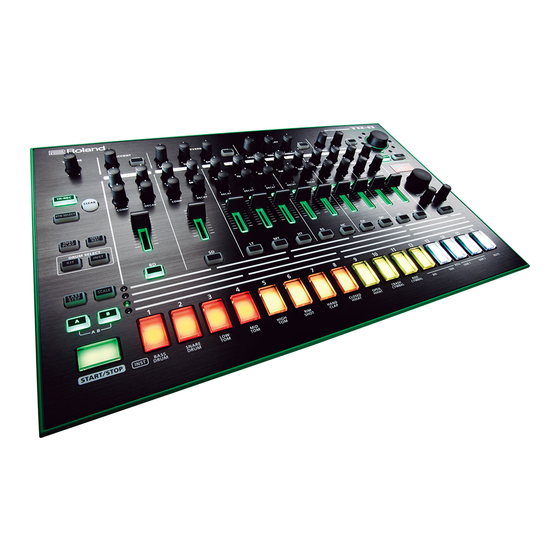
Roland TR-8 Operation Manual
7x7-tr8 drum machine expansion
Hide thumbs
Also See for TR-8:
- Manual (27 pages) ,
- Quick start manual (4 pages) ,
- Update procedure (3 pages)
Advertisement
Quick Links
Download this manual
See also:
Manual
Panel Descriptions
7
8
9
10
1
11
2
3
12
13
4
5
14
6
MEMO
In this operation guide, functions added by installing the TR-8 update (ver. 1.10, ver. 1.11) and
7X7-TR8 Drum Machine Expansion are printed in red.
1
[VOLUME] knob
Adjusts the output volume of the MIX OUT jacks and the PHONES jack.
* This does not affect the volume of the ASSIGNABLE OUT jacks.
2
[CLEAR] button
Erases the recorded content for an individual instrument, or deletes a pattern.
3
Mode buttons
Controller
Explanation
[TR-REC] button
Step-records a pattern.
Refer to "TR-REC (Step Recording)"
[PTN SELECT] button
Select a pattern.
Refer to "Playing/Selecting/Controlling a Pattern"
Lets you use the pads (
) to perform in real time.
14
[INST PLAY] button
You can perform even while a pattern is playing.
Lets you realtime-record a pattern.
[INST REC] button
Refer to "INST-REC (Realtime Recording)"
[KIT] button
Select a kit.
Refer to "Changing Kits/Instruments"
DRUM
Selects the sound (tone) for an instrument.
SELECT
[INST] button
Refer to "Changing Kits/Instruments"
4
[LAST STEP] button
Specifies the length of the pattern.
Refer to "TR-REC (Step Recording)"
5
Variation buttons [A][B]
Switches between variations (A/B) of a pattern.
Refer to "Playing/Selecting/Controlling a Pattern"
6
[START/STOP] button
Plays/stops the pattern.
*
While a pattern is playing, you can hold down the [TAP] button and press the [START/STOP] button to move to the
beginning of the pattern.
7
ACCENT section
Refer to "TR-REC (Step Recording)"
Adds an accent to the specified step.
8
REVERB section/
9
DELAY section
Let you edit the parameters for reverb and delay.
Controller
Explanation
[LEVEL] knob
Volume of the reverb/delay
[TIME] knob
Length of the reverb/delay
[GATE] knob
Timing at which the reverb is cut off (only for reverb)
[FEEDBACK] knob
Delay repetitions (only for delay)
[STEP] button
Lets you use the pads (
) to specify the step to which reverb or delay will be applied.
14
10
EXTERNAL IN section
Here you can adjust the sound that's input to the EXTERNAL IN jacks.
Controller
Explanation
[LEVEL] knob
Volume
Adjusts ("ducks") the volume of the audio input according to the pattern being played by
[SIDE CHAIN] knob
the TR-8 (side chain). Turning the knob toward the right produces a greater effect.
Lets you use the pads (
14
) to specify the steps at which side chaining will adjust the
[STEP] button
volume.
11
INST edit section
Here you can adjust the tonal character of the instrument.
What is an "INST"?
The TR-8 lets you use 11 different INST (instruments; BASS DRUM–RIDE CYMBAL) in a pattern. You can assign a desired
sound (tone) to each instrument.
Controller
Explanation
[TUNE] knob
Tuning (pitch)
[DECAY] knob
Length of decay
[ATTACK] knob
Strength of the attack (only for BASS DRUM)
[SNAPPY] knob
Volume of the snare (stretched wires) (only for SNARE DRUM)
[COMP] knob
Amount of compressor effect (only for BASS DRUM and SNARE DRUM)
[LEVEL] fader
Volume
* For some tones, there might not be an effect.
12
INST select button
Mode
Explanation
TR-REC
Selects the instrument for TR-REC.
Refer to "TR-REC (Step Recording)"
Selects the instrument whose tone will be changed.
DRUM SELECT-INST
Refer to "Changing Kits/Instruments"
7X7-TR8 Drum Machine Expansion Operation Guide
13
SCALE section
Switches the scale of steps during TR-REC.
Button/LED
Explanation
[SCALE] button
Choose one of the following four to specify the note value of each step.
15
8th note triplet ( )
Three steps will be one beat.
16th note triplet ( )
Six steps will be one beat.
16th note ( )
Four steps will be one beat.
16
32nd note ( )
Eight steps will be one beat.
14
Pad [1]–[11](INST)/ Pad [12]–[15](ROLL)/ Pad [16](MUTE)
17
Mode
Explanation
TR-REC
For each step, specify whether the instrument will sound.
PTN SELECT
Select a pattern 1–16.
• Pads [1]–[11](INST) play instruments.
• If you hold down [12]–[15](ROLL) and press [1]–[11], a roll is played on that instrument;
you can press two or more of the [12]–[15] pads to change the roll variation.
If you hold down the [INST PLAY] button and press the [12]–[15] and [1]–[11] pads,
INST PLAY
the sound will be held so that it continues playing even after you release your finger.
To cancel Hold, press the selected pad without pressing [INST PLAY].
• If you press [16](MUTE) and then press the instrument pad or INST select button, that
sound is muted.
INST REC
During realtime recording, the pads record the corresponding instrument.
KIT
Select kits 1–16.
DRUM SELECT
INST
Select a tone for the instrument.
15
SCATTER section
Controller
Explanation
[SCATTER] knob
Selects the scatter type.
[DEPTH] button
If this is on, the [SCATTER] knob adjusts the scatter depth.
[ON] button
Enables the scatter function.
* The scatter effect will not apply to the first cycle of the loop; the effect will apply to the second and subsequent cycles
of the loop.
*
By holding down the [DEPTH] button and pressing the [ON] button, you can apply scatter to just the cycle that is
currently playing.
16
Display/
17
TEMPO section
The current tempo is shown in the display (
16
).
Controller
Explanation
[TEMPO] knob
Adjusts the tempo.
[SHUFFLE] knob
Adjusts the amount of shuffle (bounce).
[FINE] knob
Makes fine adjustments to the tempo.
[TAP] button
To set the tempo, tap this button several times at the desired interval.
Playing/Selecting/Controlling a Pattern
Playing a pattern
Copying a pattern for an individual
instrument
1.
Press the [START/STOP] button (
6
).
1.
2.
Switch patterns by pressing the pad for the
Use scatter (
) or INST edit (
) to modify the
15
11
sound.
pattern that you want to copy.
2.
Hold down the [PTN SELECT] button (
Selecting a pattern
press the INST select button(s) (
instrument(s) that you want to copy. (Multiple
1.
Press the [PTN SELECT] button (
).
3
selections are allowed.)
2.
Use the pads (
) to select a pattern.
3.
14
When you've specified the instrument(s), press the
[PTN SELECT] button (
The selected pad blinks. It remains lit during
playback.
4.
Press the pad (
If you select the next pattern during playback, the
pattern.
pad blinks.
You can have a range selection by pushing two
Deleting a pattern
pads simultaneously. The selected patterns play
sequentially.
1.
Press the [PTN SELECT] button (
3.
Use the variation buttons (
) to select A or B.
5
2.
Hold down the [CLEAR] button (
If you make both buttons [A] and [B] light, A and
pads (
) to specify the pattern that you want to
14
then B are played successively.
delete.
Generating a random pattern
Locking (not editable) a pattern
You can automatically generate a random pattern.
1.
Hold down the [PTN SELECT] button (
This modifies the selected pattern.
the [TEMPO] knob (
1.
Hold down the [PTN SELECT] button (
) and
3
The display indicates "
press the SCATTER [ON] button (
15
).
editable).
2.
To save, press the [TR-REC] button (blinks).
Copying a pattern
1.
Press the [PTN SELECT] button (
3
).
* If a pattern is playing, stop it.
2.
Hold down the [PTN SELECT] button (
) and use
3
the pads (
14
) to specify the pattern that you want
to copy.
3.
Press the pad to which you want to paste the
pattern.
Restoring the Factory Settings (Factory Reset)
Here's how to return the TR-8 to its factory-set state.
1.
While holding down the [CLEAR] button, turn on the power.
The display indicates "
rSt
" and the [START/STOP] button blinks. If you decide to cancel the factory reset, turn off the
power.
2.
Press the [START/STOP] button to execute the factory reset.
3.
When the display indicates "
CNP
," turn the TR-8's power off, then on again.
To avoid disturbing others nearby, try to keep the unit's volume at reasonable levels.
In the interest of product improvement, the specifications and/or contents of this package are subject to change without prior
notice.
Changing Kits/Instruments
Added instruments
TR-707/727 sounds (tones) and original sounds based on the TR-808 HC circuit have been added.
The color that's displayed when you change an instrument's sound (tone) is pink for TR-808, yellow for TR-909, orange for
TR-707, and blue for TR-727.
INST
1
2
3
808 BD Long
BD
808 BD
909 BD
707 BD1/2
Decay
727 Mute/
SD
808 SD
909 SD
707 SD1/2
Open H
Conga
LT
808 LT
909 LT
808 L Conga
707 LT
MT
808 MT
909 MT
808 M Conga
707 MT
HT
808 HT
909 HT
808 H Conga
707 HT
707 RS/
RS
808 RS
909 RS
808 Claves
Cowbell
707 HC/
HC
808 HC
909 HC
808 Maracas
Tambourine
727
CH
808 CH
909 CH
707 CH
ShortWhistle
727
OH
808 OH
909 OH
707 OH
LongWhistle
CC
808 CC
909 CC
707 CC
727 Quijada
727
RC
808 Cowbell
909 RC
707 RC
StarChime
Changing kits
1.
Press the DRUM SELECT [KIT] button (
).
3
2.
Press a lit pad (
) to select a kit.
14
The selected pad blinks.
Changing an instrument's sound (tone)
This modifies the kit that is selected.
1.
Press the DRUM SELECT [INST] button (
).
3
2.
Use the INST select buttons (
) to select the
12
instrument whose tone you want to change.
3.
Press a lit pad (
) to select its tone.
14
The selected pad blinks.
Changing an instrument's pan
1.
Press the DRUM SELECT [INST] button (
3
).
2.
Hold down the INST select button (
) and turn the
12
[TEMPO] knob (L64–0–R63).
Changing the type of reverb/delay/side
chain
1.
Press the DRUM SELECT [INST] button (
).
3
2.
Press the [STEP] button (
) and use the pads
8 9 10
(
) to change the type of delay, reverb, or side
14
chain.
Turning each instrument's reverb/delay
on/off
1.
Press the DRUM SELECT [KIT] button (
).
3
) and
3
2.
Hold down the [STEP] button (
8 9
) and use the
) of the
12
INST select buttons (
) to turn the setting on/off.
12
).
3
) to which you want to paste the
14
).
3
2
) and use the
INST-REC (Realtime Recording)
In this method of recording, you create a pattern by
recording your performance on the pads (
14
) in real time.
This will modify the pattern that is selected.
1.
Press the [INST REC] button (
).
3
) and turn
3
2.
Press the [START/STOP] button (
) to start
6
).
17
recording.
OFF
" (editable) or "
Loc
" (not
3.
Perform on the pads (
).
14
* Operations in the INST edit section (
) are not
11
recorded.
Adding accents to the performance
1.
Hold down the ACCENT [STEP] button (
7
) and use
the pads (
) to specify the steps.
14
Playing alternate sounds or weak beats
The following sounds allow you to play alternate sounds.
For the other sounds, you can specify weak beats.
707 BD1/2,
707 SD1/2,
707 RS/Cowbell,
707 HC/Tambourine,
727 H/L Bongo,
727 Mute/Open H Conga,
727 H/L Agogo,
727 Cabasa/Maracas
1.
Hold down the REVERB [STEP] button (
8
) and play
a pad (
14
).
© 2014 Roland Corporation
TR-REC (Step Recording)
In this method of recording, you create a pattern by specifying the steps at which each instrument will sound.
This will modify the pattern that is selected. You can even play back the pattern while you're creating it.
1.
Press the [TR-REC] button (
2.
Use the variation buttons to select either A or B.
* If A and B are playing consecutively, you can hold down
4
5
6
7
8
[A] and press [B] to select A, or hold down [B] and press [A]
727 H/L
to select B.
909 AttackBD
---
---
Bongo
*
By holding down the [TR-REC] button and pressing [A]
or [B], you can edit the pattern of the specified variation
909 AttackSD
---
---
---
regardless of the pattern that's currently playing.
3.
Use the [SCALE] button (
808
4.
727 L Conga
707 BD1
707 BD2
Press one of the INST select buttons (
NoiseTom L
instrument that you want to record.
727 Open H
808
727 H Timbale 727 L Bongo
5.
Use the pads (
14
) to specify the steps at which you
Conga
NoiseTom M
want the selected instrument to sound.
727 Mute H
808
727 L Timbale 727 H Bongo
6.
Repeat steps 3–4.
Conga
NoiseTom H
Specifying the length of the pattern (LAST
727 H/L
---
---
---
Agogo
STEP)
727 Cabasa/
808
808 NoiseClap
---
Maracas
FingerSnap
Here's how to specify the number of steps that the pattern
will contain.
---
---
---
---
1.
Hold down the [LAST STEP] button (
pad (
) to specify the last step.
14
---
---
---
---
* You can't specify LAST STEP if multiple patterns are
727
selected.
---
---
---
ShortWhistle
Specifying accents
727
808
707
808 NoiseClap
LongWhistle
FingerSnap
Tambourine
1.
Press the [STEP] button (
Pattern 1–16
2.
Press the pads (
) for each step at which you want to
14
A
B
add an accent.
3.
Use the [LEVEL] knob (
7
accent.
A pattern plays the inst
Applying reverb or delay
of the kit.
1.
Press the [STEP] button (
Kit 1–16
2.
Use the pads (
14
) to specify the steps at which you
want to apply reverb or delay.
BASS
3.
Use the knobs such as [LEVEL] and [TIME] (
DRUM
adjust the parameters.
Deleting a recorded instrument from the
Inst x11
pattern
Changing an instrument's gain
Refer to "INST-REC (Realtime Recording)"
1.
Press the DRUM SELECT [KIT] button (
3
).
2.
Hold down the INST select button (
) of the
12
instrument that you want to adjust, and turn the
[TEMPO] knob (
17
).
Copying a kit
1.
Press the DRUM SELECT [KIT] button (
).
3
2.
Press a pad (
14
) to select the kit that you want to
System Settings
change.
3.
3
While holding down the [KIT] button (
), turn the
1.
While holding down the [PTN SELECT] button, turn on the power.
[TEMPO] knob (
17
) to select the copy-source kit.
The [START/STOP] button blinks. If you decide not to make settings, turn off the power.
* As the copy-source, you can also select an original kit
2.
Use the [TEMPO] knob and the pads to change the settings.
(707/727/808/909).
4.
14
Press the blinking pad (
) to execute the copy.
Parameter
Controller
* Before executing the copy operation, you can exit
without copying by selecting "---" as the copy-source
[TEMPO]
or by pressing a different pad that is lit.
MIDI channel
knob
MIDI
[1]
clock source
MIDI through
[2]
Alternate sounds
BOOST mode
[3]
Although one sound is assigned to each pad, specific
EXTERNAL IN
sounds (tones) such as the 707 BD and 707 SD have a
[4]
select
second sound (alternate sound) assigned as well.
The normal sound and alternate sound are played
alternately.
SCATTER [ON]
[5]
button
Playing a flam
MIDI realtime
1.
message
[6]
Hold down the DELAY [STEP] button (
9
) and play a
reception
pad (
14
).
SCALE
[SCALE]
Deleting a recorded instrument from the
operations
pattern
ASSIGNABLE
Hold down variation [A]
OUT A
Function
Operation
ASSIGNABLE
During playback, hold down the
Hold down variation [B]
OUT B
[CLEAR] button (
2
); the instrument
Deleting a
that's selected by the INST select
Hold down [TAP] and turn the
Screen-saver
specific region
buttons (
) is deleted from the
12
[TEMPO] knob
region of the pattern that plays while
you hold down the [CLEAR] button.
PROGRAMMING
Hold down the INST select button (
12
[TR-REC]
Deleting all
mode
) of the instrument that you want to
notes
delete, and press the [CLEAR] (
)
2
button.
EFFECT mode
[KIT]
3.
Press the [START/STOP] button to save the settings.
The settings are saved, and the TR-8 restarts.
02
).
Playing alternate sounds or weak beats
3
The following sounds allow you to play alternate sounds. For
the other sounds, you can specify weak beats.
707 BD1/2,
707 SD1/2,
707 RS/Cowbell,
707 HC/Tambourine,
727 H/L Bongo,
727 Mute/Open H Conga,
727 H/L Agogo,
727 Cabasa/Maracas
) to specify the scale.
13
) to select the
1.
12
Hold down one of the INST select buttons (
) and
12
press the appropriate pad (
14
).
The pad lights dimly.
Specifying weak accents
1.
Press the ACCENT [STEP] button (
7
).
2.
For each step at which you want to specify a weak
accent, hold down the ACCENT [STEP] button (
) and
7
press the appropriate pad.
) and press a
3.
Use the ACCENT [LEVEL] knob (
) to specify the
4
7
volume of the weak accent.
* You can specify either an accent or a weak accent, not
both.
* The volume of the accent and the volume of the weak
accent change in tandem.
).
7
Specifying a flam
1.
Hold down the [TR-REC] button (
3
) and press a pad
) to adjust the volume of the
to specify a flam.
The pad is lit purple.
Specifying the flam spacing
).
8 9
You can choose the flam spacing in a range of eight steps.
1.
Hold down the [TR-REC] button (
) and use the
3
[TEMPO] knob (
17
) to specify the flam spacing.
) to
8 9
* If you specify "0, " there will be no flam effect.
Explanation
Specifies the MIDI transmit/receive channel.
OFF
C1
C16
,
–
The display indicates the channel (default:
C10
).
MIDI messages of all channels are received.
ONn
(OMNI)
The MIDI transmit channel will be 10.
If MIDI clock is being input to the MIDI IN connector or the USB port, the
TR-8's tempo will automatically synchronize to MIDI clock (default).
Lit (AUTO)
If MIDI clock is being simultaneously input from the MIDI IN connector
and from the USB port, the USB port takes priority.
The TR-8 operates at the tempo specified on the unit itself. Choose the
Unlit (INTERNAL)
"INTERNAL" setting if you don't want to synchronize to an external device.
Lit (ON)
Specifies whether data received from the MIDI IN connector will be
retransmitted from the MIDI OUT connector (ON: default) or will not be
Unlit (OFF)
retransmitted (OFF).
Lit (ON)
Boosts the output level of the MIX OUT jacks and the ASSIGNABLE OUT
Unlit (OFF)
jacks (default: ON).
Lit (STEREO)
Specifies whether the audio input from the EXTERNAL IN jacks will be
stereo (default setting) or mono x 2.
Unlit (MONO)
Lit (ON)
Enabled only while you hold down the button.
Alternates between enabled/disabled each time you press the button
Unlit (OFF)
(default setting).
Lit (ON)
Only MIDI clock is received.
Unlit (OFF)
MIDI clock and START/STOP are received (default setting).
Hold down the [SCALE] button and use the [TEMPO] knob to select the
Lit (ON)
scale.
The scale switches each time you press the [SCALE] button (default
Unlit (OFF)
setting).
If the INST select button or the EXTERNAL IN section's [STEP] button is lit,
that instrument is output to ASSIGNABLE OUT A.
If the INST select button or the EXTERNAL IN section's [STEP] button is lit,
that instrument is output to ASSIGNABLE OUT B
OFF
Specifies the time until the screen saver is shown. If this is
, the
screen saver is not shown (default: 5 min).
Each time you press the pad, the setting is switched in the order of
Lit (PAD)
Strong -> Weak -> Off.
By holding down the INST select button and pressing a pad, you can
Unlit (INST)
enter a weak note (default value).
Lit (KIT)
The effect type is saved in the kit.
Unlit (SYSTEM)
All kits use the same effect type (default value).
Advertisement


Need help?
Do you have a question about the TR-8 and is the answer not in the manual?
Questions and answers