Table of Contents
Advertisement
Advertisement
Table of Contents

Summary of Contents for Arjohuntleigh Maxi Move KMC*U Series
- Page 1 Maxi Move Scale Technical Manual ...with people in mind 001-25013-EN Rev • /201...
- Page 2 Design Policy and Copyright ® and ™ are trademarks belonging to the ArjoHuntleigh group of companies. © ArjoHuntleigh 2014. As our policy is one of continuous improvement, we reserve the right to modify designs without prior notice.The content of this publication may not be copied either whole or in part without the consent of...
-
Page 3: Table Of Contents
Table of Contents Scale Description .................... 4 Verified scale....................4 Non-Verified scale..................5 SP1-Counter Verification ................6 SP2-Gravity Code Change ................7 Changing the Gravity Code ................. 7 Marking ....................... 13 European Gravity Zone Map ............... 15 Gravity Adjustment Table ................17 SP3-Scale verification .................. -
Page 4: Scale Description
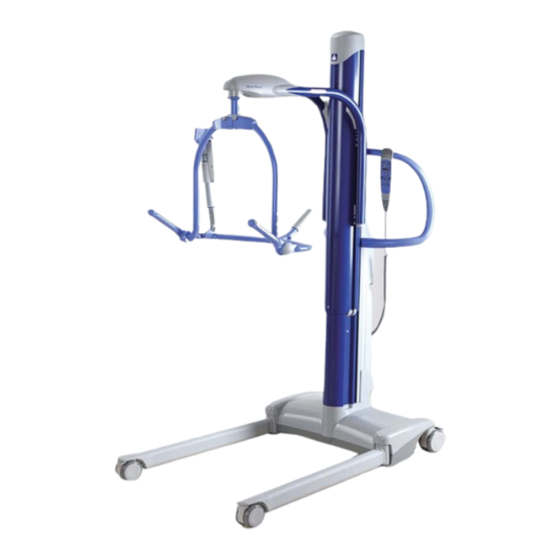
General Information Scale Description time an operation changes the value of the calibration or of the gravity code, the The Maxi Move scale makes it possible to corresponding counter automatically weigh patients during a transfer. The load cell is incremented, without any possibility of being attached to the jib. -
Page 5: Non-Verified Scale
General Information Non-Verified scale Each Maxi Move KMC*U* is equipped with a non-verified scale. Although the load cell is identical to a verified scale, the verification process is less complex. These scales don’t need to be certified by an authorized notified body and don’t use the software seal system as do verified scales. -
Page 6: Sp1-Counter Verification
Service Procedures SP1-Counter Verification (Verified Scale Only) Using the handset, enter the “Gravity Code” menu and look for the calibration counter value and the gravity counter value. STEP 1 STEP 3 To display the Press the down Hoist Status button three Screen, press times to find the both operating... -
Page 7: Sp2-Gravity Code Change
Service Procedures SP2-Gravity Code Change SP2-Gravity Code Change (Verified scales only) Note: Changing the gravity code will void the certification and the scale will need to be verifying by an authorized notified body before being put back in service. Changing the Gravity Code If the scale’s gravity code needs to be changed (for examplae, the lift needs to be moved to a different region or country), follow these instructions: 1) Access to the “Gravity Configuration Mode”:... - Page 8 Service Procedures SP2-Gravity Code Change • Confirm the selected code with the following button: CONFIRM button • For codes 00-98, the configuration is complete. WAIT 5 SECONDS, and then shut off the instrument. • Code 99 permits the gravity configuration for a location specified by a known elevation and latitude.
- Page 9 Service Procedures SP2-Gravity Code Change • In the "3D View" tab, select "Decimal Degrees" and "Meters, Kilometers" then, click "OK". • In the "Search" field, enter the information about the location of the final customer (name of the city and the country) then, click the magnifier button to search the location.
- Page 10 Service Procedures SP2-Gravity Code Change • Adjust the camera altitude by scrolling in or out as needed. • Position cursor outside the satellite view window. • The bottom center of the screen will display the latitude (lat), the longitude (long) and the elevation (elev).
- Page 11 Service Procedures SP2-Gravity Code Change • To modify the elevation, use the following buttons: (elevation is shown in meters) Move the cursor to the left Increase value Decrease value Move the cursor to the right • Confirm the elevation by pressing the following button: CONFIRM button •...
- Page 12 Service Procedures SP2-Gravity Code Change • To modify the latitude, use the following buttons: (round off degree value) Move the cursor to the left Increase value Decrease value Move the cursor to the right • Confirm the latitude using the following button: CONFIRM button •...
-
Page 13: Marking
Service Procedures SP2-Gravity Code Change Marking Once the values have been changed, enter the “Scale Counter Menu” to get the value of the Gravity Counter (see “Counter Verification” section). Apply a label corresponding to this value to the CE-Marking label. For Austria, Germany, Switzerland and Sweden, apply a new gravity zone label over the scale marking label as specified in the Gravity Adjustment Table on page 17 (if necessary). - Page 14 Service Procedures SP2-Gravity Code Change For France, apply a new label 001.00536 over the scale marking label (if necessary). Write down the year of validity (year of apposition + 1 year) Punch or circle with a black permanent pen the month of apposition NOTE: Have the change verified and approved by a notified body.
-
Page 15: European Gravity Zone Map
Service Procedures SP2-Gravity Code Change European Gravity Zone Map Norway MFG CODE GRAVITY ZONE Kristiansand, Stavanger, Oslo, Bergen, Hamar g =9.8184 m/s Alesund, Trondheim g =9.80211 m/s Bodo, Tromso g =9.8244 m/s Denmark MFG CODE GRAVITY ZONE =9.81584 Iceland MFG CODE GRAVITY ZONE Netherlands =9.82308... - Page 16 Service Procedures SP2-Gravity Code Change Sweden Estonia MFG CODE GRAVITY ZONE MFG CODE GRAVITY ZONE Lithuania Zone 2 g=9.8184 m/s =9.817823 m/s MFG CODE GRAVITY ZONE Zone 5 g=9.82279 m/s 53.5:0-300 Germany Latvia MFG CODE GRAVITY ZONE MFG CODE GRAVITY ZONE =9.810 m/s 55.5-58:0-300 Belgium...
-
Page 17: Gravity Adjustment Table
Service Procedures Gravity Adjustment Table Gravity Adjustment Table GRAVITY GRAVITY ZONE COUNTRY POSTAL CODE CODE LABEL (if required) 001.25076 Austria 1000 to 3999 / 5000 to 6599 / 7000 to 9999 Belgium 6600 to 6999 4000-4999 J1X 5Y2 Canada Cyprus Czech Republic Denmark... - Page 18 Service Procedures Gravity Adjustment Table GRAVITY GRAVITY ZONE COUNTRY POSTAL CODE CODE LABEL (if required) 05,06,10 12 to 63 00, 01, 02, 03, 04, 64, 65, 66, 67, 70, 71, 72, 73, 74, 80, 81, 82, 83, 84, 86 Italy 07, 08, 09, 75, 85, 87, 88, 89, 90,91,98 92 to 97 Latvia...
- Page 19 Service Procedures Gravity Adjustment Table GRAVITY GRAVITY ZONE COUNTRY POSTAL CODE CODE LABEL (if required) Zone 1 001.25072 www.metas.ch/SwissGravityZones Zone 2 001.25073 www.metas.ch/SwissGravityZones Switzerland Zone 3 001.25074 UK (north) www.metas.ch/SwissGravityZones Zone 4 001.25075 www.metas.ch/SwissGravityZones KY, FK, PA, PH, DD, AB, IV, KW BB, BD, BL, BT, CA, CH, CW, DG, DH, DL, DN, EH, FY, G, HD, HG, HU, HX, KA, L, LA, LN, LS, M, ML, NE, OL, PR, S, SK, SR, TD, TS, WA, WF, WN, YO...
-
Page 20: Sp3-Scale Verification
Service Procedures SP3-Scale verification SP3-Scale verification recommended that at least five readings from 0 to 225 kg for standard jibs and For Verified Scales 0 kg to 130 kg for extended jibs are performed. The five reading must be Note: ARJO technicians can perform a spread evenly throughout the entire verification to check if the scale meets range. -
Page 21: Sp4-Maxi Move Communication Tool
Service Procedures SP4-Maxi Move Communication Tool SP4-Maxi Move Communication Tool Note: This tool is to be used with the Maxi Move produced by BHM Medical in Canada (Model: KMC- Note: The communication tool is only needed for the calibration. For the verification, it’s not necessary to use the communication tool. -
Page 22: Installing The Drivers
Service Procedures SP4-Maxi Move Communication Tool Installing the drivers To install the application, you must start MMCalibSetup.exe provided on a CD-Rom or via FTP access at: http://files.bhm-medical.com/misc/MMCalibSetup.exe Once started, the following box will appear on the screen:... - Page 23 Service Procedures SP4-Maxi Move Communication Tool Click “Next” to get to the following screen: Once at this screen, plug in your Maxi Move Communication tool and check the “I accept the terms of the Licence Agreement” box before clicking “Next”.
- Page 24 Service Procedures SP4-Maxi Move Communication Tool NOTE: If the following screen is displayed next, it is important that you ignore it and continue the installation of MMCalibrator. The screen will disappear once the installation is complete. Initiate the installation. It may take a while if the Net Framework is not installed. While the installation is proceeding, you may see two pop-ups indicating that a driver is trying to be installed.
-
Page 25: Sp5-Scale Calibration
Service Procedures SP5-Scale Calibration Note: Prior to the scale calibration, make sure that the gravity code is set according to the area in which its being used. SP5-Scale Calibration Calibration Material The load cell on the Maxi Move communicates with an RS-485 protocol. To calibrate the scale, you will need: •... -
Page 26: Using The Application
Service Procedures SP5-Scale Calibration Using the Application 4) Launch the application (MMcalibrator.exe). You will get this pop-up: 5) Just click OK after making sure your Maxi Move communication tool switch is set to OFF. The following screen will appear: 6) Once ready, click “Connect” The application will try to find the COM port to which the tool is connected. - Page 27 Service Procedures SP5-Scale Calibration 7) You can now turn the Maxi Move communication tool switch to ON and then click OK. The application will try to communicate with the scale. If successful, the version of the scale firmware will show up as a result. If not, an error has occurred and you will have to restart the connection procedure.
- Page 28 Service Procedures SP5-Scale Calibration Failed connection: Once successfully connected, the “Calibrate”, “Get information” and “Constantly get information buttons” will become available: Get Information: Gets the current weight and angle of the scale. Constantly get information: Same as “Get Information”, but information is updated each second for the weight, and each 5 seconds for the angle.
- Page 29 Service Procedures SP5-Scale Calibration 10) Click “Ok” to start the zero command Wait about 6 seconds for the command to be sent. 11) Enter the calibration weight in KG in the following box. Click OK. 12) Install the weight specified in the support on the unit and click “Ok” 13) You will receive a confirmation message that the scale is correctly calibrated.
- Page 30 Service Procedures SP5-Scale Calibration 14) Turn off the power supply switch on the communication tool. 15) Disconnect the load cell from the power supply, connect it back to the hoist and reinstall the top cover (make sure that no components create any mechanical interference between the load cell and any part of the hoist).
-
Page 31: Sp6-Scale Replacement
Service Procedures SP6-Scale Replacement SP6-Scale Replacement If the scale needs to be replaced, follow the instructions in the Maxi Move Maintenance and Repair Manual 001.25075.EN, under chapter 8 “Jib, Scale and T-bar”. Verified Scale After the installation, set the correct gravity code for your location (see “SP2 - Gravity Code Change”... -
Page 32: Sp7 - Scale Installation On A Non-Scale Unit
Service Procedures SP7 - Scale Installation on a Non-Scale SP7 - Scale Installation on a procedure for the scale. Non-Scale Unit Once the scale has been installed: The installation of a scale on a non-scale unit 1) With the marker supplied in the kit, write (KMX X ) similar scale... -
Page 33: Non-Verified Scale (Outside The European Community)
Service Procedures SP7 - Scale Installation on a Non-Scale Unit other (see , callout 4). Also note that in kit expected tolerances, enter the counter menu on #700-25350, only one label is supplied the handset (see “SP1 - Verification of the (KMCSXE). - Page 34 Service Procedures SP7 - Scale Installation on a Non-Scale Once the calibration is correct: 1) Apply the scale label on the back plate (see Fig.15, callout 1). 2) Apply the scale handset label on the handset (see Fig.15, callout 2). 3) Apply the scale logo to the Maxi Move top cover (see Fig.15, callout 3).
- Page 35 AUSTRALIA FRANCE POLSKA ArjoHuntleigh Pty Ltd ArjoHuntleigh SAS ArjoHuntleigh Polska Sp. z o.o. 78, Forsyth Street 2 Avenue Alcide de Gasperi ul. Ks Piotra Wawrzyniaka 2 O’Connor CS 70133 PL-62-052 KOMORNIKI (Pozna ) AU-6163 Western Australia FR-59436 RONCQ CEDEX Tel: +48 61 662 15 50 Tel: +61 89337 4111 Tél: +33 (0) 3 20 28 13 13...
- Page 36 Hans Michelsensgatan 10 211 20 Malmö, Sweden www.arjohuntleigh.com ArjoHuntleigh is a world-leading provider of integrated products and solutions that improve the lives of patients and residents with reduced mobility. We help healthcare facilities deliver wellness and effective everyday care, early mobilisation, safe patient handling, venous thromboembolism prevention, pressure injury prevention, hygiene routines, bariatric care and diagnostics.
Need help?
Do you have a question about the Maxi Move KMC*U Series and is the answer not in the manual?
Questions and answers