Table of Contents

Subscribe to Our Youtube Channel
Related Manuals for General HT20

Summary of Contents for General HT20
- Page 1 £ ¤ ¥ ¦ § ¨ ¦ © £ " ¢ ¦ " ¢ & £ ¢ ¥ ¦ USB RH/TEMPERATURE DATA LOGGER with LCD DISPLAY USER’S MANUAL HT20 Please read this manual carefully and thoroughly before using this product.
-
Page 2: Table Of Contents
TABLE OF CONTENTS Introduction ........3 – 4 Key Features . -
Page 3: Introduction
Windows ® XP operating system after plugging the HT20 into one of the computer’s USB ports. The HT20’s internal flash memory is large enough to store up to 8000 pairs of humidity and temperature readings. Included with the product—which is slightly larger than a thumb drive—is a mini-disc with the drivers needed to... -
Page 4: Key Features
• Electronics manufacturing—Alerts provided by the low- humidity alarm function of the HT20 can mitigate the risk of damaging high-voltage static discharges. KEY FEATURES • One button starts/stops data logging without a PC •... -
Page 5: Safety Instruction
• Long battery life (up to one year) • Includes USB extension cable • One-year warranty SAFETY INSTRUCTION Do not use the HT20 in the presence of flammable or explosive gases. WHAT’S IN THE BLISTER PACK The HT20 comes in a blister pack that also contains •... -
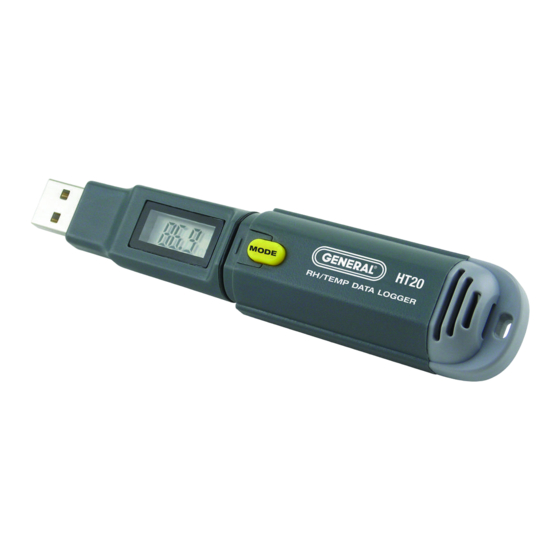
Page 6: Product Overview
PRODUCT OVERVIEW Fig. 1a below shows the main components, controls and connectors of the HT20. Fig. 1b (on the facing page) shows all possible indications on the HT20’s display. Familiarize yourself with their names and functions before moving on to the Setup Instructions. -
Page 7: Setup Instructions
SETUP INSTRUCTIONS INSTALLING/REPLACING THE BATTERY LATCH The HT20 uses a 3.6VDC “1/2 AA” Lithium-ion battery. To open the battery compartment, use a paper clip or a screwdriver with a fine point to push in the silver flange showing through the small square hole in the rear of the unit... -
Page 8: Install Software And Drivers
3. Windows Explorer will indicate that there are two “Files Currently on the Disc”. One is actually a folder containing a PDF of the HT20 user’s manual (as well as PDFs of the manuals for the HT10 and HT50—versions of the HT20 without an LCD and with an IR thermometer). - Page 9 Click on “Install this driver software anyway” to continue. 12. The next Device Driver Installation Wizard window will advise you that an HT10/20/50 driver from General Tools or Kecheng Laboratories was successfully installed and that your device is now “Ready to use.” Click Finish to...
-
Page 10: Configure The Unit
HT20 directly into the jack. You do not want the plug of the HT20 to support any of the weight of the laptop. If that is the case, plug the HT20 into the jack of the included USB extension cable and insert the plug of the extension cable into the computer’s USB jack. - Page 11 Fig. 2. The three options made available by plugging the HT20 into a USB port Note: If you have already used your HT20 to log data and it is still in recording mode, plugging the unit in will cause the following window to appear.
- Page 12 You can now use the software to “configure” your HT20. Configuring the device means choosing four key parameters: • Sampling time—How often it makes and stores humidity and temperature measurements. • Temperature unit—degrees Fahrenheit or Celsius (°F or °C). • High and low temperature alarm setpoints •...
-
Page 13: Operating Instructions
The unit is in “standby” mode, ready to begin logging data. OPERATING INSTRUCTIONS DEPLOY THE UNIT The HT20 is particularly easy to deploy on a job site because the unit does not need to be plugged into a computer to be activated (ready to start logging data). Working together, the... -
Page 14: Stop Logging And Import Logs
ELUSB software to stop logging. Each time you plug the HT20 into the USB port, the window shown in Fig. 2 will appear. When you plug in the unit, it makes no difference whether it is still logging; the procedure... -
Page 15: Viewing, Printing And Exporting Data Logs
for uploading (importing) data logs is identical. Just click on the middle selection—Stop the USB Data Logger and download data—to instantly execute both functions. The data will be imported as a .txt file. A “Save As” window will appear, asking you to identify where you want the file to be stored and what you want to name it. -
Page 16: Other Indications
As mentioned earlier, the MODE button and the LCD can be used together to display real-time temperature and humidity measurements, and to indicate the current working status of the HT20. Circuitry inside the HT20 automatically shuts down the LCD (to conserve battery life) if the MODE button has not been... - Page 17 pressed within the past 60 seconds. That is the case even when the unit is logging data. In other words, the LCD is normally “asleep”. To wake up the LCD, briefly press the MODE button. This first press of the button will cause the LCD to resume displaying the same indication that was on-screen when the LCD was last put to sleep.
-
Page 18: Specifications
SPECIFICATIONS Temperature Measurement Range -4° to 158°F (-20° to 70°C) Temperature Measurement Accuracy ±0.7°F (0.4°C) Temperature Measurement ±0.2°F (0.1°C) Resolution and Repeatability Relative Humidity (RH) 10 to 90% Measurement Range RH Measurement Accuracy ±3% RH Measurement Resolution ±0.1% and Repeatability Internal Storage Capacity 8,000 pairs of RH/Temp readings... -
Page 19: Maintenance Tips
• Do not use chemicals or abrasive cloth to clean the display window or housing. • Before storing the HT20 for an extended period of time (several months or more), remove the battery to avoid having it leak and damage the unit. -
Page 20: Return For Repair Policy
Customer Service to obtain an RGA (Return Goods Authorization) number before forwarding the unit via prepaid freight to the attention of our Service Center at this address: General Tools & Instruments 80 White Street New York, NY 10013...
Need help?
Do you have a question about the HT20 and is the answer not in the manual?
Questions and answers