Table of Contents
Advertisement
Advertisement
Table of Contents

Subscribe to Our Youtube Channel
Related Manuals for Biolase iLase

Summary of Contents for Biolase iLase
- Page 1 ™ User Manual iLase™ User Manual P/N 5400230 Rev. H...
- Page 2 Copyright ©2014 BIOLASE, Inc. All Rights Reserved. iLasesoftware copyright ©2010 BIOLASE, Inc. Biolase, the Biolase logo, iLase, are either trademarks registered trademarks BIOLASE, Inc. Other trademarks are property of their registered owners. BIOLASE, Inc. www.biolase.com Cromwell Irvine, CA 92618 Telephone:...
-
Page 3: Table Of Contents
2.1 Clinical Device and Parts 2.2 Laser Safety 2.3 Electrical Safety 7 Maintenance 2.4 Fire Safety 7.1 Regular Maintenance 7.2 iLase Cover Grip 2.5 Cleaning and Sterilization Replacement 2.6 Personal Protective 7.3 System Configuration Equipment 3 Installation 8 Troubleshooting and Repairs 3.1 Unpacking... -
Page 4: Introduction
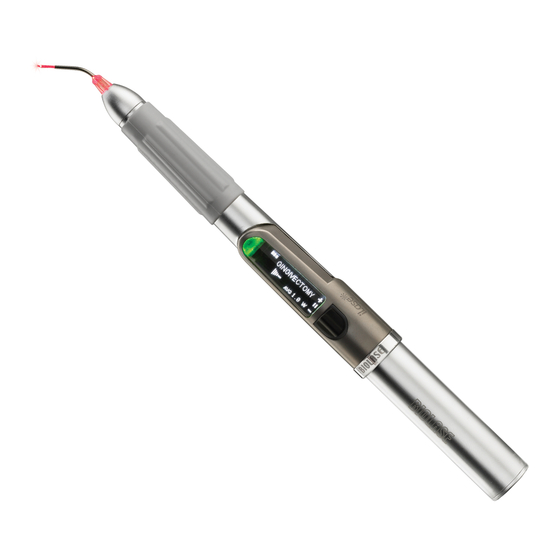
Introduction 1.1 DESCRIPTION The iLase™ dental soft tissue laser is a surgical device designed for a wide variety of dental soft tissue procedures. The iLase uses a solid state laser diode as a source of invisible infrared radiation. The energy is delivered to the treatment site via a single-use fiber optic tip assembly. Several types of tips are available for use with the iLase to perform different procedures. -
Page 5: Indications For Use
1.2 INDICATIONS FOR USE Dental Soft Tissue Indications: Incision, excision, vaporization, ablation and coagulation of oral soft tissues including marginal and inter-dental gingival and epithelial lining of free gingiva and the following specific indications: ► ► Excisional and incisional biopsies Leukoplakia ►... -
Page 6: Contraindications
1.3 CONTRAINDICATIONS All clinical procedures performed with the iLase must be subjected to the same clinical judgment and care as with traditional techniques. Patient risk must always be considered and fully understood before clinical treatment. The clinician must completely understand the patient's medical history prior to treatment. -
Page 7: Precautions And Warnings
Make appropriate power and settings adjustments to compensate for varying tissue compositions, density and thickness. Cutting with the iLase is a thermal process and any transfer or accumulation of heat into adjacent structures may result in a burn and tissue damage. -
Page 8: Laser Safety
2.5 CLEANING AND STERILIZATION The single-use tips are supplied non-sterile and must be sterilized before use. The iLase Cover is another component that requires WARNING sterilization. Refer to Chapter 6 “Cleaning and Sterilization” for instructions on sterilizing tips and the iLase cover. -
Page 9: Personal Protective Equipment
Periodically inspect laser eyewear for pitting and cracking. For EYEWEAR REQUIRED replacement or additional protective laser eyewear, please contact Biolase or your authorized dealer. Special care must be taken to prevent infection from the laser plume generated by vaporization of virally or bacterially infected tissue. Use LASER... -
Page 10: Installation
Laser Safety Glasses (Patient) iLase Cleaning Kit User Manual Retain the shipping container and store it in a cool dry place. Use this container if it becomes necessary to ship the iLase to Biolase or a Biolase Authorized Service Center. 5400230 Rev. H... -
Page 11: Cleaning And Sterilization Before Use On Patients
►Place the batteries, either end first, in any one of the battery charging receptacles at the top of the charging station. iLase batteries have contacts on both ends and allow placement into the receptacle in either orientation. The batteries will connect automatically to the charging contacts when inserted, and the charging indicator will illuminate with an amber color to indicate that the charging has started. -
Page 12: Battery Installation
NOTE: Charge spare batteries for a minimum of 2 hours before use. 3.4 BATTERY INSTALLATION Slide a fully charged battery assembly into the socket at the end of the main body of the iLase. A magnet inside the main Figure 3-2: Charging Indicat body will grip and hold the battery in place. -
Page 13: Operating Instructions
Before using the iLase, make sure the following conditions have been met: ►The iLase charging station power supply is plugged into working AC power receptacle, and at least one battery is connected to the charging station and charged for at least 2 hours. -
Page 14: Initial Selection Of A Procedure
READY mode by pressing down the selector switch. When the iLase is in READY mode, the LED will be green. Only in this mode is the red aiming beam activated and the laser can be fired. While in READY mode, you may adjust the power only. In order to save modified settings to a pre-set procedure, press in and hold the selector switch for 5400230 Rev. -
Page 15: Firing The Laser
NOTE Most procedures require tip initiation before using the iLase. For those procedures that require tip initiation, you must complete the tip initiation steps before using the iLase in a procedure on a patient. If tip initiation is not required or has already been initiated, press the selector switch to bypass this operation. -
Page 16: Tip Initiation Instructions
VERIFYING THE TIP Prior to initiating the tip, verify that it is installed correctly into the iLase cover (see previous section). The Tip Initiation Aid screen appears as you enter Ready Mode [1.4W / CW]. You will need to have the Tip Initiation Block handy to perform this step. -
Page 17: Selecting A Different Procedure
When your procedure is complete, press the selector switch on the iLase to enter STANDBY mode. The LED on the iLase will turn an amber color. The system is now in STANDBY mode. You can modify and save new settings for the Procedure by changing power values and pressing and holding the selector switch for approximately 1.5 seconds while in READY mode. -
Page 18: Adjusting Laser Power
4.11 ADJUSTING LASER POWER If you wish to change the power setting, highlight and select the power icon in the Main Screen in STANDBY mode to display the Power Setting screen. The figure below does not show a power setting, but rather has "[X.X] W" to indicate the numeric format of the average power setting. The Power Setting screen displays the current laser output power setting in both Peak and Average Power values and allows you to adjust the power up (+) or down (-). -
Page 19: Clinical
5 Clinical 5.1 PRESETS iLase has 11 pre-programmed settings, plus 2 open slots to allow the user to set and store customized settings. Peak Average Pulse Pulse ● Preset Name Power Power Length Interval Initiation Gingivectomy 3.00W 1.00W 0.20ms (0-10ms) Troughing 2.00W... - Page 20 ► 300µm tips are recommended for removing less fibrous tissue types. 400µm tips are recommended for removing fibrous tissue and inside the pocket. ► All of the procedures listed require tip initiation except for Hemostasis and Aphthous Ulcer. ► For information on how to initiate the tips that are not pre-initiated, please refer to the Tip Initiation Instructions provided in Section 4.
-
Page 21: Cleaning And Sterilization
6 Cleaning and Sterilization 6.1 CLEANING AND DISINFECTION CAUTION: During use the internal components of the iLase under the cover may become hot to the touch. Allow the iLase to cool for a few minutes before removing the cover for cleaning and sterilization. -
Page 22: Steam Sterilization Of The Handpiece Cover And Tips
Figure 6–1: Disassembly for Disinfection, Cleaning, and Sterilization 6.2 STEAM STERILIZATION OF HANDPIECE COVER AND TIPS The steam sterilization process is intended to destroy infectious microorganisms and pathogens. NOTE: Always perform the procedure immediately after cleaning and prior to use and only use FDA- cleared (USA) or CE-marked (Europe) sterilization accessories, i.e., sterilization pouch and autoclave tray. -
Page 23: Device And Parts
Authorized Service Representative. DEVICE AND PARTS The iLase is a medical device subject to regulations governing its disposal. Contact Biolase or your Biolase Authorized Service Representative for instructions on returning the device to Biolase for disposal. Do not dispose of an iLase or its parts in landfills or incinerators. -
Page 24: Maintenance
To replace the rubber grip, remove the iLase cover from the main body. Slide the old grip off of the small end of the cover and slide a new rubber grip onto the same end with the large end of the grip first. -
Page 25: System Configuration
7.3 SYSTEM CONFIGURATION The Settings Menu screen allows you to adjust the settings of the user interface. The Settings Menu is entered by pressing and holding down the selector switch for approximately 1.5 seconds when in the Main Screen while in Standby mode. Figure 7-2: Settings Screen (Aiming... -
Page 26: Troubleshooting And Repairs
5 seconds. and then re-installing the battery. If the error message reappears after restarting the iLase, the system cannot be used until the cause of the error has been remedied. Call Biolase Service at (800) 321-6717 or your Biolase Authorized Service Representative. -
Page 27: Repairs
8.3 REPAIRS There are no user-serviceable parts in the iLase. Do not open any part of the device or attempt to make repairs. Doing so may expose the user to unsafe voltages, high temperatures, or laser energy and may void the product's limited warranty. -
Page 28: Laser Calibration
9 Laser Calibration 9.1 LASER CALIBRATION Biolase recommends that a laser calibration be performed every 12 months to ensure that the laser output power corresponds accurately to the displayed power. Annual calibrations can be performed at a Biolase Authorized Service Center. -
Page 29: Specifications
Charging Station (W X D X H) 4.7” X 4.0” X 2.8” / 11.9 cm X 10.2 cm X 7.1 cm iLase Handpiece with surgical tip and battery 8.1” X 0.75” / 20.5 cm X 1.90 cm attached (Length X Diameter) Power Supply (W X D X H) 1.77”... -
Page 30: Labels
11 Labels 11.1 LABELS The iLase is labeled as indicated in the following table. Refer to Figures 11-2 for label locations. Label Description Location Charging Station, rear. Product ID Label Refer to Section 11-2. Charging Station, underside. Certification Label Refer to Section 11-2. - Page 31 +49 6894 581020 mt-procons.com BIOLASE leads the global dental laser market with over 21,000 lasers in use today and the most complete family of dental lasers – from diode lasers to the most advanced all-tissue laser, the WaterLase iPlus™.
Need help?
Do you have a question about the iLase and is the answer not in the manual?
Questions and answers