Table of Contents
Advertisement
Wireless Cloud Camera
Quick Installation Guide
Website: www.lefunsmart.com
E-mail: support@lefunsmart.com
Note: Due to the continuous updating of the product and software,
there may be a discrepancy between the operating guide and the
APP interface. All the instructions are subject to the actual
operation interface.
Advertisement
Table of Contents

Summary of Contents for LeFun C2
-
Page 1: Quick Installation Guide
Wireless Cloud Camera Quick Installation Guide Website: www.lefunsmart.com E-mail: support@lefunsmart.com Note: Due to the continuous updating of the product and software, there may be a discrepancy between the operating guide and the APP interface. All the instructions are subject to the actual operation interface. -
Page 3: Table Of Contents
Table of Contents Welcome Important Security Warning Important Safeguards and Warnings 1. Features and Specification 1.1 Overview 1.2 Features 2. Device Overview 3. Connection & Installation 3.1 Connection Guide 3.2 Installation Guide 4. Camera Access Setup 4.1 Download and Sign Up the MIPC 4.1.1 Download the MIPC 4.1.2 Sign Up an Account 4.2 Wi-Fi Setup on Mobile... - Page 4 5.2 Tab 2: Device List 5.3 Tab 3: Account Settings 6. Operation on Device Interface 6.1 Tab 1: Playback and Device Settings 6.1.1 Playback 6.1.2 Device Settings 6.2 Tab 2: Data Rate 6.3 Tab 3: Resolution 6.4 Tab 4: Record, Snapshot, Mic, Speaker and Sensitivity 6.5 PTZ 7.
-
Page 5: Welcome
2. Find LeFun products on Your Orders 3. Email us Important Security Warning In order to keep your LeFun Wireless Cloud Camera secure and prevent unauthorized access, please make sure to follow the steps below: 1. Always make sure that your camera has the latest firmware as listed on MIPC app. -
Page 6: Important Safeguards And Warnings
Important Safeguards and Warnings 1. Electrical Safety All installation and operation should conform to your local electrical safety codes. We assume no liability or responsibility for any fires or electrical shock caused by improper handling or installation. 2. Transportation Security Heavy stress, violent vibrations, and excess moisture should not occur during transportation, storage, and installation of the device. - Page 7 5. Environment The camera should be kept in a cool, dry place away from direct sunlight, flammable materials, explosive substances, etc. This product should be transported, stored, and used only in the specified environments as stated above. Do not aim the camera at a strong light source, as it may cause overexposure of the picture, and may affect the longevity of the camera’s sensors.
-
Page 8: Features And Specification
1.Features and Specifications 1.1 Overview The LeFun Wireless Cloud Camera is an excellent digital surveillance product that can be useful to a wide variety of users. The camera connects to any router launching 2.4GHz Wi-Fi, and uses an internet connection to allow the user to access all of its functionality from phones, tablets and computers. - Page 9 32ft Clear Night Vision 32ft clear night vision so you won’t miss anything even in a dark condition Smart Alerts to Mobile Receive notification to your mobile when motion is detected Easy Mobile Wi-Fi Setup Easy setup using a mobile device in 2.4G (IEEE802.11b/g/n) Wi-Fi network Advanced Video Recording Record and store video &...
-
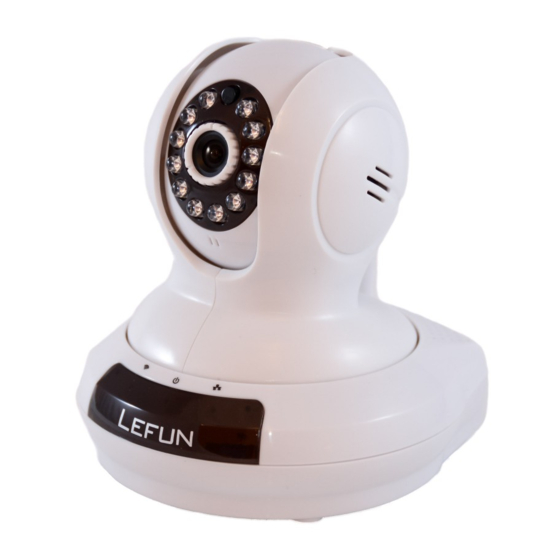
Page 10: Device Overview
2.Device Overview... -
Page 11: Connection & Installation
3 .Connection & Installation 3.1 Connection Guide Wi-Fi Internet Ethernet Router Server(U.S.) Camera MIPC MIPC Phone/PC/Tablet 3.2 Installation Guide The camera comes with a mounting bracket and two screw packages for use in mounting the camera onto a stable surface. Note: Prior to installation ensure that the installation environment can support at least triple weight of the camera. -
Page 12: Download And Sign Up The Mipc
4.1 Download and Sign Up the MIPC 4.1 .1 Download the MIPC The LeFun Wireless Cloud Camera enables to access through the use of the MIPC on iOS or Android mobile/tablets operating systems and computer for Window operating systems. 1. Scan the QR code with the phone to download the MIPC app. -
Page 13: Wi-Fi Setup On Mobile
Signup-01 Signup-02 4.2 Wi-Fi Setup on Mobile Before connecting to your camera, please confirm if your home Wi-Fi network is 2.4Ghz. Meanwhile, please choose 2.4Ghz Wi-Fi to connect your phone. Additionally, please put this camera close to your Wi-Fi router, it will help you connect the camera with Wi-Fi successfully. - Page 14 3. Scan the QR code at the bottom of the camera (Figure-03), a device ID should be automatically filled in the “device ID” input box (Figure-04) if it scans successfully, then tap “Add”. If you got a blank screen, please add this camera on PC (4.4 Local Web Access Setup).
- Page 15 Figure-03 Figure-04 Figure-05 Figure-06 6. Please press the RESET button 1 second to release the camera. After hearing the voice prompts (waiting for receiving wireless configuration information), tap “Next” (Figure-07).
- Page 16 7. Then the Wi-Fi name will automatically display. Please input your Wi-Fi password and tap the “Next” (Figure-08). In order to make the camera connect your home network successfully, please confirm your phone has connected 2.4G Wi-Fi network that you would like the camera to connect. 8.
- Page 17 Figure-09 Figure-10 10. Please customize your camera name and choose the right time zone (Figure 11) (you can skip this step). 11. Congratulations! You add this IP camera successfully (Figure 12). Figure-11 Figure-12...
-
Page 18: Wired Setup On Mobile
4.3 Wired Setup on Mobile LeFun Wireless Cloud Camera can be set up with Ethernet via mobile devices. Using the wired access interface, the camera can be configured. 1. Connect the camera to a power supply using the included power adapter. Please wait for 60 seconds to allow the camera getting ready. -
Page 19: Operation On Main Interface
3. Using a PC or Mac, download the browser MIPC and install it (www.mipcm.com). 4. Sign up an account (please refer to 4.1.2 Sign Up an Account), log in and add the camera. 5. Now, the camera is successfully setup for living view and playback. -
Page 20: Tab 2: Device List
5.2 Tab 2: Device List This feature enables the user to find all added camera in one app. Note: Users can not view all live video at one screen. 5.3 Tab 3: Account Settings This feature enables the user to choose the way to Notification Center notify him/her when the motion is detected. -
Page 21: Operation On Device Interface
Binding This feature enables the user to find back their Email account password. Note: To using this function, users must be bound their email before forgetting their password, or they will fail. This feature allows the user to write a feedback Feedback about their experience after testing the app. -
Page 22: Tab 1: Playback And Device Settings
6.1 Tab 1: Playback and Device Settings 6.1.1 Playback The playback tab allows the user to playback the camera’s recorded video and snapshots. Below is a screenshot of the playback tab. Playback Device Settings 1. Calendar: This panel allows users to pick a date that they would like to playback video and check the snapshots. -
Page 23: Device Settings
6.1.2 Device Settings About Users can find the device model, firmware version and device id from this tab. This feature allows users to modify camera’s name Nickname according to their preference. This feature allows the user to change the device Admin Password admin password. - Page 24 This tab enables the user to use our cloud service. Cloud Storage This function is being test, if you would like to be a tester, please contact us directly to get an Activation Code. Note: The function is unstable. If you have any problems when you are testing, please E-mail us directly.
-
Page 25: Tab 2: Data Rate
2. The event record is only available for motion detection. Once the object triggers the motion alarm, the camera will start to record until the end of the movement.The camera will automatically record video and screenshot once the user sets it up to event record. -
Page 26: Ptz
Section1: This icon allows users to record video manually. The video will saved at the path specified in Account Settings-My Folder. Section2: Click the button to take a screenshot of the live feed. The picture is saved at the path specified in Playback- Snapshots. -
Page 27: Troubleshooting
7.Troubleshooting 1. If you could not connect your camera with Wi-Fi successfully, please confirm: ①. Your home Wi-Fi network is 2.4G. Our camera does not support 5G Wi-Fi network. Please check your Wi-Fi Frequency band of the Wi-Fi router, or search its brand and model on google. - Page 28 4. If you get a black screen after click the camera to watch live video, please figure out the problem by following steps. ①. Please turn on the device setting page, click the button “About” to check if there is malfunction notification of the sensor.
-
Page 29: Warranty Policy
7. If you could not receive sound notifications after detecting a moving object, please confirm: ①. The Alarm for Motion Detection turns on (Path: mipc- device settings-alarm-motion detection). ②. The Sound on Notification Center turns on (Path: mipc- account settings-notification center-sound). ③. - Page 30 IV. The following situations are in the free maintenance range, we only provide paid services, please pay attention: · Failure to follow the operation manual requires for installation, application, maintenance and custody leading to products failure or damage; ·...
Need help?
Do you have a question about the C2 and is the answer not in the manual?
Questions and answers