Table of Contents
Advertisement
Advertisement
Table of Contents

Summary of Contents for AimCam PRO 2
- Page 1 INSTRUCTION MANUAL...
-
Page 3: Table Of Contents
Thank you for purchasing the AimCam Pro 2 Line Of Sight Camera Glasses. Before using your AimCam please read carefully all the safety precautions included in this manual. TABLE OF CONTENT Your AimCam’s Markings Your AimCam’s Specification Your AimCam 1.Preparation 2.Power ON/OFF... -
Page 4: Your Aimcam's Markings
BEFORE YOU GET STARTED! Your AimCam meets the following protective eyeware standards:- ANSI/ISEA Z87.1-2015 (impact resistant) MARKINGS A series of numbers are marked on the ocular and frame, which refers to the field of use, the protection capabilities and performance. -
Page 5: Your Aimcam's Markings
AC- Identification of the manufacturer 1 to 3- Optical class F- Low energy impact. Typically, applicable to safety glasses with reinforced mineral lenses particles More information on your AimCams markings can be found at https://aimcam.com QUICK START GUIDE www.aimcam.com/quick-start... -
Page 6: Your Aimcam's Specification
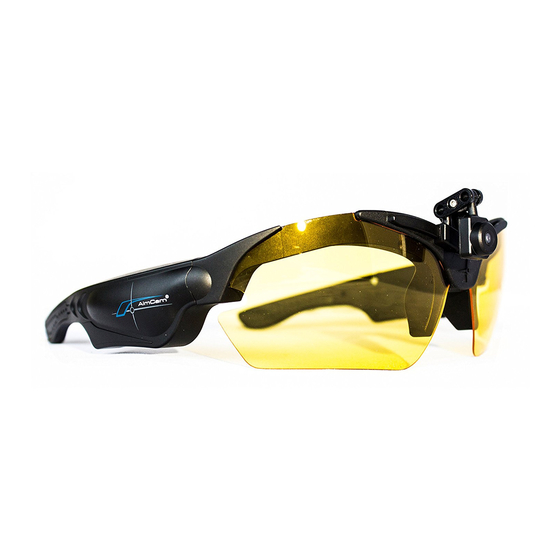
720P 60FPS CMOS SENSOR PROTECTIVE LENS FULLY 620 FIELD OF WIFI ENABLED ADJUSTABLE VIEW LIVE STREAM TO MICRO CAMERA THE AIMCAM APP IMPACT RECHARGEABLE 12MP PHOTO RESISTANT BATTERY 1+ HOUR (VIA APP) SAFETY LENSES RECORD TIME INTERNAL MICRO SD CARD... - Page 7 6- Standby/Recording LED Indicator (Red) 5- Wifi LED Indicator (Blue) 4- Charge LED 7- Mic Indicator 8- Micro SD Card Slot 9- USB Port 11- Metal Pivot Arms 3- Camera 14- Screw 13- Rail 12- Camera Mount 1- On/Off/Record Button 2- Wifi Button 10- Reset Button BOTTOM...
-
Page 8: Your Aimcam
To charge the battery, use the USB cable supplied. Connect the included USB cable to the AimCam glasses in slot (9) and con- nect the other end of the cable to a compatible charging device such as a mobile phone charger, computer, battery pack, or any device that is able to deliver up to a 5v charge. - Page 9 When part of an image is extremely dark but another part is so bright you can’t see any details. AimCam has (WDR) which is special software that allows this range of lighting to balance out.
-
Page 10: Connecting Your Aimcam To Your Mobile Device
Ensure your AimCam is ON and in standby mode (see section 2). You can now turn on your AimCam’s WiFi. To do this press the WiFi ON/OFF button (2), with WiFi ON the blue WiFi LED indi- cator (5) will illuminate. The AimCam will then be visible within your mobile devices WiFi settings as “AimCamXXXX (XXXX is the unique Identification... -
Page 11: Setting Up The Aimcam Camera For Your Personal Line Of Sight
WiFi router. Now your AimCam is connected to your device via WiFi, open the AimCam APP and connect. For further instructions please visit www.aimcam. com/app-instructions Note: Due to the power consumption of the WiFi... - Page 12 Firstly, determine which is your dominant eye when aiming. Usually (though not always) this is the same side as your dom- inant hand. Out of the box, the AimCam has camera mounts (12) over the right and left eye, with the camera mounted on the right camera mount.
-
Page 13: To Begin Recording
(14). To begin recording. To start record mode please ensure your AimCam is turned on and in standby mode (see section 2). Now press the ON/OFF/Record button (1) briefly once, the camera LED indicator (6) will begin to flash to indicate AimCam is now record- ing. -
Page 14: Viewing And Editing Videos On Your Pc Or Laptop
Viewing videos from your SD card. Should you wish, you also have the option to view your photos or video directly from your SD card. You can achieve this by simply removing the SD card from your AimCam and inserting it into your PC. -
Page 15: Ichanging Your Aimcam Lenses
11. Changing your AimCam lenses Insert the hooked edge (Left of this image) into the side channel. Once the hook is firmly in place, push the opposite side into position. Firmly manipulate curved catch into channel (Expect some resistance the first time you do this). -
Page 16: Applying Nose Pads (If Required)
12. Applying nose pads (if required) Note: To get the best results from your AimCam nose pads, please clean the area where the nose pads will be applied. This will ensure a better stick and stronger hold. If you have a... -
Page 17: Troubleshooting
Ensure that the Micro SD card is properly secured in the slot (8) If No Function AimCam is still not responding use a small pin to press the reset button (10) to restart the device. Please contact WiFi LED (5) is support@aimcam.com... - Page 18 AimCam at support@aimcam.com Note: Your AimCam will generate heat during normal operation. This is nothing to be concerned about and will not affect function in any way, it is simply a result of the heat generated by the microprocessor...
-
Page 19: Weee/Warnings
Warning: Keep dry and away from moisture. Do not use if damaged or wet. The AimCam is not waterproof and should not be used in wet conditions or un- derwater. Ingress of water will damage both the camera electronics and the battery, which could cause an explosion or fire. - Page 20 Warning: When not in use store your AimCam in the case provided to avoid it being damaged or becoming dusty. Do not clean your AimCam device with water, detergents or other chemicals. Wipe with a soft cloth or cotton bud. Use air to blow any accumulated dust from apertures.
-
Page 21: Warranty
AimCam. If you experience a problem with your AimCam device or accessory, please first visit our website for advice. If your product or part has a manufacturing defect that is covered by the following warranty we will repair or replace your product or part free of charge. -
Page 22: Warranty
AimCam accept no liability for any accident, injury, death, loss, or other claim related to or resulting from the use of its products. AimCam encourage responsible participation in sports and accept no liability for any illegal, reckless or unintended use of its products. - Page 24 PLEASE VISIT WWW.AIMCAM.COM FOR FURTHER INFORMATION DESIGNED IN BRITAIN RoHS MADE IN CHINA...
Need help?
Do you have a question about the PRO 2 and is the answer not in the manual?
Questions and answers