Advertisement
Quick Links
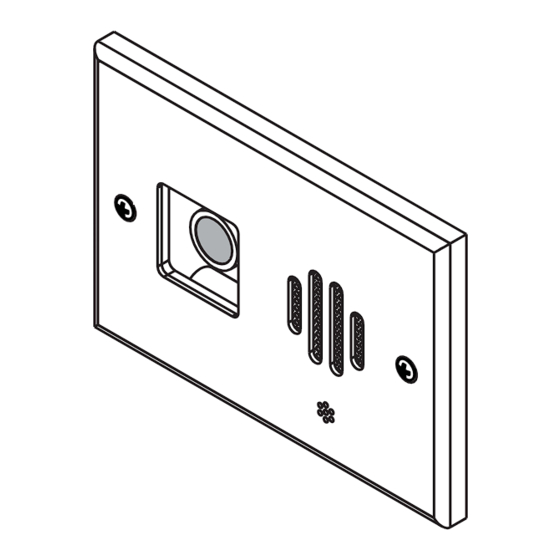
DS3 Series Door Station
Installation Manual
DSS3/DSC3/DSF3
Getting Help
You can get support via the Internet at
www.elanhomesystems.com, or call
Tech Support at (800) 622-3526
© ELAN Home Systems 2006 • All rights reserved.
Part Number 9900826 Rev A
PreWiring
PreWiring
The DSF3 and DSS3 Door Stations require two con-
ductors to achieve full functionality. The DSC3
requires six conductors in order to utilize the camera
functionality (eight for long runs over 500 feet). Cat-5
network cable is recommended in each instance.
Route Cat-5 from the head-end location to each Door
Station location.
To mount DSF3 and DSC3 Door Stations, use an
ELAN DBK1000 Rough-In Bracket during construc-
tion. The DSS3 Door Station is designed to be surface
mounted and utilizes four wall anchors and screws,
(included).
For best aesthetics and audio quality, (and viewing
angle when positioning the DSC3), mount the unit
approximately 4-1/2 to 5-1/2 feet from the ground. It
is strongly recommended to test the view from the
camera before finalizing installation!
NOTE: See the back page of this instruction for door
station pinouts.
DIP Switch Settings
Each door station has DIP switches that must be set
to allow the COM2 to differentiate between door
stations, and assign unique door chimes (see Figure
1). Locate and adjust the DIP switches to indicate the
desired door station for your location (see Figure 2),
i.e., front door = Door Station 1, back door = Door
Station 2 etc. (see Figure 2).
WARNING: The COM2 must be powered down during
DIP switch adjustments to ensure proper operation
and implementation of the new switch settings..
Non Balun Application
Non VBRM Applications
In the rare instance that an ELAN VBRM Video Balun is not
used, the installer can still connect the DSC3 Door Station
and camera using Cat-5 for the door station, RG59/RG6
for the camera and 18/2 AWG stranded wire for power.
ELAN recommends using Cat-5 wire for the DS+ and DS-
connections from the door station to the COM2 Door
Station Bus.
To connect the camera:
1. Unplug the power connector and RCA video connector
from the video balun on the DSC3 circuit board.
2. Remove the camera power connector, then strip back
the insulation on the red and black camera power
wires and connect the corresponding red and black
conductors of the 18/2 AWG wire as shown in Figure 4.
NOTE: DO NOT remove the DSC3's yellow (video) RCA
jack connector!
3. Remove the connector from the PWR3 Power Supply.
Figure 4.
4. Tie the red wire of the 18/2 AWG to the black/white
wire of the PWR3. Tie the black wire of the 18/2 AWG
to the black wire of PWR3 Power Supply (see Figure 4.)
5. Splice camera power to PWR3 using 18/2 wire.
6. Connect "F-to-RCA" barrel connector (included)
between the RG-6 or RG-59 coax cable and the DSC3
RCA composite video connector (yellow).
-
+
-
+
+DB-
-DS+
1RL2
To ELAN V883, S12,
or MOD4000 Video Controller
Figure 4: DSC3 Without VBRM
Introduction
Introduction
ELAN's new DS3 Series Door Station and the COM2
Communications Controller provide you with full two-
way communications and door latch control from your
touch-tone telephones. A simple #-D (for Door) from any
touch-tone phone allows you to speak with visitors at the
door. Another simple button press ("0") activates the
door latch to let them in. The door latch must be installed
and is not included. The DSC3, with its on-board color
camera, gives you the option of seeing who's there
before you even pick up the phone. The door stations
must be utilized with ELAN's COM2 Communications
Controller.
Door Station Models
ELAN's two-wire door station models include the DSS3
Surface Mount Door Station, the DSF3 Flush Mount Door
Station, and DSC3 Flush Mount Door Station with Color
Camera. Designed to be installed in a variety of locations,
each door station allows custom installation in areas
such as the front door, back door, guest house, or gates.
Each model allows independent conversation with visi-
tors at up to four locations. With the Door Latch Activa-
tion feature, you can remotely unlock a door or gate and
let the visitor enter, if desired (a third-party door latch
must be installed and is not included with ELAN door
stations)
NOTE: The new DS3 Series Door Stations are only
compatible with ELAN's COM2 Communications
Controller and will not work with the Z•600
Communications Contoller or HDC1050/HDC2050
Telephone Interface Cards used with ELAN HD systems.
Setting DIP Switches
DS1
DS2
ON
ON
ON
ON
1 2
3
1 2
Door
Station
1
2
3
Figure 1: Door Station DIP Switch Settings
1 2
DSC3
Figure 2: DIP Switch Locations
DSF3 & DSC3 Installation
Both the DSF3 and DSC3 Door Stations are installed using the
DBK1000 Door Station/Camera Rough-In Bracket (sold separate-
ly).
In order to install the DSC3 or DSF3 Door Station in the DBK1000
the door station trim brackets must be mounted to the front of the
DBK1000, (see Figure 5). Note the orientation of the trim bracket's
inner flanges.
Figure 5: DSC3 or DSF3 Trim Brackets
The DSC3 ships ready for horizontal installation. Should you
(Splice)
choose to mount the DSC3 vertically, the DBK1000 must also be
mounted vertically and the camera module must be rotated 90
18/2
degrees to orientate the camera display (see Figure 6.
(for Power)
Whether mounted horizontally or vertically, the camera wire
PWR3
POWER
should always protrude from the UPPER-RIGHT corner of the
SUPPLY
camera module when the DSC3 is viewed from the rear (see
Figure 6). To rotate the camera:
Normally located
at the equipment
1. Use a 7/16 wrench to loosen the Screw and rotate the camera.
head end.
2. Make sure the Camera Wire is located in the upper right
corner of the camera module when the DSC3 is viewed from
the rear.
3. Adjust the viewing angle by carefully twisting the Camera
Bracket.
DS3
DS4
ON
ON
ON
ON
1 2
3
3
1 2
3
DIP Switch Setting
1 - ON, 2 - ON, 3 - ON
1 - OFF, 2 - ON, 3 - ON
1 - ON, 2 - OFF, 3 - ON
3
DIP
-DS+
1RL2
SWITCHES
DSF3 OR DSS3
DSF3 or DSC3 Installation
TRIM BRACKETS
Specifications
Specifications
Item
Door Station Speaker
Microphone
Door Latch Relay
Wiring Requirements
Dimensions (H/W/D)
DSC3 Color Camera Specifications
Imager
Auto Iris
Lux
Resolution
Horiz. Viewing Angle
Vert. Viewing Angle
Swivel
Video Output
Video Output Impedance
Power Requirements
Video Balun Connections
VBRM Video Balun
The DSC3 Door Station with color camera requires a video balance/
unbalance (balun) to properly pass video thru Cat-5 network cable at
any significant distances. Figure 3 shows the wiring connections using
Cat-5 network cable and the VBRM Video Balun (included).
PWR3 PS INPUT
VIDEO
JACK
OUTPUT
(12VDC 1.5 Amp)
VBRM VIDEO BALUN
Quick Lock connection
used for runs up to
1000 feet.
RJ45 connection
used for runs up to
500 feet.
RJ45
CONNECTOR
CONNECTED TO
DSC3 DOOR STATION
Figure 3: VBRM Video Balun
4. Once the camera has been repositioned, tighten the
bracket screw to secure the camera at the desired
position.
Camera
Module
Camera
t
Bracke
DBK 1000
DOOR STATION
ROUGH-IN BRACKET
Figure 6: Camera Orientation
NOTE: Regardless of the DSC3's orientation, always
make sure the wire protruding from the rear of the
camera module is located in the UPPER-RIGHT corner
when viewed from the rear.
Description
8 ohm, sealed back mylar cone
Hi-gain omni-directional condenser
12VDC coil, 2A contact rating
Cat-5, 1000 ft. max
5 3/8
" X 3 7/8" X 3/8" (1" D for DSS3)
1/3 in. CCD
1/50-1/100,000 sec.
.05 min.
480 TV lines
120°
100°
+15°/-15° left to right
1V peak-to-peak
75 Ohms
12VDC @ 130 mA (included)
QUICK LOCK
CONNECTOR
DS-
1
OUT
DS+
2
TO COM2
PWR
3
GND
4
VID-
5
CONNECTED
VID+
6
TO DSC3
DS-
7
DOOR STATION
DS+
8
NOTE: Installer can use either the
Quick Lock Connector for runs from
0-1000 feet, or the RJ45 Connector
for runs from 0-500 feet to connect
the DSC3 with camera, but not both.
Camera
Module
Screw
Camera
Wire
Advertisement

Subscribe to Our Youtube Channel
Related Manuals for Elan DSS3

Summary of Contents for Elan DSS3
-
Page 1: Specifications
4. Once the camera has been repositioned, tighten the bracket screw to secure the camera at the desired In the rare instance that an ELAN VBRM Video Balun is not Both the DSF3 and DSC3 Door Stations are installed using the position. - Page 2 To ensure that consumers obtain quality pre-sale and after-sale support and service, ELAN Home Systems products are sold exclusively through authorized dealers. ELAN products are not sold online. The warranties on ELAN products are NOT VALID if the products have been purchased from an unauthorized dealer or an online E-tailer. To determine if your ELAN reseller is authorized, please contact ELAN Home Systems at (859) 269-7760.
Need help?
Do you have a question about the DSS3 and is the answer not in the manual?
Questions and answers