Table of Contents
Advertisement
Quick Links
707426_MultiChoice_RDN-1270309:Multichoice opmaak op stand
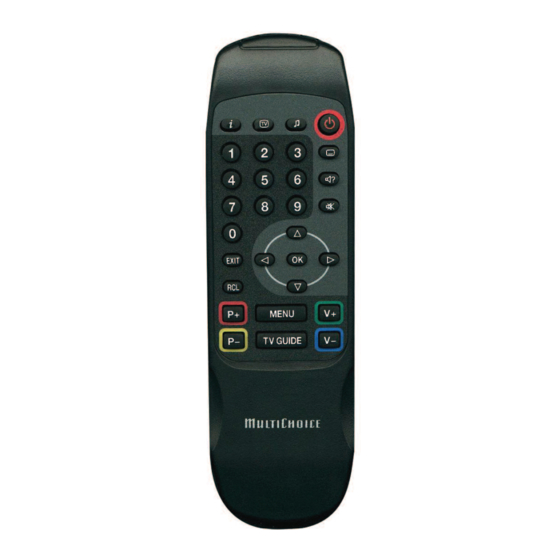
MultiChoice
The MultiChoice Universal Remote Control
can be programmed to control a range of
Universal Remote
MultiChoice decoders as well as other
audio / video devices in your home. Some
of the basic programmable options are
listed here. A more comprehensive list of
Model A3
available options are detailed in the full
manual available at www.dstv.com
When programming the remote control :
• Pressing EXIT abandons any
• Pressing HELP concludes programming
• Two red blinks at any time indicates an
Note : Always use alkaline batteries.
To The five buttons on the top of the
remote control each have a secondary
function (referred to as the "shift" mode).
To use the shift mode, press and release
the SHIFT button. It will blink to indicate
that SHIFT is active. Any button pressed
while the SHIFT button is blinking will
automatically be in "shift" mode. The
SHIFT button will stop blinking if you
press it again or if no other buttons are
pressed within 20 seconds (ie. it will
time-out).
User Guide
6
There are 4 methods which can be used
to program the remote control to emulate
If you want the MultiChoice remote control
another remote control. 3 of these meth-
to "learn" a function from a remote control
ods are described in this manual.
normally used to control another device,
The 4th (Exhaustive Search) is explained
follow the steps below. (e.g.: Program the
in the more detailed manual available at
TV remote's mono/stereo function to work
www.dstv.com
off the STOP button on the PVR remote).
Place the two remote controls on a flat
surface. Ensure that the ends which
Direct Set
Method 2:
would normally be pointed at the
device are facing each other (about 2 to
If you have the specific device code
5cm apart).
(obtained from the web manual or a previ-
ous Code Verification) the following steps
can be followed to program the remote:
1.
Set the dial to the mode (A, B, C or D)
that you want programmed to control
the selected device.
1.
2.
Press and hold the SHIFT button
until the mode window gives three
yellow blinks.
2.
3.
Enter the 5-digit device code using
the number buttons on the remote
3.
control.
4.
4.
All button presses will be acknowl-
edged by a single yellow blink. If the
mode window gives three red blinks,
you have entered an invalid code.
5.
5.
The mode window will give three
green blinks to indicate successful
completion and will automatically
return to the normal operational
mode.
6.
7.
Result (example) : you can now control
the mono/stereo function of the TV by
pressing the STOP button on the
MultiChoice remote control.
• You cannot programme the HELP or SHIFT
• Learning within modes 1, 2, 3, and 4 are
• Two red blinks at any time during the
6
27-03-2009
Introduction
2
programming changes and returns the
remote control to normal operational
mode.Programming a macro is the only
exception.
and stores all changes.
The remote control dial has 8 modes.
error and that the remote control has
Modes 1 – 4 are for use with PVR, 1110 or
returned to normal operational mode.
1131 decoders. Modes A – D are
Check the procedure carefully and start
programmable and can be used to control
again.
any other device (including older
MultiChoice decoders, the TV, Hi-Fi, etc).
The "mode window" (where you see the
mode) lights up when any button is
pressed, confirming the active mode and
Shift Mode
also that the command has been
transmitted (green indicates normal use,
yellow indicates programming mode and
red indicates an error).
To turn the dial, put one thumb on either
side of the dial and slide in the direction
required.
2
Learning
7
Method 3:
This feature allows you to determine the
code for a device that you programmed.
To verify a code :
1.
2.
3.
4.
Set the dial to the mode (A, B, C or D)
of the device to which the remote
5.
control belongs (example : you have
programmed the TV to mode B).
Press and hold the SHIFT button
until the mode window gives three
6.
yellow blinks.
Press the BLUE button.
Press the button that needs to "learn"
7.
the function (example : STOP button).
The mode window will give rapid
yellow blinks.
8.
Press the button on the other remote
control from which you want to
"learn" (example : mono/stereo
button). If the mode window on the
9.
MultiChoice remote control gives two
green blinks, the "learning" has been
successful.
ote :
Repeat steps 4 and 5 as required for
• The 5 numbers "blinked" are the code.
any additional "learning".
• A green blink indicates a 0 (zero).
• You can only verify codes in modes A, B,
Press HELP to end the "learning"
C or D. Attempting to verify a code in
process. The mode window will give
modes 1, 2, 3 or 4 will result in the mode
three green blinks to indicate
window blinking twice and the remote
successful completion of the process.
resuming normal operation.
• If you press digits other than 1 – 5, these
will be ignored.
• Two red blinks at any time during the
process indicates an incorrect entry.
ote :
button on the MultiChoice remote control.
not possible.
process indicates an incorrect entry.
7
15:54
Pagina 1
The Dial
3
MultiChoice decoder
This remote control works with
PVR, 1110 or 1131 decoders
and can be programmed to con-
trol older decoder models.
1.
If you own another decoder model,
refer to the picture of the original
remote control packaged with the
decoder and use the code indicated
above the picture to programme the
new remote control.
2.
Set the dial to the mode (A, B, C or D)
that you want programmed to control
the older decoder.
3.
Press and hold the SHIFT button
until the mode window gives three
yellow blinks.
4.
Enter the 5-digit code using the num-
ber buttons on the remote control.
The mode window gives one
yellow blink after you enter each of
the first four numbers and gives three
green blinks after you enter the last
number, confirming that a valid code
has been entered.
ote : The remote control will indicate an
error (two red blinks in the mode window)
and exit the programming mode if you
press an invalid code or anything other
than a number button when entering the
device code.
This mode on the new remote control can
now be used to control the older decoder.
Please note the mapping of buttons below
the picture of the original remote used to
programme the remote control.
3
Code Verification
8
This feature allows you to change the
volume on a selected device without hav-
ing to change the mode on the remote
control. So, although the remote is being
Set the dial to the mode for which
used to control the decoder, all volume
you wish to verify a code (A, B, C or
related commands are sent to the device
D)
you have selected (eg. the TV), instead of
the decoder.
Press and hold the SHIFT button
until the mode window gives 3 yellow
1.
Note the mode of the device that you
blinks.
want programmed to receive the
volume commands (eg. home theatre
Press the YELLOW button. The mode
system on mode A).
window will give 3 yellow blinks to
indicate acceptance.
2.
Set the dial to the mode (1, 2, 3, or 4)
from which you want the volume
Press 1 and count the times the mode
commands to be relayed.
window blinks. (Only count amber
blinks, a green blink indicates zero)
3.
Press and hold the SHIFT button
until the mode window gives three
Press 2 and count the times the mode
yellow blinks.
window blinks. (Only count amber
blinks, a green blink indicates zero)
4.
Press the MUTE button. (The mode
window will again give three yellow
Press 3 and count the times the mode
blinks.)
window blinks. (Only count amber
blinks, a green blink indicates zero)
5.
Set the dial to the mode (A, B, C or D)
to which you want the volume
Press 4 and count the times the mode
commands relayed. This must be the
window blinks. (Only count amber
mode on which you have programmed
blinks, a green blink indicates zero)
the target device. (see "Controlling the
TV, Amp / Tuner or DVD")
Press 5 and count the times the mode
window blinks. (Only count amber
6.
Press HELP to confirm your selection.
blinks, a green blink indicates zero)
(The mode window will give three
green blinks to indicate successful
Press the HELP button to exit this
completion).
mode and resume normal operation.
7.
Return the dial to the mode in step 2.
ote :
• Two red blinks at any time during the
process indicates an incorrect entry.
• Volume commands will now result in the
SHIFT button blinking once and the
volume changing on the selected device.
• Once programmed, it is possible to easily
jump between the original volume control
and the programmed Volume Relay by
just pressing Shift and Mute (Relay) at
any time. Relayed Volume commands are
indicated via a "SHIFT" blink while
normal mode volume commands are
indicated via the mode window.
8
4
Controlling Other
Controlling the TV,
Amp / Tuner or DVD
This remote control can be programmed
to control other devices in your home.
Method 1:
1.
Find the code for the selected device
in the "Brand set list". Codes are
listed by type of device and brand.
If the brand or device is not listed in
the "Brand set list", go to
www.dstv.com
2.
Set the dial to the mode (A, B, C or
D) that you want programmed to
control the selected device.
3.
Press and hold the SHIFT button
until the mode window gives three
yellow blinks.
4.
Press the GREEN button.
5.
Enter the 5-digit brand code using
the number buttons on the remote
control.
6.
Search the models by pressing the
RIGHT arrow until the device you are
trying to control switches on or off
(this confirms that you have the cor-
rect code).
7.
All button presses will be
acknowledged by a single yellow
blink. If the mode window gives five
red blinks, you have searched all the
available models for that brand.
8.
Press HELP to confirm the code.
The mode window gives three green
blinks to indicate successful
completion.
ote : Some codes are quite similar. If the
device is not functioning correctly with the
selected model (step 6), try the sequence
again and select another model in step 6.
This mode on the new remote control can
now be used to control the selected device.
To ensure that any future changes can be
done easily, the specific device code can be
obtained by doing "Code Verification".
Write the code on the sticker inside the
battery compartment for future reference.
4
Volume Relay
9
A macro is used to store a series of com-
mands that you use regularly (example :
switch multiple devices on or off with one
button press). You can store the com-
mands on a selected button (0-9 or
Standby) and then recall this command
sequence at any time and from any mode
by pressing SHIFT plus that button.
As an example, we will assume using a
decoder set to listen to mode 1, a TV that
has been programmed to mode A and an
amplifier programmed on mode B. We
want a macro that will switch them all on
or off using the Standby button on the
remote.
ote: as macros are mode independent
(you can program or recall a macro from
any mode) the start mode is not important.
1.
Press and hold the SHIFT button
until the mode window gives three
yellow blinks.
2.
Press the WHITE button.
3.
Select the button to which you
want to assign the Macro (0 – 9 or
Standby). (For this example:
Standby)
4.
Enter the corresponding
commands which you would like the
macro to perform (For this
example, change to mode 1 and press
Standby, change to mode A and
press Standby, then change to
mode B and press Standby.)
5.
Press HELP to save the macro.
The mode window will give three
green blinks to indicate successful
completion.
To use the macro, press the SHIFT button
followed by the selected Macro button. (In
the example : you can now turn your
decoder, TV and amplifier on or off from
any mode by just pressing SHIFT +
Standby.)
ote: a red blink indicates that the
memory is full or that you are trying to
enter too many commands into one macro.
9
5
Brand Set
5
Macro
10
10
Advertisement
Table of Contents

Summary of Contents for MultiChoice A3
- Page 1 This feature allows you to determine the This feature allows you to change the A macro is used to store a series of com- If you want the MultiChoice remote control another remote control. 3 of these meth- code for a device that you programmed.
- Page 2 707426_MultiChoice_RDN-1270309:Multichoice opmaak op stand 27-03-2009 15:54 Pagina 6 Herewith the functions that Type 1a Type 1b Type 2 Brand-Set-List (code 21363) (code 21363) (code 21463) can be controlled with the MultiChoice remote: As used for 720, 720i, 910, 933, 988 and 988i...
Need help?
Do you have a question about the A3 and is the answer not in the manual?
Questions and answers