Advertisement
Quick Links
Advertisement

Related Manuals for Gourmia GCM5100


Summary of Contents for Gourmia GCM5100
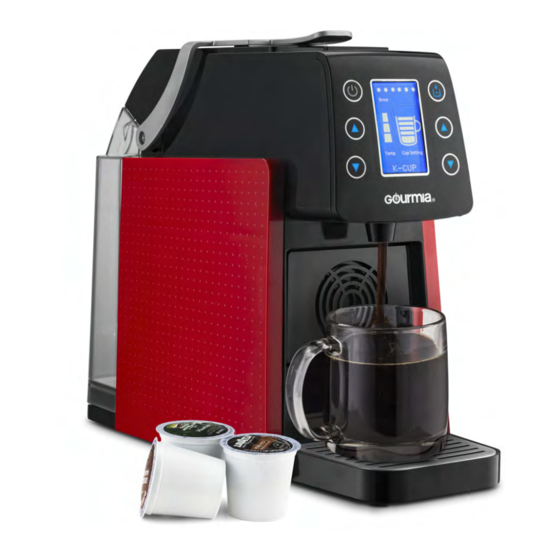
- Page 1 MODEL# GCM5100 K CUP & ESPRESSO COFFEE MAKER...
- Page 2 K Cup & Espresso Coffee Maker. Please read all safety instructions and complete directions carefully for safe usage at all times. Thank you for your purchase! We hope you will enjoy all the innovative products brought to you by our family at Gourmia. Printed in China...
- Page 3 SAFETY FIRST P. 6 FEATURES & FUNCTIONS p. 8 BEFORE FIRST USE & ASSEMBLY p. 12 STEP BY STEP COFFEE & ESPRESSO p. 16 REMOVING & SWITCHING CARTRIDGES SPECIALTY COFFEE & ESPRESSO RECIPES p. 23 MAINTENANCE p. 25 WARRANTY & SERVICE p.
-
Page 4: Important Safeguards
IMPORTANT SAFEGUARDS FOR HOUSEHOLD USE ONLY When operating this electric appliance, basic safety instructions should always be followed. Refer to the following for these instructions. Electrical Polarized Plug: This K Cup & READ ALL SAFETY & USAGE INSTRUCTIONS BEFORE USING THE K CUP Espresso Coffee Maker has a polarized &... -
Page 5: Features And Functions
FEATURES & FUNCTIONS houses the Automatic Cartridge System that holds pods and capsules, the Cartridge Holder Compartment, Cartridge Panel Compartment, Lift Lever, Demitasse Cup & Cold Milk Frother. Display for easy operation (see p. xxx). B. Automatic Cartridge System: a) K-Cup® Pod Cartridge and Cartridge Panel b) Nespresso®... - Page 6 F. Removable Drip Tray and Grate: The Grate sits on top of the Drip Tray/Used Pod Container. The Grate allows any liquid that drips or spills to be captured. It can easily be removed for cleaning. G. Used Pod/Capsule Container: Attached to the Drip Tray, the Used Pod/Capsule Container holds 12 to 14 used Capsules and/or Pods.
- Page 7 BEFORE FIRST USE Using a soft, damp cloth, clean the K Cup & Espresso Coff ee Maker Base, including accessories, and dry thoroughly with a soft cloth. Do not immerse the Base, cord or plug in water. Place the K Cup & Espresso Coff ee Maker on a fl at counter surface. Plug the K Cup &...
- Page 8 fi g. 1 fi g. 2 fi g. 3 ASSEMBLY Nespresso Espresso Cartridge and Cartridge Panel Set Move the Lift Lever up and back until it CLICKS into place. The empty Cartridge Holder Compartment fi g. 4 fi g. 5 fi g.
- Page 9 STEP-BY-STEP COFFEE AND ESPRESSO fi g. 1 fi g. 2 Step-by-Step K-Cup Coffee After assembling your K-Cup Cartridge and Cartridge Panel Set, insert the K-Cup Pod. (fi g 1) fi g. 3 Move the Lift Lever down until it is fully closed. (fi g 2) Power Button Lights up Start Brew Button when ready to operate...
- Page 10 Step-by-Step Nespresso Espresso After assembling your Espresso Cartridge and Cartridge Panel Set, insert the Espresso Capsule. (fi g 1) fi g. 1 fi g. 2 Move the Lift Lever down until it is fully closed. (fi g 2) Select espresso temperature and size variables on the Control Panel. (fi g 3) Place a demitasse cup on the Demitasse Cup Platform and Press Start Button.
- Page 11 To Remove or Switch Cartridge Holder and Cartridge Panel Sets fig. 1 fig. 2 Pull the Lift Lever up and back until it clicks. To remove the Cartridge Holder from the Compartment, with one hand, press the spring-loaded Tabs together on the Cartridge Holder. (fig 1) With the other hand, remove the empty Cartridge Holder.
- Page 12 SPECIALTY COFFEE & ESPRESSO BEVERAGE RECIPES CaffË di Miele 2 Tbsp. honey ¼ cup low fat milk 1 K-Cup Pod Pinch ground cinnamon Pour the honey and milk into a 12-oz. mug and stir to combine. Insert the K-Cup Sprinkle with cinnamon. Jamaican Rum Buzz 1 K-Cup Pod 1 Tbsp.
-
Page 13: Maintenance
MAINTENANCE ALWAYS clean the exterior of the Base as needed; however, do not immerse the Base in water. Remove used pods and capsules as needed; rinse and dry the Used Pod Container. Wash the Milk Frother tank is warm, sudsy water, including the plastic tubing and connector. -
Page 14: Warranty And Service
Product defects not covered under the Warranty provisions include normal wear and damage incurred from use or accidental negligence, misuse of company is not liable for any incidental or consequential damages incurred by such circumstances. For Customer Service or Questions, Please call: 888-552-0033 www.gourmia.com... - Page 15 www.gourmia.com...
Need help?
Do you have a question about the GCM5100 and is the answer not in the manual?
Questions and answers