Advertisement
Quick Links
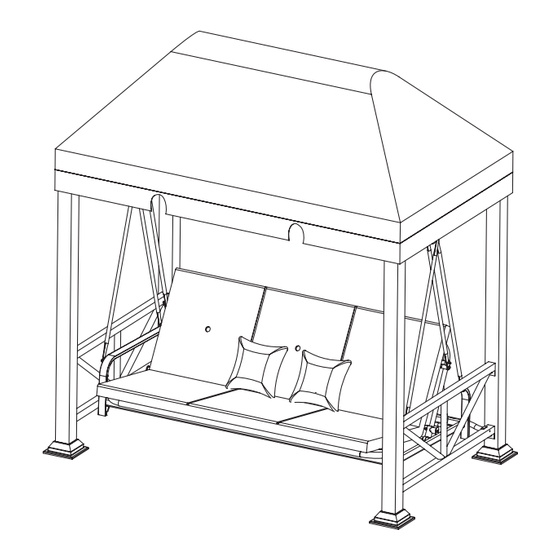
BHG Sullivan Pointe 3 person Gazebo Swing
ASSEMBLY INSTRUCTIONS
ITEM# BH15-092-099-01
ATTENTION: THIS PRODUCT IS NOT FOR COMMERCIAL USE
INTENDED FOR RESIDENTIAL USE ONLY.
Questions, problems, missing parts with this product? Do not return to your
retailer,please call our customer service department 9:00 a.m. to 5:00 p.m.
Eastern Standard Time Monday through Friday Phone # 1-800-457-4652
or
contact us at www.numarkcustomerservice.com
DON'T RETURN TO STORE
1
Advertisement

Summary of Contents for BHG BH15-092-099-01
- Page 1 BHG Sullivan Pointe 3 person Gazebo Swing ASSEMBLY INSTRUCTIONS ITEM# BH15-092-099-01 ATTENTION: THIS PRODUCT IS NOT FOR COMMERCIAL USE INTENDED FOR RESIDENTIAL USE ONLY. Questions, problems, missing parts with this product? Do not return to your retailer,please call our customer service department 9:00 a.m. to 5:00 p.m.
-
Page 2: Warnings And Cautions
WARNINGS AND CAUTIONS * It is essential to place the swing on level ground and not less than 1.83m from any obstruction such as fences, garages, the house, overhanging branches, laundry lines, or electrical wires. Oil all metallic moving parts during usage season *... - Page 3 Remove all components from the polybag and unwrap all package materials. Please count the components, there are: Part Description Quantity Leg Post Leg Post Side Panels Top Crossbar Top Crossbar Rear Leg Crossbar Right Arm Left Arm Seat Support Bar Seat and Back Long Hanging Bar Short Hanging Bar...
- Page 4 DON’T RETURN TO STORE...
- Page 5 ACCESSERIES Description Part Quantity M6x12L 8+1 spare Counter Sink Bolt M6x15L Bolt M6x36L Bolt M6x55L Bolt 12+1 spare M8x20L Bolt M8x65L Bolt M8x77L Bolt M6 Nut M8 Nut M6 Metal Washer M8 Metal Washer Plastic Washer S-Hook U-Bracket Open Hex Wrench Open Hex Wrench Allen Wrench M8 Hex Wrench...
- Page 6 Step1 T2 x 4 T1 x 8 T14 x 4 M6x12L U-Bracket M6x15L Bolt Counter Sink Bolt Please don’t tighten the bolts fully at this step. Note: After assembly, Bolt T1 should flush with base plate S Repeat procedure for the other 3 legs. Step2 T5 x 8 T11 x 8...
- Page 7 Step3 T11 x 4 T5 x 4 M8 Metal Washer M8x20L Bolt Please don’t tighten the bolts fully at this step. Repeat procedure for the other side. DON’T RETURN TO STORE...
- Page 8 T6 x 4 T9 x 4 T11 x 8 Step4 M8x65L Bolt M8 Nut M8 Metal Washer Please don’t tighten the bolts fully at this step. Repeat procedure for the other side. Step5 T4 x 2 T10 x 2 M6x55L Bolt M6 Metal Washer Note:Arrow on the rear leg crossbar should point upside.
- Page 9 Step6 Note: There is a ‘FRONT’ label mark on the left & right arm. The seat should be assembled the front of the arms. Please make sure the tabs on the ends of the seat support bars fully insert into the brackets on the arms .
- Page 10 Step8 T13 x 2 S-Hook Note: Long hanging bar should face outside. Short hanging bar should face inside. Step9 DON’T RETURN TO STORE...
- Page 11 Step10 T3 x 4 T8 x 4 M6x36L Bolt M6 Nut Please tighten all the bolts and nuts. Fully check with all the bolts and keep all them tightened at this step. Step11 Using as a swing. DON’T RETURN TO STORE...
- Page 12 Step12 Converting the swing to a hanging bed. Removing the cushions. Taking out the hanging bar L from the pin bolt of the back J . The supporting bar of the back J should be inserted into the U-shaped brackets at the same time by 2 persons and then fully press it, keeping the bed steady .
Need help?
Do you have a question about the BH15-092-099-01 and is the answer not in the manual?
Questions and answers