Advertisement
Advertisement
Table of Contents

Summary of Contents for REXON AP3300
- Page 1 ® 13 IN. (330 MM) BENCH THICKNESSER AP3300 INSTRUCTION MANUAL...
- Page 2 CONTENTS P 1 - 8 The original instruction manual is in English.
-
Page 3: Unpacking And Checking Contents
CARTON CONTENTS UNPACKING AND CHECKING CONTENTS Separate all parts from packing materials. Check each part with the illustration below to make certain all items are accounted for, before discarding any packing material. WARNING! ● If any part is missing or damaged, do not attempt to assemble the thicknesser, plug in the power cord, or turn the switch ON until the missing or damaged part is obtained and is installed correctly. -
Page 4: General Safety Rules
General Safety Rules 9. USE PROTECTIVE EQUIPMENT. Use safety glasses. Use face or dust mask if WARNING ! When using electric tools cutting operations create dust. basic safety precautions should always 10. CONNECT DUST EXTRACTION be followed to reduce the risk of fire, EQUIPMENT. - Page 5 20. CHECK DAMAGED PARTS. Before ● Read manual before using thicknesser. further use of the tool, it should be ● Wear safety goggles. carefully checked to determine that it ● Never perform planning operation will operate properly and perform its with cutterhead guard or belt guard intended function.
- Page 6 BEFORE EACH USE 4. PLAN YOUR WORK: 1. INSPECT YOUR THICKNESSER: ● Before trying a new or not often used ● If any part is missing, bent or broken operation, carefully plan your hand in any way, or any electrical part does placement.
-
Page 7: Environmental Protection
● Use extra support (tables, sawhorses, ● Make the workshop childproof. Lock blocks) if your workpiece is hard to the shop. Disconnect master switches. hold down to the table. Remove the ON/OFF switch key. Store ● Do not use another person as it away from children and others not additional support or to help feed, qualified to use the tool. -
Page 8: Installation
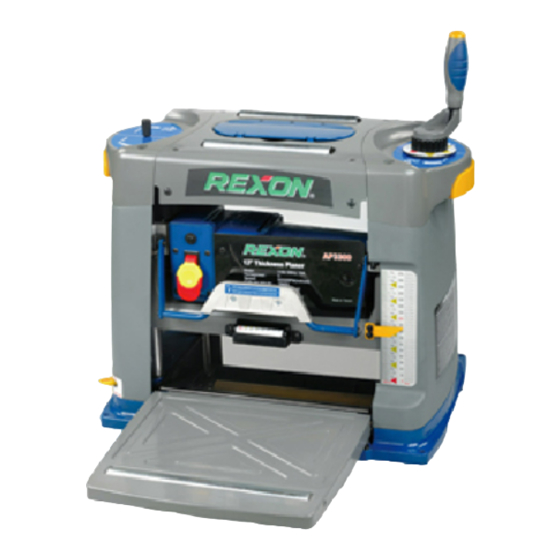
Installation INSTALLING THE DEPTH ADJUSTMENT HANDLE (FIG. 2) Know Your Thicknesser (Fig. 1) 1. Place the depth adjustment handle (1) on the right hand side, on the top of the Tool Storage machine. Depth Adjustment Handle 2. Insert the hex socket bolt (2) into the Depth Scale Pointer handle (1). -
Page 9: Operating The Tool
ADJUSTING THE EXTENSION TABLE 5. Loosen or tighten two adjustment bolts (FIG. 5, 6) (5) with hex wrench until the knife 1. Pull out the cutterhead lock lever (1) to touches the knife setting gauge (6). unlock the head. (Fig. 5) (Fig. -
Page 10: Changing Blades
3. If snipe happens (snipe is a depression ● Remove all foreign objects from the made when the ends of the workpiece workpiece. Do not plane wood that is contact the cutters), make sure the severely knotted or warped. extension tables and support stands are ●... -
Page 11: Maintenance
10. Replace the hold-down plate (5), screw Replace for the other side. To reassemble the eight hex bolts (4) in, but do not reverse the procedure. The ears on the tighten. (Fig. 16) metal end of the assembly go in the same 11. - Page 12 Fig. 1 Fig. 2 Fig. 5 Fig. 3 Fig. 6 Fig. 4 Fig. 7...
- Page 13 Upper drawing shows the emergency stop cover removed Fig. 8 Fig. 11 Fig. 9 Fig. 12 Fig. 10 Fig. 13...
- Page 14 Fig. 18 Fig. 14 Fig. 15 Fig. 16 Fig. 17...
- Page 15 AP3300 PARTS LIST (A) ORDER ONLY BY MODEL NUMBER AND PART NUMBER I.D. Description Size Q’ty I.D. Description Size Q’ty 04Q3 EARTH LABEL 0JDC SPRING PIN 04TP LIMIT SWITCH GUARD 0JEC C-RING 04TR LIMIT SWITCH INSULATION BLOCK 0JGB PARALLEL KEY...
- Page 16 Schematic A MODEL: AP3300...
- Page 17 AP3300 PARTS LIST (B) ORDER ONLY BY MODEL NUMBER AND PART NUMBER I.D. Description Size Q’ty I.D. Description Size Q’ty 086G INSERT 0J7B FLAT WASHER 5/16*25/32-1/8 086H CHAIN 0J95 SPRING WASHER φ6 086K SPROCKET 0JEV E-RING 086L BEARING COVER 0JPF HEX. HD. BOLT M6*1.0-25...
- Page 18 Schematic B MODEL: AP3300...
- Page 19 AP3300 MOTOR PARTS LIST ORDER ONLY BY MODEL NUMBER AND PART NUMBER I.D. Description Size Q’ty I.D. Description Size Q’ty 0JB9 WAVE WASHER BWW-6201 148G GEAR BOX 0JEA C-RING 148H HERIX GEAR 0JEE C-RING 148J GEAR SHAFT 0JGW PARALLEL KEY 148K HERIX GEAR 0JX4 HEX.
- Page 20 ®...
Need help?
Do you have a question about the AP3300 and is the answer not in the manual?
Questions and answers