Table of Contents
Advertisement
Snow Thrower
Owner/Operator Manual
Model
938400 - 522
Transfer
model &
serial number
label from
product
registration
here.
Coller l'autocollant du
modèle et du numéro de
série dans cet encadré.
Transferir aquí la etiqueta
del modelo y número de
serie del registro del
producto.
5758436 and 5966846
ENGLISH
FRANÇAIS
ESPAÑOL
03812600 6/01
Printed in USA
U.S. Patents
Advertisement
Table of Contents

Summary of Contents for Mask 938400-522
-
Page 1: Snow Thrower
Snow Thrower Owner/Operator Manual Model 938400 - 522 U.S. Patents 5758436 and 5966846 ENGLISH FRANÇAIS ESPAÑOL Transfer Coller l’autocollant du model & modèle et du numéro de serial number série dans cet encadré. label from Transferir aquí la etiqueta product del modelo y número de registration serie del registro del... -
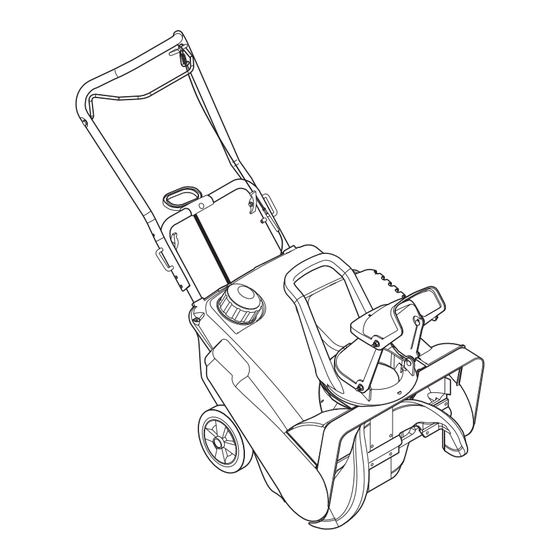
Page 2: Controls And Features
CONTROLS AND FEATURES OS0242 OS0155 Figure 1 WARNING The engine exhaust from this product contains chemicals known to the State of California to cause cancer, birth defects or other reproductive harm. - Page 3 ENGLISH FRANÇAIS ESPAÑOL 1. Auger Clutch Bail 1. Commande d'embrayage 1. Asa del embrague del 2. Recoil Starter Handle de la turbine sinfín 3. Handlebar Knob 2. Poignée du démarreur à 2. Manilla de retroceso del 4. Chute Deflector Handle cordon arranque 5.
-
Page 4: Table Of Contents
TABLE OF CONTENTS Controls and Features....2 Storage ......21 Introduction . - Page 5 DELIVERY Customer Note: If you have purchased this product without complete assembly and instruction by your retailer, it is your responsibility to: • Read and understand all assembly instructions in this manual. WARNING: Improper assembly or adjustments can cause serious injury. If you do not understand or have difficulty following the instructions, contact your nearest Ariens Dealer for assistance.
-
Page 6: Safety
SAFETY SAFETY ALERTS NOTATIONS Look for these symbols to NOTE: General reference information for proper operation and maintenance practices. point out important safety precautions. They mean: IMPORTANT: Specific procedures or information required to prevent damage to unit Attention! Personal or attachment. Safety Is Involved! PRACTICES AND LAWS Become Alert! Obey The... -
Page 7: Safety Decals And Locations
SAFETY DECALS AND LOCATIONS ALWAYS replace missing or damaged Safety Decals. Refer to Figure 3 below for Safety Decal locations. DANGER / PELIGRO ROTATING PARTS Stop engine & remove ignition key before clearing. PIECES EN ROTATION DANGER / PELIGRO Arreter le moteur et retirer la clé de contact avant le débourrage. -
Page 8: Safety Rules
3. DANGER! ROTATING PARTS! Operation Understand: Stop engine and remove ignition key before clearing. • How to operate all controls • The functions of all controls • How to STOP in an Emergency Before starting engine, disengage OL0900 control(s).DO NOT operate at too fast a rate. DO NOT change engine governor settings or 4. - Page 9 Personal Safety Before tipping unit up onto housing, remove enough fuel so no spills will occur. Ensure unit Only trained adults may operate unit. is secure and will not tip over during Training includes actual operation. maintenance. NEVER operate unit after or during the use of Fuel is highly flammable and its vapors are medication, drugs or alcohol.
-
Page 10: Assembly
ASSEMBLY TOOLS REQUIRED 7/16" Open-end wrench TO REMOVE UNIT FROM CARTON 1. Cut off top of carton. 2. Remove front and rear inserts and literature pack. 3. Cut out back of carton and roll unit out. 4. Remove protective packaging materials. ASSEMBLY Handlebar Assembly r d w... -
Page 11: Operation
CHECKLIST While learning how to use your unit, pay extra attention to the following important Please complete the following checklist before items: proceeding: ❑ ❑ Fill fuel tank with proper gasoline/oil mix. All assembly instructions have been ❑ completed. Become familiar with all controls – their ❑... - Page 12 IMPORTANT: Check clutch/brake function Discharge Chute Deflector before each use. If auger clutch bail moves freely with no resistance before contacting handlebar, adjust or repair unit before CAUTION: THROWN OBJECTS operating. can cause personal injury and/or property damage. DO NOT Primer Bulb throw snow any higher than Push in the primer bulb to add...
-
Page 13: Filling The Fuel Tank
FILLING THE FUEL TANK BEFORE STARTING ENGINE Check fuel level by looking at fuel level indicator on rear of unit. Add fuel as required. WARNING: IMPROPER CLOTHING AND SAFETY GEAR could result in death or WARNING: FLAMMABLE FUEL serious injury. Wear adequate and its EXPLOSIVE VAPORS winter gear, protective gloves can result in death or serious... - Page 14 3. Check Engine Fuel Level 7. Pull rope with a rapid continuous full arm stroke. Let rope rewind slowly. IMPORTANT: DO NOT let starter handle snap WARNING: FLAMMABLE FUEL against unit. and its EXPLOSIVE VAPORS 8. Repeat until engine starts. (If engine can cause death or serious does not start, refer to Troubleshooting.) injury.
- Page 15 3. Lift handlebar so auger contacts surface TO TRAVEL TO ANOTHER WORK to be cleared. Lift the handlebar only high AREA enough to propel unit forward. 1. Release auger clutch bail to disengage NOTE: Do not lift so high to allow snow to kick auger.
-
Page 16: Maintenance
MAINTENANCE GENERAL RECOMMENDATIONS MAINTENANCE SCHEDULE The chart below shows the recommended WARNING: ACCIDENTAL maintenance schedule that should be ENGINE START UP can cause performed on a regular basis. More frequent death or serious injury. ALWAYS service may be required due to heavy loads or stop engine, remove key, and use. - Page 17 CHECK CLUTCH FUNCTION CLEAN UNIT After each use, brush snow and debris off with a soft bristled brush. Occasionally apply a light WARNING: FAILURE OF coat of spray lubricant to exposed metal joints CLUTCHES OR BRAKES may and surfaces. Wipe off excess with soft cloth. result in death or serious injury.
-
Page 18: Service And Adjustments
SERVICE AND ADJUSTMENTS WARNING: ACCIDENTAL ENGINE START UP can cause death or serious injury. ALWAYS stop engine, remove key, and wait for moving parts to stop before performing maintenance or service. HOT SURFACES can cause death or serious injury. DO NOT touch parts which are hot from operation. - Page 19 5. Remove old belt. TO ADJUST BELT FINGER 6. Install new belt onto pulleys. With the auger clutch engaged, there should 7. Reinstall auger drive pulley and secure be 1/32 to 1/16" (1-1.6 mm) clearance with washer and cap screw. between the belt finger and drive belt.
- Page 20 8. Repeat the above steps until proper adjustment is achieved. 1/4 to 3/8” 9. Replace cowl. (6-10 mm) 1/32"-1/16" (1-1.6 mm) 1. Control 4. Threaded Cable Spring Section 2. Adjusting 5. Solid Section Feature 1. Idler Arm/Brake 3. Locknut 2. Idler Figure 10 OS1220 3.
-
Page 21: Storage
STORAGE UNIT WARNING: FLAMMABLE FUEL and its EXPLOSIVE VAPORS can cause death or serious injury. DO NOT store unit inside a building with fuel in the fuel tank where any ignition sources are present. Drain fuel outdoors away from any ignition source. Allow engine to cool before storing in any enclosure. -
Page 22: Troubleshooting
TROUBLESHOOTING PROBLEM PROBABLE CAUSE CORRECTION Engine will 1. Ignition switch not in 1. Turn key to "RUN" position. not crank "RUN" position. 2. Check connections. See your Dealer. 3. Check wiring for wear, damage or poor 2. Bad starter or wire connections. -
Page 23: Specifications
SPECIFICATIONS Model Number 938400 Description Engine - Tecumseh HSK-850-8310C Engine Power - HP (kW) - 2 Cycle 5 (3.73) Engine Operating Fast Idle Speed - RPM 3600 ± 150 Engine Displacement - cu. in. (cc) 8.46 (139) Fuel See Engine Manual for type and grade Fuel to Oil Mix 50:1 Fuel Tank Capacity - qt (liters) -
Page 24: Accessories
ACCESSORIES See your authorized Ariens Dealer to add these optional accessories. 73800300 Discharge Chute Crank Kit SERVICE PARTS Be sure to always use genuine Ariens parts to keep your unit running like new. Part no. Description 07236300 Drive Belt 03810600 Scraper Blade GB - 24... -
Page 25: Warranty
2 Year Limited Warranty Ariens Company warrants to the original purchaser that consumer products manufactured by Ariens Company will be free from defects in material and workmanship for a period of two (2) years after the date of purchase, and will repair any defect in material or workmanship, and repair or replace any defective part, subject to the conditions, limitations Ariens Company and exclusions set forth herein. - Page 26 Ariens Company 655 West Ryan Street P.O. Box 157 Brillion, WI 54110-0157 920-756-2141 Fax 920-756-2407 www.ariens.com...
Need help?
Do you have a question about the 938400-522 and is the answer not in the manual?
Questions and answers