Table of Contents
Advertisement
Advertisement
Table of Contents

Related Manuals for XT Racing GPX Pro

Summary of Contents for XT Racing GPX Pro
- Page 1 User Manual 11/11/2010...
- Page 2 GPX Pro Manual © 2009 XT Racing All rights reserved. No parts of this work may be reproduced in any form or by any means - graphic, electronic, or mechanical, including photocopying, recording, taping, or information storage and retrieval systems - without the written permission of the publisher.
-
Page 3: Table Of Contents
Contents Table of Contents Part I GPX Pro 1 Circuit Racing Mode ........................... 1 Basic Operation ................................1 More Details ................................5 Menus ................................7 2 Point-to-Point Racing Mode ........................... 11 Basic Operation ................................11 More Details ................................13 Menus ................................ - Page 4 GPX Pro Manual Battery and Charging ................................50 Pow ering Dow n ................................50 Mem ory ................................51 File Maintenance ................................51 Other Notes ................................52 10 Introduction to GPS ........................... 52 11 Troubleshooting ........................... 53 Part II XTStudio 1 Loading sessions ...........................
-
Page 5: Part I Gpx Pro
Fresh out of the box, the GPX is configured in Circuit Racing mode and is ready to go. Turn on the GPX by pressing the Menu button and you should see the main Circuit Racing screen: © 2009 XT Racing... - Page 6 GPX Pro Manual NOTE: if the GPX does not power up by pressing any button, try pressing all four buttons simultaneously. If this does not power up the GPX, then the internal rechargeable battery is probably discharged and will need to be charged.
- Page 7 From the main screen, press the Left arrow to go to the first session stored in the GPX, or the Right arrow to go to the most recently captured session. This will show a summary screen for that session: © 2009 XT Racing...
- Page 8 GPX Pro Manual You move from session to session by pressing Left and Right as desired. You can at this point also press Menu to return to the main screen. To review the laps for a session, press Select from that summary screen and you will see the lap detail: Press the Left and Right arrow button to cycle through the laps for that session.
-
Page 9: More Details
“longest straightaway”. (The straightaway that the GPX calculates allows for some slight variation from a straight line] The other way to set a start/finish at a new track is to walk over to near where you want the start/ © 2009 XT Racing... - Page 10 GPX Pro Manual finish line to be, and set the start/finish line via the GPX’s menu system (Track options, Set start/ finish line of a new track). This point will now form the basis for the start/finish line when you start racing the track.
-
Page 11: Menus
Set the start/finish line of a new track – allows you to manually “create a new track” by physically going to the start/finish line to register the GPS coordinate Change start/finish (select a track) - allows you to move the start/finish line © 2009 XT Racing... - Page 12 GPX Pro Manual Maintain splits (select a track) Add split – adds a new split for this track. There is a limit of 5 splits. Remove a split – removes the selected split (a little box indicates which split will be removed when you press Select) Remove all splits –...
- Page 13 Delete a track and its sessions - see section on File Maintenance (confirmation required) Delete all sessions for a track -- see section on File Maintenance (confirmation required) Delete all session -- see section on File Maintenance © 2009 XT Racing...
- Page 14 GPX Pro Manual (confirmation required) Delete all tracks and sessions -- see section on File Maintenance (confirmation required) File system check – checks the integrity of the GPX’s built-in file system Display Formats and Units Time Format – specifies how times will be displayed...
-
Page 15: Point-To-Point Racing Mode
You must “create” a new track, then define the start and finish point. (And optionally define split points.) To “create” the new track, go into the menu system, go to Track Options, then press Select. Using © 2009 XT Racing... - Page 16 GPX Pro Manual the arrows, go to Create a new track, and press Select. Enter the name of the new track using arrows and Select. Press Menu when the name is complete. Now, physically go to the starting point of the race. On the main screen, make sure you have a good GPS signal (4 or more satellites, less than 5.00 EHPE).
-
Page 17: More Details
(For example, the above website reports coordinates in the degree/fractional degree format.) For latitude, positive numbers are NORTH and negative numbers are SOUTH. For longitude, positive numbers are EAST and negative numbers are WEST. When entering coordinates manually, the GPS requires N/S and E/W. © 2009 XT Racing... - Page 18 GPX Pro Manual If a coordinate contains more decimal points than the GPX can handle, you can safely ignore the extra digits. Use the Left and Right arrows to change each position of data entry, and press Select to go to the next position.
-
Page 19: Menus
Track options Create a new track - enter the name of a new track Set start/finish/splits Coordinates via GPS capture - go to the spot and record GPS coordinates (select from list of tracks) Set start point © 2009 XT Racing... - Page 20 GPX Pro Manual Set finish point Set split # 1 point Set split # 5 point Coordinates via keypad entry - enter known latitude and longitude (select from list of tracks) Set start point Set finish point Set split # 1 point...
- Page 21 Minutes until auto power off – after this many minutes of no activity, the GPX will turn off File Maintenance Delete last viewed session (for deleting the last session you viewed in the GPX) (confirmation required) © 2009 XT Racing...
- Page 22 GPX Pro Manual Delete a track and its sessions - see section on File Maintenance (confirmation required) Delete all sessions for a track -- see section on File Maintenance (confirmation required) Delete all session -- see section on File Maintenance...
-
Page 23: Drag Racing Mode
Drag Racing mode allows you to perform a “drag session” and record data for that session. A number of different types of drag modes are supported – ¼ mile, 1/8 mile, 1 mile; 0-30, 0-60, 0- © 2009 XT Racing... -
Page 24: Basic Operation
GPX Pro Manual 100 mph; 0-30-0, 0-60-0, 0-100-0 mph; and a roll-on mode which times and measures from a programmable start speed to a programmable stop speed (for example, 60-100 mph). 1.3.1 Basic Operation In Drag Racing mode, you can select from the following types of drag race via the menu item Type of drag race: 1/8 mile;... -
Page 25: More Details
High sensitivity means the GPX will be most sensitive to the slightest movement; Low means the GPX will be more lenient to vibration. If you find that the GPX starts timing a drag race before you start your vehicle, change the © 2009 XT Racing... -
Page 26: Menus
GPX Pro Manual sensitivity to a lower setting. 1.3.3 Menus Type of drag race 1/8 mile 1/4 mile 1 mile 0-30 0-60 0-100 0-30-0 0-60-0 0-100-0 Roll-on - times race from a specified start speed (roll-on start speed) to a higher stop... - Page 27 Tach Display Maximum RPM – this is the maximum RPM on the Tach that displays on the LCD graph LCD Display Options Backlight on/off control – control over the LCD panel backlight Off – no backlight On Activity – turns on for about 10 seconds after every keypress, and lap or split © 2009 XT Racing...
- Page 28 GPX Pro Manual completed Always ON – always on (consumes more battery power!) Backlight brightness – a value from 1-10 controlling the brightness (higher values use more battery power!) LCD contrast – adjusts the contrast of the LCD panel Normal or reverse display Normal display –...
- Page 29 Clear distance/time meter 1 Clear distance/time meter 2 Set local time – sets the local time as a variation from UTC (Greenwhich Mean Time) Personalization -- owner information Set personalization line 1 Set personalization line 2 © 2009 XT Racing...
-
Page 30: Instrument Cluster Mode
GPX Pro Manual Clear personalization line 1 Clear personalization line 2 Show Version Information – displays information about the GPX software version Reset settings to factory default – resets all settings. Does not delete sessions or tracks. (confirmation required) Device mode – changes the basic racing mode of the GPX Circuit Racing –... -
Page 31: Switching Racing Modes
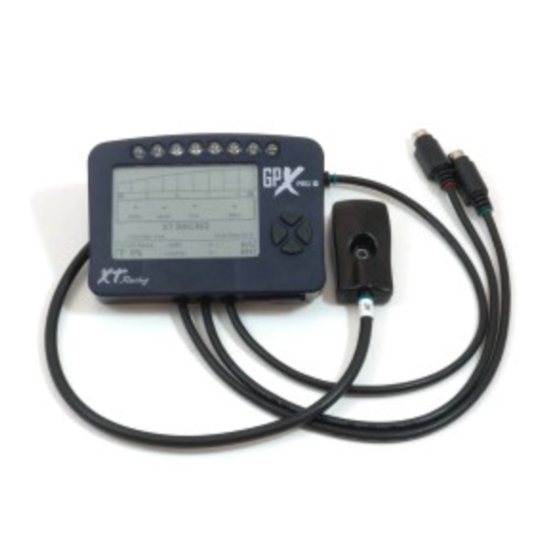
Select. The GPX will restart in the selected mode. Data Acquisition (DAQ) 1.7.1 Basic Information Your GPX is capable of capturing other data in addition to the speed, acceleration data, and GPS © 2009 XT Racing... - Page 32 Cabling and Electrical Information There are two sets of expansion cables supplied with the GPX Pro, labeled “A” and “B”. If you use these expansion cables, make sure that you plug the “A” cable into the “A” connector and the “B”...
- Page 33 Analog input # 3 is the BLUE WIRE OF CABLE “B”. Analog only. Analog input # 4 is the GREEN WIRE OF CABLE “B”. Analog only. Digital input # 5 is the GREEN WIRE OF CALBE "A". Digital only. © 2009 XT Racing...
- Page 34 GPX Pro Manual Wiring Summary – CABLE “A” Black wire Connect to vehicle’s negative battery terminal Red wire Connect to (preferably switched) source of 12V (positive battery terminal) Green wire Digital input # 5 Blue wire Connect to coiled wire around spark plug if...
-
Page 35: Installing Cables
1.7.1.2 Wiring with Scotchlok Connectors Included with your GPX Pro is a set of Scotchlok connectors that can be pressed onto your wires with no stripping or soldering required. Supplied initially are 6 of these connectors in order to begin wiring your vehicle to collect data. More Scotchloks and color-coded wiring can be purchased in our DAQ Wire Kits at www.xtracing.com. -
Page 36: Basic Daq Setup
GPX Pro Manual BAD: 1.7.2 Basic DAQ Setup All DAQ setup is performed via the menu item Data acquisition setup and parameters from the main menu: © 2009 XT Racing... - Page 37 When the box is outlined, you make changes as normal - Left and Right to cycle through the choices, Select to make that selection, Menu to exit. When you press Select on a Channel/Name entry, you can change the type of that input. Select © 2009 XT Racing...
-
Page 38: Typical Inputs
GPX Pro Manual from the list. Select Custom if you want to select one of the Generic types. Pressing Select on an Hz entry allows you to change the sampling rate for that input. You should not record data at a higher sample rate than you need... - Page 39 2- or 4-cycle engine, and type of signal you are monitoring. To set the multiplier or divider, go to the cal column of the RPM input and press Select: © 2009 XT Racing...
-
Page 40: Throttle Position
GPX Pro Manual Then, use the arrows to make your choice, and press Select: In addition, a coupled input may need to have an internal threshold value changed. This threshold value is used by the GPX's internal circuitry for determining a valid signal. For coupled RPM capture, you may need to adjust both the threshold, and the number of wraps around the spark plug wire, to obtain a reliable RPM reading. - Page 41 You need to point the gun at a place where the coolant is circulating: For each temperature you want to calibrate, do the following: On the Data Acquisition screen, highlight the Cal column of the temperature input, and press Select: Select Calibrate: © 2009 XT Racing...
-
Page 42: Gear
GPX Pro Manual Using the arrows, select the temperature; when the "gun" reads that temperature, press Select: Repeat this up to 10 times. You should try to get a pretty nice distribution of temperatures from the expected lowest to expected highest temperature. - Page 43 First, set the number of gears. Then, pick a gear to calibrate, get your vehicle going in that gear, and press Select: When you're done, a check-mark will be displayed next to each gear that is calibrated: © 2009 XT Racing...
-
Page 44: Acceleration
GPX Pro Manual NOTE: When you are going below about 3mph (5kph), the gear will be reported as "N" when utilizing rpm/speed ratio to report gear. There is one particular advantage to using the rpm/speed ratio for capturing gears (even if you have a gear sensor), if you are already capturing RPM: using this method does not "use up"... -
Page 45: Wheel Speed
1.7.3.7 Suspension The GPX can acquire suspension data on any of the analog channels. Suspension is usually determined from a linear potentiometer, which basically is a sliding resistor. © 2009 XT Racing... -
Page 46: Switch Input
GPX Pro Manual A typical linear potentiometer has 3 wires -- positive voltage, ground, and the output signal. Depending on the extension of the slider, the output signal's voltage will vary continuously between the positive voltage and ground. For the GPX, the positive voltage should be connected to a voltage between +3V and +5V. A convenient source of +3V is the RED WIRE OF CABLE "B". -
Page 47: Generic Types Of Inputs
A zero-based input is a generic input which has a base value (0 point). Only that point gets calibrated. The value displayed and used in GPStudio will be an arbitrary number above or below this 0- point, depending on whether the voltage is higher or lower than the calibration point. © 2009 XT Racing... -
Page 48: Temperature
GPX Pro Manual 1.7.4.3 Temperature This is for calibrating a thermistor input, with up to 10 calibration points. See the section on Temperature under Typical Inputs for more information. 1.7.4.4 A Raw input has no calibration at all. It merely reports a number from 0 to 1023, where 0 represents 0 volts, and 1023 represents about 5.0 volts. -
Page 49: Time And Distance Meters
The GPX has two internal time and distance meters. These each keep track of the active time and distance the vehicle traveled, whenever the GPX is receiving a valid GPS signal. The two meters are independent of each other, and either may be cleared at any time. © 2009 XT Racing... -
Page 50: Miscellaneous Information
GPX Pro Manual Miscellaneous Information 1.9.1 Tach LCD display and LED/Shift lights Tach LCD display If you are connected to an RPM input, you have several different ways of displaying the current RPM. On any main screen or running ("spinner") screen, you may display the RPM as text (e.g., 11200 or 11.2K). -
Page 51: Session Number Ids
LEDs blink or come on solid, or have all 8 LEDs flash, via a menu item: 1.9.2 Session Number IDs Each race in the GPX is assigned a Session ID. This is just a number that the GPX assigns to each race. © 2009 XT Racing... -
Page 52: Normal / Reverse Lcd Display
GPX Pro Manual 1.9.3 Normal / Reverse LCD Display You might find that in darker conditions, (e.g., night racing), that the combination of Reverse LCD display (white display on a dark background), along with the backlight, might be a useful configuration. -
Page 53: Mounting
30- or even 15-minute increments – for example, Nepal is UTC + 5:45.) The GPX has a menu item which allows setting the local time. It uses the UTC time as reported by © 2009 XT Racing... -
Page 54: Battery And Charging
GPX Pro Manual the GPS as the basis, and, using the arrows, you can increase the time of day (press Right) (UTC +) or decrease the time of day (press Left) (UTC -) in 15-minute increments until the time shown is correct for your local time. -
Page 55: Memory
Delete a track and its sessions - for this option you select a track, and that track and all sessions (races) run at that track are also deleted. If you go back to that track, it will not recognize it as an existing track, since you deleted it. © 2009 XT Racing... -
Page 56: 1.9.11 Other Notes
GPX Pro Manual Delete all sessions for a track - this deletes all races at a track, but does not delete the track information (start/finish/splits). Delete all sessions -- deletes all races in the GPX. All tracks remain. Delete all tracks and sessions -- deletes all races and tracks. -
Page 57: 1.11 Troubleshooting
· When you connect the GPX to your PC, it may take up to 10 seconds before you hear the "da- ding" sound indicating that the GPX is properly connected. This is normal. · Occasionally when you connect the GPX to the PC, you may not get a "da-ding" sound, or you © 2009 XT Racing... -
Page 58: Part Ii Xtstudio
GPX Pro Manual might not get the normal "PC connected" message. In that case, disconnect the GPX, wait a few seconds, and try again. XTStudio A perfect companion to the myriad functions in the GPX, XTStudio allows you to take the data gathered on track and analyze it in detail on your Windows enabled PC. - Page 59 The other option is only used if the device you are connecting is a replacement (due to buying a new one or sometimes from and authorized repair with XT Racing). In this case, you will choose the existing database entry that this device is replacing, then click Replace an existing device.
-
Page 60: Downloading A Device
GPX Pro Manual 2.1.2 Downloading a device After the device is connected, the download sessions dialog will appear if there are sessions on the device that need to be downloaded to the database. © 2009 XT Racing... -
Page 61: Importing Gpstudio Databases
The GPStudio database that contains your old session can be imported into XTStudio. To start the import process choose Home -> Import database. Next, the import database wizard will appear. On this first page, simply click the button that says © 2009 XT Racing... - Page 62 GPX Pro Manual Open database file and choose the old gpstudio.dat file from the file dialog (usually in My Document\GPStudio). After XTStudio successfully detects the data file as a GPStudio database you can click Next to specify the destination profile to import the sessions.
- Page 63 Once the profile is selected (new or existing), the preview page will appear that tells you what is going to be imported. Clicking Next will start the import. © 2009 XT Racing...
-
Page 64: Importing Your Friend's Sessions
GPX Pro Manual Once the import is complete all of the sessions will appear in the session tree under the new (or existing) profile. 2.1.4 Importing your friend's sessions XTStudio allows you to share sessions with your friends. By exporting sessions from your database and then emailing or posting them to a forum, your friends can then import the session into their database and compare all of the available data. -
Page 65: Database Sessions
GPX Pro unit correctly for the track you are racing at so the date/time offset will be correct when you download the session into XTStudio. - Page 66 GPX Pro Manual Circuit sessions For circuit tracks, each session you have raced will be displayed under the track name, and under each session there will be an entry for each lap in that session. In addition to the laps for the session there are two entries for pre-roll and post-roll.
-
Page 67: Session Management
The device options page is typically used only by the support staff from XT Racing if you have a problem with your device. You can also delete a profile and all of its sessions by choosing "Delete Profile"... -
Page 68: Track Filter
GPX Pro Manual · Export session for TrackVision - this allows you to export your session for use with TrackVision software to synchronize your data with a video 2.2.3 Track filter The session track filter allows you to hide certain tracks from the session tree without deleting them from your sessions database. -
Page 69: Input Configuration
Input range With the input menu, the minimum value and maximum value of a channel can be forced to specific values. These minimum and maximum values are used throughout the system in all graphs and gauges. © 2009 XT Racing... -
Page 70: Analyzing Sessions
GPX Pro Manual The inputs can be automatically set to the full range by clicking on the Use full input range option. By turning this option off you will have access to the number boxes that will allow you to specify the minimum and maximum value for the input. -
Page 71: Overview
The current location is shown with the blue marker. The active sessions are managed through the controller menu which can be accessed on the main menu bar under the controller item or by right-clicking on the track map. © 2009 XT Racing... -
Page 72: Moving
GPS signal quality is low. A low signal quality could mean that you need the GPX Pro external antenna. · TPS (or another DAQ channel name) displays the DAQ channel value from red (0%) to green (100%). -
Page 73: Track Map
GPS data collected. The normal track map is displayed in the same color as the comparison item it corresponds to with no track offset displayed. In addition the track map is auto-rotated to fit correctly in the window. © 2009 XT Racing... -
Page 74: Graph Bar
Graph bar The graph bar will graph data values captured with the GPX Pro. With the ability to plot multiple laps and zoom in and out on the data, the graph bar provides a powerful tool for race analysis. In addition, since you can add multiple graph bars to your XTStudio window, graphing multiple variables at once is possible. -
Page 75: Input
Speed since that is provided by the GPS module. All other data acquisition will be listed; simply click on one of them to change the current graph © 2009 XT Racing... -
Page 76: Gear Overlay
GPX Pro Manual input. If you have acceleration turned on and calibrated, then the acceleration data will appear as two entries in the list. · Accel lat - the latitudinal acceleration, which is the acceleration to the right or left of the direction you were traveling;... -
Page 77: Graph Delta To Master
The link all chart zooms option (in the View menu) is used when you have multiple graph bars open in XTStudio. By choosing this option, all of the graphs in XTStudio will zoom to the same level by moving any one of the graph zoom bars. © 2009 XT Racing... -
Page 78: Data Bar
GPX Pro Manual 2.4.4 Data bar The data bar displays detailed information for each comparison item at the current system time. The information includes the current time, current distance, lap time, lap distance. To add a data bar to the screen use the menu item Window -> Add data bar If data acquisition channels are connected and calibrated, then each of the DAQ channels will be displayed. - Page 79 Each DAQ channel can be individually turned on and off through this menu to access only the channels you are interested in. In addition the minimum, maximum and delta values can be display by turning on and off those options in the menu. © 2009 XT Racing...
-
Page 80: Options
GPX Pro Manual 2.4.4.1 Options The track maps options are found under the View menu on the controller bar. There are multiple options available to control the track map display. © 2009 XT Racing... - Page 81 Track offset The track offset setting is used to separate track maps from displaying on top of each other in the © 2009 XT Racing...
- Page 82 GPX Pro Manual window. This is used when you want to compare track map views from one lap to another. For example, to compare where on the track you started accelerating in one lap versus another, simply increase the offset to separate the display. For small tracks, or tracks with tight turns to large, an offset can result in a display that overlaps itself, so set the offset carefully for accurate analysis.
- Page 83 Show track map legend This option will show the keyboard shortcut keys associated with the track map window. Show track map comments This option will display the track map comments in the upper left of the track map screen. © 2009 XT Racing...
-
Page 84: Gauge Bar
GPX Pro Manual 2.4.5 Gauge bar The gauge bar displays a series of circular gauges where the current data values are shown for a given data channel. Multiple gauge bars can be added to XTStudio and multiple gauges can be added to a single gauge bar. -
Page 85: Designing Screens
(Main screen, Session summary, Lap details, Spinner), there are literally infinite ways to make the GPX Pro your own. 2.5.1 Overview You can access the GPX Pro screen designer by going to Window > GPX Screen Designer. © 2009 XT Racing... - Page 86 GPX Pro Manual Starting the screen designer for the first time will bring up the designer with no layout file loaded, if you have already started designing screens, then the designer will open the last layout you were editing. The designer window is split up into two sections, the screen display on the left and the object editor on the right.
-
Page 87: Menus
The file menu allows you to maintain your layout files. The file menu is also where you can send the opened layout to the GPX Pro (only available if the GPX Pro is currently connected to the computer) or you import certain screens from a friend's layout file. -
Page 88: Text Objects
The update interval tells the GPX Pro timer how often to update the screen with this text value, or if there are multiple rotating text values then how often to switch between the text values. The update... - Page 89 A screen variable is a two letter (and up to two number) combination enclosed in curly brackets. This special sequence of characters tells the GPX Pro to insert a screen variable value in the place of the curly bracketed section. The available variables are displayed in the screen variables list.
-
Page 90: Images
GPX Pro Manual 2.5.4 Images The image object is used to insert an image on your screen. Again, the update interval specifies how fast the image rotates if you specify more than one image. 2.5.5 Indicators There are two indicators available. The battery graphic and the GPS antenna graphic. Simply choose which you want to display. -
Page 91: Boxes
Windows drivers The Windows drivers are provided on the XTStudio installation CD and they are also copied to C: \Program Files\XT Racing\XTStudio\Driver after the XTStudio installation is complete. You may also need your original Windows CD when installing the driver. - Page 92 GPX Pro Manual Windows XP To begin the installation of the GPX Pro driver on Windows XP simply plug the GPX Pro into your computer's USB port. After the device is connected, the Found New Hardware Wizard will appear. Choose "No, not this time" when the wizard asks you to connect to Windows Update to search for the driver.
- Page 93 Windows Vista To begin the installation of the GPX Pro driver on Windows Vista simply plug the GPX Pro into your computer's USB port. After the device is connected, the Found New Hardware Wizard will appear.
- Page 94 If this is the case, then choose "Browse my computer for driver software" In the "Search for driver software in this location" box enter "C:\Program Files\XT Racing\XTStudio\Driver". Then click Next. This will install the GPX Pro driver. © 2009 XT Racing...
- Page 95 XTStudio © 2009 XT Racing...
Need help?
Do you have a question about the GPX Pro and is the answer not in the manual?
Questions and answers