
Subscribe to Our Youtube Channel
Summary of Contents for Horizon Fuel Cell Technologies H-CELL 2.0
- Page 1 UNIT 3 TEACHER GUIDE ASSEMBLY MANUAL H-CELL 2.0 AND HIMOTO Copyright © All Rights Reserved to Horizon Educational Group www.horizoncurriculum.com...
-
Page 2: Safety Information
UNIT 3 TEACHER GUIDE Assembly Manual: H-Cell 2.0 and Himoto SAFETY INFORMATION Please read before proceeding to assembly Equipped with a high performance running battery and motor, the RC car models are capable of speeds of over 50km/h. Operating RC models in improper areas may result in accidents causing injury or property damage. - Page 3 UNIT 3 TEACHER GUIDE Assembly Manual: H-Cell 2.0 and Himoto H-CELL 2.0 Parts list Fuel cell unit Fasteners Pressure regulators Spanner Hydrogen cartridges Wiring protection covers Electronic Valve Support Aluminum plate connectors Electronic Control Box Plastic tie Aluminum support plate M1.
- Page 4 TEACHER GUIDE Assembly Manual: H-Cell 2.0 and Himoto RC vehicle parts list (not included in the H-Cell 2.0 kit) N. Chassis with car body O. Chassis with NiMH battery, propulsion motor, servo motor, receiver and speed controller P. Radio controller Q.
- Page 5 The cable must be moved and secured elsewhere. NOTE: the H-cell 2.0 can be oriented multiple ways on the bracket. Sealed H-cell 2.0 Copyright © All Rights Reserved to Horizon Educational Group www.horizoncurriculum.com...
- Page 6 UNIT 3 TEACHER GUIDE Assembly Manual: H-Cell 2.0 and Himoto Disconnect the silicon tube and connect Please pay special attantion to the Remember - the gas goes into the valve another one. Then connect the solenoid direction of the solenoid valves (input and via the iron fitting and out from the plastic valves.
- Page 7 UNIT 3 TEACHER GUIDE Assembly Manual: H-Cell 2.0 and Himoto Correct setting Correct setting Remove the radio receiver in order to make room for the hydrogen system.* *NOTE: to remove it you will need lot of force - it is attached via double sided adhesive tape.
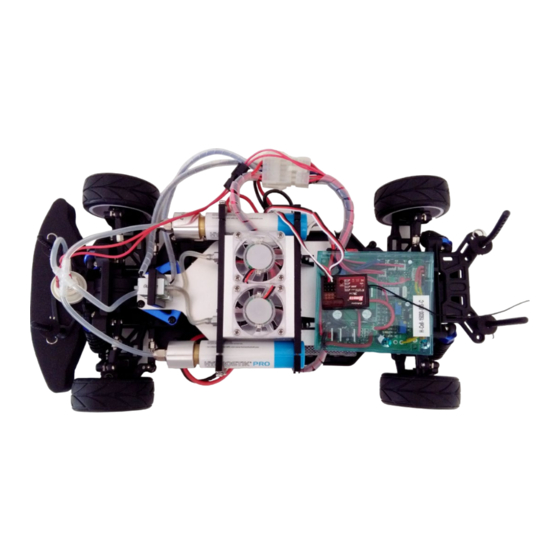
- Page 8 (bottom fitting) The finished assembly of the pipes once The pressure gage must be connected to The H-cell 2.0 must be connected via the 10 they´re attached to the input solenoid the control unit as shown below pin connector to the control unit (blue box)
- Page 9 UNIT 3 TEACHER GUIDE Assembly Manual: H-Cell 2.0 and Himoto The battery must be connected to the connector labeled „battery“, which is coming from the other side of the control unit (the blue box). You need to replace the connector. Be sure to solder properly because the current going through the connector is very high (peak 40A).
Need help?
Do you have a question about the H-CELL 2.0 and is the answer not in the manual?
Questions and answers