
Summary of Contents for Lumen Dynamics Group OmniCure S2000
- Page 1 OmniCure S2000 ® USER’S GUIDE Lumen Dynamics Group Inc. 2260 Argentia Road Mississauga (ON) L5N 6H7 Canada +1 905.821.2600 www.LDGI.com Printed in Canada 035-00362R Rev.2...
- Page 2 20 Mb for Data Storage SVGA video 800 x 600 resolution One available RS-232 Port Trademarks ® ® OmniCure and Intelli-Lamp are trademarks of Lumen Dynamics Group Inc. All other product names are trademarks of their respective owners. - I –...
-
Page 3: Table Of Contents
User Guide Table of Contents Lumen Dynamics Group Inc..................I Introduction ......................1 Getting Started ......................2 Box Contents: ....................2 Front Panel ...................... 3 Rear Panel ......................... 4 Safety Precautions ....................5 Installing the Lamp Module ..................8 Inserting and Removing the Light Guide ............. - Page 4 User Guide 17.10 Intensity Reading ................... 51 17.11 Shutter Control ....................51 17.12 Alarm Function ....................52 17.13 Calibration Status ..................52 18 StepCure ........................ 53 18.2 Clear StepCure: ..................... 54 18.3 PLC Shutter Mode ..................55 19 Routine Care and Maintenance ................56 19.1 Replacing the Lamp Module ................
- Page 5 User Guide Table of Figures Figure 1 Front Panel......................3 Figure 2 Rear Panel ......................4 Figure 3 Lamp Housing Panel ..................8 Figure 4 Lamp Direction ....................9 Figure 5 Lamp Connection ....................9 Figure 6 Active Low Signal Circuit Configuration: ............21 Figure 7 Active High Signal Circuit Configuration: ............
-
Page 6: Introduction
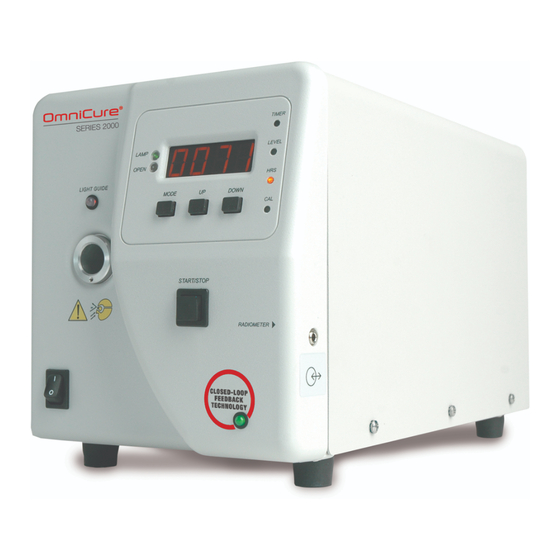
User Guide 1 Introduction The OmniCure® SERIES 2000 represents a new standard in UV Curing. It gives you the power, control and reliability never before available in such a cost effective UV curing system. The SERIES 2000 joins the family of light Lumen Dynamics systems offering the same high level of innovation, quality and reliability that our customers have come to expect. -
Page 7: Getting Started
User Guide 2 Getting Started 2.1 Box Contents: 1. The S2000 UV/Visible Spot Curing Unit 2. The 200W lamp module 3. UV Safety Glasses 4. Foot Pedal Switch 5. Lamp Housing Access Tool (fastened beneath the system housing) 6. Grounded POWER Cord 7. -
Page 8: Front Panel
User Guide 2.2 Front Panel „ ‟ LAMP STATUS LED DISPLAY SHUTTER STATUS LED MODE INDICATOR ‟ LIGHT GUIDE STATUS LED CALIBRATION STATUS LED LIGHT GUIDE PORT MODE DOWN ADJUST BUTTONS RADIOMETER POWER ON CALIBRATION (RS-232) SWITCH PORT CLOSED LOOP FEEDBACK LED START STOP BUTTON... -
Page 9: Rear Panel
User Guide Rear Panel PIN DE STYLE PORTS FOR PLC INTERFACING ADDITIONAL STANDARD I/O (P2) I/O (P1) ANALOG JACK FOOT PEDAL RS-232 (P3) PORT AC RECEPTACLE AND DUAL FUSE HOLDER Figure 2 Rear Panel - 4 –... -
Page 10: Safety Precautions
User Guide 3 Safety Precautions Glossary Caution risk of danger – consult accompanying documents Caution eye damage may result from directly viewing ultraviolet light – protective eye shielding and clothing must be used at all times. Input/Output Signals Input Signal The S2000 is equipped with two safety sensors to protect the user from accidental UV exposure. - Page 11 User Guide Danger This unit contains HIGH VOLTAGE components. It is recommended that ONLY QUALIFIED TECHNICAL PERSONNEL perform any testing or repairs. Monitoring the unit during manual operation The Level of UV energy supplied by the S2000 is sufficient to ignite flammable substances.
- Page 12 User Guide Warning Should this S2000 unit be used in a manner not specified by , the Lumen Dynamics protection provided by the equipment may be impaired. Warning The method in which lamps are disposed of must comply with local rules & regulations for disposal of hazardous materials.
-
Page 13: Installing The Lamp Module
User Guide 4 Installing the Lamp Module The S2000 curing system is available configured in 2 different versions, one version is for standard curing and one version is for surface curing. The appropriate type of lamp must be installed depending on which configuration your S2000 is set. Note: Refer to Section 3 –... -
Page 14: Figure 4 Lamp Direction
User Guide LAMP HOLDER LAMP RIM POWER LEADS CERAMIC COMPONENT Figure 4 Lamp Direction 4.1.5 Make sure the middle of the lamp is in position to fit into the spring clamp. Slide the lamp until it snaps into the spring clamp. The leading edge of the reflector (lamp rim) should fit snugly into the lamp holder recess. - Page 15 User Guide NTELLI CONNECTOR OWER ONNECTOR 4.1.7 Locate power connector with two leads and connect it to its mate located on the side of the lamp-housing wall. CENTER BAR AND LEAD WITHIN THE CUTOUT 4.1.8 Ensure the lamp anode cooling fin (bar) and lamp power lead, at the front of the lamp, are centered within the lamp holder cut out.
-
Page 16: Inserting And Removing The Light Guide
User Guide 5 Inserting and Removing the Light Guide Note: 3mm single leg liquid light guides are not compatible with the S2000! 5.1.1 Ensure that the protective end caps are removed from both the input and output ends of the light guide prior to installation. 5.1.2 Insert the light guide into the light guide port located on the front panel of the unit. -
Page 17: Powering Up And Powering Down
User Guide 6 Powering Up and Powering Down Lamp Warm-UP: The ARC lamp has 3 distinct phases of operation; 1.Ignition. 2. Warm-up. recommends 20 minutes of proper warm-up Lumen Dynamics and to ensure a stable optical output. 3. Stable Operation. It is recommended that phase 1 and 2 are not interrupted. -
Page 18: Output Intensity Modes/Calibration Process
User Guide 7 Output Intensity Modes/Calibration Process 7.1.1 Calibration of the exposure timer is not required. The S2000 system uses a quarts crystal to generate it’s system clock signal. It 7.1.2 provides a stable and precise clock signal to the S2000 control system and sub-systems, including the timing module of the light intensity control shutter. - Page 19 User Guide 7.1.12 When the CAL button is pressed for less than 5 seconds, and then released, the radiometer will send the set point to the S2000 thus setting the S2000 in the absolute mode. Additionally, the current light guide diameter value selected by the radiometer will be transferred to the S2000.
-
Page 20: Adjusting The Light Output
8.1 Adjusting the Light Output in the Relative Mode (“CAL” LED is OFF) 8.1.1 Set your OmniCure S2000 to Level Mode by pressing the Mode button until the “LEVEL” LED on the front panel is illuminated. The “CAL” LED indicator will be OFF. -
Page 21: Adjusting The Light Output In The Absolute Mode
User Guide 8.1.2 Press the start /stop button to open the shutter. The open LED indicator will illuminate. The display will show three (3) digits (XXX). The three digit number shown will indicate the percentage of maximum iris opening. Note: While in Level Mode, pressing the start/stop button will manually open the shutter until the start/stop button is pressed again to close the shutter. - Page 22 User Guide Warning UV light will be emitted from the light guide. The light could severely damage the cornea and retina of the eye if the light is observed directly. Eye shielding must be used at all times as well as clothing to protect exposed skin. Note: The shutter will not open if the light guide is not inserted properly.
-
Page 23: Locking And Unlocking The Up/Down Adjustment Button
User Guide 9 Locking and Unlocking the UP/DOWN Adjustment Button 9.1.1 Your S2000 system allows you to disable the up/down buttons. When the system is locked, no modifications to the set time or the optical output power can be made. This can help to ensure process control when multiple operators are using the same equipment. -
Page 24: Timed Exposures
User Guide 10 Timed Exposures Your S2000 system includes a timer to automatically close the shutter after a user selected amount of time. Adjustments to the exposure time can only be made when the S2000 unit is in Timer Mode. 10.1 Adjusting the Exposure Time 10.1.1 Set the system to Timer Mode by pressing the Mode button until the front panel... -
Page 25: Interfacing With The Series 2000
User Guide 11 Interfacing with the SERIES 2000 11.1 Connection Options 11.1.1 The S2000 is designed to be fully automated both quickly and easily via PLC control or computer control using the RS-232 port. All of the advanced features ensuring process control and curing repeatability can be accessed through built in standard optically isolated I/O signals. -
Page 26: Figure 6 Active Low Signal Circuit Configuration
User Guide Figure 6 Active Low Signal Circuit Configuration: Figure 7 Active High Signal Circuit Configuration: - 21 –... -
Page 27: Figure 8 Rear Panel Sample Connection
User Guide 11.2.2 Input Signals The "digital" inputs have the following characteristics: >polarized type, input device optocoupler, photo-diode, cathode side >logic Level active low, zero voltage input >max open circuit output voltage: 6 VDC >max current sinking requirement: >logic low time for momentary 150mS, minimum The diagram below is a sample connection method which may be utilized for the S2000 rear panel I/O connections:... -
Page 28: Table 1 "P1" Pin-Out
User Guide 11.2.3 Analog Signals The analog I/O signals have the following characteristics: Intensity Monitor Output >output voltage: 1-5VDC >maximum output current: 1mA Intensity Control Input >input voltage: 1-5VDC >maximum input current: 500 µA Four I/O signal connectors are located on the rear panel of the S2000 and one connector located is located on the right side of the front panel. -
Page 29: Table 2 "P2" Pin-Out
User Guide Additionally, the rear panel Optional I/O signal connector labelled “P2”; it is a 15 pin DE style connector. It has the following pin-out: PIN NO SIGNAL NAME alarm clear input shutter alarm out (-) shutter alarm out (+) bulb alarm out (-) bulb alarm out (+) intensity control input... - Page 30 User Guide 11.2.5 I/O signal connector (P1): signal descriptions Pins 1 (-) and 9 (+): Lamp on output This signal advises the user of the lamp status. When the lamp is ON the signal is active. When the lamp is OFF, the signal is inactive. Pins 2 (-) and 10 (+): Shutter verification output The shutter verification output signal remains inactive during successful shutter activations.
- Page 31 User Guide Pin 12: Lamp off/on input This contact closure type signal toggles power to the lamp. If the lamp is OFF, a momentary closed contact will turn the lamp on. Conversely, if the lamp is ON, a momentary closed contact on this input will turn the lamp off. Pin 13: Shutter verification mode input Providing a contact closure changes the mode of the shutter verification output signal found on pins 2 and 10 to a shutter position indicator.
- Page 32 User Guide Pin 6: Intensity control input (external feedback) This option is optically isolated. This analog input pin has been provided to allow the S2000 to regulate its output intensity at the cure site or somewhere external to the unit. The DC input voltage should range between 1VDC and 5VDC depending on the sampled intensity.
-
Page 33: Table 3 "P3" Pin-Out
User Guide 11.2.7 RS-232 9 Pin Connector (P3): Signal Descriptions The rear panel 9 pin RS-232, female connector is labelled “P3”. This is a RS- 232 interface which utilizes a standard 9 pin serial cable that is supplied with the unit. Plugging the cable into any free serial port of a PC, allows data to be transferred to and from a PC to perform a variety of functions. -
Page 34: Radiometer Rs-232 Phono Connector: Signal Descriptions
User Guide 11.3 Radiometer RS-232 Phono Connector: Signal Descriptions The side front panel RS-232 stereo phono connector is labelled “Radiometer”. 11.3.1 This connector is used to connect S2000 to the R2000 Radiometer for calibration and setup purposes. It is a RS-232 connector dedicated to communication with the R2000 Radiometer. -
Page 35: Messages / Indicators
User Guide 13 Messages / Indicators The S2000 display and LED indicators provide information to the user to aid in unit operation and to advise when certain conditions exist. The following is a collective listing of messages and their meanings. "XXXX."... - Page 36 User Guide " old / bulb" The “old” and then “bulb” message appear in alternating sequence for about 10 seconds when POWER is first turned on to the unit if the accumulated lamp hours have reached 2000 hours. When this message occurs, it is recommended that the lamp be replaced soon.
- Page 37 User Guide 15. E3 The “E3” message appears on the display when the lamp temperature monitoring has turned off the lamp due to excessive heat. Turn off power as per section 6 and verify the cooling exhaust vent is not blocked. Restart the system as per section 6. If error re-occurs the unit should be serviced.
-
Page 38: Led Indicators
User Guide 14 LED Indicators LED indicators display the status of the following: Light Guide Lamp Shutter Calibration Display Modes: Timer/ Level (Intensity) / Lamp Hours The following table describes LED status and descriptions of each status in details. LED Indicator Status Description... -
Page 39: Clearing Audible Alarm
User Guide 15 Clearing Audible Alarm 15.1.1 The S2000 provides an audible alarm to alert the user of various error conditions. 15.1.2 To clear the audible alarm: Press the front panel start/stop button Note: Alternately, depressing the foot pedal, or providing a momentary contact closure on the rear panel analog jack, will clear an audible alarm. -
Page 40: Remote Automated Control Requirements
User Guide 16 Remote Automated Control Requirements 16.1.1 The S2000 system is designed to provide remote automated control of the UV spot curing system from a PC. 16.1.2 The S2000 PC software requirement specification below is used to describe the communication protocol between the S2000 unit and a PC. WARNING: If the user does not observe and adhere to the protocol and command timing specifications, abnormal unit operation will result! 16.2 Com Port Configuration:... -
Page 41: Command Descriptions
User Guide 16.4 Command Descriptions: 1. Connect S2000 Command to S2000; CONN Response from S2000; READY 2. Disconnect S2000 Command to S2000; DCON Response from S2000; CLOSE 3. Lock the front panel Command to S2000; LOC Response from S2000; Received 4. - Page 42 User Guide 10. Turn On Lamp Command to S2000; TON Response from S2000; Received 11. Turn Off Lamp Command to S2000; TOF Response from S2000; Received 12. Get Lamp Configuration Command to S2000; GLH Response from S2000; n (n represents a integer number) Bit 15: Abuse Bit (0=OK, 1=lamp abused) Bit 14: Lamp Type (0= surface curing, 1=standard) Bit 13 –...
- Page 43 User Guide 16. Get exposure time Command to S2000; GTM Response from S2000; n (n represents a integer number in 100’s of msecs) Example: If “20XX\r” is responded, the exposure time will be 2 seconds. 17. Get software versions from main board Command to S2000;...
- Page 44 User Guide 20. Get light guide diameter Command to S2000; GLG Response from S2000; n (n represents a float number) Example: If “2.5XX\r” is responded, the light guide diameter will be 2.5mm Note: If “3.402823466e38XX\r” is responded, no light guide diameter information is available.
- Page 45 User Guide 23. Get SERIES 2000 actual irradiance reading Command to S2000; GIM Response from S2000; n (n represents a float number in Watts per square cm) If the unit is in LEVEL mode, “Need CAL” will be the response. Example: If “15.66XX\r”...
- Page 46 User Guide 26. Set exposure time Command to S2000; STMn Note: 2 ≤ n ≤ 9999 n must be a integer number Example: If “STM10XX\r” is set, the S2000 exposure time will be 1 second Response from S2000; Received – if the value n is valid Invalid –...
-
Page 47: Command Timing Specification
User Guide 28. Set irradiance set point Command to S2000; SIRn Note: n > 0, and n is a float number Example: If “SIR15.32XX\r” is set, the S2000 irradiance set point will be 15.32 W/cm2. Response from S2000; Received – if the value n is valid Invalid –... -
Page 48: Sample Code
User Guide 16.7 Sample Code: Example Borland C++ code for command “GLG” – Get light guide diameter void __fastcall TForm1::Cmd33Click(TObject *Sender) signed char Tries = 4; float LG_diameter; unsigned char *Command; String Textcom= "GLG"; Command_CRC; Timer1->Enabled = false; Cmd33->Enabled = false; Command = Textcom.c_str();... -
Page 49: Table 7 Unit Status
User Guide if ( strcmp(RdPtr, "Err") == 0) MessageDlg("Command is wrong", mtError, TMsgDlgButtons() << mbCancel, NULL); Screen->Cursor = crDefault; Cmd33->Enabled = true; Timer1->Enabled = true; Application->ProcessMessages(); return; } else LG_diameter = atof(RdPtr); Edit9->Text = FloatToStrF(LG_diameter, ffFixed, 12, 3); Screen->Cursor = crDefault; Cmd33->Enabled = true;... - Page 50 User Guide CRC8 sample code: unsigned char CalcCRC8(unsigned char *Data) // calc 8 bit CRC unsigned char LoopCntr; unsigned char CRC8; unsigned char A; unsigned char i; CRC8 = 0; // reset CRC8 for (i = 0; i < 8; i++){ // data loop A = *Data++;...
-
Page 51: S2000 Graphical User Interface
User Guide 17 S2000 Graphical User Interface The purpose of the Graphical User Interface (GUI) is to provide quick control of the S2000 UV curing system functions via a remote PC. There is no need to create code or applications. The main GUI below is the Control Panel which is used to control the S2000 unit: The Control Panel provides the following features: COM port selection... -
Page 52: S2000 Software Minimum Pc Configuration Requirements
User Guide 17.1 S2000 Software Minimum PC Configuration Requirements The following are the minimum requirements for a PC to be used with the S2000 Control Panel software: 300+ MHz recommended Pentium or equivalent processor 64 MB RAM 10 MB available storage for software installation ... -
Page 53: Session Function - S2000 Connection
User Guide 17.3 Session Function - S2000 Connection 17.3.1 Connect the rear panel RS-232 port (P3) on the SERIES 2000 unit to an available COM port on your PC using the 9 pin cable assembly supplied. 17.3.2 Ensure that your S2000 unit is plugged in a functional AC outlet. 17.3.3 Turn on the front panel POWER switch and wait until the warm-up period has been completed (front display has stopped flashing). -
Page 54: Exposure Settings
User Guide 17.5 Exposure Settings 17.5.1 Iris Level (% of Iris Opening): Relative Mode only 17.5.2 Iris Level can be selected by the Up/Down control buttons next to the Iris Level text box only when the unit is in Relative mode (calibration LED OFF). In Absolute Mode when the unit is calibrated, these buttons will be greyed out (non-functional). -
Page 55: Iris Level (Power In W): Absolute Mode Only
User Guide 17.7 Iris Level (Power in W): Absolute Mode only 17.7.1 Iris Level can be set in power (W) when the unit is in Absolute mode (calibration LED is ON). The iris level can be changed to power mode (W) from irradiance (W/cm2) under Menu. -
Page 56: Exposure Settings: Disabling Exposure Timer
User Guide Method 2: Click with your mouse on the “Exposure Timer” text box and type in 17.8.3 the desired value. Click on the Set button, once the time has been accepted, the SET button will be greyed out. The allowable exposure time range by this method is 0.2 to 999.9 seconds. -
Page 57: Alarm Function
User Guide 17.12 Alarm Function The following conditions will cause the unit to indicate an alarm condition: 1. Lamp fails to strike (bulb) 2. Lamp access door not correctly installed (bulb) 3. Intelli-lamp sensor/ connection failure (bulb) 4. Shutter position failure (SFI) 5. -
Page 58: Stepcure
User Guide 18 StepCure 18.1.1 To open the StepCure screen, go to Menu and click on StepCure. The following is the StepCure screen: For each step, the input parameters required are: 18.1.2 Exposure Time: The time (seconds) the shutter is open at the specified intensity set point. -
Page 59: Clear Stepcure
User Guide 18.1.6 Download: The download button transfers the step cure process into the S2000 unit. When programmed with Step Cure, initiating a timed exposure on the S2000 unit will perform the step cure operation. In Timer or Hours mode, pressing the start/stop button will run the step cure cycle. -
Page 60: Plc Shutter Mode
User Guide 18.3 PLC Shutter Mode 18.3.1 To change PLC Shutter Signal mode, you need to open the administrator screen, go to the Administrator menu and click on Setup System. The following is the administrator screen: The PLC Shutter Signal Mode can be switched between the pulsed start/stop and the level start/stop without password. -
Page 61: Routine Care And Maintenance
User Guide 19 Routine Care and Maintenance 1. Operate the unit in a well ventilated area with at least six inches clearance at the rear of the unit for proper air flow. Do not place any objects below the unit, between the feet as this will restrict airflow through the bottom of the front face plate. -
Page 62: Replacing The Lamp Module
User Guide 19.1 Replacing the Lamp Module 19.1.1 The S2000 comes configured for either standard or surface curing applications. Please ensure that the appropriate type lamp has been selected for your curing system/ application. The part number of the lamp module is available on the lamp box. -
Page 63: Replacing The Bandpass Filter
User Guide 19.4 Replacing The Bandpass Filter 19.4.1 The S2000 includes a bandpass filter to limit the wavelengths of light for your application. There are 5 bandpass filters available, which are selected at the time of purchase Part # Description P019-01045R Filter 365 nm P019-01046R... - Page 64 User Guide Notes: 1. The staining which appears on the light emitting end of the light guide is the result of gaseous burn-off from the UV adhesive. 2. Inspect light guide optical input port of R2000 Radiometer for signs of residual gaseous burn-off powder/dirt, transferred from the light emitting end of the light guide, clean as stated below.
-
Page 65: Troubleshooting
User Guide 20 Troubleshooting Decimal Point Display Alarm Message Description Status Displays the accumulated hours the lamp has XXXX. Flashing L. Hrs Mode been on Displays the time in seconds the shutter will XXX.X Solid Timer Mode remain open when the start button is pressed Displays Irradiance (W/cm2) if the S2000 has XX.XX Solid... -
Page 66: Table 11 Front Panel Led Descriptions
User Guide LED Indicator Status Description ON – Green Light guide is fully inserted Light Guide ON – Red Light guide is not fully inserted The lamp is ON Lamp The lamp is OFF The shutter is open Open The shutter is closed The unit is in timer mode;... -
Page 67: Table 12 Front Panel Button Descriptions
User Guide Front Panel Buttons Position Description Front POWER ON/OFF POWER ON “I / “O” Switch POWER OFF Start/Stop Button Depressed Shutter Activation Momentary Selects between three Modes: Timer, MODE Depressed Level and Lamp Hours Momentary Increases the current value displayed. Depressed Momentary Decreases the current value... - Page 68 User Guide 20.1.3 If the shutter does not open, check that: 1. The light guide is fully inserted; the LED above the light guide port will be illuminated green. The lamp is warmed-up; the display is not flashing. The shutter interlock input is not active (P1, pins 6 & 4). 2.
-
Page 69: Technical Specifications
User Guide 21 Technical Specifications OmniCure ® S2000 Exposure Timer Tolerance: +/- 250ms or +/- 1% of the exposure time setting, whichever is greater. OmniCure ® S2000 Output Accuracy (with close-loop feedback activated): +/-5% or 200mW/cm2, whichever is greater. OmniCure® S2000 Minimum Adjustable Irradiance Level: 0.5W/cm² OmniCure®... - Page 70 User Guide providing they are returned in its original packaging. will dispose of them Lumen Dynamics in the appropriate manner. Warning Hg – LAMP CONTAINS MERCURY, Manage in Accord with Disposal Laws, see: www.lamprecycle.org or 1-800-668-8752 - 65 –...
-
Page 71: Light Guide
User Guide 21.2 Light Guide Light Delivery Flexible High Power Fibre Light Guides will be available in a variety of lengths with a variety of core diameters. Note: 3mm single leg liquid light guides are not compatible with the S2000! Power Input Power Supply:... -
Page 72: I/O Ports (Including Rs-232)
User Guide 21.3 I/O Ports (including RS-232) 21.3.1 The S2000 has 5 different I/O ports; 4 located on the back of the unit. The 1st port is a simple 2-wire, audio style jack that can be connected to a foot pedal (supplied with each unit) or any other electro-mechanical triggering device. -
Page 73: Noise And The Omnicure Series 2000
User Guide 21.6 Noise and the OmniCure SERIES 2000 Using the SERIES 2000 in a Noisy Environment What is Noise? "Electrical noise" is a term used to describe unwanted electronic emissions. Noise is actually comprised of RFI (Radio Frequency Interference) EMI (Electro Magnetic Interference) and other similar sources of energy. - Page 74 User Guide 21.6.3 Shielding Any wire or cable assembly entering or exiting the S2000 may act like an antenna which will pick up noise and transmit it to the internal electronics. This may cause the S2000 to operate erratically. There are several ways in which the S2000 can be shielded (protected). Lumen Dynamics recommends the use of shielded cables for all cable assemblies: the AC line cord, the I/O cables and the foot switch.
-
Page 75: Regulatory Compliance
User Guide 22 Regulatory Compliance Product Safety: IEC 61010-1:2001 Safety Requirements for electrical Equipment for Measurement, Control and Laboratory Use Part 1. EN 61010-1:2001 Safety Requirements for Electrical Equipment for Measurement, Control and Laboratory Use. CAN/CSA C22.2 No. 61010-1-04/ Safety Requirements for UL 61010-1: 2004 Electrical Equipment for Measurement, Control and... -
Page 76: Fcc Part 15, Subpart B, Class B-Unintentional Radiators
User Guide 22.1 FCC Part 15, Subpart B, Class B-Unintentional Radiators FCC Class B Digital Device or Peripheral - Information to User NOTE This equipment has been tested and found to comply with the limits for a Class B digital device, pursuant to part 15 of the FCC Rules. -
Page 77: China Rohs
User Guide 22.2 China RoHS 22.2.1 The following table contains substance information for the Omnicure S2000 as required by China RoHS regulations. 有毒有害物质名称及含量的标识格式 有毒有害物质或元素 部件名称 铅 汞 镉 六价铬 多溴联苯 多溴二苯醚 (Pb) (Hg) (Cd) (Cr6+) (PBB) (PBDE) ○ ○ ○... -
Page 78: Weee Directive (2002/96/Eu)
User Guide 22.3 WEEE Directive (2002/96/EU) 22.3.1 The symbol above indicates that this product should not be disposed of along with municipal waste, that the product should be collected separately, and that a separate collection system exists for all products that contain this symbol within member states of the European Union. -
Page 79: Warranty
User Guide 23 Warranty 23.1.1 warrants the original purchaser for a period of one (1) full year, Lumen Dynamics calculated from the date of purchase, that the equipment sold is free from defects in material and workmanship. All repairs are warranted for 90 days. 23.1.2 In the event of a claim under this warranty, the equipment is to be sent postage and carriage paid to the... -
Page 80: Replacement Bulb Warranty
User Guide 23.2 Replacement Bulb Warranty 23.2.1 If the S2000 bulb fails to strike during the warranty period of 2000 hours, the bulb will be replaced under warranty. In the event of a claim under this guarantee, the lamp is to be sent postage and carriage paid, including a description of the fault, to the Service Centre. -
Page 81: Contact Information
User Guide 24 Contact Information 2260 Argentia Road Lumen Dynamics Mississauga, Ontario L5N 6H7 CANADA Tel.:+1 905 821-2600 Toll.:+1 800 668-8752 (USA and Canada) Fax:+1 905 821-2055 Web site: www.ldgi.com http://www.ldgi-omnicure.com/contact.php Sales: omnicure@ldgi.com Tech Support: techsupport.@ldgi.com - 76 –... -
Page 82: Addendums
User Guide 25 Addendums 25.1.1 All systems shipped after January/01/2009 will have the following modifications. Section 11.2.5 The Rear Panel I/O signal connector labelled “P1”; PIN 5 shutter activation. Section 20 Front Panel LED Descriptions (level indicator). Section 16.4 Command Descriptions;...
Need help?
Do you have a question about the OmniCure S2000 and is the answer not in the manual?
Questions and answers