
Summary of Contents for EURONOM Exotic Compact 5
- Page 1 Installation and user guide for Exotic Compact C For software version 1.4‐ With “flow reduce valve” Exotic Compact C 1308‐118 ver.1.3 EN ...
-
Page 2: Table Of Contents
Contents The heat pump..................... 4 Exotic Compact........................ 4 Delivery & Safety ..................5 Overview of tank section................6 Overview of heat pump module ..............7 Handling ..................... 8 How the Exotic Compact works ..................8 Heating curve ........................9 Heating requirements for the house.................9 Setting the curve ......................10 Why is the heating curve important? ................17... - Page 3 Normal operation......................35 Errors..........................37 Alarm displays ........................38 Installation ....................42 Placement / Moving ......................42 Pipes to heating system....................42 Tap water pipe ........................43 Hot water circulation .....................43 Brine medium........................44 Schematic connection diagram for brine medium ............45 Brine medium pump ......................46 Electrical installation ................. 47 Overview ........................47 Power supply ........................48 Terminal blocks ......................49...
-
Page 4: The Heat Pump
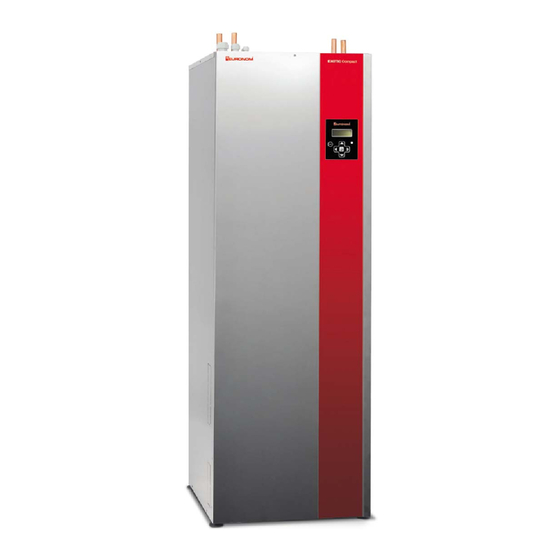
Introduction This manual is written for Euronom's compact ground source/geothermal heat pumps Exotic Compact C 5, 8, 10 and 12. The manual contains chapters that are intended for both end users and installers. The chapter "Handling" is directly specifically at users of the system. The heat pump Congratulations! You are now the owner of a top‐quality product that will reduce your electricity bills and save you money that can be spent on much more enjoyable things. ... -
Page 5: Delivery & Safety
Delivery & Safety Important! Check the following points during delivery and installation: • Remove packaging and check that the product has not been damaged in transit. Report any transit damage to the freight agent. • Make sure that at least one meter of space is available in front of the product for service access. • The heat pump module can be easily uninstalled and carried separately by disconnecting the heating hoses to the tank, the communication cables and the power cord. • Make sure that the bag accompanying the unit includes the following accessories for the product: ‐ Manual ‐ Outdoor sensor & room sensor Safety regulations The following safety regulations must be observed when handling, installing and using the product: • An omnipolar switch should be installed on the power supply cables prior to the product • Disconnect the power supply in the control box prior to carrying out any kind of maintenance or service work on the products. • Make sure that all lifting equipment, eye bolts and other components are undamaged when handling heat pumps fitted with eye bolts or similar items. Never stand under a product when it is in an elevated position. • Never compromise on safety by removing housings, hoods or similar items which are screwed in place. • Never compromise on safety by disconnecting safety equipment. • Only authorized personnel are allowed to modify or service the product. ... -
Page 6: Overview Of Tank Section
Overview of tank section Expansion connection, DN25 Hot water out, cu22 Flow line heating system, cu22 Cold water in, cu22 Return line heat system, cu22 Cable penetrations Circuit board for tank unit Connection terminal blocks Fuses heat pump/elec. heater Hot water flow switch Contactor for electric heater Extra outlet for upper tank Emergency heat switch Upper tank sensor Reset, overheating protection Electric heater (max 10.5 kW) Changing valve upper/lower Hot water exchanger Mixing valve motor Extra outlet for lower tank Drainage valve Circulation pump HEX Brine in Shutoff valve HP flow line Brine out Lower tank sensor Extra outlet for lower tank Shutoff valve HP return Heat pump module Adjustable footings ... -
Page 7: Overview Of Heat Pump Module
Overview of heat pump module Condenser Expansion valve Hot gas pipe Sight glass Heat carrier flow line Filter/receiver Charge pump (low energy) Compressor Heat carrier return line Heat pump circuit board Drainage valve condenser Rubber bushings Evaporator High pressure switch Suction gas pipe Service outlet, high pressure Brine in Service outlet, low pressure Brine circulation pump Low pressure switch Brine out Drainage valve evaporator ... -
Page 8: Handling
Handling This chapter is intended for you, the end user of the product, and describes how your new heating system functions and your options for adjusting the settings in order to make your house as comfortable as possible with the best cost‐efficiency. Ask your installer to go through the system with you, and ask for the registration form to fill in after the installation is completed. How the Exotic Compact works The Exotic Compact consists of 2 parts: a tank component and a heat pump component. The tank holds the water which is used to heat your house and to supply hot water for showering, etc. Since the water to heat your house (radiators/underfloor heating) does not need to be equally hot all the time, the tank is divided into two sections, a lower section and an upper section. There is a plate between these two sections, which ensures that the tank can maintain two different temperatures. Lower tank section The lower tank section is used primarily to heat the house, but also to preheat the cold water that will become hot water in the Exotic Compact. Depending on your heating system, different water temperatures are necessary at different outdoor temperatures. If it is warm outside, the system does not need very hot water. Conversely, if it is very cold outside, higher temperatures are needed to heat the inside of the house. The temperature of the water that is sent to your radiators / underfloor heating is determined by the so‐called heating curve. You can set this curve yourself. It is important to make sure that the heating curve is set properly ‐ for your own comfort, but also to ensure the overall efficiency of the heating system. Upper tank section The upper part of the tank is used primarily to heat your hot water. Because you always want to have hot water available, the heat pump keeps this section warm regardless of the outdoor temperature. You can set the temperature in this part of tank yourself. The higher the temperature, the warmer the hot water, but hotter water needs more energy and is therefore more expensive. Hot water Exotic Compact uses a special technique for heating the hot water through a special exchanger. ... -
Page 9: Heating Curve
Heating curve This chapter describes how the heating for the house works and how you can adjust the so‐called heating curve to achieve maximum savings without sacrificing comfort. Heating requirements for the house How your house is built, the climate in your area, and what type of heating system you have all influence how much energy is needed to heat it. There are many factors that affect the temperature required for your heating system. For example, if it is cold outside, the house will need more energy/heating. If you have an old radiator system, the radiators will require warmer water than modern radiators to generate enough heat. If you have an underfloor heating system, the water will not need to be as hot to achieve sufficient heating. Based on all of these parameters, which vary from house to house, the settings will be unique in each case. We call this the heating curve. In simple terms, the heating curve can be described as the relationship between the outdoor temperature and the temperature (flow line) that your heating system requires ‐ see the diagram below. You can adjust the heating curve in many different ways so that it is suited precisely for your house, and we will review these in this chapter. Remember! A house heating curve that is set properly can save a lot of money over the year. Example of a heating curve. (This is the factory default heating curve) ‐30 ‐25 ‐20 ‐15 ‐10 ‐5 Outdoor temperatur ... -
Page 10: Setting The Curve
Setting the curve There are 3 basic settings for the heating curve, points A, B and C. With these 3 points, you can adjust the gradient and vertical position. The aim is always to set the curve as low as possible. Point A Point A describes the temperature of the water to be sent to the radiators if the outdoor temperature is ‐15°C. The factory default setting for this item is 55°C. In other words, when it is ‐15°C outside, the Exotic Compact unit sends 55°C water to the radiators. When you adjust this point, you change the angle of the entire heating curve. The biggest changes occur when outdoor temperatures are cold ‐ see the graph below. If you feel that there isn't enough heat when it is below ‐5°C outside, but there are no problems when it is warmer, you can adjust this point upwards. Adjusting point A on the heating curve. (The factory default setting 55° C is marked with a cross) ‐30 ‐25 ‐20 ‐15 ‐10 ‐5 Outdoor temperature 10 ... - Page 11 Point B Adjusting point B means that the entire heating curve moves upwards or downwards (parallel movement). In other words, you don't adjust the gradient for any particular outdoor temperature, rather you adjust the curve for the entire outdoor temperature range. The factory default setting is 0°C, i.e. no movement at all. If you increase this value, the curve moves upwards, i.e. becomes warmer, and if you reduce this value, the temperature drops. This setting is primarily used when you feel that it is too cold (or warm) regardless of the outdoor temperature. (This is also the setting that should be used when first adjusting the heating curve). Adjusting point B on the heating curve. ‐30 ‐25 ‐20 ‐15 ‐10 ‐5 Outdoor temperature ...
- Page 12 Point C Point C has 2 meanings. On the one hand, it is used to adjust the gradient of the heating curve during warmer outdoor temperatures, but it is also used as a "shutoff temperature" for the heat to the house. When the outdoor temperature reaches this temperature and stays there for at least 8 hours, the Exotic Compact stops sending water/energy to the heating system and thereby shut off heating to the house. During summer time when heat is in off‐mode both circulation pump and mixing valve, which determines the temperature to the heating system, will be run periodically in order to prevent sticking If you feel that there isn't sufficient heating when the temperature is above +5°C outside, but there aren't any problems when it gets colder, you can adjust this point upwards. Adjusting point C on the heating curve. (The factory default value of +17°C is marked with a cross). ‐30 ‐25 ‐20 ‐15 ‐10 ‐5 Heating system 12 ...
- Page 13 Cracking When the outdoor temperature is around 0°C and it is very windy, slightly warmer water may sometimes need to be sent to the heating system. We call this adjustment, when the outdoor temperature is 0°C, cracking the curve. If you feel that there isn't enough heating when it is around 0°C outside, but it is otherwise sufficient, you can increase this setting somewhat. Adjusting the cracking point. (The factory default value is 0) ‐10 ‐9 ‐8 ‐7 ‐6 ‐5 ‐4 ‐3 ‐2 ‐1 Outdoor temperature ...
- Page 14 Limiting the heating curve Points A, B and C are all used to set the curve in different positions. There are also 3 other ways for adjusting the curve. Basement heating, underfloor heating and room sensors. These 3 settings do not affect the gradient or the position of the heating curve. Instead, they restrict the curve and allow you to set a minimum and maximum temperature that is sent to the heating system. Basement heating Basement heating allows you to cancel the function described in point C, "heat off", which means that the Exotic Compact unit stops sending water to your heating system. If you activate basement heating, Exotic Compact will continue to send water at the temperature you set, even if the outdoor temperature is high. Activate basement heating if you don't want the heating to be turned off even if it is warm outside. This applies primarily when you have a basement that needs a certain amount of heating even in the summertime, or a bathroom with underfloor heating coils that you want to keep warm in the summertime as well. (In the example below, basement heating is set to 25°C) Adjusting "basement heating" on the heating curve. ‐30 ‐25 ‐20 ‐15 ‐10 ‐5 Outdoor temperature 14 ...
- Page 15 Underfloor heating Underfloor heating is the opposite of basement heating. Underfloor heating limits the heating curve and sets the maximum temperature at which water can be sent to your heating system, regardless of how cold it is outside. Note that your installer must unlock this function in the installer's menu in order for you to be able to view it. Setting a maximum temperature also allows you to protect your underfloor heating system against excessively high temperatures. This setting is only used if you only have underfloor heating. Adjusting "underfloor heating" on the heating curve. ‐30 ‐25 ‐20 ‐15 ‐10 ‐5 Outdoor temperature ...
- Page 16 Room sensor A room sensor is a sensor placed in a central location in your house, which provides information to the Exotic Compact unit regarding the ambient temperature. Depending on how your house is designed, a room sensor may work more or less effectively. If you have a large house with many small rooms, it can be difficult to use room sensors because it may be too cold or hot in the rooms that are far way from the sensor. If you have an open plan house, room sensors are recommended, both for the sake of comfort and from an energy efficiency standpoint. If you have a room sensor installed, you can decide whether it should be used to compensate the heating, i.e. be allowed to affect the heating curve. If it becomes warmer than your original setting, the Exotic Compact will reduce the heat to your radiators/underfloor heating system. The greater the difference, the cooler the water that is sent out. This adjustment will take place continuously, which means that the appearance of the heating curve will be constantly changing. For each 1/10 of a degree (0.1°C) that the current room temperature deviates from the set temperature, the temperature in your heating system drops by approximately 4 °C. Block temporarily The button placed on the room sensor can be used for different functions of your own choice. One of these functions is to temporarily block the sensors impact on the heating curve. This function is of interest if you for example have an open fireplace placed in the same room as the sensor. When you add heat to the room with the fire place the sensor will stop the heat to the complete heating system, i.e. all rooms will be affected. However, if you use this function you can set a time delay in hours for blocking of the sensor when you want to use the fire place. When you press the button the activation will be confirmed by 2 blinks from the red diode. Observe that you have to have set this function first in the menu:”Settings”‐>”For customer”‐ >Function button”. Further information in the chapter “Menu function button” Remember! The room sensor cannot increase the heating curve if it becomes too cold inside the house. If it becomes too cold, you need to increase the heating curve manually according to the previous instructions in this chapter. Example of the room sensor function. The set value for room temperature is 21.0°C. If the temperature in the house rises, the temperature in the heating system will gradually decrease. 20,5 20,6 20,7 20,8 20,9 21,0 21,1 21,2 21,3 21,4 21,5 21,6 21,7 21,8 21,9 22,0 16 ...
-
Page 17: Why Is The Heating Curve Important
Why is the heating curve important? Now we have gone through the settings for the heating curve, and the importance of properly setting the heating curve has been highlighted. Why is this so important? Well, the heat pump doesn't act like a oil‐based furnace, wood stove or electric boiler, where the temperature does not have as great an impact on efficiency. The effectiveness/efficiency of the heat pump is called the COP and is a measure of how much energy you get back in relation to how much you put in. COP = 3 means that if you put in 1 kWh of energy, you get 3 kWh of energy back out. The efficiency, COP, of the heat pump depends on many different parameters, but there is a clear connection between the water temperature in the heat pump and COP. The hotter the water that the heat pump must produce, the lower the degree of efficiency, COP, and the lower the cost savings. This means that in order to optimise your savings, the heating curve needs to be set as low as possible. If the heating curve is set too high, the heat pump generates water that is warmer than necessary and therefore has a lower degree of efficiency. The best savings for your heating system come from setting the water temperatures as low as possible! In practice It can take a long time to set up the perfect house heating curve for your house, and you may need ... -
Page 18: Hot Water
Hot water In addition to heating in your home, having domestic hot water available is obviously also important. The Exotic Compact primarily uses the heat pump with its special exchange valve technology to produce hot water. You can influence how your hot water is produced, and your choice will affect both the amount of hot water and the efficiency of the heating system. Just as with heat for your house, which you can read about in the previous chapter, there is a connection between the temperature of the hot water and the savings you can achieve. High temperatures always mean lower savings. Using Exotic Compact's unique hot water exchanger, you can have a good level of domestic hot water with optimal savings. How hot water is produced The Exotic Compact does not have any container or coils with hot water inside the tank, but fresh hot water is produced continuously using a special hot water exchanger. This exchanger uses water both from the lower tank section, which is often somewhat cooler, and from the upper tank section, which always has hot water. The lower tank section preheats the incoming cold water, and the upper tank section is used to top up the temperature so that the water is really hot. The Exotic Compact only heats hot water when you are using it. A flow monitor senses when the hot water is being used and starts a pump that sends water from the lower tank section through the exchanger that heats the warm water. See the diagram below. Exotic Compact Upper tank section Hot water exchanger Lower tank section Flow monitor Circulation pump exchanger Cold water in Hot water out 18 ... -
Page 19: Hot Water - Settings
Hot water - settings You can use a number of settings to influence hot water production in your Exotic Compact. Economy or priority One basic decision to be made is whether you want to have extra domestic hot water or whether you want to prioritise saving as much money as possible. In most cases, the economy setting provides enough hot water, but if you have large bath tubs, a jacuzzi, etc. you may want to select the priority hot water setting. Remember! Always start with the economy setting and see whether this provides enough hot water for your needs. Economy The economy setting means that the hot water pump in the Exotic Compact unit has more time to try to heat the water in the upper tank. When you use hot water from the Exotic Compact unit, primarily when showering or filling the bathtub, the temperature in the upper (and lower) section will drop. The heat pump will start when the temperature has dropped a few degrees. If the temperature continues to drop, the electric heater may also need to start. If you use the economy setting, the temperature is allowed to drop further before the electric heater is allowed to start. This gives the heat pump the option of heating up the water instead, which is the most economical solution. Priority The priority setting means that the electric heater starts sooner if the temperature in the upper section of the tank drops. This provides better hot water performance, but it also costs more to heat the water. The figures below show what happens in the economy and priority mode when the temperature in the upper tank section drops. Heat pump starts Heat pump starts 2°C 8°C Electric heater starts Electric heater starts ... -
Page 20: Extra Hot Water
Extra hot water The button placed on the room sensor can be used for different functions of your own choice. One of these functions is the function “Extra hot water”. The function gives the possibility to temporarily increase the hot water performance of the Exotic Compact. This function can be used if for example many people need to shower quickly after each other, many showers used at the same time or if a bigger bath tub/Jacuzzi should be filled. When you press the button the activation will be confirmed by 2 blinks from the red diode. Observe that you have to set this function first in the menu:”Settings”‐>”For customer”‐>Function button”. Further information in the chapter “Menu function button” Observe that it will take at least 15‐30min for the heat pump to increase the tank temperature. No electric heater is used for this function which implies lower costs. Upper tank temperature You can set the temperature that you want to be maintained in the upper tank yourself. As mentioned previously in this chapter, a higher temperature setting costs more, but the level of comfort is somewhat better. If you set the temperature to a very high level, above 60°, this may mean that the heat pump cannot manage to heat the upper tank by itself but needs the electric heater to help out. The factory default setting for the upper tank temperature is 55°C. Try reducing this temperature setting a few degrees and see whether the hot water temperature is satisfactory for your requirements. This allows you to save even more money. If your house (heating system) needs water that is warmer than the temperature that you set on the upper tank section, the heating curve for the upper tank will be applied. 20 ... -
Page 21: Base Heat
Base heat Base heat is the lowest temperature to which the Exotic Compact unit allows the temperature to drop in the lower tank section, even if the heating system doesn't need very hot water. The reason for this setting is so that you can have a good amount of hot water even when your house doesn't need so much heat. This is because the water in the lower tank section is used to preheat your hot water. If you want to increase the amount/volume of hot water, you can raise this value somewhat. Summer charging During the summertime, your house needs very little heating, or none at all. In order to increase the running time for the heat pump and increase the amount of domestic hot water in the summertime, you can set a temperature where the heat pump charges the entire lower section of the tank, so‐ called summer charging. Exotic Compact goes into summertime mode if the outdoor temperature has been above the set value for at least 8 hours. The system remains in summertime mode for at least 12 hours, or for as long as the outdoor temperature is above the set temperature. This is to prevent the Exotic Compact unit from switching between summer charging and heating according to the heating curve during summer nights. Settings that affect the lower tank section temperature. The figure shows "base heat" set at 30°C and summer charging at 20°C Summer charging Base heat ‐30 ‐25 ‐20 ‐15 ‐10 ‐5 Outdoor temperature ... -
Page 22: Display
Display All of the adjustable settings can be adjusted via the display and the 6 buttons. The display allows you to see current system information as well as any activated alarms. Overview Operating indicator A solid green light on the right‐hand side during normal operations indicates that everything is running fine. If a fault occurs, the light will turn red. If the light flashes red, this means that the error is active and cannot be reset by pushing buttons. If the light is solid red, this means that an alarm has been triggered, but it is no longer active and can be reset. Buttons Up/down arrow: Up/down arrow is used to browse up and down through the different menu trees but also to increase or decrease a value for the various settings. Left/right arrow: Use the right arrow to move up one step in the menu tree when there are submenus and to activate a change in any of the settings. (Right arrow is used to move backwards when entering codes) ENTER: Enter is used to confirm a setting, i.e. when you are inside a setting, you can confirm any changed values by pushing the Enter button. ESC: Escape is used to move upwards in the menu system, i.e. if you are at level 4 in the menu and hit the escape button, you will go up to menu level 3. Escape is also used to reverse a setting. **** SYSTEM OK **** Display window Heat pump status: Standby No need for heat Operating indicator ... -
Page 23: Menu Modes
Menu modes There are 2 main groups of displays: ‐ Automatic mode/Alarm ‐ Menu system You cannot browse in automatic mode, rather it displays the most current information in the system, e.g. current values for tank temperatures or the status of the heat pump. If one or more alarms are triggered, this is displayed in this mode. The menu system is the mode where you can browse through the different displays and see the current values and/or adjust settings for the system. Use "ESC" to switch between the 2 modes. If you have been in menu mode and not touched any of the buttons for at least 15 minutes, the display will return to the automatic mode/alarm. Adjust a setting In order to adjust a setting, you must be in a display that contains something that can be adjusted. All of the setting displays are in the "Settings" submenu. When you are in a settings display, there is either a number or a yes/no option. All of the adjustable parameters have an arrow in front of them (→). To activate the setting, press the right arrow. This will make the arrow change shape and will start to flash. Now you can use the up/down arrows to adjust the value. Example 1 Confirm the change with Press the right arrow to The arrow starts to flash. Use ENTER or reverse the setting activate the setting up/down to change the value. with ESC. Heat curve point B: Heat curve point B: Heat curve point B: →... -
Page 24: Menu Tree
Menu tree The menu tree has several branches. Some of them can be accessed directly, and some need to be unlocked with a code. The code‐locked menus are intended for the installer/service technician and should not be used without thorough knowledge of the system or when contacting a service agent/installer. This section of the manual will describe the menus that are not code‐locked. Main menu The main menu appears as below and has 4 options. →Settings Present values Info/operation time Service Settings: This is where you can adjust the settings for the heating curve, among other things, and set the room temperature and the domestic hot water temperature, etc. Present values: This branch allows you to see the current values in the system, e.g. tank temperatures, room temperature, electric heater operation, etc. Info&Run times: Info&Run times contains operating information that the system saves as well as information about serial numbers and the program version. This is where you can see how much the heat pump has been working in the past 24 hours, for example. Service: This menu contains advanced settings and should only be used by a service technician/installer. 24 ... -
Page 25: Menu - Settings
Menu - Settings The menu settings have 3 submenus as below. →For customer For installer For customer: This is where you can adjust the settings for the heating curve, among other things, and set the room temperature and the domestic hot water temperature, etc. For installer: This menu contains the settings for the entire system and should only be used by the installer. Menu - For customer The "For the customer" menu contains 3 submenus as below. →Heating/Hot water Function key Pool heating Heating/Hot water: Menu for setting of house heating and domestic hot water. Function key: Menu for setting of functions for the button on the room sensor. ... -
Page 26: Menu - House Heating System 1(2)
Menu – House heating system 1(2) Before adjusting the settings in this menu, read through the "Heating curve" chapter. Display Description Comments Room sensor used for The display allows you to set whether the room sensor will be compensation of ► used to adjust the set heating curve. If the set temperature on the room sensor exceeds the set heat curve: →Yes Room sensors must be nominal value (set point) for room temperature, the system installed in order for this function to be automatically reduces the temperature to the heating system. used. Note that the room sensor can only decrease the heating curve, ↓ i.e. reduce the temperature to the heating system, not raise it. Room temperature Actual: 20.2C ► Setting room temperature (if room sensor is installed). The box ... -
Page 27: Menu - Hot Water
Menu – Hot water Before you adjust the setting in this menu, be sure to read the chapter "Hot Water". Display Description Comments Hot water comfort Exotic Compact has a special technology that allows the heat Choice: →Economy ► pump to heat the hot water first. An electric heater is available for backup. With this setting, you can decide whether the electric (Prio may increase heater should come on immediately after the temperature drops electric heater op.) in the upper tank section or if the system should wait until the temperature falls even further. Only displayed if a heat Economy pump module is This means that the temperature is allowed to drop further before installed. the electric heater starts. ↓ Priority Means that the electric heater can start at an earlier temperature. Note that the priority setting means that the electric heater runs longer. Temperature for upp- Setting for the nominal value in the upper tank section, i.e. the ... -
Page 28: Meny - Function Button
Meny – Function button This menu gives possibilty to set a function for the button placed on the room sensor unit. Visning Beskrivning Kommentarer Choice of function Here you choose what type of function you want the room sensor for button on room ► button to have when you press the button. sensor: Not used →”TEXT” This is the default setting. Room sensor button is inactivated and nothing will happen if the button is pressed. Reset errors If the system generates some kind of error the button on the room sensor can be used to reset the error. (Observe that if the error is still active it cannot be reset with the button.) Extra hot water The function gives the possibility to temporarily increase the hot water performance of the Exotic Compact. This function can be used if for example many people need to shower quickly after ↓ each other, many showers used at the same time or if a bigger bath tub/Jacuzzi should be filled. ... -
Page 29: Menu - Present Values
Menu – Present values The present values menu has 3 sub menus as shown below. →Heating/Hot water Heat pump Acessories Heating / Hot water: Here you see the current values for the tank temperatures, the temperature of the water in the radiators / underfloor heating, room temperature, etc. Heat pump: Here you see the heat pump's different temperatures and operating status. Accessories: The asscessories menu is only accessible if any accessories are installed, e.g. solar panels, pool heating, etc. Menu – Heating/Hot water Display Description Comments Room temperature (1) ► Actual room temperature, set nominal value and the difference ... -
Page 30: Menu - Heating/Hot Water
Menu – Heating/Hot water Display Description Comments Chosen function room ► When using the function button on the room sensor for extra hot sensor button: Only displayed if extra water this display will be available. Here you can see the set time hot water function is Extra hot water chosen. for extra hot water and also if the function is activated or not. Time:50min Act:Yes ↓ Chosen function room sensor button: ► When using the function button on the room sensor for the Only displayed if function deactivate room sensor this display will be available. Here deactivate room sensor ... - Page 31 Display Description Comments Temp upper tank part Information about status of upper tank section. Actual: 52.2C ► Actual value is the current temperature in the upper section of Nominal: 53.0C the tank. Startdiff HP: 5.0C ↓ Nominal value is the temperature set in the settings menu for the heat pump to maintain. (If the house requires higher temperatures than the one set, this value will become the nominal value). Start diff HP Same explanation as in previous display but applies to the upper tank section. El.heat: 7.5 kW (10.5) Power distribution ►...
- Page 32 Display Description Comments Upper tank part is The water sent out to the radiators/underfloor heating can come needed for heating ► from 2 places in the Exotic Compact unit; from the lower tank section or from the upper tank section. system (1): No In normal cases, water is only sent (mixinged) from the lower part Active delay: 180min of the tank because this is the "cheapest" water in the tank (lower temperature). If the energy in the lower tank section is not sufficient, e.g. the house requires more power than the heat pump can provide, energy can be sourced from the upper tank section with the electric heater in it. Before the heating system can take water / energy from the upper tank section, a certain length of time must have passed from when Only displayed if a heat the need arose (the standard is 3 hours). This gives the heat pump pump module is the chance to work and see if it can "catch up" to meet the installed. heating needed before opening the upper (more expensive) section. If the display shows that the upper tank section is needed to heat the house, the "Delay" time will start to count down. If the need ...
-
Page 33: Menu - Heat Pump
Menu – Heat pump This menu is only displayed if a heat pump module is installed. Display Description Comments Water temperature In: 32.4C Out: 54.9C ► Displays the temperature of the water to the heat pump, the temperature of the heated water from the heat pump to the tank, Diff: 22.5C and the difference between the two. Depending on whether the Max temp: 58.0C heat pump is working on the lower or upper tank section, the ↓ difference may vary. Most often, the largest difference is when the heat pump is working on the upper tank section. Max water temp indicates the maximum temperature that the heat pump can send to the tank sections. Brine temperature In: 2.4C Out: -1.3C ►... -
Page 34: Menu - Info & Run Times
Menu – Info & Run times This menu does not contain any submenus and has information about your system's operation and other important information. Display Description Comments Total operation time Information about the tank section in Exotic Compact. boiler: 3284h ► Total boiler running time is the length of time the unit has been S/N: 3465842456 in operation since the first startup, i.e. from when the boiler was ProgramID: 2.01 installed. Serial number is the unique ID for the boiler. Always provide this for any servicing or maintenance. ↓ ProgramID is the current program version for the tank section's circuit board. Installed heat pump: Information about the installed heat pump module in Exotic ... -
Page 35: Automatic Mode / Alarm
Automatic mode / Alarm When you are not in the menu tree and you are adjusting the settings or looking at the operating values, the screen shows an autogenerated display of what is happening in the Exotic Compact. If an alarm is tripped, this is displayed instead of the normal displays. Normal operation During normal operation (no alarms), the screen switches continuously between different displays, depending what is happening in the heat pump. (Any necessary setting adjustments are can also be seen here. Normally, your installer has already adjusted these settings.) Display Description Comments Settings for heat ► This display is only relevant before the installer has adjusted the pump/electric heater settings in the installer menu. neccessary! Go to installer menu ↓ Electric boiler operation activated ►... - Page 36 Display Description Comments **** SYSTEM OK ***** Heat pump status: ► The heat pump cannot run if the water is too hot, and always checks just before starting to make sure the water in the tank Standby sections is not too hot. The heat pump will automatically start Tank temp too high again when the tank temperature has dropped. ↓ **** SYSTEM OK ***** Each time the heat pump module (the compressor) stops, at least ► 10 minutes must pass before it can be restarted. This screen is Heat pump status: displayed each time the compressor has stopped, and shows how Start delay much of the time delay remains. Time left:4min 38sec ↓ ...
-
Page 37: Errors
Errors If an Exotic Compact unit receives an ERROR, none of the autogenerated screens discussed in the previous section are displayed, but the active alarms are displayed instead. Error management For all alarms, one or more, an overview display appears, providing information about how many alarms have been activated and information about the ones that are still active. An alarm can be either active or inactive. Active alarms cannot be reset before the cause of the error has been found and corrected. Inactive alarms can be reset by confirming them with the Enter button. You can easily browse through the alarms with the up/down arrows. (Note that if there are several inactive alarms, all of them are reset if you reset one of them.) Example of alarm display where 3 alarms have been activated and 2 of the alarms are still active. ******* ERROR ****** Alarm overview display Error total: 3 Information about how many alarms in total and Active errors: 2 how many of the alarms are active and cannot be reset. Scroll with up/down Alarm 1 of 3 The display provides information about where *** ERROR *** 1(3) the alarm is, in this case the room sensor. In ... -
Page 38: Alarm Displays
Alarm displays The table below shows all the alarms that can be tripped in an Exotic Compact Display Description Comments ------ ERROR ------- This error is not like any of the regular alarms, rather it is a self‐ No communication ► generated alarm from the display. All the text will flash. The alarm is displayed if there is a communication failure between Exotic Compact's circuit board in the tank section and the circuit board for the display. Check the cabling between the tank's circuit board and the ↓ display. *** ERROR *** 1(1) Error with the brine in the sensor located on a pipe in the heat pump module ‐ see the overview diagram at the beginning of this ► Brine in sensor Only displayed if heat manual. Type: (See explananation) pump module is ... -
Page 39: Outdoor Sensor
Display Description Comments *** ERROR *** 1(1) Error in the secondary heating system's flow line temperature sensor, which ensures that the correct temperature is sent to the ► Flowtempsen system 2 Only displayed if the other heating system. Type: (See explananation) extra heating system This type of error can be either a short circuit or a failure in the accessory is installed Error must be fixed! sensor or cable. ↓ *** ERROR *** 1(1) Error in the heat pump's flow line temperature sensor located on a pipe in the heat pump module ‐ see the overview diagram at the ► Flowtmp sensor HP beginning of the manual. ... -
Page 40: Heat Pump
Display Description Comments *** ERROR *** 1(1) Error in the sensor in the lower section of the tank. ► Tank sensor upper This type of error can be either a short circuit or a failure in the sensor or Type: (See explananation) cable. Error must be fixed! ↓ *** ERROR *** 1(1) Communication error between the circuit board in the heat pump module and the tank section's circuit board. ► No communication with heat pump. Check the cabling between the module and the tank section. ... - Page 41 Display Description Comments *** ERROR *** 1(1) This error occurs if the pressure in the heat pump's compressor ► Low pressure switch becomes too low. This can be caused by problems with air in the heat pump cut out brine system or a defective circulation pump on the brine side, Error must be fixed! etc. Contact the service department in the event of repeated alarms. ↓ *** ERROR *** 1(1) This error occurs because the low‐voltage supply to the heat ► 12VDC supply to pump's circuit board is outside the range. heat pump low/high Contact the service department in the event of repeated alarms. ...
-
Page 42: Installation
Installation This chapter is intended for installers of the heating system. ► Note that a commissioning report must be filled in after completing the installation Placement / Moving Place the Exotic Compact indoors in a location with a solid foundation, preferably on a concrete floor. In order to prevent unnecessary noise, if possible, position the heat pump with its back against an exterior wall. • If possible, avoid placing the unit close to bedrooms or other areas that are sensitive to noise. The heat pump module can be easily removed from the tank section in order to lift/transport the product in 2 parts. Exotic Compact has 4 adjustable legs that can be used to balance the tank unit. Pipes to heating system In the basic design, heating pipes are mounted for a top connection. However, both pipes can be ... -
Page 43: Tap Water Pipe
Tap water pipe In the basic design, the tap water pipes cannot be angled for bottom assembly without a complete rebuild. As an alternative, customised drain water pipes for a bottom connection can be ordered. Connection pipe bottom installation tap pipe, item no. 97774707001 The flow switch must be removed for a bottom installation. It is very important to check the direction of flow when reinstalling the switch. An arrow shows the correct flow direction ‐ see diagram below. The connection pipes for tap water are designed with a cc measurement of 55 mm in order to make installing a combination of valves easy. Note that the safety valve does not need to be installed as the exchanger volume is below 1 litre. Cold water pipe Hot water pipe Flow switch Hot water circulation Exotic Compact has controls that can be easily connected to a hot water circulation system. This system requires an accessory package that can be ordered from Euronom and includes a hot water circulation sensor and footings. Connecting a hot water circulation system directly to the boiler is not recommended without this accessory kit. Alternatively, a smaller, external hot water heater can be used for connecting a hot water circulation system. ... -
Page 44: Brine Medium
Brine medium Dimensioning The collector for earth / bedrock / groundwater / lake heat, etc. should be dimensioned according to a computerised calculation program. Euronom has a dimensioning program and can assist with this type of calculation. Connection hoses Brine medium hoses for the brine system are already installed at the factory and can be removed from the tank on the right or left side. The side plates are perforated at the outlets. Use pliers or a similar tool to cut off the metal blanks on the desired side. Be careful because this can create sharp edges. The brine hoses are marked with the text "Brine in" and "Brine out" with arrows showing the flow. Condensation insulation Since the brine system can become colder than 0°C, all pipes/connectors must be insulated to prevent ice or condensation from forming. Brine fluid The brine medium should contain an antifreeze medium, e.g. bio ethanol, to maintain fluidity down to temperatures of ‐15°C. Collector hose The collector hose, PEM 40 x 2.4 PN 6.3, is used as standard. Every metre of hosing holds about 1 litre of fluid. Aerating The earth heat collector should be installed in a manner that facilitates self‐aerating without any air pockets. If this is not possible, aerating valves will have to be fitted to the highest points in the collector. The level tank should be located at the highest point. Fill coupling Pre‐fabricated couplings, e.g. LK 520 Multifill 25, with integrated valves / dirt filters, are recommended for quick installation in insulated houses. Expansion vessel The expansion vessel or level tank should be installed as high as possible on the incoming brine pipe (brine in). -
Page 45: Schematic Connection Diagram For Brine Medium
6 6 Complete kit as shown can be ordered from Euronom item no. 1921062 No. Description 1 Brine to heat pump (in) 2 Brine from heat pump (out) 3 Fill coupling (including valves, dirt filter) 4 Safety valve 5 Level tank/ Expansion vessel 6 Shutoff valve ... -
Page 46: Brine Medium Pump
Brine medium pump A brine medium pump is installed in the heat pump module and has 3 fixed speeds. Different flows are achieved depending on the overall drop in pressure in the brine medium system. A maximum temperature difference of 3 °C between the brine in/out is the ideal. If the difference is too high, the system will issue a low brine flow alarm. The diagram below shows the drop in pressure for the evaporator and the pump curve for the various models. Diagram 1. Pressure drop in the evaporator with 30% ethylene glycol in the brine medium. Compact 5/8 Compact 10/12 Diagram 2. Pump curve Exotic Compact 5/8 Diagram 3.Pump curve Compact 10/12 ... -
Page 47: Electrical Installation
Electrical installation Electrical installation should be performed by an authorized electrician, in accordance with local regulations. Overview The control unit consists of a connection list of all possible connections and a box for circuit boards and electromechanical components ‐ see the schematic diagram below. An adhesive sticker describes the function of the terminal blocks and how the connection should be set up. The terminal blocks are divided into blocks called A, B, C, D, E and F. Note that this manual only describes how to connect standard components, i.e. blocks A and B. A separate manual will be sent if you are installing any accessories. Earthing bar PE Terminal block fittings Circuit board Cable penetrations Automatic fuse heat pump Power supply block 400 V N Automatic fuse electric heater Automatic fuse circuit board Terminal blocks standard Contactor electric heater, 6 Emergency heat switch Overheating protection reset ... -
Page 48: Power Supply
Power supply The power supply to the Exotic Compact is connected on the power supply terminals up and to the left of the connecting plate. Check the phase sequence before connecting. Based on the maximum power requirements for the system, select the correct fuse and cable dimensions. Max fuse for the product is 32A. The electric heater can be blocked in stages of 1.5 kW in order to limit the maximum connected power. Installing current transformers is recommended (accessories), which provides automatic control of the maximum power based on a main fuse in the system. The table below provides a rough guide to power usage with different electric heater stages connected to the heat pump. Note that the element in the electric heater is 230 V, and if current transformers are installed the least loaded phase will be selected. Table 1. Power usage by heat pump at different power settings for the electric heater. Power electric 6.0 kW 7.5 kW 9.0 kW 10.5 kW heater Phase L1 L2 L3 L1 L2 L3 L1 L2 L3 L1 L2 ... -
Page 49: Terminal Blocks
Terminal blocks The terminal blocks are divided between 2 levels with a spring‐loaded connection. Installation is easy by unloading the spring with a small screwdriver (about 3mm wide), pushing in the stripped cable and pulling out the screwdriver again. Check that the installation is correct by pulling hard on the cable. See also the diagrams below. Also note the marking on the adhesive sticker regarding the upper and lower connection. Upper connection Lower connection Block A – 230V The only high voltage connection to be made apart from the power supply is connecting the radiator pump on block A. Use one of the cable fittings at the top for cable penetration. The earth wire is connected directly to the earth block. ... -
Page 50: Block B - Extra-Low Voltage
Block B – extra-low voltage Block B contains all of the low‐voltage connections that are included as standard with the Exotic Compact. Some of the connections do not need to be connected for the product to work. Communication 1-2 The connection is named "COM HEAT PUMP" on the adhesive sticker. This connection is only used for Euronom's air/water heat pumps and should not be connected. Outdoor sensors 3-4 The connection is named "OUTDOOR SENSOR" on the adhesive sticker. The outdoor sensor has a catch to be opened; tools are not needed. Two spring‐loaded terminal blocks are located inside the sensor. Press the release button and insert the stripped cable to make the connection. Cable to the outdoor sensor should be drawn with a minimum cable area of 0.5 mm and is best mounted on the north or south side of the house so that it is not exposed to the morning sun. The sensor should be placed at about 2/3 of the height of the house's facade and should be mounted to avoid direct sunlight. Make sure that the sensor is not affected by ventilation ducts, doors, windows or similar fixtures which can affect the temperature measurements. Release button Sensor ... -
Page 51: Room Sensors 5-8
Room sensors 5-8 The connection is named "ROOM SENSOR 1" on the adhesive sticker. The primary job of the room sensor is to transmit information about the room temperature in order to adjust the set house heating curve. This brings overall cost savings because the temperature of the water in the heating system never gets too high. You do not need to use the room sensor function. (It can be turned off in the installer's menu in the display.) However, it is always recommended to install the room sensor because it also includes an alarm diode that flashes if something is wrong. In addition, there is a button on the room sensor that can be used for different functions, e.g. extra hot water, which can be set in the display. In order for the room sensor to work well, the sensor should be placed in as central and open a location as possible in the house. Do not place it by windows, radiators or similar fixtures. Mount the sensor about 2/3 of the way up the wall, and it is best installed in such a way that it is possible to reposition it. The room sensor terminals are marked (1‐4) and should be connected according to the figure below. The tank section's adhesive sticker is also marked with connection numbers 1‐4. Connect the same numbers for the room sensors as for the boiler. Mounting hole Button Sensor Indicator diode Release buttons Cable penetration 1 2 3 4 ... -
Page 52: Current Transformers 10-13 (Accessories)
Current transformers 10-13 (accessories) The connection is named "CURRENT SENSORS" on the adhesive sticker. Current transformers are not included as standard. The job of the current transformers is to continuously measure the current on the incoming phases in the house/system. This measuring helps the program ensure that the power never exceeds the rating for the main fuse by releasing any power‐stage in the electric heater. The current transformers are phase selective, i.e. they measure each phase separately. This allows the system to decide itself which phase to load. This also ensures that the 3 phases are distributed as evenly as possible. Installing the current transformers is recommended but not required. It is possible to limit the maximum electrical power for the electric heater in the display. The current transformers should be installed on the incoming feed to the central control unit, which must be protected against overloads. This should only be performed by an authorised electrician. The minimum cable area for the connection is 0.5 mm². At least 4‐lines must be used. Mount the transformers by threading the incoming phases through the transformer. The blue cables from the transformers should be joined together and connected to the common terminal block 13 Current transformers item no. 4663003 Terminal block Exotic Compact Current transformers Main fuses 52 ... -
Page 53: Error Out 14-16
Error out 14-16 The connection is named "ERROR OUT (MAX 1A)" on the adhesive sticker. The output is potential‐free and has both an NC and an NO connection. It can be used to get a signal to an external unit or to a GSM unit. The output can be loaded with max 1A During normal operations with no alarm, there is contact between terminals 15 and 16. In the event of an alarm or power failure there is contact between 14 and 15 Error or power failure (NC) Normal operations (NO) Digital input 17-18 Connection named "EXTRA DIGITAL IN" on the adhesive sticker. The input should be potential‐free and has different functions depending on what settings are chosen in the display. From program version 1.4 the set function is standby. If the input is closed the heat pump and electric heater will be blocked until the input is opened again. When closing the input below display text will be activated. ****SYSTEM OK***** Standby mode active Heatpump/El.heater blocked. Time 26min ... -
Page 54: First Commissioning
First commissioning During the initial commissioning, a number of selections must be made in order for the system to start. The first thing that appears during commissioning is the following display. (If you want to learn more about how to use the buttons to navigate, see the chapter "Handling". Choose language... Confirm with ENTER >>>SWEDISH<<< You can change the language using the up/down arrows. Confirm the selected language with the ENTER button. After selecting the language, you will come to menu where you can adjust the settings. Use the arrow buttons to move to the following location: →Settings For the customer Enter access code! → → Present values →For the installer Confirm with ENTER Info/Operation time 0 0 0 0 Service ... -
Page 55: System Settings
System settings Display Description Comments Heat pump found... The display provides information on which heat pump module is Model: Exotic 8 ► installed and its serial number. Exotic Compact can be run without a heating pump as purely and Only displayed if heat S/N: 4335645495 pump module is found electrical boiler with an integrated electric heater. In order to Installed: →No activate the heat pump module, select installed: yes ↓ Compressor blocking Compressor is: ► The compressor is blocked by default in order to prevent the Only displayed if heat system from unintentionally starting before the installation is →Blocked pump module is finished. Do not remove the blocking before the installation is installed ... - Page 56 Display Description Comments Flow reduce valve From 2013‐06 all Exotic Compacts will have a special flow reduce is mounted: →Yes ► valve mounted in the hose from the heat pump unit. If this valve is mounted a sticker will be place on the mentioned hose. If no Only displayed if heat (Don’t mount for HP pump is installed sticker is found the setting in the display must be “No”. Default EA16/Pol14/Exotic17) setting is “Yes” ↓ Language ► →ENGLISH Setting the language for the display screen ↓ ** Factory reset ** This menu is used to reset all of the settings to the factory default ...
-
Page 57: Service
Service The last item in the main menu is the "Service" option. This menu includes more advanced settings as well as options for test runs and calibrating the sensors. This menu is used primarily by service technicians and should not be used unless you have a thorough knowledge of the system. Use the arrow buttons to move to the following location: Settings Enter access code! → Present values Confirm with ENTER Info&Run times 0 0 0 0 →Service Enter access code: 7902 You are now in the service menu. →Settings Error logs Calibration Manual operation ... -
Page 58: Settings
Settings This menu is only accessible if the heat pump module is installed. Display Description Comments Restart diff for heat pump in lower ► Setting for restarting hysteresis for the lower tank section. tank part: →5.0C ↓ Restart diff for ► heat pump in upper tank part: →5.0C Setting for restarting hysteresis for upper tank section. ↓ ... - Page 59 ↓ PI regulator charge pump ► IGain: 400 ↓ PI regulator charge pump ► Note that the settings in the remaining displays should not be Integral time: 15 sec adjusted before contacting Euronom. (The charge pump that moves the water through the heat pump module is controlled with a PI regulator to achieve the correct PI regulator temperature under different conditions. The regulator control can charge pump ► be adjusted by changing a number of settings.) Integral max: 5000 ...
-
Page 60: Error Log
Error log The error log selection displays the past 5 alarms with information about the cause of the alarm and the existing operating data when the alarm was tripped. This allows service technicians to draw conclusions about the cause of the alarm. Display Description Comments 1(5)High pressure A:62C B:53C C:15.2A ► The number 1 in "1(5)" indicates which display is shown. 1(5) is D:-12C E:-14C F:115C the last alarm that was logged. G:-16C H:99% I:1250l The letters A‐I have the following meanings according to the table ↓ below. A: Flow temperature from the heat pump module B: Return temperature to heat pump module C: Power consumption compressor D: Brine temperature to heat pump module E: Brine temperature from heat pump module ... -
Page 61: Calibration
Calibration The calibration menu is used to adjust the value on the sensor up or down. Note that calibration should only be performed with a calibrated temperature instrument. When you enter the calibration menu, a submenu appears where you can choose to calibrate the boiler or the heat pump sensor. All of the calibration displays show the sensor's current values as well as the current offset, i.e. how much the sensor is adjusted and in which direction. The default offset value is always 0.0°C Settings Calibration → Error logs →Boiler →Calibration Heat pump Manual operation Calibration - Boiler Display Description Comments Tank sensor lower Actual: 34.6C ► Offset:→+0.0C Calibrating the lower tank sensor ↓ Tank sensor upper ►... - Page 62 Display Description Comments Current sensor L2 Actual: 12.4A ► Offset:→+0.0A Calibrating current sensor L2 ↓ Current sensor L3 Actual: 12.4A ► Calibrating current sensor L3 Offset:→+0.0A Calibration - Heat pump Display Description Comments Primary flow temp sensor ► Actual: 44.6C Calibrating primary flow temp sensor ...
-
Page 63: Manual Operation
Manual operation The manual operation menu is used to manually run all of the components separately. This menu can be used to check that the installation is correct and for troubleshooting. When you enter this menu, a submenu appears where you can test the heat pump functions as well as the boiler. Note that when you enter this menu, all of the components are shut off, and the status light starts to flash red and green. Settings Functions → Error logs →Boiler Calibration Heat pump →Manual operation Manual operation - Boiler Display Description Comments Radiator pump (Heating system 1) ► →Off Manual operation of radiator pump (for heating system 1) ↓ Circulation pump hot water exchanger ►... - Page 64 Display Description Comments Electric heater L2 Manual operation of the electric heater stages 1.5 kW on phase L2 (1,5kW) ► and current value on current sensor L2. When turning the system →Off on, the power will increase by about 6.5A if current sensors are Curr sens L2: 10,1A installed. ↓ Electric heater L3 Manual operation of the electric heater stages 1.5 kW on phase L3 ► (1,5kW) and current value on current sensor L3. When turning the system →Off on, the power will increase by about 6.5A if current sensors are Curr sens L3: 10,1A installed. ↓ El.h L1/L2/L3 (6kW) Manual operation of the electric heater stages 6 kW (2 kW/phase) ...
-
Page 65: R/T Tables Sensors
R/T tables sensors Water/brine Hot gas sensor Temp Temp Temp Temp R (kΩ) R (kΩ) R (kΩ) R (kΩ) (°C) (°C) (°C) (°C) ‐15 11,50 21 2,34 0 163.4 72 8.2 ‐14 10,94 22 2,25 2 147.6 ... -
Page 66: Technical Data
Technical data Technical data Exotic 5 Exotic 8 Exotic 10 Exotic 12 Item No. 9774705001 9774700401 9774705101 9774700501 Dimensions (w x h x 600 x 1830 x 730 mm Weight 250kg 253kg 260kg 265kg Total volume 205 l Insulation 35 mm polyurethane Electrical 400V N PE connection... -
Page 67: Commissioning Report
Commissioning report DATA INSTALLER Model: Order number: Company: □ 5 □ 8 □ 10 □ 12 Exotic Compact Heat pump serial number: Date: Address: Electricity metre reading: Postal address: Signature: INSTALLATION CHECK The system is filled with water and has been aerated Name in Block Letters: □... -
Page 68: Electrical Diagram Tank Unit
Electrical diagram tank unit 68 ... - Page 69 ...
- Page 70 70 ...
-
Page 71: Electrical Diagram Heat Pump Module
Electrical diagram heat pump module ... - Page 72 72 ...
-
Page 73: Spare Parts List
Spare parts list Order number Compact 5 Compact 8 Compact 10 Compact 12 Compressor 521240500 520933800 520969100 520879800 Receiver drier 520837800 520837800 520837800 520837800 Evaporator 521204700 521204700 521241000 521241000 Condensor 521204800 521204800 521204800 521204800 Low pressure pressostate 521103900 521103900 521103900 521103900 High pressure pressostate 520930400 520930400 520930400 520930400 Sight glass ... - Page 74 Visiting and delivery address: Franska vägen 12 393 56 KALMAR • SWEDEN Telephon +46(0)480 221 20 Telefax +46(0)480 870 17 www.euronom.se info@euronom.se 74 ...
Need help?
Do you have a question about the Exotic Compact 5 and is the answer not in the manual?
Questions and answers