Table of Contents
Advertisement
Available languages
Available languages
Model ETW240
Single Pole
2 Wire Connection
Line Voltage Thermostat
Installation & Maintenance Instructions
Dear Owner,
Congratulations! Thank you for purchasing this new Tempra-Sure thermostat from Marley Engineered Products. You have made a wise
investment selecting the highest quality product in the heating industry. Please carefully read the installation and maintenance directions
shown in this manual. You should enjoy years of efficient heating comfort with this product from Marley Engineered Products... the indus-
try's leader in design, manufacturing, quality and service.
1. To prevent a possible electrical shock, disconnect power
to heating system at main power fuse or circuit breaker
panel before attempting to install this thermostat.
2. All wiring must be in accordance with all local codes and
the National Electrical Code.
3. The Model ETW240Thermostat is intended for connec-
tion to a 208/240 Volt AC electrical power system ONLY.
INSTALLATION INSTRUCTIONS
With wires through the square hole, attach base plate to
thermostat junction box with the two screws included. See
Fig. 1 for an installation with the main power supplied direct-
ly to the thermostat. This also applies when the main power
supply is to the heater junction box.
Use certified solderless wire connectors approved for No.
12 wires. Tighten firmly to prevent wires from pulling out. Use
electrical tape to further secure the wire connectors.
Properly place wires in the junction box and hinge the top
of the thermostat to the top of the mounting base as shown in
Fig. 2.
Rotate the thermostat down and snap into the lower por-
tion of the mounting base. Secure with screw.
Helpful Hints
1. Install thermostat about 5 ft. from floor on an
inside wall — not directly above the heater.
2. Install in area of natural light and room lights but not
in direct sunlight.
3. The setback mode can be controlled with room
lights. Examples include:
• Use Normal Setting during nighttime use in
rooms with regular lights.
1
... The Employees of
Marley Engineered Products
WARNING
!
The thermostat will not function properly or could be dam-
aged when used on other voltages.
4. In the event you are not completely familiar with house
wiring and electrical code requirements that apply in your
area, do not attempt to install this device. Consult a qual-
L2
L1 (HOT)
208/240 V
Fig. 1
SAVE THESE INSTRUCTIONS
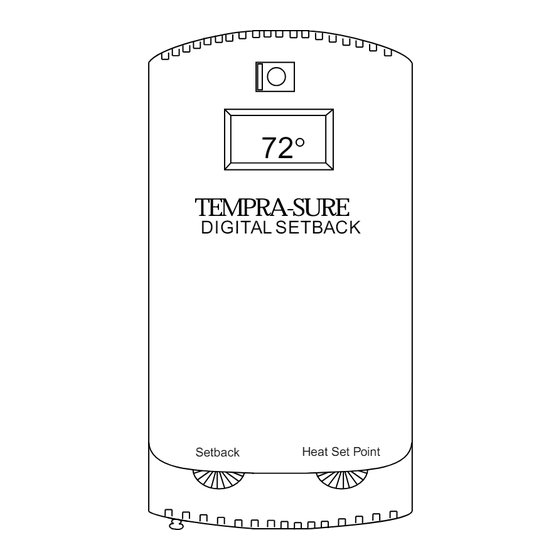
72°
TEMPRA-SURE II
D I G I T A L S E T B A C K
Setback
Heat Set Point
ified electrician.
• A Light Switch Timer can be used to bring the
thermostat out of setback mode for early
morning start-up.
• Adjust light sensor shade to increase the required
light for setback mode. Cover entire sensor for
setback vacation mode.
WHITE
72°
TEMPRA-SURE II
D I G I T A L S E T B A C K
Setback
Heat Set Point
BLACK
TO LOAD
WHITE
TO LOAD
BLACK
Advertisement
Table of Contents

Related Manuals for Marley ETW240

Summary of Contents for Marley ETW240
- Page 1 Please carefully read the installation and maintenance directions shown in this manual. You should enjoy years of efficient heating comfort with this product from Marley Engineered Products... the indus- try’s leader in design, manufacturing, quality and service.
-
Page 2: Operating Instructions
Marley Engineered Products Service Center. Within the limitations of this warranty, inoperative units should be returned to the nearest Marley autho- rized service center or the Marley Engineered Products Center, and we will repair or replace, at our option, at no charge to you with return freight paid by Marley. - Page 3 Nous sommes sûrs que vous bénéficierez de nombreuses années de confort grâce à cet appareil de chauffage efficace de Marley Engineered Products... le numéro 1 du secteur du chauffage en matière de conception, fabrication, qualité...
- Page 4 être accompagnée d’une preuve d’achat montrant la date. Le client assume tous les frais associés à l’enlèvement ou à la réinstallation du produit, y compris les frais de main-d’œuvre et les frais d’envoi des produits à un centre de service Marley Engineered Products.
- Page 5 Nous sommes sûrs que vous bénéficierez de nombreuses années de confort grâce à cet appareil de chauffage efficace de Marley Engineered Products... le numéro 1 du secteur du chauffage en matière de conception, fabrication, qualité...
- Page 6 être accompagnée d’une preuve d’achat montrant la date. Le client assume tous les frais associés à l’enlèvement ou à la réinstallation du produit, y compris les frais de main-d’œuvre et les frais d’envoi des produits à un centre de service Marley Engineered Products.
Need help?
Do you have a question about the ETW240 and is the answer not in the manual?
Questions and answers