Table of Contents
Advertisement
Quick Links
Advertisement
Table of Contents

Summary of Contents for Target BLU EYE
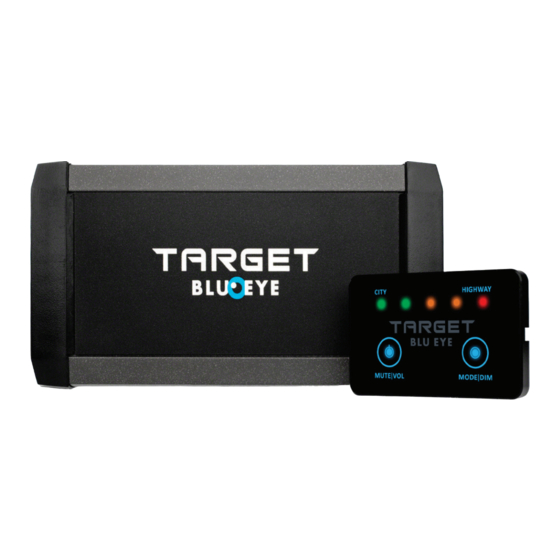
- Page 1 USER & INSTALLATION MANUAL TARGET BLU EYE An eye for safety.
-
Page 2: Table Of Contents
CONTENTS FUNCTIONS TARGET BLU EYE On/of-Mute-Volume button On/Of Mute Volume Mode-Dim button Mode VISIBLE WARNINGS BY LEDS AUDIBLE WARNINGS Installer Mode INSTALLATION INSTRUCTIONS Connection Diagram Antenna Central unit Display REGISTRATION OF YOUR TARGET BLU EYE TECHNICAL SPECIFICATIONS... -
Page 3: Functions Target Blu Eye
The operation of the Target Blu Eye system is very user-friendly. If an emergency vehicle is nearby, Target Blu Eye is able to recognize such a vehicle in time, thanks to the very advanced electronics. You will be warned in advance with an acoustic and visual alert. -
Page 4: On/Of-Mute-Volume Button
❶ ON/OFF-MUTE-VOLUME-BUTTON • System on/off manually: press and hold the button for at least 2 seconds • Mute on/off: press the button shortly • Set volume: press buttons ❶ ❷ simultaneously ON/OFF ❶ The system is powered from the ignition of the car. Press button for at least 2 seconds to switch the display on or off manually. -
Page 5: Mode-Dim Button
City Mode depending on your sensitivity selection. Only signals stronger than the led that is continuously on, will lead to alerts from your Blu Eye. The use of City mode is recommended in urban areas. Adjust the sensitivity (1, 2 or 3 leds ) to get the best results from your Blu-Eye. -
Page 6: Audible Warnings
AUDIBLE WARNINGS ❹ Target Blu Eye will generate two different audible warnings depending of the type com- munication that is used at a speciic moment: Type of Acoustic alert Explanation communication Target Blu Eye Periodic log-on Periodic log-on Emergency services vehicles log-on periodically to the nearest TETRA base station. - Page 7 DMO (Direct Mode Operation). In DMO, there is a direct connection between 2 or more vehicles and their respective radio’s are not connected to the Tetra network. Target Blu Eye always detects the presence of an emergency vehicle if there is communication between the vehicles or communication between the vehicle and the emergency room.
-
Page 8: Installer Mode
Installer Mode can be used to check both, existing installs and new installs. TIP: Before you even take off the trim in the vehicle, lay out the Blu Eye system with all the cables and display in the locations that you plan to it the Blu Eye and then run the installer mode, you will get a quick idea if there are any issues before you spend time removing trim. - Page 9 Start the engine and let it run idle for approximately 60 – 120 seconds. If no yellow or red leds come on during this test, the chosen location for the receiver is good. Continue with 'Testing the Blu Eye antenna location'...
- Page 10 Interference may be caused when the antenna cable is routed against or very close to the vehicle‘s wiring looms. In some cases the interference can be eliminated by moving the antenna cable a short distance away from the vehicle’s loom. If the above was successfully solved, continue with: 'Registration of your Target Blu Eye'...
-
Page 11: Installation Instructions
INSTALLATION INSTRUCTIONS Control display For future use Antenna (Powered by the ignition +15V. key switch of the car +12V) Ground ANTENNA The standard antenna is suitable for most situations and provides an average detection range. It is preferred to install this antenna as high as possible on the inside of the rear- or front windshield with the top down. -
Page 12: Central Unit
In case the standard antenna can not be used, you may select one of the following options: Dipole antenna for installation in the front- or rear bumper. Installation in the front bumper, provides the best reception in the driving direction of the vehicle. Installation in the rear bumper gives the best results towards the rear side of the vehicle. -
Page 13: Display
DISPLAY The display must be mounted so that it is visible and easily accesible for the driver. There are three cable slots allowing you to route the cable from the left, right or bottom of the display (depending on the mounting position). If you bring the cable in from the bottom, slide the loose sleeve over the wires to protect and hide them. -
Page 14: Registration Of Your Target Blu Eye
Switch on the ignition of your car. The ID of your Target Blu Eye will be copied to the SD card. All leds will light up for ive seconds. This step is completed if the leds on the signal strength meter go out and only the two blue leds are lit. -
Page 15: Technical Specifications
TECHNICAL SPECIFICATIONS • Power supply: 10 – 30V. • Power consumption while display is switched on: 300mA (350mA max.) • Power consumption while display is switched off: 275mA • Fuse: 3A • Frequency range: 380-400 Mhz • TETRA detection by Waveform recognition, no decoding •... - Page 16 Know what’s out there... Röderweg 32 | 35418 Buseck| Germany Phone +49 6419728645 | info@radarwarner.de www.radarwarner.de...
Need help?
Do you have a question about the BLU EYE and is the answer not in the manual?
Questions and answers