Silhouette DIM32D1BSSPR Installation Instructions Manual
Hide thumbs
Also See for DIM32D1BSSPR:
- Owner's use and care manual (17 pages) ,
- Owner's manual (41 pages)
Advertisement
Available languages
Available languages
Quick Links
•
INSTALLATION IN-
OWNER'S USE AND
STRUCTIONS
CARE GUIDE
•
INSTRUCTIONS D'IN-
GUIDE D'UTILISATION
STALLATION
ET SOIN DE PROPRI-
•
INSTRUCCIONES DE
ÈTAIRE
INSTALACIÓN
GUÍA DE UTILIZACIÓN
Y CUIDADO PARA EL
PROPIETARIO
•
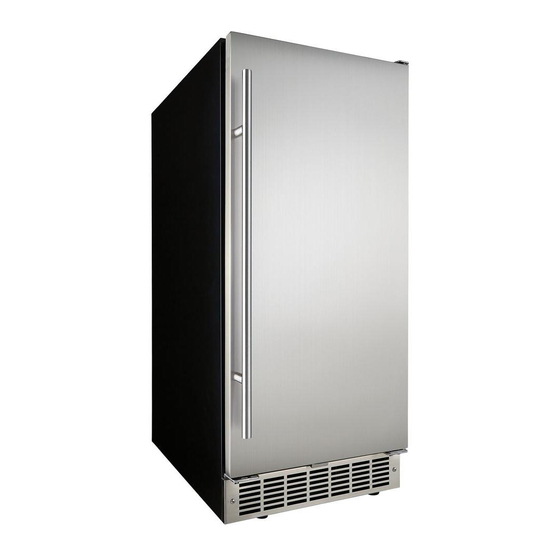
DIM32D1BSSPR
CAUTION
Read and follow all safety rules
and operating instructions
before first use of this product.
PRÉCAUTION
Veuillez lire attentivement les
consignes de sécurité et les
instructions d'utilisation avant
l'utilisation initiale de ce produit.
PRECAUCIÓN
Lea y observe todas las reglas
de seguridad las instrucciones
de operación antes de usar esto
producto por primera vez.
•
NOTE: SEE SEPERATE USE AND CARE IN-
STRUCTIONS
•
REMARQUE : VOIR LES INSTRUCTIONS DIS-
TINCTES POUR L'UTILISATION ET L'ENTRETIEN
•
NOTA: CONSULTE LAS INSTRUCCIONES DE
USO Y CUIDADO POR SEPARADO-ES
Danby Products Limited, Guelph, Ontario Canada N1H 6Z9
Danby Products Inc., Findlay, Ohio USA 45840
1-844-455-6097
2015.09.09
Advertisement

Related Manuals for Silhouette DIM32D1BSSPR


Summary of Contents for Silhouette DIM32D1BSSPR
- Page 1 • INSTRUCCIONES DE ÈTAIRE INSTALACIÓN GUÍA DE UTILIZACIÓN Y CUIDADO PARA EL PROPIETARIO • DIM32D1BSSPR CAUTION • NOTE: SEE SEPERATE USE AND CARE IN- Read and follow all safety rules STRUCTIONS and operating instructions before first use of this product.
- Page 2 • Produit jusqu’à 32 lb par jour / capacité de la glacière e 25 lb • Produce hasta 32 lb al día / la capacidad de la caja de hielo es de 25 lb Model • Modèle • Modelo DIM32D1BSSPR...
-
Page 3: Installation Instructions
INSTALLATION INSTRUCTIONS IMPORTANT It is recommended that this appliance be installed by a recognized installation professional following any or all National Safety codes or Municipal by- laws for the installation area. BEFORE USING ICE MAKER • Remove the exterior and interior packaging. •... - Page 4 INSTALLATION INSTRUCTIONS INSTALLATION SPECIFICATIONS - BUILT-IN TOOLS REQUIRED FOR YOUR SAFETY: During installation gloves, safety glasses or goggles should be worn. Flat Blade Adjustable Screwdriver Wrench Level Safety Glasses Gloves Flash Light Carpenters Square Measuring Tape Phillips Drill & Hole Saw Set Phillips Screwdriver Screwdriver...
-
Page 5: Connecting Ice Maker To Water Supply
INSTALLATION INSTRUCTIONS CONNECTING ICE MAKER TO WATER SUPPLY WARNING CAUTION To avoid electrical shock, which can cause death Plastic tubing is not recommended since it greatly or severe personal injury, disconnect the ice maker increases the potential for water leaks. The manu- from power outlet before connecting a water supply facturer will not be responsible for any damage if line to the ice maker. -
Page 6: Location Of Parts
INSTALLATION INSTRUCTIONS LOCATION OF PARTS Fig.B 1. Ice bucket: Stores ice 2. Bottom board of ice box: Separate the ice and unneces- sary water during ice making. 3. Drain nut (front): Stops water from draining through the front. Please leave nut in place during continuous drain mode and drain pump mode. - Page 7 INSTALLATION INSTRUCTIONS WARNING Please disconnect unit from power and make sure no water is near the ice maker or fl oor board to avoid electric shock before following the steps below. CONNECTING ICE MAKER TO DRAIN Drain pipe connection (drain hose not provided) •...
- Page 8 INSTALLATION INSTRUCTIONS CONNECTING ICE MAKER TO DRAIN Drain Type Drain Drain Height Operation Instructions Continuous • Excess water • The height of the drain Reference Fig. C, D and E. Drain Mode will drain out hole in the room Drain nut and drain pump switch Condi- of the contin- ≤...
- Page 9 INSTALLATION INSTRUCTIONS CONNECTING ICE MAKER TO DRAIN Drain Type Drain Drain Height Operation Instructions Manual Drain • Manually drain • There is no drain hole Reference Fig. B, C and D Mode the water from in the room Drain nut and drain pump switch Condi- the ice bucket tion...
-
Page 10: Installation Instructions
INSTALLATION INSTRUCTIONS DOOR REVERSAL INSTRUCTIONS This appliance can be modifi ed for the door to open from either the left or the right side. The unit is delivered to you with the door opening from the left side. If you wish to reverse the opening direction, follow the instructions below: 1. -
Page 11: Instruction D'installation
INSTRUCTIONS D'INSTALLATION IMPORTANT Il est recommandé de faire installer cet appareil par un professionnel d'installation certifi é conformé- ment à tout code de sécurité national ou règlement municipal en vigueur dans la zone d'installation. AVANT D'UTILISER LA MACHINE À GLAÇONS •... - Page 12 INSTRUCTIONS D'INSTALLATION SPÉCIFICATIONS RELATIVES À L'INSTALLATION - INTÉGRÉE OUTILS REQUIS POUR VOTRE SÉCURITÉ : Il est recommandé de porter des gants et des lunettes de protection pendant l'installation. Clé à Tournevis molette à lame plate Niveau Lunettes de Gants Lampe de poche sécurité...
- Page 13 INSTRUCTIONS D'INSTALLATION RACCORDER LA MACHINE À GLAÇONS À L'ARRIVÉE D'EAU AVERTISSEMENT MISE EN GARDE Pour éviter tout choc électrique, ce qui peut Il n'est pas recommandé d'utiliser des tuyaux de être potentiellement mortel ou être la cause de plastique étant donné leur potentiel accru pour blessures graves, débrancher la machine à...
- Page 14 INSTRUCTIONS D'INSTALLATION EMPLACEMENT DES PIÈCES Fig.B 1. Réservoir à glaçons : Conserve la glace. 2. Panneau inférieur du bac à glaçons : Sépare la glace et l’excès d’eau pendant le processus de fabrication de glace. 3. Écrou de vidange (avant) : Empêche l’eau de drainer du devant.
- Page 15 INSTRUCTIONS D'INSTALLATION AVERTISSEMENT Prière de débrancher l'appareil et de s'assurer qu'il n'y a pas d'eau près de la machine à glaçon ou sur le plancher pour éviter tout choc électrique avant de procéder avec les étapes suivantes. RACCORDER LA MACHINE À GLAÇON À LA VIDANGE Raccord du tuyau de vidange (tuyau de vidange non fourni) •...
- Page 16 INSTRUCTIONS D'INSTALLATION RACCORDER LA MACHINE À GLAÇONS SUR LA VIDANGE Type de Vidange Hauteur de la vidange Instructions de fonctionnement vidange Mode de • L’eau en excès • La hauteur du trou de Référence Fig. C, D et, E. vidange con- sera vidangée vidange dans la pièce État de l’écrou de vidange et de l’in-...
- Page 17 INSTRUCTIONS D'INSTALLATION RACCORDER LA MACHINE À GLAÇONS SUR LA VIDANGE Type de Vidange Hauteur de la vidange Consignes d’utilisation vidange Mode de • Vidanger • Il n’y a pas de trou de Référence Fig. B, C et D vidange man- manuellement vidange dans la pièce.
-
Page 18: Instruction D'installation
INSTRUCTIONS D'INSTALLATION DIRECTIVES POUR INVERSER LA PORTE Cet appareil peut être modifi é afi n que la porte puisse s'ouvrir de la gauche que de la droite, au choix. L'appareil vous est livré avec la porte s'ouvrant à la gauche. Si vous désirez inverser le sens d'ouverture de la porte, suivre les instructions ci-dessous : 1. -
Page 19: Instrucciones De Instalación
INSTRUCCIONES DE INSTALACIÓN IMPORTANTE Se recomienda que un profesional de instalación reconocido instale este artefacto siguiendo todos y cada uno de los estatutos municipales o códigos nacionales de seguridad para el área de instalación. ANTES DE USAR EL EQUIPO PARA HACER HIELO •... - Page 20 INSTRUCCIONES DE INSTALACIÓN ESPECIFICACIONES DE INSTALACIÓN - INCORPORADO HERRAMIENTAS NECESARIAS PARA SU SEGURIDAD: Durante la instalación, se deben usar guantes, gafas o anteojos de protección. Llave Destornillador inglesa plano Nivel Gafas de Linterna Guantes protección Escuadra de carpintero Cinta Conjunto de taladro y Destornillador métrica Phillips...
- Page 21 INSTRUCCIONES DE INSTALACIÓN CÓMO CONECTAR EL EQUIPO PARA HACER HIELO AL SUMINISTRO DE AGUA ADVERTENCIA PRECAUCIÓN Para evitar descargas eléctricas, que pueden No se recomienda el uso de tubos de plástico ya provocar la muerte o lesiones personales graves, que aumentan la posibilidad de pérdidas de agua. El desconecte el equipo para hacer hielo de la toma de fabricante no se responsabiliza ante ningún daño si se corriente antes de conectar una línea de suministro...
- Page 22 INSTRUCCIONES DE INSTALACIÓN UBICACIÓN DE LAS PIEZAS Fig.B 1. Cubeta de hielo: Almacena hielo. 2. Panel inferior del congelador: Separe el hielo y el agua innecesaria durante la fabricación de hielo. 3. Tuerca del drenaje (frente): Evita que el agua se drene por el frente.
- Page 23 INSTRUCCIONES DE INSTALACIÓN ADVERTENCIA Desconecte la unidad de la toma y asegúrese de que no haya agua cerca del equipo ni del panel del piso para evitar descargas eléctricas antes de continuar con los siguientes pasos. CÓMO CONECTAR EL EQUIPO PARA HACER HIELO AL DRENAJE Conexión del tubo de drenaje (la manguera de drenaje no viene incluida) •...
- Page 24 INSTRUCCIONES DE INSTALACIÓN CÓMO CONECTAR EL EQUIPO PARA HACER HIELO AL DRENAJE Tipo de drenaje Drenaje Altura del drenaje Instrucciones de operación Modo de drenaje • El exceso de • La altura del orifi cio Referencia Fig. C, D y E. constante agua drenará...
- Page 25 INSTRUCCIONES DE INSTALACIÓN CÓMO CONECTAR EL EQUIPO PARA HACER HIELO AL DRENAJE Tipo de dre- Drenaje Altura del drenaje Instrucciones de operación naje Modo de dre- • Drene manual- • No hay orifi cio de dre- Referencia Fig. B, C y D. naje manual mente el agua naje en el ambiente...
-
Page 26: Instrucciones De Instalación
INSTRUCCIONES DE INSTALACIÓN INSTRUCCIONES PARA CAMBIAR EL SENTIDO DE APERTURA DE LA PUERTA Se puede modifi car este artefacto para que la puerta abra hacia la izquierda o hacia la derecha. La unidad se envía con la apertura de la puerta hacia la izquierda. Si desea cambiar el sentido de apertura, siga las instrucciones a continuación: 1. - Page 27 NOTES / REMARQUES / NOTAS : __________________________________________________________________________________________ __________________________________________________________________________________________ __________________________________________________________________________________________ __________________________________________________________________________________________ __________________________________________________________________________________________ __________________________________________________________________________________________ __________________________________________________________________________________________ __________________________________________________________________________________________ __________________________________________________________________________________________ __________________________________________________________________________________________ __________________________________________________________________________________________ __________________________________________________________________________________________ __________________________________________________________________________________________ __________________________________________________________________________________________ __________________________________________________________________________________________ __________________________________________________________________________________________ __________________________________________________________________________________________ __________________________________________________________________________________________ __________________________________________________________________________________________ __________________________________________________________________________________________ __________________________________________________________________________________________ __________________________________________________________________________________________...
- Page 28 All repair parts available for purchase or special order when you visit your nearest service depot. To request service and/or the location of Model the service depot nearest you, call toll free. DIM32D1BSSPR When requesting service or ordering parts, always provide the follow- ing information: For service, contact your nearest service depot or call: Le numéro de modèle se trouve sur la plaque d’information sur la...
Need help?
Do you have a question about the DIM32D1BSSPR and is the answer not in the manual?
Questions and answers