Table of Contents
Advertisement
SERVICE
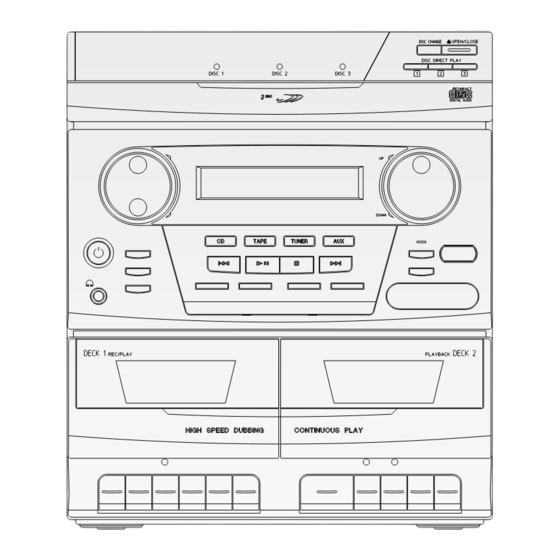
3CD CHANGER MINI COMPONENT
©
Samsung Electronics Co., Ltd. Dec. 1996.
3 CD CHANGER MINI
COMPONENT SYSTEM
MAX-445/455
Manual
11. Wiring Diagram
CONTENTS
Code No. AH68-20144A
Advertisement
Table of Contents

Related Manuals for Samsung MAX-445


Summary of Contents for Samsung MAX-445
- Page 1 4. Alignment and Adjustments 5. Special Circuit Descriptions 6. Troubleshooting 7. Exploded Views and Parts List 8. Electrical Parts List 9. Block Diagrams 10. PCB Diagrams 11. Wiring Diagram 12. Schematic Diagrams © Samsung Electronics Co., Ltd. Dec. 1996. Code No. AH68-20144A...
-
Page 2: Precautions
Examples: Handle brackets, Metal Part metal cabinets, screwheads and control shafts. The current measured should not Ohmmeter exceed 0.5 milliamp. Reverse the power- plug prongs in the AC outlet and repeat. Fig. 1-2 Insulation Resistance Test Samsung Electronics... -
Page 3: Specifications
Make sure that the 8. Always connect a test instrument's ground portion around the serviced part has not lead to the instrument chassis ground been damaged. before connecting the positive lead; always remove the instrument's ground lead last. Samsung Electronics... - Page 4 SCAN : Manufactured for Scandinavian KATSO SATEESEEN! Market. VARNING: OSYNLIG LASERSTRÅLNING NAR DENNA DEL AR OPPNAD OCH SPARREN AR URKOPPLAD BETRAKTA EJSTRÅLEN! Fig. 1-4 Warning Labels (Location: Disc Clamper, Inner Side of Unit Door or Nearby Unit Chassis ) Samsung Electronics...
- Page 5 6. After replacing the Pickup, reopen the Short Terminal. See diagrams below: THE UNIT (1) WRIST-STRAP CONDUCTIVE SHEET FOR GROUNDING short short short short terminal terminal terminal terminal SOH-A1 SOH94T4N SOH91CI(CAR,walkman) (CMS-V10,CMS-V30) SOH91VI(LDP) (CMS-V10,CMS-V30) Samsung Electronics...
- Page 6 2. Specifications Power source 230V 50Hz(Option) Power consumption 90W (MAX-445) General (Option) 150W (MAX-455) Dimensions (mm) 270(W) x 315(H) x 335(D) Power output (Option) 20W/CH(6Ω) (MAX-445) 40W/CH(6Ω) (MAX-455) Total harmonic distortion 0.5% Amplifier Frequency range 20Hz ~ 20kHz Signal to noise ratio...
-
Page 7: Disassembly And Reassembly
3. Disassembly and Reassembly 3-1 Cabinet-Top 1. Remove 11 screws holding the cabinet-top. 2. Lift the back of the cabinet-top and slide it to the rear to remove. (See arrow) OPTION OPTION Figure 3-1 Samsung Electronics... - Page 8 - Turn the gear clockwise using a screw driver as shown in Figure 3-2- 1. - Pull the Tray in the direction of arrow @ and then remove the Door in the direction of arrow # . 3. Remove 2 screws $ and lift the CD-MECHA. Figure 3-2-1 OPTION OPTION Figure 3-2 Samsung Electronics...
- Page 9 1. Remove 14 screws % and then lift the cabinet-rear ^ and slide it to rear to remove (see arrow). 2. Remove the Main-PCB & to rear. OPTION OPTION Figure 3-3 3-4 Cabinet-Front and Cabinet-Bottom 1. Remove 5 screws 2. Remove the cabinet-rear by pushing the "A" and "B" as shown. OPTION OPTION Figure 3-4 Samsung Electronics...
- Page 10 16 16 13 13 17 17 18 18 10 10 11 11 12 12 CD SUB PCB 14 14 19 19 20 20 21 21 TRAY DISC ASS'Y 15 15 HOOK CD MAIN PCB Figure 3-5 Samsung Electronics...
- Page 11 1. Remove the Lever-Lifter (9) from the Base-Main by releasing two hooks. 2. Remove four Rubber-CD (0) from the Lever-Lifter and then remove the Deck-CD (“). 3. Remove the Hook . 4. Remove the CD Main PCB with the soldering iron. Samsung Electronics...
- Page 12 * Align the Gear-cam with the gear-Tray as shown in Figure3-6, then mount the Tray-Disc. Gear-Tray Gear-Cover Gear-Cam Timming Point Gear-Cam Figure 3-6 * When assembling the Tray-Disc, take extreme care not to engage with Gear-Synchro. Gear-Synchro Insert Gear-Disc Figure 3-7 Samsung Electronics...
- Page 13 8. Remove the Gear(c) ( by pushing the hook. 9. Lift the Gear(b) ) . 10. Remove the Gear(a) 1 . 11. Remove 2 screws 2 and then remove the Feed-Motor 3 . 12. Remove the Chassis-Deck(M) 4. Figure 3-8 Samsung Electronics...
-
Page 14: Alignment And Adjustments
Figure 4-2 FM Auto Search Level Adjustment 60cm IFT1 AM(MW) I.F Adjustment OUTPUT SSG FREQ. 450KHz AM ANT Adjustment point AM I.F COIL Speaker Terminal AM SSG (IFT1) 450KHZ INPUT Maximum output(Figure 4-3) OUTPUT Oscilloscope VTVM Figure 4-3 AM I.F Adjustment SPEAKER JACK Samsung Electronics... - Page 15 Bias oscillation Figure 4-4 85KHz 3) Press Hi-SPEED JPT1 MTT5512 frequency button. in the DECK1. 4) Press RECORD button. VTVM Oscilloscope OUTPUT Speaker Frequency (GND) Terminal Counter Figure 4-5 REC PB Head Figure 4-4 AZIMUTH Adjustment Screw Figure 4-6 Samsung Electronics...
- Page 16 Raise NVR1702 and adjust the waveform so that its middle Set NVR1701 to 0mV. comes to GND of the oscilloscope (or until the upper half of waveform becomes symmetrical to the bottom half, A=B) Adjust NVR1704 (arrow) for normal sound. Samsung Electronics...
-
Page 17: Special Circuit Descriptions
The inverted input of FZC comparator is set to 5.7% of the difference between Vcc and VC(pin69) {{5.7% x (Vcc-Vc)}. Note : If the resistance connected to pin7 changes, the phase compensation peak of the focus tracking sled servos change. (The 'op-amp' dynamic range and offset voltage also change.) Samsung Electronics... - Page 18 TM5 or TM6 = 22µA, This current is inversely proportional to the resistor, variable within a range of t 5 to 40 µA for TM3. STOP is the ON/OFF detection signal for the limit SW (or the sled motor's innermost cirumference). Samsung Electronics...
-
Page 19: Troubleshooting
(pin no. 27 ; 5V) Front PCB When the power is Replace µ-com. ON 'H' displays at pin no. 5 ?(5V) Connect Front PCB and Main PCB. Check the Power PCB : P/T, FUSE Check the connector Main PCB. Wafer MCW2 Samsung Electronics... - Page 20 RC2,3 and RIC1. B+,B- circuits Confirm for TR short AQ103L,R Base B+ ? replace it. Is Mute selected ? Remove it with Remocon. Replace Headphone jack Headphone Jack short ? soldering condition. Check if the output line is short. Samsung Electronics...
- Page 21 1.7V 7.5V ? Replace LC72131 AM VT Check the LC72131 LC72131 pin 20 CONTROL ok? 0.9V 7V ? Check HIC1 pin 20 ? Check FEP interior LPF1,2 Check TDA7318 function ok? pattern, and any line output ok? disconnections. Samsung Electronics...
- Page 22 Connector inserted Reinsert the connector. correctly? Check Main-PCB Front PCB Check voltage : AC 4.8V connection and the voltage of at FRONT-PCB FLT? MCW2, pins1,2(AC4.8V) Check voltage at UIC1 Check the voltage of RD3(-30V) pin no. 48(-30V) Replace UIC1 Samsung Electronics...
- Page 23 2 R/P Deck : L Check for voltage at LC2 BIAS OSC Oscillate RECORD BIAS (85KHZ) Osc Frequency : 85kHz When inoperative : LQ4, LQ3 check Check for voltage at pin no.16,8 R/P Switching Convert of PLAY/RECORD Mode Pin no.16,8 Rec. PLAY Samsung Electronics...
- Page 24 Check Roulette Control Sensor Check oscillation of NXF100 Is Focus Search ok ? (16.9344MHZ) Does Laser function during Replace PICK UP Focus Search ? Check NIC9282 pin73 voltage Replace NIC9282 during Focus Search : 5V Replace NIC9220 or NIC9258 Samsung Electronics...
- Page 25 6-3-2 Audio Output Malfunction Malfunction of Audio Output Check voltage of NIC05 : 5V Replace NIC05 Check waveform of NIC9282 Check NIC9282 soldering pin no. 19,20 Replace NIC9270 Check waveform of NIC9270 Check NIC9270 soldering pin no. 9,12 Check Amp Samsung Electronics...
-
Page 26: Exploded Views And Parts List
10000-607-162 AH81-10025K REEL GEAR ASS’Y 11128-00045AA 10000-607-109 AH81-10026L BELT MAIN 59.7 PI X 1.0T 10000-607-159 AH81-10025T ARM-SENSOR 11102-00530AA 10000-607-117 AH81-10026H BELT SUB 34.7 PI X 1.0T 10000-607-156 AH81-10025M PAUSE LOCK CAM 11116-00011A 10000-607-111 AH81-10025U BUTTON KNOB 11133-00010AA 10000-607-128 Samsung Electronics... - Page 27 1851-05-03 A/S 10000-601-019 AH81-10023P T-CAM GEAR(R) 1851-06-02 10000-601-022 AH81-10023Q PINCH ROLLER(F) 1851-09-501 10000-601-054 AH81-10023R PINCH ROLLER(R) 1851-10-501 10000-601-055 AH81-10023S REEL ASS’Y 1851-11-501 10000-601-057 AH81-10023T LEAF SW MSW1290CV 10000-601-058 AH81-10023W FLY WHEEL ASS’Y 1851-12-501 10000-601-065 AH81-10023W MAIN BELT 1821-17-03 10000-601-066 Samsung Electronics...
- Page 28 Exploded Views and Parts List 7-2 Main Exploded View and Parts List ONLY MAX-455 OPTION OPTION OPTION OPTION OPTION Samsung Electronics...
- Page 29 AH64-10333B KNOB-DECK,FF ABS,94HB,BLK AH64-10334B KNOB-DECK,ST/EJ ABS,94HB,BLK AH64-10338C KNOB-DECK,PAUSE ABS,94HB,BLK OPTION AH64-10339B KNOB-DECK,PLAY.L ABS,94HB,BLK “ AH64-10336B KNOB-DECK MODE ABS,94HB,BLK “” AH64-10388B KNOB-DECK DIRECT ABS,94HB,BLK AH64-10646A KNOB-MIC ABS,94HB,BLK AH67-10081B LENS-SRS -,-,PMMA,T6.5 OPTION OPTION OPTION AH67-10083A LENS-SBS ,PMMA,-,-,MILKY AH67-10103A LENS-SKIP -,-,PMMA,-,-,TRP+T102 Samsung Electronics...
- Page 30 DECK-CD *CMS-A30NG6 AJ59-20003F DECK-CDP 16 16 13 13 17 17 18 18 10 10 11 11 12 12 CD SUB PCB 14 14 19 19 20 20 21 21 TRAY DISC ASS'Y 15 15 HOOK CD MAIN PCB Samsung Electronics...
- Page 31 AJ30-200013B PICK-UP CDP *SOH-AP P/U SOH-A1 ROW V-P/J AH61-60055A SPRING-T/TABLE CS STS-W PI0.4 D5.7 L9.3 CMS-V10N 12724-0062-00 AH31-10009A MOTOR-SPINDLE RF-310T-11400 43L 25V 85mA 16829-0004-00 AH31-10002B MOTOR-FEED RF-310TA 30MM NDM4RA3ETL 11.0MM 14769-057-250 AH60-10014A SCREW-PH(+M2*3) 17008-120-032 +M2X3 FE FZY W700 Samsung Electronics...
-
Page 32: Electrical Parts List
2001-000066 R-CARBON(S);10KOHM,5%,1/2W,AA,TP,2. 11018-377-103 IR10 2001-000117 R-CARBON(S);68OHM,5%,1/2W,AA,TP,2.4 11018-377-680 IR14L,14R 2001-000241 R-CARBON;1.5KOHM,5%,1/8W,AA,TP,1.8X 11018-877-152 BR3L,3R,HR10,CR7 2001-000273 R-CARBON;100KOHM,5%,1/8W,AA,TP,1.8X 11018-877-104 FR17 2001-000281 R-CARBON;100OHM,5%,1/8W,AA,TP,1.8X3 11018-877-101 BR4,5L,5R,HR42,43,JR15,27 2001-000290 R-CARBON;10KOHM,5%,1/8W,AA,TP,1.8X3 11018-877-103 CR6,15,20,HR23,JR37,AR130 SR1L,1R,35,37,JR17,29 LR4,6,IR13 2001-000331 R-CARBON;12KOHM,5%,1/8W,AA,TP,1.8X3 11018-877-123 RR16 2001-000411 R-CARBON;18KOHM,5%,1/8W,AA,TP,1.8X3 11018-877-183 FR5,HR4,CR10,ZR10,IR11 2001-000429 R-CARBON;1KOHM,5%,1/8W,AA,TP,1.8X3. 11018-877-102 BR6L,6R,10,11,HR2 Samsung Electronics... - Page 33 R-CARBON(S);4.7OHM,5%,1/2W,AA,TP,2. 11018-377-479 AR109 2003-000549 R-METAL OXIDE(S);2.2KOHM,5%,1W,AA,T 11048-477-222 AR107,114 2008-000121 R-FUSIBLE;100OHM,5%,1/4W,AA,TP,2.6X 11058-223-101 JSVR15L 2103-000171 VR-SEMI;10KOHM,30%,1/10W,TOP 11249-102-034 CVR1 2103-000341 VR-SEMI;2KOHM,30%,1/10W,TOP 11249-102-104 IVR1 2103-000492 VR-SEMI;5KOHM,30%,1/10W,TOP 11249-102-024 HC12 2201-000247 C-CERAMIC,DISC;15PF,5%,50V,NPO,4X3. 11407-057-150 IC34 2201-000260 C-CERAMIC,DISC;180PF,10%,50V,SL,4*4 11407-018-181 2201-000300 C-CERAMIC,DISC;1NF,20%,50V,Y5T,4X4, 11417-329-102 RC104 2201-000381 C-CERAMIC,DISC;22NF,20%,50V,Y5V,8.0 11417-344-223 Samsung Electronics...
- Page 34 2401-000240 C-AL;100UF,20%,10V,GP,6*11MM,5MM,TP 11608-102-104 CC10,AC110,RC15 2401-000303 C-AL;100UF,20%,25V,GP,6.3*11,2.5MM, 11608-104-104 IC3,14,13,JC23,CC2 2401-000419 C-AL;10UF,20%,16V,GP,5X11,5,- AC111 2401-000471 C-AL;10UF,20%,50V,BP,6X11MM,5MM,TP RC12,AC105,106 2401-000475 C-AL;10UF,20%,50V,GP,5*11,2MM, 11608-106-100 HC10 2401-000778 C-AL;220UF,20%,10V,GP,6.3X11,2.5MM, 11608-102-224 RC14,BC27,23 2401-000795 C-AL;220UF,20%,16V,GP,8X11.5,3.5MM, 2401-000871 C-AL;220UF,20%,50V,GP,10X16MM,5MM, 11609-402-300 CC1,BC17 2401-000907 C-AL;22UF,20%,16V,GP,5*11,2MM, 11608-103-223 JC17L,17R 2401-001019 C-AL;3.3UF,20%,50V,GP,4X7,1.5MM, HC4,JC9L,9R,14L,14R 2401-001022 C-AL;3.3UF,20%,50V,GP,5*11,2MM, 11608-106-332 Samsung Electronics...
- Page 35 12450-304-040 IFT1 AH26-10001E TRANS-IF;KS940228-09,-,-,7.6X12.0,- 12619-030-005 AH26-10002G TRANS-IF;IODT-N5002,BIAS-OSC,3.7MH, 12619-573-071 JL1L,1R AH26-10002Y COIL-TRAP;FB875-85A,BIAS-TRAP,35DB, 12429-306-113 IFT2 AH26-10020A TRANS-DET;-,7KLL,DET,-,7.8MM,91PF,1 AH39-50001H LEAD-FASTEN;RING,1007#24,100MM,BLK 13059-201-103 TO CHASSIS 3811-000389 WIRE-NO SHEATH CU;SPCW,300V,52.4MM, JTP1 AH61-40022A STUD-TAP;SPC1,T0.5,BT2,-,-, 13124-100-710 MIC PARTS(OPTION) MD01,02,03,04,1,2,4,5 0401-000101 DIODE-SWITCHING;1N4148,100V,200MA,5 MD50 MZD1 0403-000393 DIODE-ZENER;UZP5.1B,5.1V,4.8-5.4V,1 12169-403-330 Samsung Electronics...
- Page 36 AH61-40022A STUD-TAP;SPC1,T0.5,BT2,-,-, 13124-100-710 MIC-WIRE AH65-30013A CLAMP-CORD;,-,DALA-2,-, 16634-517-300 SRS PARTS(OPTION) 0401-000101 DIODE-SWITCHING;1N4148,100V,200MA,5 0504-000121 TR-DIGITAL;KSR1007,NPN,300MW,22K-47 12159-301-800 SQ1,2 0504-000148 TR-DIGITAL;KSR2007,PNP,300MW,22K-47 12149-301-150 SIC3 1001-000111 IC-ANALOG SWITCH;GD4066B,BILATERAL SIC2 1201-000463 IC-OP AMP;074,SOP,14P,196MIL,SINGLE SR10 2001-000008 R-CARBON;15KOHM,5%,1/8W,AA,TP,1.8X3 11018-877-153 SR6,11 2001-000010 R-CARBON;68KOHM,5%,1/8W,AA,TP,1.8X3 11018-877-683 SR14 2001-000241 R-CARBON;1.5KOHM,5%,1/8W,AA,TP,1.8X 11018-877-152 Samsung Electronics...
- Page 37 11018-877-823 SC14 2202-000807 C-CERAMIC,MLC-AXIAL;22NF,+80-20%,25 11448-010-223 SC22 2301-000442 C-FILM,PEF;4.7NF,10%,50V,5.5X7X3MM, SC2,3 2401-001887 C-AL;100NF,20%,50V,-,4X7MM,5,TP SC4,5 2401-001919 C-AL;2.2UF,20%,50V,-,4X7MM,5,TP SC11 2401-001968 C-AL;470NF,20%,50V,GP,5X11MM,5,TP USE ONLY MAX-445(POWER AMP PARTS) RD14,15 0402-000151 DIODE-RECTIFIER;1N5392,100V,1.5A,DO 12169-201-140 AIC101 1201-000327 IC-POWER AMP;4121,SIP,18P,-,-,-,PLA 12119-208-500 RR13,14 2001-000020 R-CARBON(S);22OHM,5%,1/2W,AA,TP,2.4 11018-377-220 2001-000062 R-CARBON;470OHM,5%,1/4W,AA,TP,2.4X6 11018-277-471 AR125L,125R 2001-000449 R-CARBON;2.2KOHM,5%,1/8W,AA,TP,1.8X...
- Page 38 R-CARBON;22KOHM,5%,1/8W,AA,TP,1.8X3 2201-000223 C-CERAMIC,DISC;12PF,5%,50V,NPO, AC116L,116R 2201-000381 C-CERAMIC,DISC;22NF,20%,50V,Y5V,8.0 AC115L,115R,116L,116R 2201-000547 C-CERAMIC,DISC;4.7NF,20%,500V,Y5T, AC117L,117R 2201-000783 C-CERAMIC,DISC;100NF,+80%,-20%,50V AC122,123 2202-000796 C-CERAMIC,MLC-AXIAL;1NF,10%,50V,Y5P BC26 2301-000411 C-FILM,PEF;220NF,5%,50V,-,-,BK TUNER LOCATION-N 2401-001975 C-AL;47UF,20%,16V,GP,5X11MM AJW1,2 2701-000111 INDUCTOR-AXIAL;100UH,10%,2.5X3.4MM ICF2,3 2903-000102 FILTER-CERAMIC;BP,10.7MHZ+-25KHZ 3716-000198 TERMINAL-BLOCK;NON SOLDER,3P,4MM AH27-10001K COIL-CHOKE;10MH,K,Q10,-,-,CL-3 AH27-80060B COIL-OSC;RBQ-07VB,393UH,MW/LW-RF AL101L.101R,RJW36,37 AH27-90001A COIL-SPRING;2.2UH,-,-,SPRING Samsung Electronics...
- Page 39 UR21,31 2001-000924 R-CARBON;680OHM,5%,1/8W,AA,TP,1.8X3 11018-877-681 UR22,23,32,33 2001-000995 R-CARBON;820OHM,5%,1/8W,AA,TP,1.8X3 11018-877-821 UC13,14 2201-000247 C-CERAMIC,DISC;15PF,5%,50V,NPO,4X3. 11407-057-150 UC7,8 2201-000423 C-CERAMIC,DISC;27PF,5%,50V,NPO,5.0X 11407-057-270 UC2,11,12,15,22,24,9 2201-000565 C-CERAMIC,DISC;47nF,20%,50V,Y5V,12. 11417-344-473 UC32,33,35,36,37,38,39 2202-000807 C-CERAMIC,MLC-AXIAL;22NF,+80-20%,25 11448-010-223 UC10,40 2401-000240 C-AL;100UF,20%,10V,GP,6*11MM,5MM,TP 11608-102-104 2401-000778 C-AL;220UF,20%,10V,GP,6.3X11,2.5MM, 11608-102-224 UC20 2401-001572 C-AL;47UF,20%,50V,GP,6.3*11,2.5MM, 11608-106-470 UC21,23 2401-001904 C-AL;10UF,20%,16V,-,4X7MM,5,TP Samsung Electronics...
- Page 40 RF1(OPTION) 3601-000304 FUSE-FERRULE;250V,630MA,TIME LAG,GL 14709-241-160 RF2(OPTION) 3601-000162 FUSE-FERRULE;250V,1.25A TIME LAG,GL RF1(OPTION) 3602-000147 FUSE-CLIP;250V,7.5A,30MOHM 13164-101-913 P/T(OPTION) AH26-80140C TRANS-POWER;EI66X45,115/230V,60/50H P/T(OPTION) AH26-80140U TRANS-POWER;EI66X45,110/220V 60/50HZ POWER-CORD(OPTION) AH39-10002L POWER CORD;CP2,KLCE-2F,2.15M,5239,V A6006-0187 POWER-CORD(OPTION) AH39-10002F POWER-CORD;BS,GTBS-2F,2.5M,5239,BS POWER-CORD(OPTION) AH39-10001S POWER-CORD;EP2,STP#2/18,2M,SOLDERING VSW1(OPTION) 3408-000163 SWITCH-SLIDE;250V,3A,SPDT VSW1(OPTION) 3408-000165 SWITCH-SLIDE;250V,3A,SPDT Samsung Electronics...
- Page 41 A6010-0388 RCW2 3711-000814 CONNECTOR-HEADER;BOX,2P,1R,2.5MM,AN 13349-511-573 PL1,2 AH27-10001F COIL-CHOKE;27UH,K,Q30,-,-,DR(6.5*7. 12429-010-330 RF2(OPTION) 3601-000248 FUSE-FERRULE;250V,2A,TIME LAG,GLASS RF1(OPTION) 3601-000207 FUSE-FERRULE;250V,1A,TIME LAG,GLASS 14709-241-200 RF1(OPTION) 3602-000147 FUSE-CLIP;250V,7.5A,30MOHM 13164-101-913 P/T(OPTION) AH26-80140D TRANS-POWER;EI74X52,220V,60/50HZ,MA POWER-CORD(OPTION) AH39-10002L POWER CORD;CP2,KLCE-2F,2.15M,5239,V A6006-0187 P/T(OPTION) AH26-80141C TRANS-POWER ; EI74X52 115/230V 60/50HZ 8-10 Samsung Electronics...
- Page 42 C-CERAMIC,CHIP;100NF,+80-20%,50V,Z5 NC603 NC205,110,116,102,103 2203-000260 C-CERAMIC,CHIP;10NF,10%,50V,X7R,201 11129-004-103 43R,44L,500,600,601,602 NC1000,1001 2203-000363 C-CERAMIC,CHIP;150PF,5%,50V,NPO,201 NC112 2203-000495 C-CERAMIC,CHIP;2.2NF,10%,50V,X7R,20 11129-004-222 NC118 2203-000787 C-CERAMIC,CHIP;330PF,5%,50V,NPO,201 NC113,125,101 2203-000802 C-CERAMIC,CHIP;33NF,10%,50V,X7R,201 11129-001-333 NC100 2203-000892 C-CERAMIC,CHIP;4.7NF,10%,50V,X7R,20 NC204,124 2203-000919 C-CERAMIC,CHIP;470NF,+80-20%,16V,Y5 NC200 2203-000979 C-CERAMIC,CHIP;47NF,10%,50V,X7R,201 NC2000 2203-001026 C-CERAMIC,CHIP;4PF,0.25PF,50V,SL,20 NC45R,46L 2203-001058 C-CERAMIC,CHIP;560PF,5%,50V,NPO,201 11129-019-561 Samsung Electronics 8-11...
- Page 43 2401-000795 C-AL;220UF,20%,16V,GP,8X11.5,3.5MM, SC10 2401-001912 C-AL;1UF,20%,50V,GP,5X11MM,2MM,BK 2701-000177 INDUCTOR-AXIAL;33UH,10%,2.5X3.4MM 12429-211-330 SCW2 3708-000507 CONNECTOR-FPC/FC/PIC;12P,1.25MM,ANG 3708-001131 CONNECTOR-FPC/FC/PIC;5P,1.25MM,STRA SCW1 3711-002579 CONNECTOR-HEADER;WALL,22P,1R,2.5MM, 3711-003379 CONNECTOR-HEADER;NOWALL,3P,1R,2.5MM SIC3 AC14-12001G IC;KA78L05,T,- SCW4 AH39-20025S LEAD-CONNECTOR,ASSY;-,51004-08,3502 16439-0291-00 SCW3 AH39-20025T LEAD-CONNECTOR,ASSY;-,51004-08,3502 16439-0292-00 SCW5 3708-001131 CONNECTOR-FPC/FC/P/C;5P,1.25MM STRAIGHT SCW6 3711-003379 CONNECTOR-HEADER; NOWALL,3P,1R,2.5MM 8-12 Samsung Electronics...
-
Page 45: Block Diagrams
9. Block Diagrams 9-1 Main Samsung Electronics... - Page 46 Block Diagrams 9-2 CD Samsung Electronics...
- Page 47 SENS SCOR INTERRUPT REMO REMOCON INPUT DISC2 DISC2 LED DISC3 DISC3 LED VFD CONTROL " " " " " " " " " " " " " +5.6V VDVP -30V VFD PINCH OFF VOLTAGE S 16 VFD CONTROL Samsung Electronics...
- Page 48 CLOSE CLOSE SW CE 23 NJU3713(OPTION) CE CE 22 NJU3713 CE DISC1 DISC 1 LED 1 SYNC REC-IN (CD-SYNC) CE 21 M65840 (KEY CON) LATCH DO 2 P5 0 NJU3713, NJU3713 (O) CLK 2 P5 1 NJU3713, NJU3713(O) Samsung Electronics...
- Page 49 TUNER TAPE NJU3713 : UIC3 (ECHO, KEY+CON OPTION) Description Name LED : VOICE CANCEL LED : "b" LED : "#" LED : ECHO ON/OFF SW B, C (M62453) SW A (M62453) ECHO CE DATA RESET DOUBLE EMPHA SEL3 Samsung Electronics...
- Page 50 BA3950 : RIC1 M65840 : EIC1 (OPTION KEY+CON) HPFIN HPFOUT TEST1 TEST2 TEST3 XOUT MIXIN MIXOUT CLOCK LPF2 LPF1 LOGIC D/A1 D/A2 LPF1IN ADINTIN ADCONT CLOCK DA1NTIN DA1CCNT DA2INTOUT LPF2IN LPF2OUT LPF1OUT ADINTOUT STROBE DATA DA1INTOUT DA2INTIN DA2CONT Samsung Electronics...
- Page 51 Block Diagrams NJU3713 : UIC2, UIC3 (OPTION) DATA Controller Circuit MC14066 : SIC3 IN/OUT1 OUT/IN1 CONT1 OUT/IN2 CONT4 IN/OUT4 IN/OUT2 CONT2 OUT/IN4 CONT3 OUT/IN3 IN/OUT3 Samsung Electronics...
- Page 52 REC IN(1) 100K 100K PB IN(1) PB GND MUTE NF(1) IN(1) OUT(1) STK4121V (20W) : AIC101 STK4141V (40W) (OPTION) TR18 TR17 TR21 TR19 TR14 TR22 TR15 TR20 D3 TR23 TR10 D2 TR16 TR24 TR11 TR12 TR13 8 9 101314 Samsung Electronics...
- Page 53 Block Diagrams M62453SP : MIC1 (MIC OPTION) 2.16K 2.16K Switch Control 100K LA1836 : IIC1 DECODER RF AMF STERO DUFF STEREO DRIVE TRIG MUTE SMFT AM/FM COMP PILOT LEVEL AM/FM BUFF S-CURVE TUNING PHASE DET DRIVE Samsung Electronics...
- Page 54 ON OFF MODE SEL VOL SEL L P F D / A MICMIX SW V O L 16kSRAM PHASE SEL PHASE L O G I C MODE SEL C L K L P F A / D Samsung Electronics 9-10...
- Page 55 * NOTE : KSB564 ='EBC' TYPE 1 2 3 LB1641/BA6209(MOTOR DRIVER) : SIC1, SIC2,SIC3, NIC1641 LB1641/BA6209 VCC2 OUT1 OUT2 VCC1 8 10 Input logic circuit LB1641 KA9258 : NIC9258 LEVEL SHIFT LEVEL T S D SHIFT REGULATOR MUTE LEVEL LEVEL SHIFT SHIFT Samsung Electronics 9-11...
- Page 56 FSCH & COMPARATOR ARC AMP FDFCT FOCUS ERROR AMP RF AMP LDON FSEO 65 66 67 78 70 71 75 74 69 73 74 76 62 61 68 79 80 1 33 57 56 19 18 17 9-12 Samsung Electronics...
- Page 57 3RAM ADDRESS LOCK GENERATOR X' TAL XOUT TIMING GENERATOR INTERPOLATE X' TAL C P U MDAT TIMING INTERFACE GENERATOR MCK 38 DIGITAL FILTER (BFS) TRCNT /ISTAT VREFH2 VREFH1 D A C VREFL1 MODE DIGITAL SELECTOR OUTPUT VREFL1 Samsung Electronics 9-13...
-
Page 58: Pcb Diagrams
10. PCB Diagrams 10-1 Main Samsung Electronics 10-1... - Page 59 PCB Diagrams 10-2 Samsung Electronics...
- Page 60 PCB Diagrams 10-2 Front Samsung Electronics 10-3...
- Page 61 PCB Diagrams 10-3 Only MAX-445 Power 10-4 Only MAX-455 Power 10-4 Samsung Electronics...
- Page 62 PCB Diagrams 10-5 CD 10-5-1 Top View 10-5-2 Bottom View Samsung Electronics 10-5...
- Page 63 PCB Diagrams 10-5-3 CD SUB 10-6 Samsung Electronics...
- Page 64 PCB Diagrams 10-3 Only MAX-445 Power 10-4 Only MAX-455 Power 10-4 Samsung Electronics...
-
Page 65: Schematic Diagrams
12. Schematic Diagrams 12-1 Main MIC1 AIC102 AIC101 BIC1 EIC1 ZIC1 MIC2 ZIC1 SIC2 RIC1 Samsung Electronics 12-1... - Page 66 Schematic Diagrams 12-2 Front 12-2 Samsung Electronics...
- Page 67 Schematic Diagrams 12-3 CD NIC9270 NIC9220 NIC9282 NIC9258 FIC01 NIC1641/SIC2 SIC1 LB1641 Samsung Electronics 12-3...
Need help?
Do you have a question about the MAX-445 and is the answer not in the manual?
Questions and answers