Advertisement
Quick Links
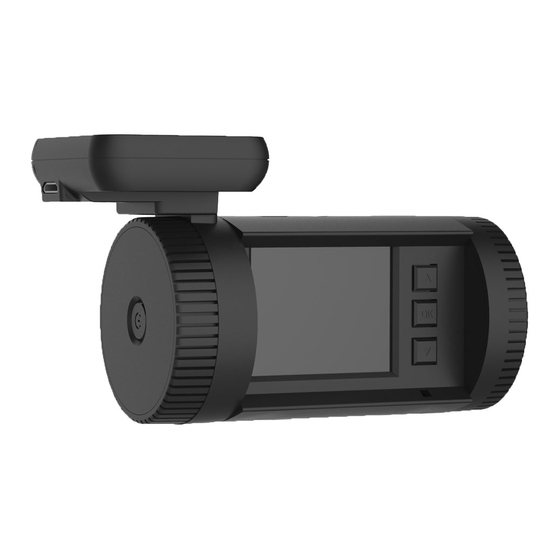
Mini 0826 Super HD 1296P Dash Camera
Our Web Site:
www.combi.org.uk
User Manual
Ambarella A7
Please read this manual carefully before using this product.
Please get this manual well-kept for future reference.
Please use it correctly based on a full understanding of the manual
Advertisement

Related Manuals for Mini 0826


Summary of Contents for Mini 0826
- Page 1 Mini 0826 Super HD 1296P Dash Camera Our Web Site: www.combi.org.uk User Manual Ambarella A7 Please read this manual carefully before using this product. Please get this manual well-kept for future reference. Please use it correctly based on a full understanding of the manual...
- Page 2 Preface Precautions General precautions Do not expose this product to dusty, dirty or sandy areas to reduce the risk of · damaging components. · Do not expose the camera to high temperature. High temperature may shorten the life span of electronic device, damage the battery and wind or melt specific plastic parts.
- Page 3 · Do not operate or expose the camcorder under following condition: —Direct sunlight area —High temperature or dusty area —Near air conditioner or heaters or any other extreme temperature area —In a closure car, especially parking in direct sunlight —Violent vibration area 1 Brief Introduction of the Dash Camera The features and functions are introduced in this chapter.
- Page 4 1. GPS tracker box also GPU (bracket), 3M sticker put here and then stick to car front window.If no GPS, it is as a bracket only 2. USB port 3. AV port 4.Up button / Menu / Mute hot button 5.
- Page 5 Light indicator: Red, charging / Blue, stand by / Blue flashing, recording Operation Read this chapter to know how to operate the camera. 2.1 Inserting a TF card Inserting a TF card into the camera provides more space to store videos, images or other files.
- Page 6 2.3 Take a picture Taking a still picture 1. On recording, long press "OK" button and take a picture 2. On stand by, long press "OK" button and take a picture 2.4 Reviewing the pictures 1. Long press "Down" button and into Movie reviewing, then long press "Down" button again that you can review the pictures.
- Page 7 2.5.3 Loop recording setting Off/1minutes/3minutes/5minutes 1. off mode a. The device can not record automatically and can not record by recycled b. Maximum length of each recorded video file is 3.66G. When it reaches the maximum, the recording is automatically split and saved as another file c.
- Page 8 2. EV:0/-0.3/-0.7/-1.0/-1.3/-1.7/-2.0/+2.0/+1.7/+1.3/+1.0+0.7/+0.3 3. Flicker: 50/60Hz Use this function to set the flicker frequency in your area. 4. Lens: wide angle 135 degree+6G 5. White Balance This item is for correction in different colors under different light conditions. When the white balance is set as Auto, the camcorder compensates different light conditions automatically.
- Page 9 17. Language: English/Russian/Chinese 18. Default setting : Yes/No This function will restore all the settings to the factory defaults. 19.Format: Yes/No (Please format micro SD card at first use, and format micro SD card regularly to avoid storage problems. ) Use this function to Format the storage medium.
- Page 10 Plug in the GPS module to the DVR, satellite searching will be start automatically. 2. When GPS signal is located, will be showed on the display. 3. When taking picture in Camera mode, location will be recorded automatically. 2.6 Review/playing your video files 1.
- Page 11 Attention: When connected to HDTV, shuttering, recording and taping are not available! 3.0 Recording Mode This mode is for recording a video or tacking picture file. The files are saved into TF card. 3.1 Some icons meaning Record Mode: About the indication of each icon and symbol, see the table below. Video Mode Battery TF Card...
- Page 12 Using Play back mode to display all the video files saved in the DVR. About the indication of each icon and symbol, see the table below 000:00:15 Playback time Play Battery Pause 3.3 USB mode You can use USB mode to connect with the host PC. ((Effective under recording settings off)) When the camera is connected with the host PC, it appears as a removable disk in the Windows explorer.
- Page 13 Attention:To unlock the files, repeat the steps above. After being unlocked, no files are with .; under Loop record setting, the previous file is not protected ,protects only the last cycle recorded file. 4.2 When recording (SOS) Press “DOWN” button and the current file will be save and lock and can not be deleted.
- Page 14 Videos Format:H.264 (MOV) Resolution:2560*1080 30P 21:9 / 2304*1296 30P 16:9 / 1920*1080 45P 16:9 / 1920*1080 30P 16:9 / HDR 1920*1080 30P 16:9 / 1280*720 60P 16:9 / 1280*720 30P 16:9 / 1296*1080 60P (only A7LA70 have, optional) Quality:Auto Audio Built-in microphone/ speaker Tape White Balance...
- Page 15 Troubleshooting Question Possible reasons Solutions The camcorder is Auto Off Function ·Turn on again the camera suddenly turned off is On. Charge battery Low battery Captured images Power is off before Charge battery are not saved into images memory saved. Memory card can Memory card...
- Page 16 Name Quantity Name Quantity Camera 1 piece Car Adapter 1 piece USB cable 1 piece 3M sticker 4 pieces Cable Clip 1 bag User Manual 1 piece Film 1 piece Lens Cleaning 1 piece Cloth optional GPS mount optional CPU (mount) optional Hardwire Kits optional...
- Page 17 However, we can not guarantee that all the content is correct without any errors. If there is a difference between the manual and camera, please take the camera as standard. We keep the right to change content or technical regulations without informing you beforehand.
Need help?
Do you have a question about the 0826 and is the answer not in the manual?
Questions and answers