Table of Contents
Advertisement
Advertisement
Table of Contents

Subscribe to Our Youtube Channel
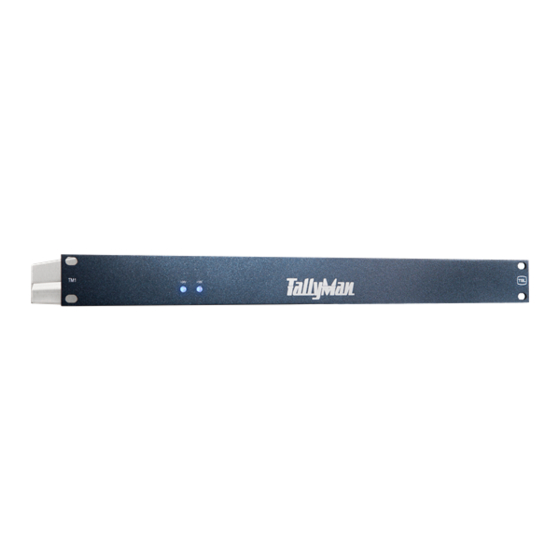
Summary of Contents for TSL Tallyman TM1
- Page 1 Tallyman Controller Installation Manual TallyMan V1.81 on | Introduction...
-
Page 2: Table Of Contents
Contents Introduction ............................4 Installation .............................. 5 TM1 ..............................5 Connections ............................ 5 Pin out details ..........................6 Default IP ............................10 Initial setup ........................... 10 TM2 ..............................13 Connections ..........................13 Pin out details ..........................14 Default IP ............................18 Initial setup ........................... - Page 3 EC Declaration of conformity ......................42 Warranty, Maintenance and Repair ..................... 43 Failure during warranty ........................43 Technical support information ......................43 TSL Returns Procedure ........................43 Fault report details required ......................43 Packing ............................43 TallyMan V1.81 on | Introduction...
-
Page 4: Introduction
The following document covers installation of the TSL Tallyman controllers TM1, TM2, TM2+ and TMC-1. The TSL tally system consists of a number of displays, either discrete modules or Multiviewers / IMD (In-Picture-Display); controlled by a 19” 1RU remotely located TallyMan Controller. -
Page 5: Installation
Installation The TallyMan controller should be installed in a standard 19” rack with good ventilation, no other special precautions need be taken, further information regarding earthing, mounting, power etc may be found in the Safety section. Connections Tally 1 This is for the parallel tallies. 1 – 32 Tally 2 This is for the parallel tallies 33 –... -
Page 6: Pin Out Details
Pin out details Ethernet The cable required to connect the TM1 controller with the configuring computer is as follows: Signal Name RJ-45 Ethernet Pin Crossover Cable Numbers Pinouts TX + TX - RX + EPWR + Power EPWR + Power RX - EPWR - Power EPWR - Power... - Page 7 Control Ports Control ports 1 and 2 – Serial RS422 Pin Numbers Signal Pin Numbers Signal 0v/Chassis Control Port 3 – Serial RS232 (Maintenance port) Pin Numbers Signal Pin Numbers Signal Control Port 4 - Serial RS422 Display Ports RJ45 DISPLAY CONNECTORS +24v +24v The Display ports are wired pin to pin, all 8 display ports are paralleled and are addressed as port 4.
- Page 8 Parallel Tally connectors TALLY 1 & 2 INPUT/OUTPUT CONNECTORS D37 SOCKET TALLY 1 TALLY 20 TALLY 2 TALLY 21 TALLY 3 TALLY 22 TALLY 4 TALLY 23 TALLY 5 TALLY 24 TALLY 6 TALLY 25 TALLY 7 TALLY 26 TALLY 8 TALLY 27 TALLY 9 TALLY 28...
- Page 9 Tally inputs A ground or 0V to the pin is required to activate a tally input. The common or ground connection is connected to pin 36. Tally outputs Tally outputs consist of open collector driver circuits. Common (ground) appears on pin 36. The circuit is capable of sinking approximately 150mAto ground to activate relays etc.
-
Page 10: Default Ip
Default IP The default IP parameters of TSL Tallyman controllers are: IP Address: 192.168.205.121 Subnet Mask: 255.255.255.0 Connection for configuration purposes is via a PC running TallyMan, available for download from the TSL website www.TSL.co.uk Initial setup Connect a PC running a terminal program (Hyper terminal/Putty/Tera Term Pro for example) to the Maintenance Port, Port 3 on the TallyMan controller. - Page 11 Start HyperTerminal and then power up the TM1 and wait for about 10 seconds. Press Y on the keyboard within 1 sec of the message appearing. Follow the on-screen instruction Pressing S or Enter on the PC’s keyboard will set the TallyMan units as the Main Unit •...
- Page 12 Back to Top ^ TallyMan V1.81 on | Installation...
-
Page 13: Tm2
The TallyMan controller should be installed in a standard 19” rack with good ventilation, no other special precautions need be taken, further information regarding earthing, mounting, power etc may be found in the Safety section. Connections Tally 1 This is for the parallel tallies. 1 –... -
Page 14: Pin Out Details
Pin out details Ethernet The cable required to connect the TM2 controller with the configuring computer is as follows: Signal Name RJ-45 Ethernet Pin Crossover Cable Numbers Pinouts TX + TX - RX + EPWR + Power EPWR + Power RX - EPWR - Power EPWR - Power... - Page 15 Control Ports Control ports 1,2,5,6 & 7 – Serial RS422 Pin Numbers Signal Pin Numbers Signal 0v/Chassis Control Port 3 – Serial RS232 (Maintenance port) Pin Numbers Signal Pin Numbers Signal Control Port 4 - Serial RS422 Display Ports RJ45 DISPLAY CONNECTORS +24v +24v The Display ports are wired pin to pin, all 8 display ports are paralleled and are addressed as port 4.
- Page 16 Parallel Tally connectors TALLY 1,2,3 & 4 INPUT/OUTPUT CONNECTORS D37 SOCKET TALLY 1 TALLY 20 TALLY 2 TALLY 21 TALLY 3 TALLY 22 TALLY 4 TALLY 23 TALLY 5 TALLY 24 TALLY 6 TALLY 25 TALLY 7 TALLY 26 TALLY 8 TALLY 27 TALLY 9 TALLY 28...
- Page 17 Tally inputs To activate a Tally input, pull the relevant pin to ground or 0V. The common or ground connection is connected to pin 36. Tally outputs Tally outputs consist of open collector driver circuits. Common (ground) appears on pin 36. The circuit is capable of sinking approximately 150mAto ground to activate relays etc.
-
Page 18: Default Ip
Default IP The default IP parameters of TSL Tallyman controllers are: IP Address: 192.168.205.121 Subnet Mask: 255.255.255.0 Connection for configuration purposes is via a PC running TallyMan, available for download from the TSL website www.TSL.co.uk Initial setup Connect a PC running a terminal program (Hyper terminal/Putty/Tera Term Pro for example) to the Maintenance Port, Port 3 on the TallyMan controller. - Page 19 Start HyperTerminal and then power up the TM2 and wait for about 10 secs. Press Y on the keyboard within 1 sec of the message appearing. Follow the on-screen instruction Pressing S or Enter on the PC’s keyboard will set the TallyMan units as the Main Unit •...
- Page 20 Back to Top ^ TallyMan V1.81 on | Installation...
-
Page 21: Tm2
TM2+ The TallyMan controller should be installed in a standard 19” rack with good ventilation, no other special precautions need be taken, further information regarding earthing, mounting, power etc may be found in the Safety section. Connections Tally 1 This is for the parallel input tallies. 1 –... -
Page 22: Pin Out Details
Pin out details Ethernet The cable required to connect the TM2+ controller with the configuring computer is as follows: Signal Name RJ-45 Ethernet Pin Crossover Cable Numbers Pinouts TX + TX - RX + EPWR + Power EPWR + Power RX - EPWR - Power EPWR - Power... - Page 23 Control Ports Control ports 1,2,5,6, 7 & 8 – Serial RS422 Pin Numbers Signal Pin Numbers Signal 0v/Chassis Control Port 3 – Serial RS232 (Maintenance port) Pin Numbers Signal Pin Numbers Signal Control Port 4 - Serial RS422 Display Ports RJ45 DISPLAY CONNECTORS +24v +24v...
- Page 24 Parallel Tally connectors Parallel (GPI) tallies are connected directly to the Tally 1, 2, 3 & 4 D37 connectors on the TM2+ controller. Tally inputs To activate a tally input, pull the relevant pin to ground or 0V. The common or ground connection is connected to pin 36.
- Page 25 Tally outputs The Tally Outputs consist of isolated relay contact pairs. Current loading is rated at 0.5A at 125 VAC, 1A at 24 VDC, non-inductive. Common (ground) appears on Pin 36. The example below demonstrates the circuit required for Tally 33 on the Tally 2 D37 connector, Tally 34 uses pins 3 + 4, Tally out 35 uses pins 5 + 6.
- Page 26 TALLY 3 OUTPUT CONNECTOR D37 SOCKET TALLY 49 TALLY 58 TALLY 49 TALLY 59 TALLY 50 TALLY 59 TALLY 50 TALLY 60 TALLY 51 TALLY 60 TALLY 51 TALLY 61 TALLY 52 TALLY 61 TALLY 52 TALLY 62 TALLY 53 TALLY 62 TALLY 53 TALLY 63...
- Page 27 Notes: Pin 34 carries a +12 V, or from Serial Number: 66200 +24V supply rated at 0.5A. Do not use this internal +12V for relay coil supply. Pin 35 LK1 on the internal EAB2 cards is set for the pull-up resistors to be referenced to normally + 5V or, by changing the link to positions Centre/Ext, an external voltage reference applied to Pin 35 on the D37 connector.
-
Page 28: Default Ip
Default IP The default IP parameters of TSL Tallyman controllers are: IP Address: 192.168.205.121 Subnet Mask: 255.255.255.0 Connection for configuration purposes is via a PC running TallyMan, available for download from the TSL website www.TSL.co.uk Initial setup Connect a PC running a terminal program (Hyper terminal/Putty/Tera Term Pro for example) to the Maintenance Port, Port 3 on the TallyMan controller. - Page 29 Start HyperTerminal and then power up the TM2+ and wait for about 10 secs. Press Y on the keyboard within 1 sec of the message appearing. Follow the on-screen instruction Pressing S or Enter on the PC’s keyboard will set the TallyMan units as the Main Unit •...
- Page 30 TM2+ Back to Top ^ TallyMan V1.81 on | Installation...
-
Page 31: Tmc-1
TMC-1 The TallyMan controller should be installed in a standard 19” rack with good ventilation, no other special precautions need be taken, further information regarding earthing, mounting, power etc may be found in the Safety section. Connections Control 1 RS422 – User Assignable. Used for Mixer/Router/Multiviewer connection Control 2 RS422 –... -
Page 32: Pin Out Details
Pin out details Ethernet The cable required to connect the TMC-1 controller with the configuring computer is as follows: Signal Name RJ-45 Ethernet Pin Crossover Cable Numbers Pinouts TX + TX - RX + EPWR + Power EPWR + Power RX - EPWR - Power EPWR - Power... - Page 33 Different expansion cards have been used over time dependant upon customer demand and availability. The information booklet for the expansion card fitted to your units will be included with your TMC. If you no longer have the information booklet please contact support@tsl.co.uk with the serial number of your TMC for details.
-
Page 34: Default Ip
Default IP The default IP parameters of TSL Tallyman controllers are: IP Address: 192.168.205.121 Subnet Mask: 255.255.255.0 Connection for configuration purposes is via a PC running TallyMan, available for download from the TSL website www.TSL.co.uk Initial setup Connect a monitor, keyboard and mouse to the VGA and USB ports respectively. -
Page 35: Specification
Specification Internal Power Supply Specification In the event of a failure the faulty item should be returned to TSL for replacement. The user should not attempt any repairs as this voids the PSU manufacturer’s three year warranty. Specifications Manufacturer’s Specification... -
Page 36: Tm2
Internal Power Supply Specification This is a MeanWell SP-300 Series unit. In the event of a failure the faulty item should be returned to TSL for replacement. The user should not attempt any repairs as this voids the PSU manufacturer’s warranty. - Page 37 TallyMan V1.81 on | Specification...
-
Page 38: Tm2
Internal Power Supply Specification This is a MeanWell SP-300 Series unit. In the event of a failure the faulty item should be returned to TSL for replacement. The user should not attempt any repairs as this voids the PSU manufacturer’s warranty. -
Page 39: Tmc-1
R1V-2275V power modules and one R1V2-5275V4H power system frame. In the event of a failure the faulty item should be returned to TSL for replacement. The user should not attempt any repairs as this voids the PSU manufacturer’s warranty. -
Page 40: Motherboard
Motherboard Supplier – Impulse Corp UK Part number – SBC81205VGG Part number - Intel Core 2 Duo E7400 - 2.8Ghz 3Mb Cache 1066 FSB, Dual Core Processor, 775 Socket Memory Specification - 2GB, DDR2 SDRAM , 240 pin DIMM, 1.8V Supplier –... -
Page 41: Safety
Safety Installation Unless otherwise stated TSL equipment may be installed at any angle or position within an operating temperature range of 5 ~ 25 degrees C. The RJ45 connectors are for use only with TSL UMD equipment. All TSL equipment conforms to the EC Low Voltage Directive: EC Low Voltage Directive (73/23/EEC) (OJ L76 26.3.73) (LVD). -
Page 42: Ec Declaration Of Conformity
EC Declaration of conformity EC DECLARATION OF CONFORMITY Application of Council Directives Nos: EC Low Voltage Directive (73/23/EEC)(OJ L76 26.3.73)(LVD). Amendment: (93/68/EEC) (OJ L220 30.8.93). Conformity Standards Declared: EN 60950 EMC Directive: 89/336/EEC, Amended 92/31/EEC. Conformity Standards Declared: EN 50081-1, EN 50082-1 Manufacturer’s Name: Television Systems Ltd Manufacturer’s Address:... -
Page 43: Warranty, Maintenance And Repair
Warranty, Maintenance and Repair All TSL equipment is guaranteed for one year from the date of delivery to the customer’s premises. If the equipment is to be stored for a significant period, please contact TSL concerning a possible extended warranty period.
Need help?
Do you have a question about the Tallyman TM1 and is the answer not in the manual?
Questions and answers