Table of Contents
Advertisement
Advertisement
Table of Contents

Related Manuals for Dream-Flight Libelle


Summary of Contents for Dream-Flight Libelle
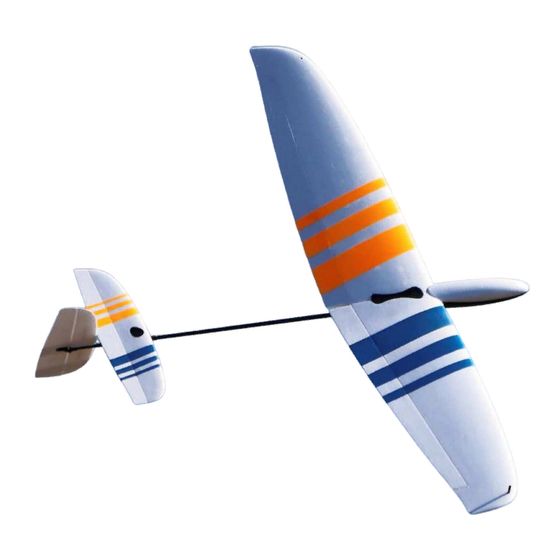
- Page 2 Modern RC Glider Design ARG - The Libelle is our first ARG design (Almost Ready to Glide). You'll get out and glide faster, as many time- saving tasks have been expertly finished at our factory. Utilizing the most modern materials and foam molding techniques, we have achieved a durable, lightweight, and super smooth airframe that is a huge improvement from the past.
- Page 4 CAUTION! READ BEFORE PROCEEDING: ►The Libelle R/C glider is not a toy; a certain amount of experience and practice is required to safely fly this model. We recommend consulting an experienced R/C pilot before attempting to fly this glider. With proper instruction, learning to fly R/C gliders can be a safe and extremely rewarding activity.
-
Page 5: Table Of Contents
Discus Launch Technique Fine-Tuning CG Position “Urban Soaring” Technique Background Important guidelines to follow when flying the Libelle Slope Soaring Flatland Soaring To familiarize yourself with the assembly process, we recommend reading over this manual before proceeding with final assembly. -
Page 6: Kit Contents
Wing Panels (Left/Right) Horizontal Stabilizer/Elevator Vertical Fin/Rudder Spare Parts Elevator/Rudder Pushrods available at Manual dream-flight.com Small Hardware Bag Contents: (2)Wing Dihedral Braces (Front/Rear) Wing Center Plate (3) Nylon Bolts for Wing and Stabilizer: 20mm, 15mm, 10mm (2) Aileron Pushrods (4) Control Horns... -
Page 7: Items Required For Completion (Not Included)
Programmable 6 channel radio system with flaperon mixing (see chart for transmitter suggestions) Micro receiver, 4-6 gram weight (see chart below for receiver suggestions) (4) Sub-micro servos (Part DFFA005 recommended, or purchase our Libelle flight pack, Part DFFA007) (2) Lightweight aileron extensions, 120mm long (Part DFLB109) ... -
Page 8: Radio Gear Setup
RADIO GEAR SETUP ►Our setup and installation guide is based on the use of our 4.3g digital servos (Part DFFA004). We have included the exact measurements needed to recreate our setup if you choose another brand of servo. Additionally, we highly recommend using a programmable radio with flaperon mixing. Note: Have tools accessible throughout assembly. - Page 9 9. Arrange servos on table and attach shorter servo arms to elevator and rudder servos. Attach longer servo arms to aileron servos. IMPORTANT: Servo arms must be installed in the orientations shown below to ensure proper function. 10. Referring to graphic below, check for correct servo rotation direction. If needed, reverse servo directions using transmitter.
-
Page 10: Wing Assembly
WING ASSEMBLY ►IMPORTANT! Joining the right and left wing panels is the most critical and difficult part of assembly. We strongly encourage you to practice the steps below first WITHOUT glue. Once you are comfortable with the steps, proceed with glue. Gather items below: ... - Page 11 2. Place right and left wing panels on table as shown below, upside down with wing roots (centers) aligned with edge of table. 3. Apply masking tape to flat side of each dihedral brace as shown. Tape should be slightly longer than each brace.
- Page 12 6. Apply medium instant glue to areas of right foam wing shown in graphic to the right. Glue is applied to the following locations on right wing only: molded recesses for dihedral braces, alignment tab recesses, and adjoining wing root face areas.
- Page 13 10. Wipe away excess glue along entire wing joint and around Center Wing Plate. Turn wing over and carefully remove masking tape covering dihedral braces. 11. Locate control horn recess on underside of each aileron. NOTE: the two holes on each control horn should face forward towards the molded servo pockets.
- Page 14 13. Remove servos and securely re-install using a drop or two of medium instant glue, thin double-sided tape, or low-temperature hot glue. Press the servo wires and extensions neatly into the provided channels. If you have chosen the Wing Reinforcement Decal option (Part DFLB111), apply this now. Otherwise, apply a piece of clear packing or office tape over each servo and extension wires.
-
Page 15: Fuselage And Tail Assembly
FUSELAGE AND TAIL ASSEMBLY Gather items below: Fuselage Horizontal stabilizer/elevator Vertical fin/rudder Elevator pushrod Rudder pushrod (longest) Elevator and rudder servos (2) Control horns (2) Adjustable clevises and clamping screws Nylon elevator bolt (10mm long) ... - Page 16 6. Attach a clevis to each pushrod as shown below. 7. Feed Z-Bend end of shorter pushrod through rear of elevator mount at angle as shown below. Slide pushrod all the way forward through tail boom for connection with elevator servo arm. 8.
- Page 17 10. As shown below, attach clevis to elevator control horn at outermost hole. If necessary, use a small flat- bladed screwdriver to spread clevis apart. If you are having difficulty, try removing stabilizer to make clevis connection easier (re-install stabilizer after connection has been made). IMPORTANT: Clevis must be installed with correct orientation (screw head on right side of tail boom) for sufficient pushrod clearance.
- Page 18 13. For added strength, apply a small strip of clear tape over tail boom and overlapping onto fin (see below). The tape should not cover pushrod cutout in carbon tail boom. 14. Feed Z-Bend end of longer rudder pushrod into rear opening of carbon tail boom as shown below. Slide pushrod all the way forward through tail boom for connection with rudder servo arm.
- Page 19 16. Remove rudder servo arm and attach to pushrod Z-Bend. Re-install servo arm and replace screw as shown below. IMPORTANT: Elevator and rudder pushrods must hang BELOW servo arms for proper clearance. 17. Ensure elevator and rudder servo arms are centered on servos as shown below. 18.
-
Page 20: Wing Installation
WING INSTALLATION Gather items below: Completed wing Completed fuselage with tail group installed Canopy (2) Wing bolts (20mm front, 15mm rear) Carbon fiber launching peg 1. Press wing onto fuselage by aligning wing with anti- rotation pins on fuselage wing saddle. -
Page 21: Balancing The Libelle: Cg Position
It is best to start at the 5mm mark and move forward in small increments, 1mm at a time, until the Libelle's flight feels right to you. We do not recommend moving the CG position more than 6mm behind the carbon wing spar. -
Page 22: Control Surface Deflections
CG position). If desired, secure receiver in position with a bit of double-sided tape. CONTROL SURFACE DEFLECTIONS The control surface deflections in the table below provide the Libelle with active response to control inputs. You can set separate Low and High rates using the "Dual Rate" menu and toggle switches on your programmable radio. -
Page 23: Pre-Flight Check
PRE-FLIGHT CHECK 1. Ensure transmitter and receiver batteries are fully charged. 2. Check balance of glider and control surface deflections one last time. Make adjustments if necessary. It is always important to do this check before each flight. 3. Turn on transmitter, then glider, by plugging battery lead into receiver - observe proper polarity! 4. -
Page 24: Test Flights: Trimming For Straight And Level Flight
4. ALWAYS launch and land your glider into wind to minimize ground speed. Throw the Libelle firmly but not excessively, like a javelin, without twisting your wrist. Make sure to point nose towards horizon (not up or down). -
Page 25: Programming Mixes: From Launch To Thermal
PROGRAMMING MIXES: FROM LAUNCH TO THERMAL ►The Libelle launches and flies great without any use of flaps to adjust wing camber and reflex. However, just as a bird adjusts its wing shape to suit varying flight conditions, you may want to as well in order to broaden your soaring experience and technique. -
Page 26: Discus Launch Technique
DISCUS LAUNCH TECHNIQUE ►You will be surprised by how little force is required to discus launch your Libelle to good flying altitude. Always release your glider into the wind; your launches will be higher and less effort will be required. Like all techniques... - Page 27 Discus Launch Sequence One complete rotation shown at 90 degree intervals, from start to launch. It is OK to take a few steps into the wind while completing one revolution. Always release into wind and keep arm as straight as possible!
-
Page 28: Fine-Tuning Cg Position
►It is well worth spending a little time verifying the proper balance and trim of your glider. Doing so will ensure the Libelle is a pure joy to fly and reacts predictably to the varying air currents experienced while soaring. We find it easiest to fine-tune the CG position on the slope in light to moderate lift. This will make it easy to climb quickly to altitude for the "dive test"... -
Page 29: Urban Soaring" Technique
Successfully flying an R/C sailplane doesn’t require a far journey in search of large open spaces. The Libelle’s ability to be flung to considerable height with the simple swing of an arm makes for convenient soaring, both on the slope and over flatland. The Libelle’s low weight, compact size, and maneuverability, allow you to participate in what we call “urban soaring;”... - Page 30 ►Tune into your surroundings… Watch for birds and insects! Listen to and feel for sudden yet subtle changes in the wind and air temperature. Soaring birds often appear miraculously when a thermal is present. Look for groups of swallows or sparrows picking rising insects out of the air as a thermal passes by. Oftentimes the wind will change suddenly and the temperature will rise a few degrees as a thermal passes through.
- Page 31 Our goal is to create unique aircraft that are pure fun to fly. Beginners through experts will appreciate the simplicity and versatility of our designs. Our passion is designing quality, affordable R/C aircraft that get more people outdoors to enjoy the wind and sun.
- Page 32 Thank you for your support of our products! Join us on facebook for the latest Dream-Flight news, pictures, and videos from around the world. www.facebook.com/dream.flight.rc Dream-Flight, LLC www.dream-flight.com PO Box 1448 E-mail: info@dream-flight.com Goleta, CA 93116 ©2014 Dream-Flight, LLC. All Rights Reserved.
Need help?
Do you have a question about the Libelle and is the answer not in the manual?
Questions and answers
Trying to find a 6 channel futaba receiver that will fit the in the libelle!
A compatible 6-channel Futaba receiver for the Dream-Flight Libelle should be one that works with the Futaba 6EX-2.4GHz transmitter and is as small as possible due to limited space. Based on the discussion, the recommended receiver is an FRSky one, as the DSM2 receiver mentioned is not compatible with the Futaba 6EX.
This answer is automatically generated