Advertisement
Quick Links
Kit dE RÉSiStanCE aUX VEntS FoRtS
EQUiPo dE alta RESiStEnCia al ViEnto
PLEASE READ ASSEMBLY INSTRUCTIONS
COMPLETELY BEFORE STARTING.
ALL STATED SIZES ARE NOMINAL DIMENSIONS.
HigH Windload Kit
S'ASSURER DE BIEN LIRE LES INSTRUCTIONS
DE MONTAGE AVAANT DE COMMERNCER.
TOUTES LES DIMENSIONS INDIQUÉES SONT NOMINALES.
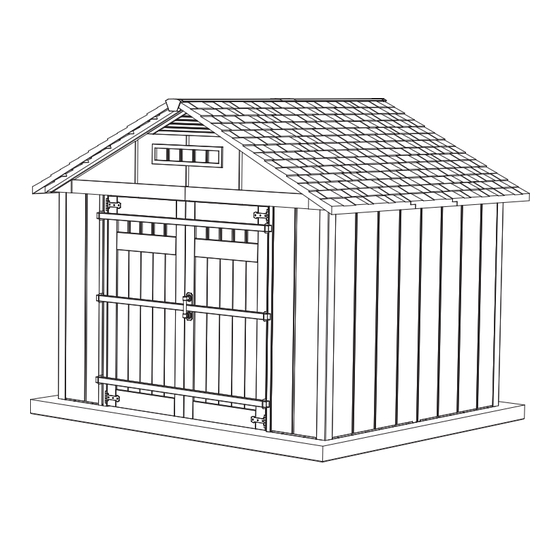
Models / Modèles / Modelos
10x8
Owner's Manual
Manuel du propriétaire
Manual del Propietario
Version / Edición
1.0
LEA LAS INSTRUCCIONES DE ENSAMBLAJE
EN SU TOTALIDAD ANTES DE COMENZAR.
TODAS LAS DIMENSIONES INDICADAS SON NOMINALES.
73005131
73005132
73005137
Advertisement

Related Manuals for Homestyles 73005131

Summary of Contents for Homestyles 73005131
- Page 1 Models / Modèles / Modelos 10x8 73005131 73005132 73005137 Owner’s Manual Manuel du propriétaire Manual del Propietario Version / Edición HigH Windload Kit Kit dE RÉSiStanCE aUX VEntS FoRtS EQUiPo dE alta RESiStEnCia al ViEnto PLEASE READ ASSEMBLY INSTRUCTIONS S'ASSURER DE BIEN LIRE LES INSTRUCTIONS LEA LAS INSTRUCCIONES DE ENSAMBLAJE DE MONTAGE AVAANT DE COMMERNCER.
- Page 2 1,2,3 Thank you for choosing the Barrette Outdoor Living Parts List: Length Part No. Qty. “Windload Kit”. Please read this Owner’s Manual completely in. (cm) before assembling your building. Retain manual and your dated sales slip for future reference and warranty claims. WL Door Jamb Brace 1 (2.5) This Windload kit is for use with 10x8 sheds only.
- Page 3 7,8,9 Part Identification / Identification des pièces / Identificación de las piezas Tools Required Outils requis Herramientas necesarias ® ® ® Materials Needed Matériaux requis Materiales necesarios...
- Page 4 Identify your Base Track configuration using the diagrams below. Pre-drill pilot holes (as shown, FIGURE 1) using a 3/8" drill bit. Install the base track sections on your foundation using Hilti Kwik 3/8" x 5" bolts (WLB). Please note: The diagonal measurement included in the diagram may vary slightly from the actual measurement. It is important to ensure that your track has been squared off and your door opening is 71 ⁄...
- Page 5 Insert Wall Support Beams (WSB1, WSB2) into walls during assembly and WSB2 mark the location of the Wall Support Beams with a 3" line on the interior WSB1 of the shed walls with a pen for reference. Insert a Corner Post (CN1) and a Back and Side Wall Panel (WP1/WP2) at the rear of the platform.
- Page 6 Insert Wall Support Beams (WSB2) into walls as shown and mark the location of WSB2 the Wall Support Beams with a 3" line on the interior of the shed walls with a pen for reference. 3" Add the remaining (WP2) panels to build the right side wall.
- Page 7 21-1 Attach Gable Windload Support to Fixez le support de résistance au vent au pignon assemblé Sujete el soporte para vientos fuertes en el hastial assembled gable using two (2) 1/4" x 2" à l’aide de deux vis à tête bombée 1/4 po x 2 po (TS5) et ensamblado usando dos (2) tornillos de cabeza redonda Truss Head screws (TS5) and three (3) de trois vis à...
- Page 8 Add four (4) 5/16" -18 x 12 3/4" Hex Bolts (HXB2) as shown to assemble the 8' Ridge Beam (RS1). Slide two (2) 5/16" -18 x 13" Hex Bolts (BXB3) from each end of the ridge beam, followed by sliding two (2) 5/16" x 3/4" (BXB4) Hex Bolt from each end of the Ridge Beam.
- Page 9 24-1 Attach Corner Brace (CB1) to gable and wall cap as shown using two (2) #12 x 3/4" Hex Washer Head Screw (HX1). Attach Top Gable Truss Tube (GTT1) to BXB4 bolt in the aluminum ridge beam using the 5/16" nut (BXN) and washer (FWC) provided. Next, attach Lower Gable Truss Tube (GTT2) to gable and roof truss as shown using with a 5/16"...
- Page 10 28-1 High Windload Brace Plate Allignment: Locate the top Brace Plate 1/2" below the top door hinge and the bottom Brace Plate 1/2" above the bottom door hinge. Measure 33" from the top of the shed door to the top of the middle Brace Plate to locate it as shown. Pre-drill starter holes for the Windload Brace Plate (WBP) using a 9/64"...
- Page 11 28-2 From À partir de l’intérieur de la remise, placez la plaque de contreventement coudée pour vents forts Desde el interior del cobertizo, ubique inside (BBP) sur le montant de porte (VDJ). Mesurez 35 po du linteau (LT1) jusqu’au dessus de la plaque la placa de refuerzo doblada (BBP) the shed, de contreventement coudée pour vents forts.
- Page 12 30-1 From inside of shed, locate the Wall Support Beam marks made from steps 3-6. Pre-drill pilot holes using 9/64" drill bit at the wall cap interface and Base Track interface or side walls. Pre-drill at lintel and floor track interface of front and back wall. Do not drill through wall panel. Secure using #10 x 3/4" Pan Head Self Tapping screws (ST1).
Need help?
Do you have a question about the 73005131 and is the answer not in the manual?
Questions and answers