Advertisement
Quick Links
Download this manual
See also:
User Manual
GX-24 Control Panel Flow Chart
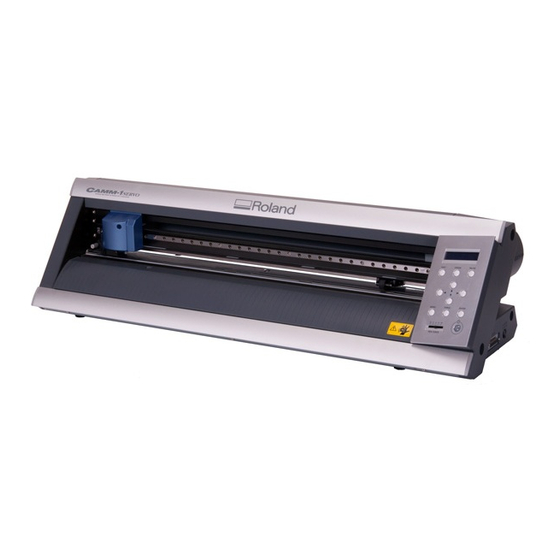
Visual Representation of the GX-24 Control Panel
This guide is a visual representation of the GX-24 menu structure with descriptions. Clicking on the menu in
the flow chart will bring you to the description page.
GX-24 Control Panel Flow Chart
8/18/2009
Advertisement

Subscribe to Our Youtube Channel
Related Manuals for Roland GX-24


Summary of Contents for Roland GX-24
- Page 1 GX-24 Control Panel Flow Chart Visual Representation of the GX-24 Control Panel This guide is a visual representation of the GX-24 menu structure with descriptions. Clicking on the menu in the flow chart will bring you to the description page.
- Page 2 Menu Flow Chart Menu Flow Chart To view the description of each menu, click the corresponding menu in the figure. The description of each menu is given in the following format. Stored in Memory: If Yes is indicated, the setting is stored even when the power is turned off. Factory Default: Indicates the factory default setting.
- Page 3 Menu Flow Chart Menu Flow Chart Display Menu...
- Page 4 Menu Flow Chart [Back/Next]...
- Page 5 Menu Flow Chart Menu Flow Chart Cutting Force Setup Menu Origin Setup Menu Pause Menu Language Selection Menu...
-
Page 6: Select Sheet
SELECT SHEET Menu Description SELECT SHEET Stored in Memory Factory Default ROLL Selection Choices ROLL, PIECE, or EDGE Description • ROLL Performs cutting using roll material. • PIECE Performs cutting using standard-size material or piece material. • EDGE When using roll material, cutting is performed from the front-left edge of the material. * When the setting for ROTATE on the display menu is 90deg, cutting is performed from the front-right edge. - Page 7 UNSETUP Menu Description UNSETUP Stored in Memory No Description Releases the setup condition when executed.
- Page 8 AREA Menu Description AREA Stored in Memory Yes Factory Default 1.0 m 24.9 m to -24.9 m (0.1 m Setting Range steps) Description This is used when cutting roll material or long, flat material that exceeds 1.6 m in length. This ensures that the material will not come loose during cutting by feeding out the length of material to be cut before actually performing cutting.
- Page 9 SPEED Menu Description SPEED Stored in Memory Yes Factory Default 20 cm/s Setting Range 1 to 50 cm/s (1 cm/s steps) Description Sets the speed used when cutting material. Set this to a suitable value for the loaded material and installed blade.
- Page 10 SELECT SHEET Menu Description FORCE Stored in Memory Yes Factory Default 50 gf Setting Range 30 to 250 gf (10 gf steps) Description Sets the blade force used when cutting material. Perform a cutting test and set the conditions to match the loaded material and the installed blade.
- Page 11 OFFSET Menu Description OFFSET Stored in Memory Yes Factory Default 0.250 mm Setting Range 0.000 to 1.000 mm (0.025 mm steps) Description Sets the amount of offset for the tip of the blade. Set a value that matches the conditions for the blade installed. When using the included blade or equivalent parts, cutting can be performed using the factory-default settings.
- Page 12 ROTATE Menu Description ROTATE Stored in Memory Yes Factory Default 0deg Selection Choices 0deg or 90deg Description Sets the direction of the coordinate axis for cutting. When set to 0deg (default value), the origin is set at the lower left of the material. When set to 90deg, the origin is set at the lower right of the material, and the data is rotated counterclockwise by 90 degrees.
- Page 13 UPSPEED Menu Description UPSPEED Stored in Memory Yes Factory Default AUTO Setting Range 10 to 50 cm/s (10 cm/s steps) or AUTO Description Sets the speed for moving the blade to the next cutting position with the blade lifted off the material during cutting operation.
- Page 14 SAVE Menu Description SAVE Stored in Memory Yes Factory Default USER1 USER1, USER2, USER3, or Selection Choices USER4 Description Stores the setting values of menus that are now being used. The menus that you can register are as follows FORCE, SPEED, OFFSET, UPSPEED, and ROTATE The registered settings can be called up using LOAD.
- Page 15 LOAD Menu Description LOAD Stored in Memory Yes Factory Default USER1 Selection Choices USER1, USER2, USER3, or USER4 Description Calls up the setting values stored using SAVE.
- Page 16 SMOOTHING Menu Description SMOOTHING Stored in Memory Yes Factory Default ON or Selection Choices Description • ON Cuts curves such as arcs smoothly. However, the corners may be rounded when a small character or a complex shape is cut. • OFF Select OFF when the corners are rounded.
- Page 17 LANG. Menu Description LANG. Stored in Memory Factory Default ENGLISH Selection Choices ENGLISH, , PORTOG, ITAL, ESPAN, FRANC, or DEUT Description Selects the language for messages on the display. • ENGLISH: English • : Japanese • PORTOG: Portuguese • ITAL: Italian •...
- Page 18 UNIT Menu Description UNIT Stored in Memory Yes Factory Default Selection Choices mm or inch Description Selects the unit of measurement for numerical values shown on the display. However, values are shown in metrics for the following menus even when inch is selected. •...
-
Page 19: Factory Default
FACTORYDEFAULT Menu Description FACTORYDEFAULT Description Resets the display menu values to the same settings as their factory defaults. However, the setting for LANG. is not reset. - Page 20 Selects the port automatically. The communication parameters for serial connection are set according to the settings made on the GX-24. If the interface is not recognized correctly when set to AUTO, use the menu to choose the type of interface you're using.
- Page 21 BAUD Menu Description BAUD Stored in Memory Yes Factory Default 9600 Selection Choices 4800 or 9600 Description Sets the communication speed for a serial connection. It is effective only when connected to the computer using a serial cable.
- Page 22 DATA Menu Description DATA Stored in Memory Yes Factory Default Selection Choices 8 or 7 Description Sets the number of data bits for a serial connection. It is effective only when connected to the computer using a serial cable.
- Page 23 STOP Menu Description STOP Stored in Memory Yes Factory Default Selection Choices 1 or 2 Description Sets the number of stop bits for a serial connection. It is effective only when connected to the computer using a serial cable.
- Page 24 PARITY Menu Description PARITY Stored in Memory Yes Factory Default NONE NONE, EVEN, or Selection Choices Description Sets the type of parity checking for a serial connection. It is effective only when connected to the computer using a serial cable.
- Page 25 HAND Menu Description HAND. Stored in Memory Yes Factory Default H-WIRE Selection Choices H-WIRE or XONOFF Description Sets the handshaking (flow control) for a serial connection. It is effective only when connected to the computer using a serial cable.
- Page 26 SELF TEST Description Executes a self test to check the status of the GX-24. Use this to check the GX-24 when it appears to be not operating correctly. If the self test is executed and the test pattern in the figure is cut, the machine is operating correctly.
- Page 27 REPLOT Menu Description REPLOT Stored in Memory No Selection Choices START or CLEAR Description • START Performs cutting using the data in the replot buffer when the ENTER key is pressed. • CLEAR Deletes the data in the replot buffer when the ENTER key is pressed.
-
Page 28: Manual Start
LENGTH Menu Description MANUAL START Description Starts the reading of crop marks. This can be executed only when CROPMARK is set to MANUAL. - Page 29 LENGTH Menu Description LENGTH Stored in Memory Yes Factory Default 210 mm Setting Range 50 to 500 mm (1 mm steps) Description Sets the distance between the centers of the top and bottom crop marks. Specify the same value as the distance between the center of the two crop marks specified by the program. This can be specified only when CROPMARK is set to MANUAL.
- Page 30 WIDTH Menu Description WIDTH Stored in Memory Yes Factory Default 170 mm Setting Range 50 to 610 mm (1 mm steps) Description Sets the distance between the centers of the right and left crop marks. Specify the same value as the distance between the center of the two crop marks specified by the program. This can be specified only when CROPMARK is set to MANUAL.
- Page 31 BASE Y Menu Description BASE Y Stored in Memory Yes Factory Default 5.0 mm Setting Range 0.0 to 50.0 mm (0.1 mm steps) Description Specifies the distance in Y-direction between the center of a crop mark and the origin point. Normally, set the value to the radius of the crop marks specified by the program.
- Page 32 BASE X Menu Description BASE X Stored in Memory Yes Factory Default 5.0 mm Setting Range 0.0 to 50.0 mm (0.1 mm steps) Description Specifies the distance in X-direction between the center of a crop mark and the origin point. Normally, set the value to the radius of the crop marks specified by the program.
- Page 33 CROPMARK Menu Description CROPMARK Stored in Memory Yes Factory Default AUTO Selection Choices AUTO or MANUAL Description Sets the method for reading crop marks. If MANUAL is selected, the crop marks must be specified by entering the size and spacing of the crop marks.
Need help?
Do you have a question about the GX-24 and is the answer not in the manual?
Questions and answers