Table of Contents
Advertisement
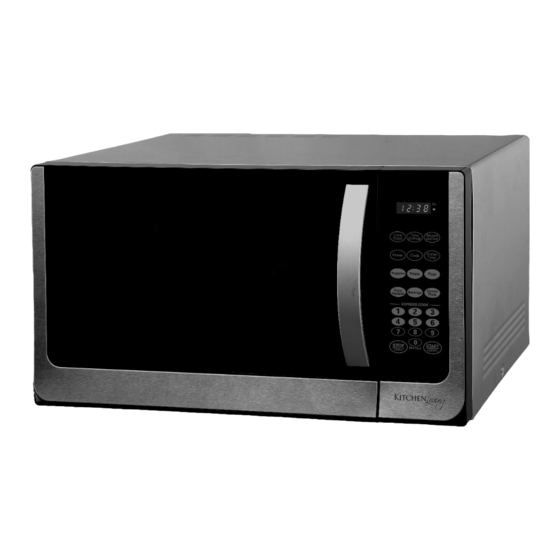
1.1 cu. ft. stainless steel
microwave oven
USER GUIDE
Now that you have purchased a Kitchen Living
AFTER SALES SUPPORT
product you can rest assured in the knowledge
that as well as your 1 year parts and labor
888 775 0202
www.mcappliance.com
USA
guarantee you have the added peace of mind
MODEL: KLM1110STU, 12/12, 43265-13
of dedicated helplines and web support.
Advertisement
Table of Contents

Subscribe to Our Youtube Channel
Summary of Contents for Kitchen Living KLM1110STU
- Page 1 1.1 cu. ft. stainless steel microwave oven USER GUIDE Now that you have purchased a Kitchen Living AFTER SALES SUPPORT product you can rest assured in the knowledge that as well as your 1 year parts and labor 888 775 0202 www.mcappliance.com...
-
Page 2: Table Of Contents
Contents 03 Product Registration 04 Precautions 06 Important Safety Instructions 08 Installation 09 Specifi cations 10 Parts and Features 14 Operation 25 Operating Precautions 27 Care and Cleaning 29 Troubleshooting 30 FAQ 32 Warranty 33 Index 35 Warranty Card AFTER SALES SUPPORT 888 775 0202 www.mcappliance.com 43265-13... -
Page 3: Product Registration
Product Registration Thank you for purchasing a Kitchen Living product. The fi rst step to protect your new product is to complete the product registration on our website at www.mcappliance.com/ register. The benefi ts of registering your product include the following: Registering your product will allow us to contact you regarding a safety notifi... -
Page 4: Precautions
Precautions PRECAUTIONS TO AVOID POSSIBLE EXPOSURE TO EXCESSIVE MICROWAVE ENERGY DO NOT attempt to operate the microwave oven with the door open since open-door operation can result in harmful exposure to microwave energy. It is important not to defeat or tamper with the door safety interlocks. DO NOT place any object between the microwave oven front face and the door, or allow soil or cleaner residue to accumulate on the sealing surfaces. -
Page 5: Grounding Instructions
GROUNDING INSTRUCTIONS The microwave oven must be grounded. In the event of an electrical short circuit, the 3-prong grounding plug reduces the risk of electric shock by providing an escape wire for the electric current. The microwave oven is equipped with a power cord consisting of a grounding wire with a 3-prong grounding plug. -
Page 6: Important Safety Instructions
Important Safety Instructions WARNING: To reduce the risk of fi re, electrical shock, and/or injury to persons, basic safety precautions should always be followed when using electrical appliances. When using electrical appliances, basic safety precautions should be followed, including the following: Read all instructions before using the appliance. -
Page 7: Save These Instructions
16. To reduce the risk of fi re in the oven cavity: a) DO NOT overcook any food. Carefully attend to the microwave when paper, plastic, or other combustible materials are placed inside the oven to facilitate cooking. b) Remove wire twist-ties from paper or plastic bags before placing into the oven. c) If materials inside the oven ignite, keep the oven door closed, turn the oven OFF, and disconnect the power cord, or shut off the power at the fuse or the circuit breaker panel. -
Page 8: Installation
Installation Examine the microwave oven after unpacking. Check for damages such as a misaligned door, broken door or dent in the cavity. If any damage is found, DO NOT install, and notify your dealer immediately. Install the microwave oven on a fl at, level surface. Check the ventilation. -
Page 9: Specifi Cations
Specifi cations Power Supply 120V AC, 60Hz Single Phase with Grounding Input Power 1500W Microwave Energy Output 1000W Frequency 2,450MHz Outside Dimensions 20.2” x 12.0” x 16.3” (W x H x D) Cavity Dimensions 12.9” x 8.9” x 14.5” (W x H x D) Cavity Volume 1.1 cu. -
Page 10: Parts And Features
Parts and Features Unit The appearance of your model may slightly differ from the illustrations in this manual. Door Lock System b. Metal Shielded Window Glass Turntable d. Microwave Inlet Cover Microwave Oven Light LED Display Control Panel Turntable and Roller Guide Turntable Roller Guide The turntable can rotate in either direction to... -
Page 11: Control Panel
Control Panel LED Display: When power is fi rst supplied to the microwave oven, “0:00” will appear on the display. If the “0:00” appears on the display at any other time, a power failure has occurred. Reset the clock if needed. See the “Clock” section on pg. -
Page 12: Kitchen Timer
Press the CLOCK button. “00:00” will appear on the LED display, along with the fi rst “0” fl ashing. Input the current time by pressing the respective numerical keys. All four digits need to be entered from left to right. Additionally, the input of the fi rst digit can only be “0”... -
Page 13: Child Safety Lock
Child Safety Lock The Child Safety Lock function deactivates the control panel to avoid unintended use of the microwave oven. To enable the safety lock function, the microwave oven must be in standby mode (i.e., no functions currently operating). The Child Safety Lock is activated by pressing the STOP/CANCEL button for 3 seconds, until one long tone indicates activation. -
Page 14: Operation
Operation Microwave Oven Use A magnetron in the microwave oven produces microwaves that refl ect off the interior cavity; passing through the turntable and appropriate cookware to cook the food. The produced microwaves are attracted to and absorbed by fat, sugar, and water molecules in the food;... -
Page 15: Cooking Guidelines
• Composition and Density Foods high in fat and sugar will reach a higher temperature, and will heat faster than other foods. Heavy, dense foods, such as meat and potatoes, require a longer cook time than the same size of a light, porous food, such as cake. •... -
Page 16: Cookware And Dinnerware
Cookware and Dinnerware The cookware and dinnerware must fi t onto the turntable. Always use oven mitts or pot holders when handling since the dish may become extremely hot from heat being transferred from the food. DO NOT use any cookware and dinnerware with gold or silver trim. -
Page 17: Microwave Cooking Power
Acceptable for Use Racks and bakewares supplied with the microwave oven (if applicable), certain aluminum foils for shielding, and approved meat thermometers may be used with the following guidelines: To avoid damage to the microwave oven, DO NOT allow the aluminum foil or the metal to come in contact with the cavity, including the side walls, ceiling, or fl... -
Page 18: Manual Cooking
For melting chocolate. For heating bread, rolls, or pastries. 30%, Medium-Low For defrosting bread, fi sh, meats, poultry, (Defrost) or precooked foods. For softening butter, cheese, or ice cream. For taking the chill out of fruit. Fan only with no heat. Manual Cooking Place the food onto the turntable and close the door. - Page 19 Press the START/+30SEC button. The display will count down the set cooking time for each stage, and a short tone will sound at the end of the fi rst stage. The power level may be seen for 3 seconds by touching the POWER button during the cooking cycle stage.
-
Page 20: Defrost By Time
POULTRY Chicken: whole and cut up Place all poultry in a microwave-safe baking dish, with the Cornish hens turkey or chicken breast side up. DO NOT cover the baking Turkey breast dish. FISH Fillets, Steaks, Whole Shellfi sh Place all fi sh cuts in a microwave-safe baking dish. DO NOT cover the baking dish. - Page 21 Press the MEMORY button. A “1” will appear on the LED display for the fi rst memory program. Set the program, following the instructions in the “Manual Cooking” or the “Cooking in Stages” sections on page 18. Press the START/+30SEC button. A valid entry tone will sound, indicating that the program has been accepted into memory.
- Page 22 To Use the POPCORN Feature: Place the popcorn bag onto the turntable, and close the door. Press the POPCORN button to select the appropriate size (see the chart above). Press the START/+30SEC button. The display will count down the popping time. When the popping cycle ends, the end-of-cycle tone will sound, and the LED display will return to the time of day (i.e., the 12-hour system clock).
-
Page 23: Dinner Plate
Press the START/+30SEC button. The display will count down the reheat time. When the reheating cycle ends, the end-of- cycle tone will sound, and the LED display will return to the time of day (i.e., the 12-hour system clock). Press the STOP/CANCEL button at any time during the countdown to pause or cancel the reheating cycle. -
Page 24: Frozen Vegetable
Press the STOP/CANCEL button at any time during the countdown to pause or cancel the cooking cycle. Frozen Vegetable PRESS DISPLAY SERVING SIZE FROZEN Once 4 oz (113g) VEGETABLE Twice 8 oz (227g) Three Times 16.0 16 oz (454g) Remove the frozen vegetables from its package. Place the items onto a microwave-safe container. -
Page 25: Operating Precautions
Operating Precautions General Use • DO NOT attempt to defeat or tamper with the safety interlocks. • DO NOT place any object between the oven front frame and the door or allow residue to build up on sealing surfaces. Wipe with a mild detergent, rinse, and dry thoroughly. - Page 26 • DO NOT leave the oven unattended while popping popcorn. • DO NOT pop popcorn in a paper bag unless it is the commercially prepared microwave popcorn product. The kernels can overheat and ignite a brown paper bag. • DO NOT exceed the microwave popcorn manufacturer’s suggested popping time. Longer popping does not yield more popcorn but it can result in buring the popcorn or risk of fi...
-
Page 27: Care And Cleaning
Care and Cleaning Unit The oven should be cleaned regularly and any food deposits removed. Failure to maintain the oven in a clean condition could lead to deterioration of the surface that could adversely affect the life of the appliance and possibly result in a hazardous situation. Unplug the power cord before cleaning any part of the oven. - Page 28 Turntable Turntable Roller Guide DO NOT operate the oven without the turntable in place. DO NOT use any other glass tray with the oven. If the turntable is hot, ALLOW TO COOL before cleaning or placing it in water. DO NOT cook directly on the turntable; use a platter container.
-
Page 29: Troubleshooting
Troubleshooting Before you call for service, refer to following checklist for common problems: The oven • Check that the power cord is securely plugged in. does not • Check that the door is fi rmly closed. work. • Check that the cooking time is set. •... - Page 30 Q : Can I use the oven with the glass tray or the roller guide removed? A : No. Both the glass tray and the roller guide must always be properly installed in the oven while cooking. Q : Can I open the door when the oven is operating? A : The door can be opened anytime during the cooking operation.
- Page 31 getting used to a microwave oven. Variations in the size, shape, weights, and dimensions could require longer cooking time settings. Use your own judgement along with the cooking guide suggestions to check whether the food has been properly cooked just as you would do with a conventional cooker. Q : Will the microwave oven be damaged if it operates while empty? A : Yes.
-
Page 32: Warranty
Under no circumstances is the consumer permitted to return this unit to the factory without prior written consent from MC Appliance corp. Model Parts & Labor Magnetron (Part Only) Type of Service KLM1110STU One Year Eight Years Carry In AFTER SALES SUPPORT 888 775 0202 www.mcappliance.com... -
Page 33: Index
Index 03 Product Registration 04 Precautions 04 Precautions to Avoid Possible Exposure to Excessive Microwave Energy 04 Federal Communications Commission Radio Frequency Interference Statement 05 Grounding Instructions 06 Important Safety Instructions 08 Installation 09 Specifi cations 10 Parts and Features 10 Unit 12 Kitchen Timer 10 Turntable and Roller Guide... - Page 34 AFTER SALES SUPPORT 888 775 0202 www.mcappliance.com 43265-13...
-
Page 35: Warranty Card
1.1 cu. ft. microwave oven Your details: Name Address E mail Date of purchase* * We recommend you keep the receipt with this warranty card Location of purchase Description of malfunction: Return your completed warranty card to: MC Appliance 777 Mark Street Wood Dale, IL 60191 www.mcappliance.com...
Need help?
Do you have a question about the KLM1110STU and is the answer not in the manual?
Questions and answers