Table of Contents
Advertisement
Quick Links
Advertisement
Table of Contents
Troubleshooting

Related Manuals for Viper XPT 6000

Summary of Contents for Viper XPT 6000
- Page 1 User Manual Viper XPT 6000...
- Page 2 Viper XPT-6000 Revision 6.12.15.1 – June 12, 2015...
-
Page 3: Table Of Contents
Connecting the Pre-Treatment Fluid Lines ....................6 2.3.1 Selecting Fluids for Spraying ........................... 8 Connecting Power ..............................11 Preparing Viper for Pre-Treatment ......................... 12 USING THE TOUCH SCREEN INTERFACE ..............13 Control Screen ................................14 3.1.1 Fluid Laydown ..............................14 3.1.2 Spray Length ................................ - Page 4 Troubleshooting ................................36 General Troubleshooting ............................. 36 6.1.1 - The Viper will not turn on/doesn’t have any power: ................36 6.1.2 - The Viper will not spray pre-treatment fluid: ..................36 6.1.3 - The Spray Pattern is “blotchy” ........................36 6.1.4 - The Spray Pattern has gaps or appears to not be irregular: .............
- Page 5 Appendix H – Disassembling, Cleaning, and Reassembling the Spray Head Solenoid ..52 Appendix I – SPRAY TIP CLOGGING AND WEAR................... 54 7.10 Appendix J – Image Armor CLEANING SOLUTION: ................56 7.11 Appendix K – Pretreating Basics with the Viper XPT-6000 .............. 58...
- Page 6 Viper XPT-6000...
-
Page 7: System Overview
1.0 SYSTEM OVERVIEW... -
Page 8: System Overview
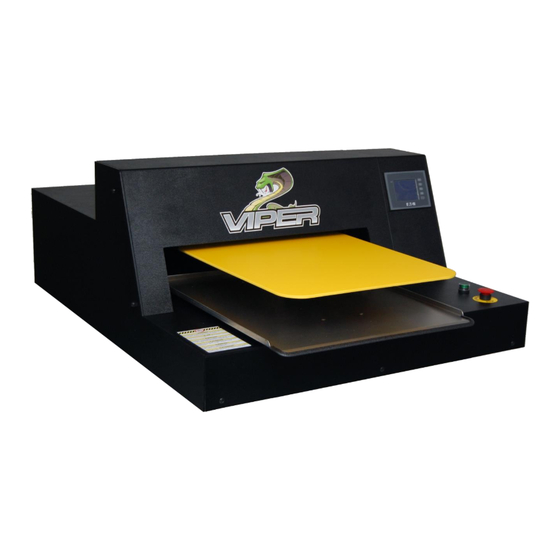
Viper XPT-6000 System Overview WARNING!!! The Viper XPT is designed for applying pre-treatment fluid to apparel that will be used for white ink direct-to-garment printing. User assumes all risks associated with the use of the machine and the fluids run through the Viper XPT. - Page 9 (1.5 amp GMA type) and also to remind the user to disconnect the machine from the power source prior to changing the fuse. The Viper XPT-6000 is an industrial system to apply a pre-treatment solution to garments that are to be printed on a digital inkjet garment printer. Features include:...
- Page 10 Viper XPT-6000 Interchangeable Platens o Adult o Youth o Infant Minimal bounce and overspray of sprayed pre-treatment solution Multi-lingual interface Plug & Play – just power up the machine to start treating Easy to load and unload garment on platen...
-
Page 11: Getting Started
2.0 Getting Started 2.0 GETTING STARTED... -
Page 12: Uncrating
CAUTION: The unit is heavy and requires at least two people to lift the Viper from the box when placing it on the stand. Use proper lifting techniques. 3. The Viper’s back will sit flush with the back of the stand, and the feet on the base will drop onto the stand foot rests. - Page 13 Viper XPT-6000 Another tube will connect to the Pre-Treatment 1 IN quick connect. Make sure that the tube labeled IN is inserted into this port. The third tube will connect to the Water Out/Waste quick connect. The fourth tube will connect to the Pre-Treatment 1 OUT quick connect. The fluid out tube for the pre-treatment has a clear check valve on one end.
-
Page 14: Selecting Fluids For Spraying
2.3.1 Selecting Fluids for Spraying During the normal course of use you will need to select different fluids for different purposes. You can select water for use in cleaning the Viper and flushing the fluid lines to keep your machine operating in top condition. - Page 15 Here’s a quick guide to the Valves and how to use them. The valve selector on the top allows you to select which fluid you would like to allow the Viper to use or pull into the delivery system. There are 4 options for this valve:...
- Page 16 Do not turn the bottom valve selector to the 12 o’clock position. This is not a valid option WARNING! and will result in the possibility of the Viper fluid delivery system over pressurizing and resulting in a tube failure. This will create a wet mess in your machine you will have to clean up. Only position the bottom valve in the 9 o’clock position (Waste water return), 6 o’clock position (Pre-Treatment 1 return)
-
Page 17: Connecting Power
Viper XPT-6000 Connecting Power 1. Plug the power cable into the Viper’s power port, located on the right side of the machine, then plug into a grounded outlet. 2. Power on the Viper XPT by toggling the power switch, located on the right side of the machine... -
Page 18: Preparing Viper For Pre-Treatment
Viper XPT-6000 Preparing Viper for Pre-Treatment 1. Eject the platen 2. On the touch screen, select the Menu tab at the top. a. Select Platen In/Out option. b. The platen will move in or out depending on the direction that it last traveled. If the platen moves in, select the Platen In/Out button to move the platen back out. -
Page 19: Using The Touch Screen Interface
Viper XPT-6000 3.0 USING THE TOUCH SCREEN INTERFACE... -
Page 20: Control Screen
Viper XPT-6000 Control Screen The control screen is the main screen of the Viper’s touch screen interface will load when the Viper is powered on. This screen allows for change the fluid laydown, the length of the spray, and zone of the shirt that pre-treatment will be applied to. -
Page 21: Spray Zones
You can also press the + or – increment buttons to increase or decrease the spray length values. 3.1.3 Spray Zones The Viper is designed with 6 independently controllable spray heads. This allows you to save money in pre-treating by reducing the amount of fluid laid down on the garment by “zoning” your spray pattern. -
Page 22: Zones Screen
Zones Screen The Zones screen (or tab) allows you to manually select and turn on specific spray heads on the Viper to allow you to create a customized spray pattern. The heads are numbered 1 through 6 from left to right and correlate to the spray heads as you stand in front of the Viper. -
Page 23: Job Counter
Figure 4.5 – The MENU tab/screen Menu Screen The MENU tab screen contains several buttons that allow you to do general maintenance on the Viper as well as changing the general settings on the touch screen, selecting the language to be displayed on the... -
Page 24: Fluid Maintenance
3.4.2 Move Platen By pressing the MOVE PLATEN IN/OUT button will cause the platen on the Viper to move either in or out. If the platen is in the complete OUT position and you press the MOVE PLATEN IN/OUT button the platen will be moved so that it is completely in the back of the unit. -
Page 25: Language
Viper XPT-6000 3.4.3.1 - Setting the Brightness/Contrast When you press the SET BRIGHTNESS/ CONTRAST button you will be able to manually set the brightness and contrast of the touchscreen. Simply use your finger to drag the lever for each option to increase or decrease the values to allow you to easily view the touchscreen in under your Figure 4.7 –... -
Page 26: Customize Buttons
Viper XPT-6000 3.3.5 Customize Buttons The CUSTOMIZE LABELS screen allows you to manually set the button labels found on the main User Interface screen. These values are associated with the “preset buttons” for the PT Fluid Laydown on the main user screen. The text for the buttons can contain up to 8 characters maximum. -
Page 27: Spraying A Garment
Viper XPT-6000 4.0 SPRAYING A GARMENT... -
Page 28: Loading A Garment
4.2.1 Setting the PT FLUID SPRAY value: Before using the Viper each time you must set the PT FLUID LAYDOWN value by selecting it from one of the preset buttons or by manually entering a PT FLUID LAYDOWN value in the in numerical display. -
Page 29: Starting Spray
NOTE: If there is an issue where you need to stop the machine immediately for any reason, press the red EMERGENCY STOP button at any time. This will stop all motion of the Viper as well as turn all pumps and solenoids to the off position. - Page 30 Viper XPT-6000 The most accurate way to measure the amount of fluid that the Viper is spraying for your particular pre- treatment fluid is to use a gram scale. First weight the un-treated shirt and zero or tare out the gram scale.
-
Page 31: Maintenance
5.0 Maintenance 5.0 MAINTENANCE... -
Page 32: Keeping The Viper Clean
After use of the Viper, pre-treatment bounce will start to accumulate on the plastic deck and housing. It is recommended that after each use that a damp rag or sponge is used and wipe down the plastic decking, aluminum shirt support tray, and interior to keep the pre-treatment from accumulating. -
Page 33: Cleaning The Viper Nozzle Tips
These yellow Spray Suppressant Guards collect over spray to help keep your Viper cleaner and hold onto excess spray bounce. These are held in with Velcro. 5.2.2 - Cleaning the Viper Nozzle Tips:... -
Page 34: To Clean The Yellow Spray Suppressant Guards
5.3.4 Machine Body Maintenance To prevent pre-treatment buildup on the Viper, clean the machine’s body once per day, minimum. If the unit is being used heavily and any pre-treatment fluid is building up on the deck or other body components make sure to wipe these areas down before they get a chance to leak or drain into the mechanical areas of the Viper. -
Page 35: Weekly Preventative Maintenance
Make sure to clean up any pre-treatment residue. 3. With the platen in the full out position you can remove the platen and reach back into the Viper to clean the plastic in those areas. This will prevent buildup of residue inside the machine keeping the machine running smoother. - Page 36 2. Gently scrub nozzle with the provided toothbrush and water until clean. Be sure to thoroughly clean spray orifice. We also recommend using the Image Armor CLEANING SOLUTION to scrub the tip with. The tip should be free from any buildup or pre-treatment residue. NOTE: For tips that have stubborn build up on the tips or in the tips running the nozzle tips through your dishwasher/Ultrasonic Cleaner might help.
-
Page 37: Machine Body Maintenance
Make sure to clean up any pre-treatment residue. 6. With the platen in the full out position you can remove the platen and reach back into the Viper to clean the plastic in those areas. This will prevent buildup of residue inside the machine keeping... -
Page 38: Internal Maintenance
5.3.3 Internal Maintenance You may find it necessary to access the transport system of the Viper. If this is necessary you will need to remove the Garage Door and Rear Access Panel. To Remove Garage Door and Rear Access Panel Take off the Garage Door and remove all 8 of the screws holding the Rear Panel on. -
Page 39: Flushing The Fluid System With Image Armor Cleaning Solution
SOLUTION. 3. Run a Fluid FILL routine as per the Viper instructions. 4. To fully clean and maintain the Viper, run 3-5 cycles of the fluid FILL routine as per Step 3 above. 5. Empty the Viper of Image Armor CLEANING SOLUTION by running a Fluid Empty routine. - Page 40 1. Image Armor CLEANING SOLUTION and distilled water are the only approved CLEANING SOLUTIONs for use in the Viper pretreatment machine. 2. Polymers can build up in your Viper and collect in nozzle tips, spray heads, the pump or solenoids. 3. Refer to our Maintenance Sheets in the Appendix for information on how to clean these parts.
-
Page 41: Troubleshooting
6.0 TROUBLESHOOTING... -
Page 42: Troubleshooting
1. Check to ensure that the power cord is plugged into a working electrical outlet. 2. Check to ensure that the power switch is turned on. 3. If the above do not solve the issue, you may need to check the fuse located inside the Viper control panel. -
Page 43: The Spray Pattern Has Gaps Or Appears To Not Be Irregular
Viper’s fluid intake filter is partially submerged and partially exposed to the air. If this is the case, the air will be sucked into the Viper resulting in a “tire track” type pattern with a more solid center. To remedy this fill your pre-treatment container with more fluid or switch to a new container. -
Page 44: There Are Drips Inside The Spray Chamber
2. Make sure that you do not have the PT FLUID IN valves in the 12:00 o’clock position (the arrow on the handle pointing straight up) – this allows the Viper to suck air into the system to flush it out – not pull in fluids. -
Page 45: Certain Spray Heads Will Not Spray Fluid
2. If the above does not resolve the shuddering or grinding then pretreatment has found its way onto the rail system of the Viper. To clean this, see section 5.3.3 on Internal Maintenance and the Appendix for more information on accessing and cleaning the rail system. - Page 46 NOTE: Most users will experience the binding issue at some point. It is better to be proactive with the cleaning of the rails and bearings in the Viper to prevent any unwanted and unintentional down time. One recommendation is that every 3000 sprays a wipe down and cleaning of the rails and bearings be done by...
-
Page 47: Appendix
7.0 APPENDIX... -
Page 48: Appendix
Appendix Appendix A – Stand Assembly... -
Page 49: Appendix B - Pre-Treatment Fluid Laydown Values
Appendix B – Pre-Treatment Fluid Laydown Values The following chart is to be used as a guide. All pre-treatment values will vary slightly based on the pre- treatment solution used. Use this chart as a guide. For the most accurate amount of fluid laydown use a gram scale and weigh the shirt before spraying and after spraying. -
Page 50: Appendix C - Valve And Fluid Connection Information
Appendix C – Valve and Fluid Connection Information... -
Page 51: Appendix D - Image Armor Cleaning Solution
13. Run a Fluid FILL routine as per the Viper instructions. 14. To fully clean and maintain the Viper, run 3-5 cycles of the fluid FILL routine as per Step 3 above. 15. Empty the Viper of Image Armor CLEANING SOLUTION by running a Fluid Empty routine. -
Page 52: Cleaning Schedule
1. Image Armor CLEANING SOLUTION and distilled water are the only approved CLEANING SOLUTIONs for use in the Viper pretreatment machine. 2. Polymers can build up in your Viper and collect in nozzle tips, spray heads, the pump or solenoids. 3. -
Page 53: Appendix E - Disassembling, Cleaning, And Reassembling The Brass Pressure Relief Valve
Appendix E – Disassembling, Cleaning, and Reassembling the Brass Pressure Relief Valve Step 1: Use a crescent wrench to loosen the large nut Step 2: Disassemble the pressure relief valve. Note the on the right side of the pressure relief valve as seen spring. - Page 54 Step 5: The picture above shows the pressure relief valve disassembled from left to right. Ensure that you DO NOT loosen the smaller nut on #4. This holds the preset pressure setting for the valve. Adjusting this will adjust the spray pressure and spray pattern.
-
Page 55: Appendix F - Disassembling, Cleaning, And Reassembling The Exit By-Pass Solenoid
Appendix F – Disassembling, Cleaning, and Reassembling the Exit By-Pass Solenoid Step 1: Remove the black Step 2: Remove the Step 3: Unscrew the two Step 4: Remove the finger nut holding the electromagnet. bolts holding the piston piston cover plate. electromagnet portion of the cover plate in place. - Page 56 Step 8: The picture above shows the disassembly process from Left to Right (#1 - #5). Thoroughly clean all components with Image Armor CLEANING SOLUTION Maintenance Solution. Especially check the bottom of the piston spring and the port the piston sits in. When re-assembling, the parts stack on top of each other in the reverse order they were removed.
-
Page 57: Appendix G - Disassembling, Cleaning, And Reassembling The Fluid Pump
Appendix G – Disassembling, Cleaning, and Reassembling the Fluid Pump Step 1: Remove the Step 2: Remove the top Step 3: Remove the fluid Step 4: Remove the pump gasket four screws holding pump cover plate. connector block which and valve block. the pump cover plate also holds the main in place. -
Page 58: Appendix H - Disassembling, Cleaning, And Reassembling The Spray Head Solenoid
Step 5: The above shows the disassembly process from Left to Right (#1 - #6). Thoroughly clean all components with Image Armor CLEANING SOLUTION Maintenance Solution and rinse with water. When re- assembling the pump, the parts stack on top of each other in the reverse order they were removed. - Page 59 (#4), the piston & spring (#5) plunger housing (#4), NOTE: This cleaning and the electromagnet housing (#6). Reassemble in the reverse order as pictured above. procedure can be completed while the spray solenoid is still mounted on the spray bar of the Viper.
-
Page 60: Appendix I - Spray Tip Clogging And Wear
Polymer Stuck in Orifice of Tip: You can photo of a new spray tip for the is a clean and healthy spray tip see above there is a small piece of Viper XPT pretreatment orifice. Notice how it is crisp and pretreatment polymer stuck in the machine. - Page 61 Spray Tip Wear and Containments: Spray tips are a wear item on the pretreatment machine. It is always a good idea to have additional tips on hand so you do not lose production time while waiting for a new tip to Good Spray Pattern: Above is Bad Spray Pattern: Above is a picture of the arrive.
-
Page 62: Appendix J - Image Armor Cleaning Solution
7.10 Appendix J – Image Armor CLEANING SOLUTION: The nozzle tips of any spray system are a wear item in the Viper XPT and will over time due to a variety of factors, erode the spray tip causing poor spray patterns. Below are several of the common factors that can cause spray tip degradation and poor pretreatment machine performance. - Page 63 5. Clogging: Clogging is when unwanted solid particles block the inside of the orifice and cause distorted spray patterns. Most commonly what happens in the Viper is as the polymers in the pretreatment separate from solution they can collect and, when the Viper is sprayed are...
-
Page 64: Appendix K - Pretreating Basics With The Viper Xpt-6000
2. Spray Gun: Very difficult to apply precise amount of fluid. Additional wasted pretreatment in overspray or bounce. 3. Automated Pretreatment Machine: With the Viper it allows for more precise application of pretreatment by utilizing 6 independent spray zones (user defined). Much more precise application of pretreatment fluid for consistent and repeatable results from shirt to shirt. - Page 65 5. Type of Pretreatment: Utilizing a white ink pretreatment versus a pretreatment for light colored polyester fabrics will also result in a different amount of applied fluid potentially. General Rules of Application: 1. Variability: There is some leeway in the amount of fluid applied. However, too much or too little pretreatment can be an issue depending on the garment and pretreatment fluid being used.
- Page 66 Heavyweight Light Colors: 20-24 grams (A setting of 42-52 on the Viper Fluid Laydown Amount) Refer to the Viper Fluid Laydown Chart for complete fluid application amount correlations. You may find that you will require less pretreatment applied as you experiment with the different...
Need help?
Do you have a question about the XPT 6000 and is the answer not in the manual?
Questions and answers