Table of Contents
Advertisement
Advertisement
Table of Contents

Summary of Contents for Ningbo Longjia Motorcycle LJ125-9A
- Page 1 Owner's Manual...
- Page 2 Preface We highly appreciate you for choosing our model LJ125-9A fuel injection motorcycle, it will offer you pleasant and safe driving. Driving motorcycle is one of the most exciting sport. For safety reason, you should read this o- wner' manual carefully and following these instructions before you drive.
-
Page 3: Important Notice
Important Notice 1.Driver and passenger This motorcycle is designed only for one driver and one passenger. 2.Road condition for driving This motorcycle is only suitable for driving on road. Please read this manual carefully. The run-in time of engine is necessary it will make mot- orcycle more durable and stable Please take notice of following words: Warning... -
Page 4: Special Notice
Special Notice Warning: The motorcycle must equip the right fuse for driving, it is not allowed to use other fuse or without fuse. Otherwise it may cause damage to the vehicle or fire. Fuse position: Beside battery. Fuse specification: The main cable fuse is 15A, others are 10A. The fuse failure is normally by vehicle circuit problem, before change fuse, should check the situation of vehicle. -
Page 5: Table Of Contents
Context Preface Important Notice Special Notice Information of safe … … … … … … … … … … … … … … … … … … Driving in slope … … … … … … … … … … … … … … … … … …1 2 Safe driving Using brake and stop... -
Page 6: Clothes
Safety information Safety Regulation: Clothes: 1.Before driving must check vehicle, in case of accident 1.For safety reason, driver must wear helmet, glass and or damage parts. boot,gloves and racing suit.Passenger should also wear 2.Driver must has legal driving license, and not allowed helmet. -
Page 7: Motorcycle Series Number
Motorcycle series number Vehicle Identification Number ( VIN ) and engine number is for motorcycle registration.Please record your number for future use. VIN number grave on the vehicle handle bar right side ① Engine number grave on the engine crankcase left side ②... -
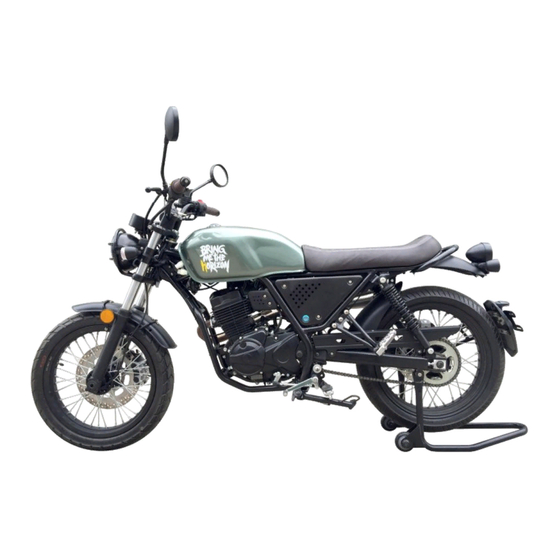
Page 8: Part Description
Parts description (1)Left mirror (3)Left side switch (2)Clutch lever (4)Ignition switch (5)Speedometer (6)Right side switch (7)Right mirror (8)Front brake lever (9)Throttle grip (10)Fuel tank (11)Oil cover (12)Rear brake pedal (13)Front footrest (14)Rear footrest (15)Rear brake (16)Front brake (17)Side stand (18)Shift gear pedal (19)Seat locker (20)Upper muffler 13 17... -
Page 9: Part Description
Parts description (1)Left mirror (3)Left side switch (2)Clutch lever (4)Ignition switch (5)Speedometer (6)Right side switch (7)Right mirror (8)Front brake lever (9)Throttle grip (10)Fuel tank (11)Oil cover (12)Rear brake pedal (13)Front footrest (14)Rear footrest (15)Rear brake (16)Front brake (17)Side stand (18)Shift gear pedal (19)Seat locker (20)Lower muffler 13 17... -
Page 10: Speedometer
Speedometer Speedo This is to show your driving speed. Turning light indicator Odometer When the left turning light on, This is to record the distance of all driving. the indicator will be flash. W- Gear position indicators hen the right turning light on, the indicator will be flash. -
Page 11: Operation Of Parts
Operation of parts position: In case of thieves, when you parking, ple- “ ” ● ase use this function. Turn the handle bar to left, press key This vehicle has two keys, it's u- down and release, then turn the key to “... -
Page 12: Right Grip
Turning light switch ④ Warning: Turn the switch to left “ ” the left side turning light will The engine off switch only use for emergency case. Wh- be flash Turn the switch to right the right side tu- “ ”... -
Page 13: Fuel Tank
●Fuel tank ●Shift gear pedal When the speedometer’s low fuel lever warning light is on , This vehicle is international gear please add gasoline immediately. First open the anti-dusty engine. Neutral gear between first cover as ① , then enter the key and turn as clockwise, pull gear and second gear. -
Page 14: Rear Brake Pedal
● Rear brake pedal Rear shock absorber ● Press down rear brake pedal (as The main component of this vehicl- picture). When the brake pedal e's rear shock absorber including working, the taillight will be on. spring and liquid damper,this shoc- ●... -
Page 15: Engine Run
Engine running in Gasoline and oil information Gasoline Top speed All the new motorcycle, during the first 1500 km driving, not Please use lead-free gasoline. Please use the octane ra- to make engine run too high speed or accelerate too much. ting above 93 . - Page 16 Before driving, please let oil lubricate sufficiently Checking item Points Before driving, please keep engine in idle situation for a Stable while, in order to have enough lubrication of engine. 2)Turning flexible Handle bar 3)No loosing First maintenance Brake level and pedal has right The first 1,000 km maintenance is the most important w- feeling Brake...
-
Page 17: Driving Motorcycle
Driving motorcycle Using gear shift Engine start Gear shift system will make engine driving smoothly. Dr- Please turn the key to position, and the engine iver should change gear according to the driving speed. “ ” switch on right handle bar on put gear “... - Page 18 Caution: The new driver always want to use rear brake,it will make brake abased very fast and brake distance too long. Warning Only using front brake or rear brake is dangerous, it may slip down or lose control. Especially in wet road condition or corner, should be very carefully use brake.
-
Page 19: Checking And Maintenance 1
Checking and maintenance The follow chart show the kilometers for maintenance. When reach the kilometer, it must follow the instruction to check and make maintenance. Turning system, engine, electronic system, side stand and wheels are key important parts. It is necessary to have a professional technician to handle. - Page 20 Maintenance Odometer ( KM ( Remark 2 period Everyday Maintenance 1000 2000 3000 4000 5000 6000 7000 8000 9000 10000 11000 12000 13000 14000 15000 check before content riding Every1000km I L A Driving chain( Remark 3 : 、 、 Friction disc Brake system 、...
- Page 21 ● Oil level and change oil Take out the oil scale, oil drainage bolt and gasket, dr- ① Check the engine oil before ride daily. ain out the oil completely, install the gasket and oil drainage Must keep oil level in the middle of m- bolt, tightening torque: 30N.m.
-
Page 22: Spark Plug
● Spark plug Adjust the free stroke of throttle grip according to the 0.6-0.7mm following steps. Using small metal brush or spark plug clea- Remove the throttle cable anti- ner to clean carbon on the spark plug in the dust cover. first 1000 km driving, and do it after every... -
Page 23: Idle Adjustment
Driving chain ● 5-15mm The life of driving chain depending on your maintenance. Not properly maintenance will cause its life shorter. Driving chain adjustment: Every drive 1000 km, please adjust If clutch cable lever adjust to maximum driving chain to make the degree of and still not correct, please adjust aga- chain droop as10-20mm. -
Page 24: Brake
same line. To help you doing this adjustment, there's basic ● Brake scale on the swing arm and every chain adjustment, they c- This vehicle front and rear brake are all disc brake. Correct an match and as reference from beginning to end. After m- operation for brake is very important of safe driving. -
Page 25: Tire
Brake oil level 3 Check brake pad condition. When the brake pad already have been abrased, the bra- Warning: ke cylinder oil will going If brake system or brake pad need to change, please go to the oil pipe automati- to professional dealer. -
Page 26: Seat
Remove the left side cover , can ① Warning: see the air filter ② Please do not try to repair any damage tire. It may affect Remove the side cover bracket . ③ the wheel balance and stable. Not correct air pressure Remove the bolts on the el-... -
Page 27: Catalyst
Catalyst ● Connecting fuel pipes, please In order to reach homologation standard, this vehicle muff- follow the drawing. ler has catalyst. ●Parts lubrication Catalyst contains rare metal, it will clean the harmful exha- Proper lubrication will keep yo- usting air which include Co, oxycarbide and oxynitride. Af- ur motorcycle every single part ter chemical treatment, those will change to Co and oxygen. -
Page 28: Battery
Battery ● First time using, please follow the steps: Battery under the seat.This vehicle battery is electrolyte Take off the seal paper on the top of battery, and add spe- aintain-free cial electrolyte into battery and close the cover to wait for type. -
Page 29: Fuse
If both side (left and right side) not bubble come out, ple- Fuse change ● ase pat slightly to the battery bottom 2 or 3 times, and ch- The fuse box under the seat of eck if any bubble come out again. driver, on the side of battery. -
Page 30: Headlight
Front headlight adjustment Remove the screws in picture ● ake off lamp cover, take out Front headlight beam can be adjusted in ③, vertical direction. The beam adjust screw bulb, change to new bulb. locate in the both side of front headlight. Take out the position light ①... - Page 31 Front, rear turning light bulb change Caution: Turn the lamp cover in clockwise direction, take out Gasoline stored in long time may go bad, it will be very bulb to change R 10w, 12v 10w bulb. difficult to start. Assemble back. Warning: Gasoline is very flammable, when you empty the gasoli- ne, please keep away spark or firework.
-
Page 32: Specification
Specification rame Size&Weight Front suspension ………… … ………… …………… Hydraulic shock Length … … … … … … … … … … … … Upper license plate 1940mm Rear shock absorber …… ………………… … Hydraulic monoshock Lower license plate 1995mm Brake method ……... - Page 33 Circuit diagram...