Table of Contents
Advertisement
serviço de atendimento
SAC
ao consumidor
4004 5400
Capitais e Regiões Metropolitanas
0800 707 5454
Demais localidades
W W W . L G E . C O M . B R
EM CASO DE DÚVIDA, CONSULTE NOSSO SAC
LCD TV
OWNER'S MANUAL
42LB7DF
47LB7DF
32LG50D
37LG50D
42LG50D
47LG50D
52LG50FD
42LG70YD
47LG70YD
52LG70YD
32LG80FD
42LG80FD
Please read this manual carefully before operating your set
and retain it for future reference.
Write the model number and serial number from the label
on the back cabinet on the front or back of this manual.
PLASMA TV
42PG60D
50PG60D
50PG70FD
60PG70FD
42PG30D
50PG30D
P/NO : MFL41469203 (0807-REV03)
Advertisement
Table of Contents

Related Manuals for LG 47LB7DF-SB


Summary of Contents for LG 47LB7DF-SB
- Page 1 LCD TV PLASMA TV OWNER’S MANUAL 42LB7DF 42PG60D 47LB7DF 50PG60D 32LG50D 50PG70FD 37LG50D 60PG70FD 42LG50D 42PG30D 47LG50D 52LG50FD 50PG30D 42LG70YD 47LG70YD 52LG70YD 32LG80FD 42LG80FD Please read this manual carefully before operating your set and retain it for future reference. Write the model number and serial number from the label on the back cabinet on the front or back of this manual.
-
Page 3: Safety Instructions
SAFETY INSTRUCTIONS IMPORTANT SAFETY INSTRUCTIONS Important safety instructions shall be provided with each apparatus. This information shall be given in a separate booklet or sheet, or be located before any operating instructions in an instruction for installation for use and supplied with the apparatus. This information shall be given in a language acceptable to the country where the apparatus is intended to be used. - Page 4 SAFETY INSTRUCTIONS Protect the power cord from being walked on Use only with the cart, stand, tripod, bracket, or pinched particularly at plugs, convenience or table specified by the manufacturer, or sold receptacles, and the point where they exit with the apparatus. When a cart is used, use from the apparatus.
- Page 5 CAUTION concerning the Power Cord : Wet Location Marking : Apparatus shall not Most appliances recommend they be placed be exposed to dripping or splashing and no upon a dedicated circuit; that is, a single outlet objects filled with liquids, such as vases, shall circuit which powers only that appliance and be placed on or over apparatus.
-
Page 6: Table Of Contents
CONTENTS - Channel Editing SAFETY INSTRUCTIONS .......... - Page 7 SOUND & LANGUAGE CONTROL APPENDIX Troubleshooting Auto Volume Leveler (Auto Volume) ..........
-
Page 8: Features Of This Tv
This TV has 3 HDMI ports. HDMI is a single cable connection that provides the highest quality images LG TV with this logo has ambient light sensor that and sound. adjusts the picture to fit room atmosphere. HDMI... -
Page 9: Preparation
PREPARATION Ensure that the following accessories are included with your TV. If an accessory is missing, please contact the dealer where you purchased the product. Owner's Manual Owner’s Manual Batteries Remote Control * Only wipe spots on the exterior with the polishing cloth. * Do not wipe roughly when removing stain. -
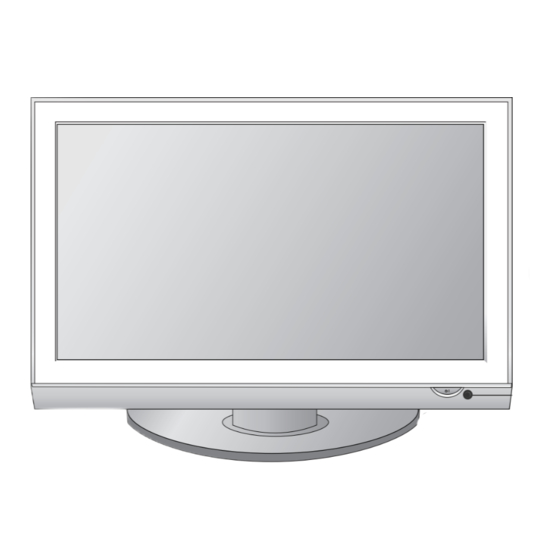
Page 10: Front Panel Information
PREPARATION FRONT PANEL INFORMATION ■ Image shown may differ from your TV. ■ NOTE: If your TV has a protection tape attached, remove the tape. And then wipe the TV with a cloth (If a polishing cloth is included with your TV, use it). Plasma TV Models Remote Control Sensor POWER Button... - Page 11 LCD TV Models : 42/47LB7DF CHANNEL ( )Buttons VOLUME ( ) Buttons ENTER Button ENTER ENTER ENTER MENU MENU MENU MENU Button INPUT INPUT INPUT INPUT Button POWER Button Remote Control Sensor Power/Standby Indicator Illuminates red in standby mode. Illuminates green when the set is switched on.
- Page 12 PREPARATION LCD TV Models : 32/37/42/47/52LG50 ** CHANNEL ( Buttons VOLUME (-,+) Buttons ENTER ENTER Button MENU MENU Button Intelligent Sensor INPUT INPUT Button Adjusts picture according to the surrounding conditions Power/Standby Indicator Illuminates red in standby mode. Illuminates blue when the set is switched on. (Can be adjusted P P o o w w e e r r I I n n d d i i c c a a t t o o r r in the OPTION menu.) Remote Control Sensor...
-
Page 13: Back Panel Information
BACK PANEL INFORMATION ■ Here shown may be somewhat different from your TV. Plasma TV Models USB Input HDMI Input Connect a HDMI signal to HDMI IN. AUDIO/VIDEO Input Connect audio/video out- put from an external device to these jacks. ANTENNA IN CABLE IN RGB IN... - Page 14 PREPARATION LCD TV Models : 42/47LB7DF S-VIDEO S-VIDEO Input Connect S-Video out from an S-VIDEO device. AUDIO/VIDEO Input Connect audio/video output from an external device to these jacks. AV IN 2 ANTENNA IN CABLE IN RGB IN ANTENNA IN DIGITAL IN DIGITAL AUDIO OUT ANTENNA IN DIGITAL IN...
- Page 15 LCD TV Models : 32/37/42/47/52LG50 **, 42/47/52LG70** USB Input HDMI Input Connect a HDMI signal to HDMI IN. S-VIDEO AUDIO/VIDEO Input Connect audio/video output from an external device to these jacks. AV IN 2 AV IN 2 LCD TV Models : 32/42LG80** USB Input HDMI Input Connect a HDMI signal...
- Page 16 PREPARATION HDMI/DVI IN Connect a HDMI signal to 1, 2 (or 3). DIGITAL AUDIO OUT ( or DIGITAL AUDIO OUT COAXIAL) Or DVI (VIDEO) signal to the 1, 2 or 3 port with a DVI to HDMI cable. Connect digital audio to various types of equipment. Note: In standby mode, these ports do not work.
-
Page 17: Stand Installation
STAND INSTALLATION ■ Image shown may differ from your TV Plasma TV Models : Only 42PG60*, 42PG30* Carefully place the TV screen side down on a cushioned surface to protect the screen from damage. Assemble the TV as shown. Fix the 4 bolts securely using the holes in the back of the TV. -
Page 18: Attaching The Tv To A Desk
PREPARATION LCD TV Models : 32/37/42LG50 **, 42LG70**, 32/42LG80** Carefully place the TV screen side down on a Assemble the TV as shown. cushioned surface to protect the screen from damage. Fix the 4 bolts securely using the holes in the Assemble the parts of the S S t t a a n n d d B B o o d d y y with back of the TV. -
Page 19: Protection Cover
PROTECTION COVER ( Except 42/47LB7DF) ■ Image shown may differ from your TV. After removing the stand, install the included p p r r o o t t e e c c t t i i o o n n c c o o v v e e r r over the hole for the stand. Press the P P R R O O T T E E C C T T I I O O N N C C O O V V E E R R into the TV until you hear it click. -
Page 20: Cable Management
PREPARATION CABLE MANAGEMENT ■ Here shown may be somewhat different from your TV. Plasma TV Models 42PG60*, 42/50PG30* 50PG60*, 50/60PG70** Connect the cables as necessary. Connect the cables as necessary. To connect additional equipment, see the To connect additional equipment, see the EXTERNAL EQUIPMENT SETUP section. - Page 21 LCD TV Models 32/37/42/47/52LG50 **, 42/47LB7DF 42/47/52LG70**, 32/42LG80** Connect the cables as necessary. Connect the cables as necessary. To connect additional equipment, see the To connect additional equipment, see the EXTERNAL EQUIPMENT SETUP section. EXTERNAL EQUIPMENT SETUP section. Install the CABLE MANAGEMENT CLIP as Install the C C A A B B L L E E M M A A N N A A G G E E M M E E N N T T C C L L I I P P shown.
-
Page 22: Securing The Tv To The Wall Fall Over
PREPARATION SECURING THE TV TO THE WALL FALL OVER. This feature is not available for all models. Here shown may be somewhat different from your TV. ■ Position the TV close to the wall to avoid the possibility of it falling when pushed. ■... -
Page 23: Desktop Pedestal Installation
This part mainly use picture for Plasma TV model. ■ Here shown may be somewhat different from your TV. DESKTOP PEDESTAL INSTALLATION For adequate ventilation allow a clearance of 4” (10cm) all around the TV. 4 inches 4 inches 4 inches 4 inches Ensure adequate ventilation by following the clearance recommendations. -
Page 24: Antenna Or Cable Connection
PREPARATION To prevent damage do not connect to the power outlet until all connections are made between the devices. ■ ANTENNA OR CABLE CONNECTION ■ Here shown may be somewhat different from your TV. 1. Antenna (Analog or Digital) Wall Antenna Socket or Outdoor Antenna without a Cable Box Connections. For optimum picture quality, adjust antenna direction if needed. -
Page 25: External Equipment Setup
EXTERNAL EQUIPMENT SETUP To prevent the equipment damage, never plug in any power cords until you have finished connecting all equipment. ■ This part of EXTERNAL EQUIPMENT SETUP mainly use picture for Plasma TV model. ■ HD RECEIVER SETUP This TV can receive Digital Over-the-air/Cable signals without an external digital set-top box. However, if you do receive digital signals from a digital set-top box or other digital external device, refer to the figure as shown below. - Page 26 EXTERNAL EQUIPMENT SETUP HDMI Connection 1. How to connect RGB IN Connect the digital set-top box to H H D D M M I I / / D D V V I I I I N N 1 1 , AUDIO RGB(PC) (RGB/D...
- Page 27 DVI to HDMI Connection ANTENNA IN CABLE IN RGB IN DIGITAL AUDIO OUT AUDIO RGB(PC) (RGB/DVI) OPTICAL HDMI/DVI IN RS-232C IN COMPONENT IN AUDIO OUT (CONTROL & SERVICE) AUDIO AUDIO VIDEO VIDEO MONO DVI-DTV OUTPUT 1. How to connect Connect the DVI output of the digital set-top box to the H H D D M M I I / / D D V V I I I I N N 1 1 , 2 2 or H H D D M M I I I I N N 3 3 jack on the TV. Connect the audio output of the digital set-top box to the A A U U D D I I O O ( ( R R G G B B / / D D V V I I ) ) jack on the TV.
-
Page 28: Dvd Setup
EXTERNAL EQUIPMENT SETUP DVD SETUP Component Connection 1. How to connect Connect the video outputs ( Y, P ) of the DVD to the C C O O M M P P O O N N E E N N T T I I N N V V I I D D E E O O 1 1 jacks on the TV. RGB IN Match the jack colors ( Y = green, P = red ) . - Page 29 S-Video Connection 1. How to connect AUDIO S-VIDEO Connect the S-VIDEO output of the DVD to the S S - - V V I I D D E E O O input on the TV. Connect the audio outputs of the DVD to the A A U U D D I I O O ANTENNA IN CABLE IN input jacks on the TV.
- Page 30 EXTERNAL EQUIPMENT SETUP HDMI Connection RGB(PC) 1. How to connect HDMI/DVI IN COMPONEN Connect the HDMI output of the DVD to the H H D D M M I I / / D D V V I I I I N N 1 1 , 2 2 , or H H D D M M I I I I N N 3 3 jack on the TV. No separated audio connection is necessary.
-
Page 31: Vcr Setup
VCR SETUP To avoid picture noise ( interference ) , leave an adequate distance between the VCR and TV. ■ Use the ISM feature in the Option menu to avoid having a fixed image remain on the screen for a long period ■... - Page 32 EXTERNAL EQUIPMENT SETUP Composite (RCA) Connection ANT IN S-VIDEO VIDEO 1. How to connect ANT OUT OUTPUT SWITCH Connect the A A U U D D I I O O /V V I I D D E E O O jacks between TV and VCR.
-
Page 33: Other A/V Source Setup
OTHER A/V SOURCE SETUP 1. How to connect Camcorder Connect the A A U U D D I I O O /V V I I D D E E O O jacks Video Game Set between TV and external equipment. Match the jack colors. -
Page 34: Pc Setup
EXTERNAL EQUIPMENT SETUP PC SETUP This TV provides Plug and Play capability, meaning that the PC adjusts automatically to the TV's settings. VGA (D-Sub 15 pin) Connection 1. How to connect RGB IN AUDIO RGB(PC) Connect the VGA output of the PC to the R R G G B B ( ( P P C C ) ) (RGB/DVI) jack on the TV. - Page 35 DVI to HDMI Connection RGB IN DIGITAL AUDIO OUT AUDIO RGB(PC) (RGB/DVI) OPTICAL RS-232C IN HDMI/DVI IN COMPONENT IN AUDIO OUT (CONTROL & SERVICE) AUDIO AUDIO VIDEO MONO VIDEO DVI-PC OUTPUT AUDIO 1. How to connect Connect the DVI output of the PC to the H H D D M M I I / / D D V V I I I I N N 1 1 , 2 2 or H H D D M M I I I I N N 3 3 jack on the TV. Connect the PC audio output to the A A U U D D I I O O ( ( R R G G B B / / D D V V I I ) ) jack on the TV.
- Page 36 EXTERNAL EQUIPMENT SETUP NOTES Depending on the graphics card, DOS mode may Avoid keeping a fixed image on the screen for a not work if a HDMI to DVI Cable is in use. long period of time. The fixed image could become permanently imprinted on the screen.
-
Page 37: Screen Setup For Pc Mode
Screen Setup for PC mode Selecting Resolution You can choose the resolution in RGB-PC mode. The position, phase, and other settings can also be adjusted. SCREEN Move Prev. MENU PICTURE Move Enter 1024 x 768 Resolution • Advanced Control 1280 x 768 •... - Page 38 EXTERNAL EQUIPMENT SETUP Adjustment for screen Position, Size, Phase If the picture is not clear after auto adjustment and especially if characters are still trembling, adjust the picture phase manually. This feature operates only in RGB-PC mode. SCREEN Move Prev. MENU PICTURE Move...
- Page 39 Screen Reset (Reset to original factory values) Returns to the default settings Resolution, Position, Size and Phase at the factory. This feature operates only in RGB-PC mode. SCREEN Move Prev. MENU PICTURE Move Enter Resolution • Advanced Control • Picture Reset Position Screen (RGB-PC) Screen (RGB-PC)
-
Page 40: Usb Connection
EXTERNAL EQUIPMENT SETUP USB CONNECTION 1. How to connect Connect the USB device to the U U S S B B I I N N jack on the side of TV(or on the back of TV). 2. How to use After connecting the U U S S B B I I N N jack, you use the USB ■... -
Page 41: Audio Out Connection
AUDIO OUT CONNECTION Send the TV’s audio to external audio equipment via the Digital Audio Output ( Optical ) port. AUDIO Analog 1. How to connect Connect audio outputs to the TV’s A A U U D D I I O O O O U U T T jacks. Set the “TV Speaker option - Off”... -
Page 42: Watching Tv / Channel Control
WATCHING TV / CHANNEL CONTROL REMOTE CONTROL KEY FUNCTIONS When using the remote control, aim it at the remote control sensor on the TV. (Only 42/50PG30*) POWER POWER INPUT RATIO INPUT PICTURE SOUND Q. MENU MENU INFO TV/DVD/VCR Select the remote operating mode: TV, DVD, or VCR. Turns your TV or any other programmed equipment POWER on or off, depending on the mode. -
Page 43: Installing Batteries
THUMBSTICK Navigate the on-screen menus and adjust the system (Up/Down/Left settings to your preference. Right/ENTER) RETURN Allows the user to move return one step in an interactive application or other user interaction function. INFO Q. MENU MENU See a list of AV devices connected to TV. When you toggle this button, the Simplink menu appears at the screen. -
Page 44: Turning On The Tv
WATCHING TV / CHANNEL CONTROL TURNING ON THE TV First, connect power cord correctly. At this moment, the TV switches to standby mode. , I I N N P P U U T T , C C H H ( ( In standby mode to turn TV on, press the ■... -
Page 45: Quick Menu
QUICK MENU Your TV's OSD (On Screen Display) may differ slightly from what is shown in this manual. Q.Menu (Quick Menu) is a menu of features which users might use frequently. A A s s p p e e c c t t R R a a t t i i o o : Selects your desired picture format. •... -
Page 46: Initial Setting
WATCHING TV / CHANNEL CONTROL INITIAL SETTING This Function guides the user to easily set the essential items for viewing the TV for the first time when pur- chasing the TV. If will be displayed on the screen when turning the TV on for the first time. It can also be acti- vated from the user menus. - Page 47 Step3. Option setting Step3. Option Setting Select O O S S D D L L a a n n g g u u a a g g e e S S e e t t t t i i n n g g or 1.
-
Page 48: On-Screen Menus Selection
WATCHING TV / CHANNEL CONTROL ON-SCREEN MENUS SELECTION Your TV's OSD (On Screen Display) may differ slightly from that shown in this manual. SETUP PICTURE AUDIO Move Enter Move Enter Move Enter Auto Tuning Aspect Ratio : 16:9 Auto Volume : Off Only LCD TV models Manual Tuning... -
Page 49: Channel Setup
CHANNEL SETUP Auto Scan (Auto Tuning) Automatically finds all channels available through antenna or cable inputs, and stores them in memory on the channel list. Run Auto Tuning again after any Antenna/Cable connection changes. SETUP SETUP Move Enter Move Enter Auto Tuning Auto Tuning Auto Tuning... -
Page 50: Add/Delete Channel (Manual Tuning)
WATCHING TV / CHANNEL CONTROL Add/Delete Channel (Manual Tuning) If selecting DTV input signal, you can view the on-screen signal strength monitor to see the quality of the sig- nal being received. SETUP SETUP Move Enter Move Enter Auto Tuning Auto Tuning Manual Tuning Manual Tuning... -
Page 51: Channel Editing
Channel Editing From the default channel list created from the Auto Tuning channel search, you can create two different types of channel lists in memory: “custom list” and “favorite channel list”. A custom list can be created by toggling each channel on or off with ENTER button. The channels in the Custom List are displayed in black and the channels deleted from the Custom List are displayed in gray. -
Page 52: Scan Option
WATCHING TV / CHANNEL CONTROL SCAN OPTION Whether to search all channels or the first channel of virtual channels is switched with when one or more virtual channels exist at one physical channel. P P r r i i m m a a r r y y C C h h a a n n n n e e l l : Only scan the first channel of virtual channels. A A l l l l C C h h a a n n n n e e l l : Scan full channel. -
Page 53: System Color
SYSTEM COLOR This function set color suited the each signal . M M u u l l t t i i : Automatically, set the PAL-M/N or NTSC. SETUP SETUP Move Enter Move Enter Auto Tuning Auto Tuning Manual Tuning Manual Tuning Channel Edit Channel Edit... -
Page 54: Input List
WATCHING TV / CHANNEL CONTROL INPUT LIST Only these input signals which are connected to a TV can be activated and selected. Antenna Cable Component1 INPUT ENTER Select the desired input source. Antenna Cable Component1 HDMI3 HDMI2 HDMI1 RGB-PC Component2 Disconnected input is inactivated. -
Page 55: Simplink
This function operates only with devices with the logo. This TV might not function when using it with other products with HDMI-CEC function. This allows you to control and play other AV devices connected with HDMI cable without additional cables and settings. - Page 56 WATCHING TV / CHANNEL CONTROL SimpLink Functions D D i i r r e e c c t t P P l l a a y y : : After connecting AV devices to TV, you can directly control the devices and play ■...
- Page 57 SimpLink Menu T T V V v v i i e e w w i i n n g g : Switch to the previous TV channel regardless of the current mode. D D I I S S C C p p l l a a y y b b a a c c k k : Select and play discs. When multiple discs are available, the titles Selected Device of discs are conveniently displayed at the...
-
Page 58: Input Label
WATCHING TV / CHANNEL CONTROL INPUT LABEL You can set a label to each input source when it's not in use. Available label: VCR -> DVD -> Set Top Box -> Satellite -> Cable Box -> Game -> PC -> HD-DVD -> Blu-ray. -
Page 59: Av Mode
AV MODE As pressing the AV MODE button to change the Cinema (orTHX Cinema), Sport and Game at the same time, you can see the optimal images and sounds. It gives the viewing environment (Picture Quality + Sound Quality) optimized for the con- sumers. -
Page 60: Epg
WATCHING TV / CHANNEL CONTROL EPG (ELECTRONIC PROGRAM GUIDE) (IN DIGITAL MODE) This system has an Electronic Program Guide (EPG) to help your navigation through all the possible viewing options. The EPG supplies information such as program listings, start and end times for all available services. In addition, detailed information about the program is often available in the EPG (the availability and amount of these pro- gram details will vary, depending on the particular broadcaster). - Page 61 ENTER Select the G G o o t t o o t t h h i i s s C C H H . Tela Quente If you select next program, it can be reserved to 5-1 Globo HD view and the is marked at the selected Mon, Nov 30 09:50AM ~10:30AM program.
-
Page 62: Schedule List
WATCHING TV / CHANNEL CONTROL SCHEDULE LIST Reserved program displays a list of previously registered in EPG. OPTION Move Enter OPTION Move Enter Language : English Language : English Input Label Input Label Schedule List Schedule List Schedule List Schedule List SIMPLINK : On SIMPLINK... -
Page 63: Usb
TO USE THE USB DEVICE Image shown may differ from your TV. When connecting the USB device When you connect a USB device, this screen is displayed, automatically. In USB device, you can not add a new folder or delete the existing folder. Connect the USB device to the U U S S B B I I N N jacks on the side of TV(or on the back of TV). -
Page 64: Photo List
PHOTO LIST You can view .JPG files from USB storage devices. The On Screen Display on your model may be slightly different. Images are an example to assist with the TV operation. Supported photo file: * .JPG Baseline: width<=15360, height<=8640 •... - Page 65 Photo Selection and PopUp Menu USB Device PHOTO LIST Page 2/3 No Marked Free Space 150MB My Father My Father Mulan Star 1366 768, 125KB Upper Navigate Move Page Mark Exit PopUp Menu RETURN USB Device When you select a file (not folder), this PopUp PHOTO LIST Page 2/3 No Marked...
- Page 66 Full Screen Menu You can change the Photo List view so that it fills the screen. More operations are available in full screen mode. USB Device PHOTO LIST Page 2/3 No Marked Free Space 150MB My Father My Father Mulan Star 1366 768, 125KB...
- Page 67 Select the S S l l i i d d e e s s h h o o w w , B B G G M M , ( ( R R o o t t a a t t e e ) ) , ENTER D D e e l l e e t t e e , O O p p t t i i o o n n or H H i i d d e e .
-
Page 68: Music List
MUSIC LIST Purchased music files(*.MP3) may contain copyright restrictions. Playback of these files may not be support- ed by this model. You can use the Music List menu to play MP3 files form a USB storage device. The On Screen Display on your model may be slightly different. Images are an example to assist with the TV operation. - Page 69 Music Selection and PopUp Menu As shown , up to 6 music titles are listed per page. USB Device MUSIC LIST Page 2/3 No Marked Free Space 150MB Music Title Play Time P P l l a a y y (During stop) : Play the selected musics. Up Folder Once a music finishes playing, the next select- ed one will be played.
- Page 70 ■ The play information box (as shown below) will automatically move across the screen when there is no user input to pre- vent a fixed image remaining on the screen for a extended period of time. NOTE When music is playing, is displayed in front of the music play time.
-
Page 71: Picture Control
PICTURE CONTROL PICTURE SIZE (ASPECT RATIO) CONTROL This feature lets you choose the way an analog picture with a 4:3 aspect ratio is displayed on your TV. RGB-PC input source use 4:3 or 16:9 aspect ratio. ■ NOTE (Only plasma TV models) If a fixed image is displayed on the screen for a long time, the image could become imprinted on the screen and remain visible. - Page 72 PICTURE CONTROL Set by program Selects the proper picture proportion to match Zoom 2 the source’s image. Choose Zoom 2 when you want the picture to be (4:3 4:3) altered, both vertically extended and cropped. The picture taking a halfway trade off between alteration and screen coverage.
-
Page 73: Preset Picture Settings
PRESET PICTURE SETTINGS Picture Mode-Preset There are factory presets for picture settings available in the user menus. You can use a preset, change each setting manually, or let the Intelligent Sensor. PICTURE PICTURE Move Enter Move Enter Aspect Ratio : 16:9 Aspect Ratio : 16:9 Picture Mode : Standard Picture Mode : Standard... -
Page 74: Color Tone - Preset
PICTURE CONTROL Color Tone-Preset (Warm/Medium/Cool) Choose one of three automatic color adjustments. Set to warm to enhance hotter colors such as red, or set to cool to see less intense colors with more blue. PICTURE PICTURE Move Enter Move Enter Color Temperature •... -
Page 75: Manual Picture Adjustment
MANUAL PICTURE ADJUSTMENT Picture Mode-User Mode Adjust the picture appearance to suit your preference and viewing situations. This feature is disable in “P P i i c c t t u u r r e e M M o o d d e e - - I I n n t t e e l l l l i i g g e e n n t t S S e e n n s s o o r r ”. PICTURE Move Enter... -
Page 76: Picture Mode-Expert Control
PICTURE CONTROL Picture Mode-Expert Control By segmenting categories, E E x x p p e e r r t t 1 1 and E E x x p p e e r r t t 2 2 provide more categories which users can set as they see fit, offering the optimal picture quality for users. -
Page 77: Picture Improvement Technology
PICTURE IMPROVEMENT TECHNOLOGY Fresh Contrast: Optimizes the contrast automatically according to the brightness of the reflection. Fresh Color: Adjusts the color of the reflection automatically to reproduce as close as possible natural colors. Noise Reduction: Removes interference up to the point where it does not damage the original picture. Gamma: High gamma values display whitish images and low gamma values display high contrast images. -
Page 78: Advanced Control - Real Cinema/Film Mode
PICTURE CONTROL ADVANCED CONTROL - REAL CINEMA / FILM MODE Set up the TV for the best picture appearance for viewing movies. When you operate Real Cinema/Film Mode (3:2 Pull-Down Mode or Cinema Correction Mode), the TV will adjust 24 fps video from movies to 30 fps video for display. It’s not available to use this function in RGB-PC . -
Page 79: Advanced Control - Black(Darkness) Level
ADVANCED CONTROL - BLACK(DARKNESS) LEVEL Adjusting the contrast and the brightness of the screen using the black level of the screen. It’s not available to use this function in DTV or RGB-PC . PICTURE PICTURE Move Enter Move Enter Color Temperature Medium •... -
Page 80: Advanced Control - Eye Care
PICTURE CONTROL ADVANCED CONTROL - EYE CARE - Only LCD TV models The Eye Care limits the brightness of the LCD. It reduces the eye dazzling by lowering the backlight voltage to decrease the brightness if the APL(Average Picture Level) is too high. When selecting Picture Mode (Standard, Game and Sport), you can operate this function. -
Page 81: Advanced Control - Trumotion
ADVANCED CONTROL - TRUMOTION (Only 42/47/52LG70 ** ) It is used for the best picture quality without any motion blur or judder when you enter a quick image or Film Source. This feature is disable in RGB-PC,HDMI-PC mode. PICTURE PICTURE Move Enter Move... -
Page 82: Trumotion Demo
TruMotion TruMotion RETURN Exit LG’s Advanced TruMotion 100Hz technology provides ima LG’s Advanced TruMotion 100Hz technology provides im MENU Select P P I I C C T T U U R R E E . ENTER Select T T r r u u M M o o t t i i o o n n D D e e m m o o . . -
Page 83: Picture Reset
PICTURE RESET Use to quickly reset selected Picture menu options to their original factory preset values. In THX Cinema mode, this function is disabled. PICTURE PICTURE Move Enter Move Enter • Advanced Control • Advanced Control • Reset • Reset •... -
Page 84: Power Indicator
PICTURE CONTROL POWER INDICATOR - Only LCD TV models It helps you adjust the brightness of moving LED and sound when power is turned on. OPTION OPTION Move Enter Move Enter Set ID Set ID Standby Light Power Indicator Power Indicator Power Indicator Power Indicator Power Light... -
Page 85: Image Sticking Minimization (Ism) Method
IMAGE STICKING MINIMIZATION (ISM) METHOD - Only Plasma TV A frozen still picture from a PC/video game displayed on the screen for prolonged periods will result in a ghost image. Use our unique method to minimize any fixed image on the screen. OPTION OPTION Move... -
Page 86: Power Saving Picture Mode
SOUND & LANGUAGE CONTROL POWER SAVING PICTURE MODE - Only Plasma TV This function allows you to reduce the power consumption of the set. OPTION OPTION Move Enter Move Enter Language : English Language : English Input Label Input Label Schedule List Schedule List SIMPLINK... -
Page 87: Sound & Language Control
SOUND & LANGUAGE CONTROL AUTO VOLUME LEVELER (AUTO VOLUME) Auto Volume makes sure that the volume level remains consistent whether you are watching a commercial or a regular TV program. AUDIO AUDIO Move Enter Move Enter Auto Volume : Off Auto Volume : Off Auto Volume... -
Page 88: Preset Sound Setting (Sound Mode)
SOUND & LANGUAGE CONTROL PRESET SOUND SETTINGS (SOUND MODE) Sound Mode lets you enjoy the best sound without any special adjustment because the TV sets the appropri- ate sound options based on the program content. S S t t a a n n d d a a r r d d , M M u u s s i i c c , C C i i n n e e m m a a , S S p p o o r r t t and G G a a m m e e are preset for good sound quality at the factory and are not adjustable. -
Page 89: Sound Setting Adjustment (User Mode)
SOUND SETTING ADJUSTMENT (USER MODE) Adjust the sound to suit your taste and room situations. AUDIO AUDIO Move Enter Move Enter Auto Volume : Off Auto Volume : Off Clear Voice : On Clear Voice : On Balance Balance Sound Mode : Standard Sound Mode : Standard... -
Page 90: Clear Voice
SOUND & LANGUAGE CONTROL CLEAR VOICE By differentiating the human sound range from others, it improves the sound quality of voices. AUDIO AUDIO Move Enter Move Enter Auto Volume : Off Auto Volume : Off Clear Voice : Off Clear Voice : On Clear Voice Clear Voice... -
Page 91: Balance
BALANCE Adjust the left/right sound of speaker to suit your taste and room situations. AUDIO AUDIO Move Enter Move Enter Auto Volume : Off Auto Volume : Off Clear Voice : On Clear Voice : On Balance Balance Balance Balance Balance Sound Mode : Standard... -
Page 92: Tv Speakers On/Off Setup
SOUND & LANGUAGE CONTROL TV SPEAKERS ON/ OFF SETUP Turn the TV speakers off if using external audio equipment. Feature turns the TV Speakers option On or Off. AUDIO AUDIO Move Enter Move Enter TV Speaker : Off TV Speaker : Off MENU Select A A U U D D I I O O . -
Page 93: Stereo/Sap Broadcasts Setup
STEREO/SAP BROADCASTS SETUP For Analog only: This TV can receive MTS stereo programs and any SAP (Secondary Audio Program) that accompanies the stereo program if the station transmits an additional sound signal. Mono sound is auto- matically used if the broadcast is only in Mono. Plasma TV Models LCD TV Models Q-Menu... -
Page 94: Audio Reset
SOUND & LANGUAGE CONTROL AUDIO RESET Returns to the default factory setting for Sound Mode, Auto Volume and Balance. AUDIO AUDIO Move Enter Move Enter Auto Volume : Off Auto Volume : Off Clear Voice : On Clear Voice : On Balance Balance Sound Mode... -
Page 95: Audio Language
AUDIO LANGUAGE Other languages may be available if a digital signal is provided by the broadcasting station. This feature operates only in DTV mode. OPTION OPTION Move Enter Move Enter Language Language : English :English Language : English Language :English Menu English(Inglês) Input Label... -
Page 96: On-Screen Menus Language Selection
SOUND & LANGUAGE CONTROL ON-SCREEN MENUS LANGUAGE SELECTION The menus can be shown on the screen in the selected language. First select your language. OPTION OPTION Move Enter Move Enter Language : English Language : English Language :English Language :English Menu English(Inglês) Input Label... -
Page 97: Caption Mode
CAPTION MODE Analog Broadcasting System Captions Select a caption mode for displaying captioning information if provided on a program. Analog caption displays information at any position on the screen and is usually the program's dialog. Caption/Text, if provided by the broadcaster, would be available for analog channels on the Antenna/Cable. This TV is programmed to memoririze the caption/text mode which was last set when you turn the power off. -
Page 98: Time Setting
TIME SETTING CLOCK SETTING Auto Clock Setup The time is set automatically from a digital channel signal. The digital channel signal includes information for the current time provided by the broadcasting station. Set the clock manually if the current time is set incorrectly by the auto clock function. TIME TIME Move... -
Page 99: Manual Clock Setup
Manual Clock Setup If the current time setting is wrong, reset the clock manually. TIME TIME Move Enter Move Enter Clock : Nov/27/2007 02:15 AM Clock Clock : Nov/27/2007 02:15 AM : Nov/27/2007 02:15 AM Clock : Nov/27/2007 02:15 AM Manual Off Time : Off... -
Page 100: Auto On/Off Time Setting
TIME SETTING AUTO ON/OFF TIME SETTING This function operates only if the current time has been set. The O O f f f f T T i i m m e e function overrides the O O n n T T i i m m e e function if they are both set to the same time. The TV must be in standby mode for the O O n n T T i i m m e e to work. -
Page 101: Sleep Timer Setting
SLEEP TIMER SETTING The Sleep Timer turns the TV off at the preset time. Note that this setting is cleared when the TV is turned off. TIME TIME Move Enter Move Enter Clock : Nov/27/2007 02:15 AM Clock : Nov/27/2007 02:15 AM Off Time : Off Off Time... -
Page 102: Auto Shut-Off Setting
TIME SETTING AUTO SHUT-OFF SETTING TV will be automatically turned off, in case of no signal for 10 minutes. TIME TIME Move Enter Move Enter Clock : Nov/27/2007 02:15 AM Clock : Nov/27/2007 02:15 AM Off Time : Off Off Time : Off On Time : Off... -
Page 103: Parental Control / Ratings
PARENTAL CONTROL / RATINGS Parental Control can be used to block specific channels, ratings and other viewing sources. The Parental Control Function is used to block program viewing based on the ratings sent by the broadcasting station. The default setting is to allow all programs to be viewed. Viewing can be blocked by choosing the type of the program and the categories. -
Page 104: Set Password
PARENTAL CONTROL / RATINGS Set Password Change the password by inputting a new password twice. LOCK LOCK Move Enter Move Enter Lock System : Off Lock System : Off Set Password Set Password : Off Set Password Set Password : Off Block Channel Block Channel Confirm... -
Page 105: Lock System
Lock System Enables or disables the blocking scheme you set up previously. LOCK LOCK Move Enter Move Enter Lock System : Off Lock System : Off Lock System Lock System : Off : Off Set Password Set Password Block Channel Block Channel Rating Rating... -
Page 106: Block Channel
PARENTAL CONTROL / RATINGS BLOCK CHANNEL Blocks any channels that you do not want to watch or that you do not want your children to watch. LOCK Move Enter Lock System : Off Set Password Block Channel Block Channel Rating Input Block MENU Previous... -
Page 107: Rating (Movie Rating)
RATING ( Movie Rating) Blocks movies according to the movie ratings limits specified, so children cannot view certain movies. You can set the ratings limit by blocking out all the movies with the ratings above a specified level. Keep in mind that the movie ratings limit only applies to movies shown on TV, not TV programs, such as soap operas. -
Page 108: External Input Blocking
PARENTAL CONTROL / RATINGS EXTERNAL INPUT BLOCKING Enables you to select a source to block from the external source devices you have hooked up. LOCK LOCK Move Enter Move Enter Lock System : Off Lock System : Off Set Password Set Password Block Channel Block Channel... -
Page 109: Key Lock
KEY LOCK The TV can be set up so that it can only be used with the remote control. This feature can be used to prevent unauthorized viewing by locking out the front panel controls. This TV is programmed to remember which option it was last set to even if you turn the TV off. OPTION OPTION Move... -
Page 110: Appendix
APPENDIX TROUBLESHOOTING T T h h e e o o p p e e r r a a t t i i o o n n d d o o e e s s n n o o t t w w o o r r k k n n o o r r m m a a l l l l y y . . ■... - Page 111 T T h h e e a a u u d d i i o o f f u u n n c c t t i i o o n n d d o o e e s s n n o o t t w w o o r r k k . . ■...
-
Page 112: Maintenance
APPENDIX MAINTENANCE Early malfunctions can be prevented. Careful and regular cleaning can extend the amount of time you can enjoy your new TV. Caution: Be sure to turn the power off and unplug the power cord before you begin any cleaning. Cleaning the Screen Here’s a great way to keep the dust off your screen for a while. -
Page 113: Product Specifications
1 144.3 x 825.5 x 306.4mm (inches/mm) 45.1 x 29.7 x 4.1 inches 47LB7DF Without Stand 1 144.3 x 754.7 x 103.0 mm 47LB7DF-SB 70.8 pounds / 32.1 kg Weight (pounds / kg) With Stand 57.3 pounds / 26.0 kg Without Stand 32.0 x 23.5 x 9.1 inches... - Page 114 APPENDIX PRODUCT SPECIFICATIONS 50.8 x 35.1 x 13.5 inches Width x Height x Depth With Stand 1291.7 x 892.1 x 342.9 mm (inches/mm) 5 5 2 2 L L G G 5 5 0 0 F F D D 50.8 x 32.1 x 4.5 inches Without Stand (52LG50FD-SA) 1291.7 x 817 .0 x 1 15.3 mm...
- Page 115 41.1 x 28.9 x12.1 inches Width x Height x Depth With Stand 1044.4 x 735.4 x 308.0 mm (inches/mm) 41.1 x 26.7x 3.1 inches 42PG60D Without Stand 1044.4 x680.6x 79.6mm 42PG60D-SA 61.7 pounds / 28.0 kg Weight (pounds / kg) With Stand 55.1 pounds / 25.0 kg Without Stand...
-
Page 116: Programming The Remote Control
APPENDIX PROGRAMMING THE REMOTE CONTROL The remote control is a multi brand or universal remote. It can be programmed. to operate most remote controlled devices from other manufacturers. Note that the remote control may not control all models from other brands. Programming a code into a remote mode Testing your remote control. - Page 117 145 147 VIDEOSONIC 047 048 REALISTIC 003 008 010 014 WARDS 003 013 017 024 LG (GOLDSTAR) 001 012 013 020 031 033 034 040 031 033 034 040 101 106 1 14 123 053 054 101 053 054 131...
-
Page 118: Ir Codes
APPENDIX IR CODES 1. How to Connect Connect your wired remote control to the Remote Control port on the TV. ■ 2. Remote Control IR Codes Output waveform ■ Single pulse, modulated with 37 .917KHz signal at 455KHz Carrier frequency FCAR = 1/TC = fOSC/12 Duty ratio = T1/TC = 1/3 Configuration of frame... - Page 119 C C o o d d e e ( ( H H e e x x a a ) ) F F u u n n c c t t i i o o n n N N o o t t e e R/C BUTTON(POWER ON/OFF) POWER R/C BUTTON...
-
Page 120: External Control Through Rs-232C
APPENDIX EXTERNAL CONTROL THROUGH RS-232C The RS-232C port allows you connect the RS-232C input jack to an external control device (such as a computer or an A/V control system) to control the TV’s functions externally. Note: RS-232C on this unit is intended to be used with third party RS-232 control hardware and software. ■... -
Page 121: Communication Parameters
RS-232C Configurations Either cable below can be used. 7-Wire Configuration 3-Wire Configurations ( Serial female-female NULL modem cable ) ( Not standard ) D-Sub 9 D-Sub 9 D-Sub 9 D-Sub 9 Set ID Use this function to specify a TV ID number. Refer to ‘Real Data Mapping1’. -
Page 122: Command Reference List
APPENDIX Command Reference List DATA DATA C C O O M M M M A A N N D D 1 1 C C O O M M M M A A N N D D 2 2 C C O O M M M M A A N N D D 1 1 C C O O M M M M A A N N D D 2 2 (Hexadecimal) (Hexadecimal) 0 ~ 64... - Page 123 0 0 1 1 . . P P o o w w e e r r ( ( C C o o m m m m a a n n d d : : k k a a ) ) 0 0 5 5 .
- Page 124 APPENDIX 0 0 9 9 . . C C o o l l o o r r ( ( C C o o m m m m a a n n d d : : k k i i ) ) 1 1 5 5 .
- Page 125 1 1 8 8 . . I I S S M M M M e e t t h h o o d d ( ( C C o o m m m m a a n n d d : : j j p p ) ) (Only Plasma TV models) 2 2 3 3 .
- Page 126 APPENDIX Data5: Main/Sub Two/One Using Physical Step Part Channel Picture Channel Reserved Main Analog air Analog cable No Use DTV air Reserved Reserved Reserved Reserved Reserved Reserved The table above lists the binary code which must be converted to Hexadecimal before sending. For example: The binary code to tune the sub source to an analog cable channel is “1000 0001”, which translates to “81”...
-
Page 127: Open Source Software Notice
LG Electronics at: Opensource@lge.com This offer is valid for a period of three(3) years from the date of the distribution of this product by LG Electronics. - Page 128 serviço de atendimento ao consumidor 4004 5400 Capitais e Regiões Metropolitanas 0800 707 5454 Demais localidades W W W . L G E . C O M . B R EM CASO DE DÚVIDA, CONSULTE NOSSO SAC...
Need help?
Do you have a question about the 47LB7DF-SB and is the answer not in the manual?
Questions and answers