
Summary of Contents for exaSound PlayPoint Mark II
- Page 1 PlayPoint Mark II Network Audio Player Owner’s Manual PLEASE READ BEFORE OPERATION REV. 1.0.0 i – 04/2018...
-
Page 2: Table Of Contents
Package Contents ......................7 Overview ......................... 8 PlayPoint Mark II - New Features ................9 How Would I Use the PlayPoint Mark II? ............. 9 Roon Server and Roon Ready Player ....................9 UPnP /OpenHome Player and Audio Library Server ..............11 Network Audio Adapter for HQPlayer ................... - Page 3 Volume Bypass ..........................25 Maximum Volume Limit ......................... 25 Using External USB Drives for Storing Audio Files ......... 26 PlayPoint Mark II Music Servers and Music Libraries ........26 Roon Music Library ........................26 UPnP Music Library ........................27 MPD Music Library ......................... 27 Web User Interface ....................
-
Page 4: Safety Information
Safety Information Explanation of Graphical Symbols The lightning flash with arrowhead symbol, within an equilateral triangle, is intended to alert the user to the presence of uninsulated “dangerous voltage” within the product’s enclosure that may be of sufficient magnitude to constitute a risk of electric shock to persons. - Page 5 • The device is still receiving power from the AC power source as long as it is connected to the wall outlet, even if the device itself has been turned off. • Unplug the power adapter if you are not going to use the device for an extended period of time. Hold the power adapter when unplugging.
-
Page 6: Proper Device Placement
ZeroJitter™, GalvanicInfinity™, ENclusiv™, FemtoMaster™ and ZeroResolutionLoss™ are trademarks of exaSound Audio Design. Direct Stream Digital (DSD) is a trademark of Sony Corporation. the Roon Labs logo are trademarks or registered Roon and Roon Ready and ... -
Page 7: Welcome
PlayPoint the central digital hub in your audio system. We hope that the exaSound PlayPoint Mark II will help you to enjoy world-class music experience for years to come. Please take a few minutes to read right through this manual. Investing a little time now is the best way to ensure that you will make the most of your investment. -
Page 8: Overview
Gigabit Ethernet, Wi-Fi 802.11AC or from attached USB storage devices. It outputs digital audio to attached USB Audio 2.0 DAC. The PlayPoint Mark II has two build-in audio servers. A full-function Roon Core and a UPnP server can stream audio to other network players on you your home network. -
Page 9: Playpoint Mark Ii - New Features
The easiest configuration for using the exaSound PlayPoint Mark II with Roon is to store your music on a USB drive. It is illustrated on the diagram below with red components and red connections. Here is how it works: You need to connect the PlayPoint Mark II to your home router with Ethernet cable or with Wi-Fi. - Page 10 Music files can also be stored on Network Attached Storage (NAS) drive. • The PlayPoint Mark II can transparently discover and connect to Roon servers running on computers • or NAS drives. Roon supports all formats - stereo and multichannel, PCM and native DSD at all sampling rates and resolutions.
-
Page 11: Upnp /Openhome Player And Audio Library Server
MPD Player PlayPoint Mark II has a built-in MPD player. Music files must be stored on attached USB drive. Playback can be controlled with any MPD client, like the MPaD / MPoD apps for iPad and iPhone available on the Apple iTunes store. -
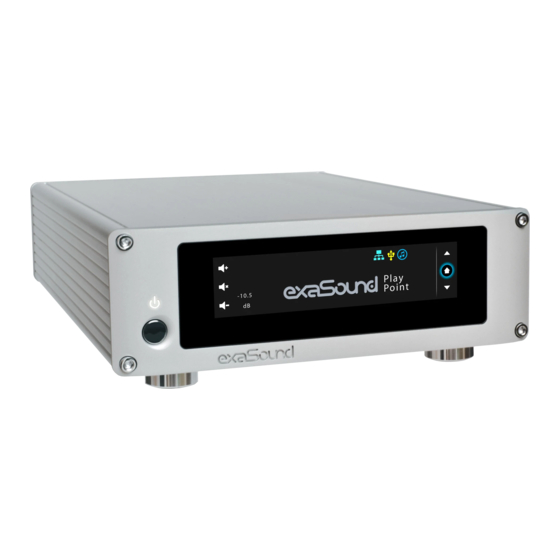
Page 12: Front And Rear Panels
Front and Rear Panels Volume Up USB Drive Network Connection Mute On/Off UPnP Server exaSound DAC Connection Volume Down Roon Server Playback Engine Previous Screen Power Button Power Light Home Screen Next Screen USB 3.0 Wi-Fi Ethernet RJ45 Connector Antenna... -
Page 13: Quick Start Guide
1. Connect the power adapter to the mains and to the PlayPoint Mark II device. 2. Attach the Wi-Fi Antennas (where applicable). 3. Connect the PlayPoint Mark II to your Gigabit home network with an Ethernet CAT 6 cable. 4. Connect the USB cable between the PlayPoint Mark II and your DAC. - Page 14 14. Another easy way to use the exaSound PlayPoint Mark II is with Kazoo installed on iPad, iPhone, PC or Mac. Connect a USB drive with music to the PlayPoint Mark II. The first time the disk will be scanned automatically for music files. When needed, you can manually update the music library.
-
Page 15: Playback Screens
15. The exaSound PlayPoint Mark II supports Network Audio Adapter (NAA) protocol for advanced upsampling and PCM to DSD conversion applications with the Signalyst HQPlayer. Follow the Step- by-step guide for configuring the exaSound PlayPoint for use with HQPlayer available on our blog. -
Page 16: Playpoint Mark Ii Configuration
PlayPoint Mark II Configuration You can configure the PlayPoint Mark II using the touch-screen or with a Web browser from a mobile device, PC or Mac. Using the touch screen is simpler. Some advanced settings are available only with the Web user interface. -
Page 17: Wireless Protected Setup (Wps) For Wi-Fi Network Access
PlayPoint IP Address, Ethernet connection The SSID of your router will appear here Start/Restart for Wi-Fi Start/Restart for Wired Connection (Ethernet) Before using the wireless connection you need to complete the WPS (Wireless Protected Setup) procedure. Alternatively you can configure manually the wireless network via the Web User Interface. Wireless Protected Setup (WPS) for Wi-Fi Network Access Setup (WPS) for Wi-Fi Network Access 1. - Page 18 10. The Select Network screen will reappear. DHCP may take another two minutes to assign an IP address to the PlayPoint Mark II. The SSID of your router will appear here Start/Restart for Wi-Fi...
-
Page 19: Switching Between Wireless And Wired Network Connection
IP address assigned to your PlayPoint Mark II. Multi-room Configuration Each PlayPoint Mark II device on your home network must have a unique name. Use the Select PlayPoint Name screen to assign different host names to your PlayPoint Mark II players. -
Page 20: Screen Saver
On if you prefer to keep the screen dark during playback. Roon Core Use the Roon Core screen to install or uninstall Roon Core on your PlayPoint Mark II. The Setup files are automatically downloaded from roonlabs.com. -
Page 21: Dac Power Off Timeout
2. Make sure that the PlayPoint Mark II power supply is reliably connected. 3. Make sure the PlayPoint Mark II is connected to your home network and your Internet connection is stable. 4. Use the Up/Down buttons on the right to navigate to the PlayPoint Firmware Update Screen. Tap on the Check button. - Page 22 6. You will see the Firmware Update in Progress screen. Don't interrupt the power to the PlayPoint Mark II during update or your device may become unusable. 7. The PlayPoint Mark II may reboot twice during the update. 8. After the update you will see the Home screen.
-
Page 23: Remote Support
PlayPoint Mark II owner by pressing the Start/Stop button. Establishing the connection may take up to 10 seconds. You need to provide the Support ID to the exaSound support representative. It is used to verify the identity of your PlayPoint Mark II on the support network. -
Page 24: Volume Control
Remotely from iPad, iPhone or Android device. Compatible apps include Roon Remote, Kazoo, UPnP control points like Bubble UPnP and PlugPlayer, MPaD clients like MPaD and MPoD. • From the PlayPoint Mark II touch-screen. You can control the master volume and trim the individual channels. Volume control screen for stereo DACs Volume control screen for multi-channel DACs. -
Page 25: Volume Bypass
Volume Bypass When the volume is set to 0dB, the hardware volume control is turned off and the PlayPoint Mark II sets the DAC in Volume Bypass Mode. To activate Volume Bypass: •... -
Page 26: Using External Usb Drives For Storing Audio Files
PlayPoint Mark II supports direct connection of one USB 3.0 hard-disk drive (HDD) or solid-state drive (SSD) with current consumption less than 900mA. Up to eight USB drives can be connected to the PlayPoint Mark II using an external powered USB 3.0 hub. -
Page 27: Upnp Music Library
UPnP Music Library When a USB drive is connected to a PlayPoint Mark II for the first time, it will be automatically scanned for music files. The PlayPoint Mark II will build a UPnP library (database) with metadata and album art from your music files. -
Page 28: Web User Interface
Web User Interface To access the PlayPoint Mark II web user interface start a web browser like Safari, Firefox or Google Chrome. In the address bar enter the PlayPoint Mark II device name. The default device name is exaSound-PP1.local. Alternatively you can enter the PlayPoint Mark II IP address which can be found on the Select Network screen. -
Page 29: Working With The Menu
Working with the Menu Tap or click on the menu icon in the upper left corner of the screen. The menu will slide in. Selecting a menu item will hide the menu. If you prefer to have the menu visible at all times tap again on the menu icon. The menu icon will be overlaid with a right arrow. -
Page 30: Dashboard For Volume Control And Input Selection
Dashboard for Volume Control and Input Selection Web Dashboard, Channel Trimming View - Stereo Web Dashboard, Channel Trimming View - Multichannel Page | 30... -
Page 31: Settings
Settings Use the Settings page of the web user interface to configure the PlayPoint Mark II. Note that feature availability depends on the capabilities of the attached USB DAC. • Maximum Volume Limit • DAC Power off Timeout • Updating the UPnP Music Library •... -
Page 32: Sharing Attached Usb Drives On The Network
Sharing Attached USB Drives on the Network File Sharing allows you to have network access to the USB drives attached to the PlayPoint Mark II. You can use file management apps like Windows Explorer and the Mac OS Finder to copy, move and erase files remotely. - Page 33 Mark II and then disconnect the USB drive. Always maintain a backup copy of your music files. We will not be responsible for any loss of data on USB drive used with the exaSound PlayPoint Mark II. Never disconnect a USB drive during playback.
-
Page 34: Ethernet Connection With Manual Ip Address
Ethernet Connection with Manual IP Address Navigate your web browser to the PlayPoint Mark II Web Interface. Open the menu and select the Network page. By default the PlayPoint Mark II will use the wired network connection - Ethernet. You can use the Reset button to re-initialize the network connection if the settings on your router are changed or in case the connection is lost. - Page 35 4. When the Network page reappears you should see the new IP address. Note that if you use an IP address to connect your Web browser to the PlayPoint Mark II, the browser won't be able to reconnect automatically. In this case you will need to manually enter the new PlayPoint Mark II IP address in the navigation bar of the Web browser.
-
Page 36: Manual Wi-Fi Configuration
Manual Wi-Fi Configuration 1. Navigate your web browser to the PlayPoint Mark II Web Interface. Open the menu and select the Network page. 2. Scroll down to the Available Wi-Fi Networks tab and tap the Refresh button. 3. You will see a list of available Wi-Fi networks. - Page 37 4. Locate the Wi-Fi network that you need to connect to and tap on the icon to the right. 5. Enter password if you are connecting to a secured network. The PlayPoint Mark II supports WPA2- PSK (AES) security mode.
- Page 38 At this point if you are using an Automatic IP (DHCP), continue with step 7. 6. Select Manual IP if you need to enter manually the IP settings. 7. Press Connect. It will take a moment for the new settings to be activated. You will see a Waiting for Connection message.
- Page 39 Note that if you use an IP address to connect your Web browser to the PlayPoint Mark II, the browser won't be able to reconnect automatically. In this case you will need to manually enter the new PlayPoint Mark II IP address in the navigation bar of the Web browser.
-
Page 40: Specifications
Specifications USB Audio Class 2.0 USB Audio Interface exaSound proprietary ZeroJitter™ USB audio interface with error correction ENclusiv™ Comprehensive Sampling Rate support 44.1kHz, 48kHz, 88.2kHz, 96kHz, 176.4kHz, 192kHz, 352.8kHz, 384kHz, 705.6kHx, 768 kHz Native DSD DSD 64 Fs: 2.8224MHz; 3.072MHz HRA (High Resolution Audio) DSD 128 Fs: 5.6448MHz;... - Page 41 USB Storage Interface USB 3.0 compatible with USB 2.0 and USB 3.0 HDD and SSD (USB 3.0 drives recommended) Ethernet Interface 1 x Realtek 8111G PCI-E Gigabit Ethernet Intel® Dual Band Wireless-AC 7260 802.11 ac/n Wi-Fi Interface 2.4 GHz, 5 GHz Compliance PCI, CISP, FIPS, FISMA IP Setup IP4, DHCP, WPA, manual configuration...
-
Page 42: Open-Source Credits
PlayPoint Mark II. In fact, we would be unable to offer the device as we envision it, at the current price, without these publically developed projects. The credit roll is available on the PlayPoint Mark II Web Interface: http://exaSound-PP1.local. -
Page 43: Limited One Year Warranty
If in our assessment the defect is covered by our Warranty, the defective item will, at our sole option, be repaired, replaced with the same item or its functional equivalent, or the purchase price will be refunded. exaSound in its sole and absolute discretion shall be the sole determiner of whether a product is in fact defective. - Page 44 Audio Design for its use nor for any infringement of patents or other rights of third parties which may result from its use. exaSound Audio Design reserves the right to change specifications at any time without notice.
Need help?
Do you have a question about the PlayPoint Mark II and is the answer not in the manual?
Questions and answers