Table of Contents
Advertisement
Quick Links
Advertisement
Table of Contents

Subscribe to Our Youtube Channel
Summary of Contents for Hansaton uTV 3
- Page 1 3 Instructions For Use...
- Page 2 The intended use of the uTV 3 is to connect your hearing aids to a TV or other audio source. It sends audio signals wirelessly to the hearing aids through a streamer within a distance of 30 m (100 ft).
- Page 3 Your uTV 3 Hearing healthcare professional: _______________ ___________________________________________ Telephone: _________________________________ Serial number of uTV 3: _______________________ Warranty: __________________________________ Date of purchase: ____________________________ Your streamer: uStream uDirect 2 uDirect 3...
-
Page 4: Package Contents
Package contents The complete uTV 3 consists of the following elements: uTV 3 plus the following cables: Power supply with mini-USB plug and • country adapter “Optical” • “Coaxial” • “Analog RCA/Cinch” • “Analog 3.5mm” •... -
Page 5: Table Of Contents
Step 2: Connecting to the TV ..........6 Step 3: Charging your streamer .......... 12 Step 4: Pairing uTV 3 with your streamer ......15 Daily usage of the uTV 3 ............17 Step 1: Wearing your streamer ........... 17 Step 2: Listening to the TV .......... -
Page 6: Utv 3 Description
3 description The uTV 3 connects your hearing aids wirelessly to your TV or other audio devices through a streamer. The system consists of three main elements: your hearing aids, a streamer and the uTV 3. hearing aid Up to 30 meters... - Page 7 TV to a streamer within a range of up to 30 meters (100 ft). The uTV 3 also serves as a charging cradle for your streamer when it is not in use.
-
Page 8: Getting Started
Getting started Step 1: Setting up the power supply To attach the country adapter: 1. Select the adapter that corresponds to your country. (Included country adapters may vary by country.) 2. Insert the round corner of the adapter to the round corner of the universal power supply until it is completely inserted. - Page 9 Connecting the power supply Place the uTV 3 next to your TV. Connect the mini-USB plug of the power supply to the power input (Power) of the uTV 3. Plug the power supply into the wall socket.
-
Page 10: Step 2: Connecting To The Tv
Step 2: Connecting to the TV Supported audio formats: The uTV 3 can be connected to any audio source such as a TV, PC or hi-fi system. It supports three different audio input formats. For best results, we recommend you use the optical or coaxial connection if available on your audio device. - Page 11 Signal priorities: Normally it is enough to connect one audio cable. If more than one cable is connected and a signal is present, uTV 3 will select the best possible input in the following order: optical, coaxial, analog. Note: even though the optical and coaxial cables are only one wire, the signal is stereo.
- Page 12 Unpack the cable labeled “Optical” • Remove the protection caps from the plugs • Connect one end of the optical cable into the • “Optical” input of uTV 3, and the other end into the optical output of your TV...
- Page 13 Unpack the cable labeled “Coaxial” (orange • plugs) Connect one end of the coaxial cable into • the “Coaxial” input of uTV 3, and the other end into the coaxial (also known as “digital out” or “S/P DIF”) output of your TV...
- Page 14 If an RCA output (red / white) is available: Unpack the cable labeled “Analog RCA/ • Cinch” Connect the 3.5 mm plug into the “Analog” • input of the uTV 3. Connect the red and white plugs to the matching red and white output sockets on your TV...
- Page 15 Option 4: connecting to the headset socket Unpack the cable labeled “Analog 3.5 mm”. • Connect the stereo plug into the “Analog” • input of the uTV 3. Plug the other end into the headset output socket of your TV...
-
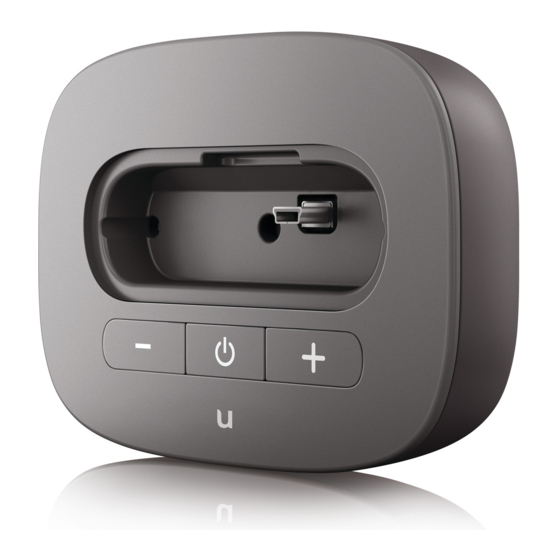
Page 16: Step 3: Charging Your Streamer
Step 3: Charging your streamer To charge the streamer, gently plug it into the charging slot of the uTV 3 as shown below. Ensure the integrated plug is inserted into the streamer charging socket correctly. Ensure that you are using the correct charging... - Page 17 Changing the charging slot for your streamer The uTV 3 comes with two charging slots. You may need to change the slot using a Phillips head screwdriver. 1. Unplug the USB power cable. 2. Unscrew the screw on the bottom of the uTV 3.
- Page 18 2/3 Charging is complete when the streamer’s indicator light turns solid green. The uTV 3 can either be on or off during charging. Its status indicator light does not indicate the charging process. The typical time to fully charge the streamer is 90 minutes.
-
Page 19: Step 4: Pairing Utv 3 With Your Streamer
Step 4: Pairing uTV 3 with your streamer If you have received the uTV 3 and the Unitron streamer together in a complete set, they are paired already and you may move on to Step 7. If they were purchased separately, they must first be paired with each other. - Page 20 3 will remain in pairing mode for two minutes or until the pairing has been completed. Completion of pairing Wait until both indicator lights turn solid blue. This can take up to two minutes but usually occurs within a few seconds.
-
Page 21: Daily Usage Of The Utv 3
Hansaton wireless hearing aids. In cases of interference with other hearing aids, contact your hearing healthcare professional. The uTV 3 can only transmit the audio signal to one streamer at a time. Streaming to multiple receiving streamers is not possible. -
Page 22: Step 2: Listening To The Tv
The uTV 3 supports Bluetooth operation up to a range of 30 m (100 ft). Line-of-sight between your streamer and the uTV 3 is not required. However, interference in the environment by walls or furniture may reduce the operating range. - Page 23 It may take up to ten seconds until the streaming resumes. Both streaming light indicators, should be solid blue during streaming. If the uTV 3 status light: • blinks green, make sure the audio input to the uTV 3 is properly connected.
-
Page 24: Step 3: Adjusting The Volume Of The Tv Signal
TV signal First, set the volume of the TV speakers at the level to suit other viewers. Next, adjust the volume via the uTV 3 volume control until the sound through the hearing aids is comfortable. To fine-tune the overall volume of the hearing aids and uTV 3, you may use the streamer’s... - Page 25 If your uTV 3 is connected to the headphone socket of your TV, you may also use your TV remote control to adjust volume via the TV directly. Refer to the TV user guide for more details on setting the TV volume.
-
Page 26: Step 4: Switching Off Utv 3 And Streamer
Step 4: Switching off uTV 3 and streamer To switch off the devices: To end the transmission of the TV audio signal, switch off the uTV 3 by pressing the on/off button as shown . -
Page 27: Understanding The Indicator Lights
Understanding the indicator lights Switched on Solid green On but no audio Short blink green input Pairing mode Rapid blue blinking Streaming mode Solid blue Pause mode Short blink blue Test mode Mulit-color blink For a more detailed explanation of the streamer indicator lights, please refer to the streamer’s user guide. -
Page 28: Testing The Audio Transmission
Testing the audio transmission The uTV 3 is able to generate a test sound to check the system. To start test mode: Switch on and wear your streamer correctly. • Switch off the uTV 3 first, • then press the uTV 3 volume... - Page 29 3 Orange: searching for a streamer Blue: streaming test sound to streamer If no streamer is found and no audio input is available the uTV 3 will stop the test mode and its light indicator will blink green.
-
Page 30: Troubleshooting Guide
Devices are turned off Turn on devices Devices are not paired Repeat pairing I see a rapidly blinking blue indicator light on the uTV 3 uTV 3 is in Bluetooth Go to the pairing section of pairing mode your streamer’s user guide... - Page 31 Devices are not on Turn on devices Cables not plugged in Repeat steps 2 and 3 correctly No audio input to uTV 3, the Make sure TV is not muted light indicator blinks green Select a 75% volume level on the TV Make sure the audio cable uses an “out”...
- Page 32 Adjust volume of your satellite receiver or set-top box Adjust the volume using the streamer volume buttons After connecting the uTV 3, the TV loudspeaker is switched off The headset output Choose another audio output connection of the TV is...
-
Page 33: Important Information
Changes or modifications to any of the devices that were not explicitly approved by Unitron are not permitted. Opening the uTV 3 might damage it. If problems occur which cannot be resolved by following the remedy guidelines in the troubleshooting section of this user guide, consult your hearing healthcare professional. - Page 34 IECXXXXX standards. Only use accessories approved by Unitron. Using your uTV 3 cables in any way contradictory to their intended purpose (e.g., wearing the USB cable around the neck) can cause injury.
- Page 35 Unitron or stabilized chargers with a rating of 5VDC, min. 500 mA. Information on product safety When uTV 3 is not in use, turn off the device. Always plug in the uDirect 3 neckloop and wear it around your neck when transmitting signals to your hearing aids.
- Page 36 Clean devices using a damp cloth. Never use household cleaning products (washing powder, soap, etc.) or alcohol to clean them. Never use a microwave or other heating devices to dry any of the devices. The digitally-coded, inductive transmission technology used in these devices is extremely reliable and experiences virtually no interference from other devices.
-
Page 37: Compliance Information
Compliance information Declaration of Conformity Hereby Unitron declares that this Unitron product is in compliance with the essential requirements of the Radio and Telecommunications Terminal Equipment Directive 1999/5/EC. The full text of the Declaration of Conformity can be obtained from the manufacturer or the local Unitron representative whose address can be taken from the list on www.unitron.com (worldwide locations). - Page 38 device generates, uses and can radiate radio frequency energy and, if not installed and used in accordance with the instructions, may cause harmful interference to radio communications. However, there is no guarantee that interference will not occur in a particular installation. If this device does cause harmful interference to radio or television reception, which can be determined by turning the equipment off and on, the user is encouraged to try to correct the interference by one or more of the...
-
Page 39: Information And Explanation Of Symbols
Information and explanation of symbols The CE symbol is confirmation by Unitron that this Unitron product meets the requirements of the R&TTE xxxx Directive 1999/5/EC on Radio and Telecommunication Terminal Equipment. The numbers after the CE symbol are the numbers of consulted certified bodies under the above mentioned directives. -
Page 40: Operating Conditions
Operating conditions: This device is designed such that it functions without problems or restrictions if used as intended, unless otherwise noted in these user guides. 0° to 45° Celsius and relative humidity of <95% (non condensing). Transport and storage conditions: During transport or storage, the temperature should not exceed the limit values of –20°/60°... - Page 43 Unitron Hearing 20 Beasley Drive, P.O. Box 9017, Kitchener, ON N2G 4X1 Canada Unitron Hearing GmbH Max-Eyth-Straße 20, 70736 Fellbach-Oeffingen, Germany...
- Page 44 Distributed by Hansaton Akustik GmbH Sachsenkamp 5 20097 Hamburg • • Telefon: 040 29 80 11 110 Fax: 040 29 80 11 850 • E-Mail: info@hansaton.de Internet: www.hansaton.com •...
Need help?
Do you have a question about the uTV 3 and is the answer not in the manual?
Questions and answers