
Related Manuals for Hal Communications CWR6850

Summary of Contents for Hal Communications CWR6850
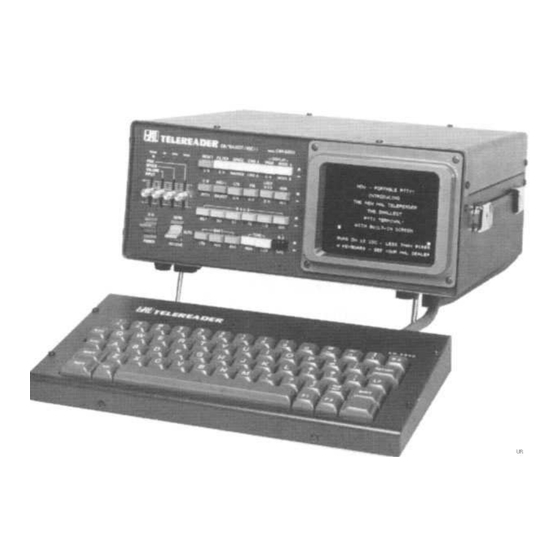
- Page 1 CWR6850 TELEREADER INSTRUCTION MANUAL QUALITY COMMUNICATIONS EQUIPMENT April, 1982 Printing...
-
Page 2: Table Of Contents
Care and feeding of your CWR6850 ....47 Typical operational problems ......48 Repair Procedures ..........49 User adjustments ..........50 CHAPTER 7 SPECIFICATIONS ............54 APPENDIX A CWR6850 KEYBOARD CONTROL COMMAND LIST ... 58 APPENDIX B CWR6850 DISPLAY FORMAT ......... 60 ADDENDUM ..................63... - Page 3 The CWR6850 ............. 4 Figure 2 Simplified CWR6850 Connections ........6 Figure 3 The CWR6850 keyboard ..........19 Figure 4 Connections to the CWR6850 ........35 Figure 5 KOS circuit connections ..........36 Figure 6 Typical Video Detector ..........41 Figure 7 Modified Video Detector ..........
-
Page 4: Introduction
SIMPLE HOOK-UP AND OPERATION. After you have your CWR6850 running as described in Chap- ter 2, please then sit down and read the rest of the manual; you'll find the CWR6850 will do a lot more things than can be outlined in the simplified instructions. -
Page 5: Chapter 1 Unpacking And Inspection
CHAPTER 1 UNPACKING AND INSPECTION When you unpack your CWR6850, carefully inspect the shipping carton and each cabinet for ship- ping damage. Any evidence of shipping damage should be immediately reported to your supplying dealer or shipping carrier. Be sure to save all packing materials if damage is found – the shipping carrier will want to inspect them for any insurance claim. -
Page 6: Figure 2 Simplified Cwr6850 Connections
CHAPTER 2 PAGE 6... -
Page 7: Chapter 2 Simple Hook-Up And Operation
4 and 5 to take full advantage of the many conveniences included in your CWR6850. Connections to the CWR6850 Refer to Figure 2 and notice the various connections you may make to and from the CWR6850. For a start, it is recommended that you make the following connections at the present and leave the other connections until after you have read Chapters 3, 4 and 5. -
Page 8: Presetting Cwr6850 Controls
CHAPTER 2 PAGE 8 Presetting CWR6850 Controls Before applying any power to the transceiver or the CWR6850, preset its switches as follows: RESET ON = Press and release FILTER ON = Off (button out) SPACE / NARROW = Off (button out) -
Page 9: Presetting The Transceiver Controls
You should now be able to tune signals on the receiver and hear them either on the receiver speaker or through the internal speaker of the CWR6850. If you are using the internal CWR6850 speaker, use the INPUT control on the CWR6850 to control the volume. -
Page 10: 2.5 Morse Operation
To transmit RTTY, make sure that the XMIT AUDIO GAIN control (of the transmitter) is set to mini- mum, turn the transmitter on with either its TX ON control or use the CWR6850 SEND switch (lev- er up). Increase the XMIT AUDIO GAIN until some RF output is obtained, tune the transmitter if necessary and set the XMIT AUDIO GAIN to the recommended power level for RTTY (see your transmitter manual). - Page 11 "weight" (and speed) of the transmitted signal. Set the CWID A / CWID B switch to "A" (button out) for CW identification. Now that the basic operations of the CWR6850 have been explored, sit back and read the rest of this manual.
-
Page 12: Chapter 3 Receiving With The Cwr6850
Figure 5 in Chapter 5. The CWR6850 includes its own monitor speaker so that you may continue to listen to the receiver output even if the receiver's internal speaker is disconnected when you connect the CWR6850. The left-hand vertical slide control (INPUT) on the front panel controls this monitor volume level. -
Page 13: Receiving Rtty Signals
CHAPTER 3 PAGE 13 Receiving RTTY signals As a first step, preset the CWR6850 front panel switches as follows: RESET ON = Press and release FILTER ON = Off (button out) SPACE / NARROW = Off (button out) CWID A / CWID B... - Page 14 * Use RTTY on Drake TR7; LSB on all other transceivers Turn up the volume control of the receiver for a comfortable listening level from the CWR6850 in- ternal monitor speaker. Leave the receiver set for this volume and use the INPUT slide control for further speaker volume adjustments.
-
Page 15: Low Tones Or High Tones
Low tones or high tones? So far we have only used one of the two possible CWR6850 demodulator combinations. You may wish to switch to the RTTY "high-tone" option – push the HIGH / LOW button in. The "high tones"... - Page 16 CHAPTER 3 PAGE 16 Disadvantages: 1. The relatively high audio frequencies used in the high tone set may not fall with- in the audio frequency response of the receiver or transmitter. In general, the standard amateur shift, 170 Hz, will pass most current receivers and transmit- ters (the Collins S-Line is an exception).
-
Page 17: Receiving Morse Code
CW LED on the CWR6850 front panel and audio tone frequency comparison using the internal audio monitor. The CWR6850 receive circuit is designed to lock onto an 800 Hz tone, so tune your receiver until the CW LED flashes in sync with the CW signal (key down = tone on = LED on). - Page 18 The automatic speed tracking pro- gram of the CWR6850 interprets the long carrier as very slow CW and adjust the speed tracking system for very very slow Morse code. The CWR6850 will readjust the speed tracking back up to the correct signal speed.
-
Page 19: Chapter 4 Transmitting With The Cwr6850
RTTY modes. The Keyboard The keyboard for the CWR6850 is a small separate unit, attached to the CWR6850 through a flexi- ble cord. This keyboard can be placed on the operating table, or you may prefer to try the "easy chair"... -
Page 20: Transmitting Features
CW mode; these switch settings will be used for the RTTY explanations that follow this section. Press and release the RESET button on the CWR6850 to clear-out any text that may remain on the screen. Now, type a line of text on the keyboard – such as "Now is the time for all good men" (do not use the RETURN or LF keys at this time). - Page 21 Morse code at approximately 20 words-per-minute (WPM) and you should hear the CW in the CWR6850 side-tone monitor output (re-adjust the [ VOLUME ] slide control if neces- sary). The CW transmit speed is adjusted with the [ SPEED ] slide control. Notice that as all of the pretyped characters are transmitted, the characters in the transmit buffer are shifted to the left.
- Page 22 RTTY tone continues. The CWR6850 will remain in transmit mode for as long as CTRL-X is active ("X" on status line); you will NOT receive text if CTRL-X is active. Also, the SW OUT - REMOTE control signal remains in trans- mitter-on condition for as long as CTRL-X is active.
-
Page 23: Use Of The Here-Is Message
CTRL-A turns off BOTH CTRL-X and CTRL-A features. 2. If CTRL-A is active and CTRL-X is typed, the CWR6850 switches to the CTRL-X mode and the transmitter remains on. A second CTRL-X command turns off both CTRL-X and CTRL-A features. - Page 24 The contents of all six HERE IS memories may be transferred to tape and be reloaded from tape, thus saving them during times that the power to the CWR6850 is turned off. To save the HERE IS messages, use the following procedure:...
- Page 25 3. Rewind the tape to the beginning of the previously recorded section. 4. Type CTRL-L and RETURN (see reverse video "L" on status line). 5. Play the tape into the CWR6850 (listen to tones using INPUT slide control to adjust the vol- ume).
-
Page 26: Special Considerations When Transmitting Morse
110 BAUD, TAPE IN). Special Considerations When Transmitting Morse Morse code may be transmitted with the CWR6850 by selecting MORSE with the CW switch button in the "out" position. The CW receive speed automatically adjusts to variations in the speed of the received signal;... -
Page 27: Table 1 Continental Morse Code
VOLUME control. The CWR6850 has Morse key output circuits to drive either a positive or negative voltage keying circuit. Most older tube-type transmitter circuits used grid-block or negative voltage circuits; most solid-state transmitters use a positive voltage key circuit. -
Page 28: Special Considerations When Transmitting Baudot
CTRL-D command only when sending CW at higher speeds. Special Considerations When Transmitting Baudot Baudot RTTY code may be transmitted with the CWR6850 by pressing both the CW / RTTY and ASCII / BAUDOT switch buttons IN. Baudot data rates are selected with the BAUD switches, 45 through 300 baud. -
Page 29: Table 2 Baudot Data Code
When used, all further transmission of text from the transmit buffer is stopped until a second CTRL-^ turns the feature off. In ASCII, the NUL character (000 0000) is transmitted. The Baudot Code used in the CWR6850 is shown in Table 2. BIT NUMBER... -
Page 30: Special Considerations When Transmitting Ascii
CHAPTER 4 PAGE 30 As discussed in section 4.3, a CW identification feature is included in the CWR6850. Current U.S. amateur RTTY regulations (and those of most other countries) require the transmission of the sta- tion call letters in Morse code before and after each major transmission. The CW ID can be con- veniently included in the program for the HERE IS 0 memory. - Page 31 Baudot code normally used at these slow rates. The CWR6850 will transmit and receive a full ASCII character set, including upper and lower case letters, all punctuation and symbols, and all control codes with the exception of the "US" (Unit Separator) code (001 1111).
-
Page 32: Table 3 Display Symbols For The Ascii Code
(ESC : CTRL-A = Press and release ESC: press CTRL and A together) As in the discussion of the Baudot code in section 4.4, the non-overprint feature of the CWR6850 makes it unnecessary to type printer control characters when typing text. The transmit lines are automatically set for a maximum of 72 characters. -
Page 33: Hdx / Fdx Operation
The KOS transistor switch will turn-on the transmitter whenever typed text is available for transmission and the transmit output of the CWR6850 is enabled (use AUTO switch position and "CTRL-A" (or "CTRL-X") as explained in sections 4.2 and 4.4). -
Page 34: The Kos Feature
With a half duplex connection, all transmitted text from the CWR6850 may be seen on the screen before and after it has been transmitted. All of the features of the CWR6850 may be used with half duplex. However, the CWR6850 may only receive or transmit one at a time. -
Page 35: Connections To The Cwr6850
CHAPTER 5 PAGE 35 Figure 4 – Connections To The CWR6850... -
Page 36: Normal Amateur Station Connections
1. A good RF ground between all components of the system. Use heavy wire or 1/4" shield braid. 2. A shielded audio cable between the receiver speaker output and the CWR6850 AF IN - RX con- nector. A high fidelity phono cable will do nicely. -
Page 37: Use Of The Ttl Data Connections
(item 2) when connections are made to a transceiver. 6. Connect the keyboard to the CWR6850 with the cable and connector furnished. 7. Connect the CWR6850 to a DC power source capable of +12 to +14.5 VDC output with a 1.6 Ampere load. -
Page 38: Use Of A Different Keyboard
11 - NOT-ACK 6 - D5 12 - +5V The NOT-ACK signal is not used in the CWR6850 on the present keyboard. When interfacing to a computer, check the response from NOT-ACK before entering data. Connection of an ASCII Printer A serial ASCII data printer may be used with the CWR6850 by connection to the PRINTER connec- tor. -
Page 39: Connection Of An Audio Tape Recorder
When the taped message stops, type CTRL-E again to end the echo-back feature. The connection of the tape recorder to the CWR6850 is shown in Figure 5. Use shielded cables for these connections; include RF and safety grounds to minimize any RF pickup in the tape recorder. -
Page 40: Using A Television Set As A Monitor
Any standard composite video monochrome TV monitor may be connected to the VIDEO OUT connector on the CWR6850 rear panel. The video output is 1 V composite video, 75 ohm impedance. Connection of an external monitor does not affect the dis- play on the internal CRT of the CWR6850. -
Page 41: Figure 6 Typical Video Detector
CHAPTER 5 PAGE 41 Figure 6 – Typical Video Detector Figure 7 – Modified Video Detector... -
Page 42: Rf-Induced Problems
PAGE 42 RF-Induced Problems The CWR6850 is designed to operate in close proximity to radio frequency transmitting and receiv- ing equipment. However, under certain conditions in an RF-saturated environment, the CWR6850 may be susceptible to HP-induced interference. This may manifest itself in any of a number of ways, such as partial or complete lack of response to switches or keyboard operations, or erratic behavior of the video display. -
Page 43: Figure 8 Rfi Reduction Techniques
Jumpers is also possible. In fact, it is this type of radiation that is most likely to be coupled into nearby I/O and power cables of the CWR6850. To locate the point or points of radiation, experiment with different cable arrangements to see if the RF-induced problem can be eliminated by reducing coupling between any of the CWR6850 cables and nearby coaxial lines carrying RF power. -
Page 44: Figure 9 Pfi Power Line Filters
CHAPTER 5 PAGE 44 Also, if possible, avoid bringing an end of a half-wave dipole in close proximity to the operating po- sition; there is a high voltage field at the ends of the dipole that may be hard to shield. Figure 9 –... - Page 45 CWR6850. There is no substitute for good shielding and by-passing; metal cabinet monitors are highly recommended! When the CWR6850 is used in a mobile or portable installation, trouble may be experienced from transients caused by the battery-charging system. These transients may be minimized by connect- ing the CWR6850 power cord directly to the storage battery terminals, avoiding connections to the vehicles DC terminal block.
- Page 46 CHAPTER 5 PAGE 46 Also, the following FCC text applies to use of peripherals attached to the CWR6850: "WARNING: This equipment has been verified to comply with the limits for a Class B com- puting device, pursuant to Subpart J of Part 15 of FCC Rules. Only peripherals (computer input/output devices, terminals, printers, etc.) certified to comply with the Class B limits...
-
Page 47: Chapter 6 In Case Of Difficulty
CHAPTER 6 IN CASE OF DIFFICULTY This section of your user's manual will discuss in general terms how to keep your CWR6850 in top operating condition and typical operating problems you might encounter (and some solutions). Cir- cuit description, repair procedures, and schematic diagrams are included in the separate CWR6850 CUSTOMER MAINTENANCE MANUAL, available separately from HAL Communications Corp. -
Page 48: Typical Operational Problems
If these ratings are exceeded for even a short period of time, considerable dam- age to the terminal may result. Therefore, be very careful KNOW the ratings of the CWR6850 and the characteristics of any other equipment before making connections. Some common causes of electrical failures have been found to be: A. -
Page 49: Repair Procedures
Repair Procedures In the event that your CWR6850 develops a malfunction, the first step is to carefully note all of the symptoms of the problem. Statements such as "BROKEN" or "DOESN'T WORK" are of little help to the service technician, and usually lead to longer repair times than might otherwise be required. -
Page 50: User Adjustments
The one-year limited warranty (listed in full at the end of this manual) provides for repair of the CWR6850 for a full year after purchase. The purchase invoice date from your dealer marks the be- ginning of the warranty period - save your copy of the invoice I Please read the warranty carefully to determine the full extent of the privileges and limitations. -
Page 51: Figure 10 Test Points And User-Adjustable Controls
You will, however, have to remove both the top and bottom covers of the CWR6850. Be careful to avoid misplacing any of the sixteen black screws that fasten the covers in place - they are metric and not easily replaced! Use a good No. - Page 52 CHAPTER 6 PAGE 52 CIRCUIT BOABD JUMPER FUNCTIONS BOARD JUMPER JP OPEN CKT JP SHORT CKT MODEM (bottom) JP-1 Set Mark Tone Set Space Tone DIGITAL (top) JP-1 SW OUT FSK: SW OUT FSK: MARK = "ON" SPACE = "ON" JP-2 SW OUT CW: SW OUT CW:...
- Page 53 These are the ONLY user-adjustable controls in the CWR6850. Please do attempt re-adjustment of any other controls or use of any jumpers not mentioned in the above discussion. If your CWR6850 still exhibits problems or cannot be adjusted as explained, please contact your dealer or the fac-...
-
Page 54: Chapter 7 Specifications
CHAPTER 7 PAGE 54 CHAPTER 7 SPECIFICATIONS INPUT/OUTPUT: AUDIO 30 mV to 2 V rms, 8 ohm audio INPUT: 800 Hz for Morse receive; 1000–3000 Hz for RTTY AUDIO XMIT OUT = 25 mV nom, 500 ohms (adj.) OUTPUT: TAPE OUT = 25 mV nom, 500 ohms (adj.) EXT.SP = adj. - Page 55 CHAPTER 7 PAGE 55 RTTY DATA Baudot or ASCII codes may be transmitted and received at RATES: 15.15, 50, 56.88, 74.2, 110, and 300 baud. MORSE Continental Morse Code including all letters, numbers, period, comma, colon, CODE: dash, apostrophe, parentheses, quote, question mark, and AA, AR, AS, BT, BT, KN, SK, and error prosigns.
- Page 56 LEVER POWER CWR6850 DC power switch. SWITCHES: SEND- SEND: The transceiver and CWR6850 are set to transmit con- AUTO- tinuously RECEIVE AUTO: The transceiver and CWR6850 TX/RX condition may be set by keyboard commands. RECEIVE: The transceiver and CWR6850 are set to receive continuously.
- Page 57 CHAPTER 7 PAGE 57 BAUD Six interlocked switches set data rate for RTTY transmit and receive to 45.45, 50.0, 56.9, 74.2, 110, 300 baud. SHIFT Three interlocked switches set RTTY transmit and receive shift to 170, 425 or 850 Hz. TONE HIGH: Select RTTY "HIGH"...
-
Page 58: Appendix Acwr6850 Keyboard Control Command List
Load start command to load contents of all six HERE IS memories RETURN L from tape; control passes to tape and CWR6850 will not respond to further keyboard commands until after an ASCII STX character is re- ceived from tape. - Page 59 APPENDIX A PAGE 59 CONTROL STATUS FUNCTION INDICATOR CTRL-W:0 Program HERE IS #0; end with RUB OUT key. CTRL-W:1 Program HERE IS #1; end with RUB OUT key. CTRL-W:2 Program HERE IS #2; end with RUB OUT key. CTRL-W:3 Program HERE IS #3; end with RUB OUT key. CTRL-W:4 Program HERE IS #4;...
-
Page 60: Appendix Bcwr6850 Display Format
APPENDIX B PAGE 60 APPENDIX B CWR6850 DISPLAY FORMAT TOTAL DISPLAY CAPABILITY:... - Page 61 APPENDIX B PAGE 61 PAGE 0 and PAGE 1 DISPLAY FORMAT:...
- Page 62 APPENDIX B PAGE 62 PAGE 2 and PAGE 3 DISPLAY FORMAT:...
-
Page 63: Addendum
4. The CTRL-Q:n command is used to change the display page from the keyboard as explained on page 58 of the manual. When the CWR6850 is first turned on, the display is set to display page 1 on the screen; other pages may be set with the CTRL-Q:0, CTRL-Q:2, etc. commands. CTRL- Q:5 will reset the display back to page 1. - Page 64 ADDENDUM PAGE 64 6. The special considerations for the ICOM brand of HF transceivers does not seem to apply to other manufacturer's brands of transceivers with the possible exception of the choice of audio output connection to the transceiver. ALWAYS use a low-impedance audio output such as the external speaker connection (or Kenwood phone patch output) rather than a high-impedance, low-level output (such as the TR7 auxiliary output).
Need help?
Do you have a question about the CWR6850 and is the answer not in the manual?
Questions and answers