Table of Contents
Advertisement
Advertisement
Table of Contents

Summary of Contents for The Renovator Twist-A-Saw Deluxe Kit
- Page 1 ™ SAFETY AND OPERATING MANUAL FOR THE DELUXE KIT...
- Page 2 Original Instructions Welcome Congratulations on purchasing your Twist-A-Saw™ rotary tool. Before using it, please read this manual carefully. This manual covers how to safely use your Twist-A-Saw™ rotary tool, as well as tips for using and maintaining it. 10X the speed of a regular cordless drill You’re about to discover why Twist-A-Saw™...
-
Page 3: Table Of Contents
Contents Twist-A-Saw Deluxe Kit . . . . . . . . . . . . . . . . . . . . . . . . . . . . . . . . 3 ™... - Page 4 Tips and troubleshooting . . . . . . . . . . . . . . . . . . . . . . . . . . . . . . 54 Choosing the right speed .
- Page 5 Twist-A-Saw Deluxe Kit ™ Code Twist-A-Saw Components ™ Twist-A-Saw ™ Twist-A-Saw Multi-purpose handle ™ Twist-A-Saw Circle cutter ™ Twist-A-Flex Rotary tool attachment ™ Twist-A-Saw Vacuum hose ™ 16mm Collet Wrench 10mm Twist-A-Flex Collet Wrench ™ (included in kit) H, I, J Collets (6.35 / 4.76 / 3.2mm) Instructional DVD (optional) Manual...
- Page 6 Twist-A-Saw Deluxe Kit ™ Twist-A-Saw™ Deluxe Kit Accessory Code Name Comments Tile Rasp Tile & Grout Tile Cutter Tile & Grout Tile Hole Saw 25mm Tile & Grout Drywall Bit Drywall/Plasterboard Wood & Multipurpose Wood & Multipurpose Wood & Multipurpose Wood &...
- Page 7 Twist-A-Saw Deluxe Kit ™ Twist-A-Saw™ Deluxe Kit Accessory RB09 Sanding Belt Sandpaper grit 120 - 12.7mm RB10 Sanding Belt Sandpaper grit 80 - 9.5mm RB11 Sanding Belt Sandpaper grit 120 - 9.5mm RB12 Sanding Belt Sandpaper grit 80 - 6.35mm RB13 Sanding Belt Sandpaper grit 120 -...
- Page 8 Twist-A-Saw Deluxe Kit ™ Twist-A-Saw™ Deluxe Kit Accessory RB28 Precision Drill Drill - 3.2mm RB29 Precision Drill Drill - 2.4mm RB30 Precision Drill Drill - 1.69mm RB31 Diamond Cutting Cutting - 22mm Wheel RB32 Polishing Tip Polishing - 6mm RB33 Polishing Tip Polishing - 6mm RB34...
-
Page 9: Twist-A-Saw ™ Deluxe Kit
Twist-A-Saw Deluxe Kit ™ Twist-A-Saw™ Deluxe Kit Accessory RB47 Dressing Stone Sharpening - 25mm x 9.5mm RB48 Mandrel for Cutting Disc Holder - 2.4mm Wheels RB49 Mandrel for Cutting Disc Holder - 2mm Wheels RB50 Sandpaper Base Sanding - 20mm RB51 Sandpaper Grit Sanding - 20mm... - Page 10 Twist-A-Saw Deluxe Kit ™ Twist-A-Saw™ Deluxe Kit Accessory RB64 Polish Compound Polishing RB65 Collet Wrench Tool RB66 Twist-A-Flex Pin Tool 11 cutting bits and 276 rotary accessories. Total: 287 pieces. Used Symbols Read these instructions Use hearing protection Use eye protection Use a dust mask Revolutions or reciprocations per minute Diameter...
-
Page 11: General Power Tool Safety Warnings
Safety General Power Tool Safety Warnings Warning WARNING Read all safety warnings and all instructions . Failure to follow the warnings and instructions may result in electric shock, fire and/or serious injury. Save all warnings and instructions for future reference . The term “power tool”... - Page 12 Safety 2) Electrical safety a) Power tool plugs must match the outlet . Never modify the plug in any way . Do not use any adapter plugs with earthed (grounded) power tools . Unmodified plugs and matching outlets will reduce risk of electric shock.
- Page 13 Safety 3) Personal safety a) Stay alert, watch what you are doing and use common sense when operating a power tool . Do not use a power tool while you are tired or under the influence of drugs, alcohol or medication. A moment of inattention while operating power tools may result in serious personal injury.
- Page 14 Safety 4) Power tool use and care a) Do not force the power tool . Use the correct power tool for your application . The correct power tool will do the job better and safer at the rate for which it was designed. b) Do not use the power tool if the switch does not turn it on and off .
-
Page 15: Additional Safety Warning
Safety 5) Service a) Have your power tool serviced by a qualified repair person using only identical replacement parts . This will ensure that the safety of the power tool is maintained. b) Hold power tool by insulated gripping surfaces, because the cutter may contact its own cord . - Page 16 Safety Additional Safety warnings f) Do not use a damaged accessory . Before each use inspect the accessory such as abrasive wheels for chips and cracks, backing pad for cracks, tear or excess wear and wire brushes for loose or cracked wires .
- Page 17 Safety Additional Safety warnings complete stop . The spinning accessory may grab the surface and pull the power tool out of your control. m) Do not run the power tool while carrying it at your side . Accidental contact with the spinning accessory could snag your clothing, pulling the accessory into your body.
-
Page 18: Kickback And Related Warnings
Safety Kickback and related warnings Kickback is a sudden reaction to a pinched or snagged rotating wheel, backing pad, brush or any other accessory Pinching or snagging causes rapid stalling of the rotating accessory which in turn causes the uncontrolled power tool to be forced in the direction opposite of the accessory’s rotation at the point of the binding. - Page 19 Safety Safety warnings specific for grinding and abrasive cutting off operations a) Use only wheel types that are recommended for your power tool and the specific guard designed for the selected wheel. Wheels for which the power tool was not designed cannot be adequately guarded that are unsafe.
- Page 20 Safety Additional safety warnings specific for abrasive cutting off operations a) Do not “jam” the cut-off wheel or apply excessive pressure . Do not attempt to make an excessive depth of cut . Overstressing the wheel increases the loading and susceptibility to twisting or binding of the wheel in the cut and the possibility of kickback or wheel breakage.
- Page 21 Safety Safety warnings specific for sanding operations a) Do not use excessively oversized sanding disc paper . Follow manufacturer’s recommendations, when selecting sand paper . Larger sanding paper extending beyond the sanding pad presents a laceration hazard and may cause snagging, tearing of the disc or kickback.
- Page 22 Safety Machine specific safety warnings a) Use the machine only for dry sanding . Penetration of water into the machine increases the risk of an electric shock. b) Keep hands away from the sawing range . Do not reach under the workpiece .
-
Page 23: General
General Twist-A-Saw components ™ The following components are included with your Twist-A-Saw ™ Part Description Twist-A-Saw Rotary ™ Tool Twist-A-Saw Multi- ™ Purpose Handle (include: Depth Guide and Fence Guide) Twist-A-Saw Circle ™ Cutter Twist-A-Flex Rotary ™ Tool Attachment Page 21... -
Page 24: Accessories
General Part Description Twist-A-Saw Vacuum ™ Hose 16mm (5/8”) Collet Wrench 10mm (3/8”) Twist-A-Flex™ Collet Wrench (included in kit) 6.35mm (1/4”) Collet 4.76mm (3/16”) Collet 3.2mm (1/8”) Collet Accessories For a list of the accessories included with Twist-A-Saw , refer to the ™... -
Page 25: Parts Of The Twist-A-Saw
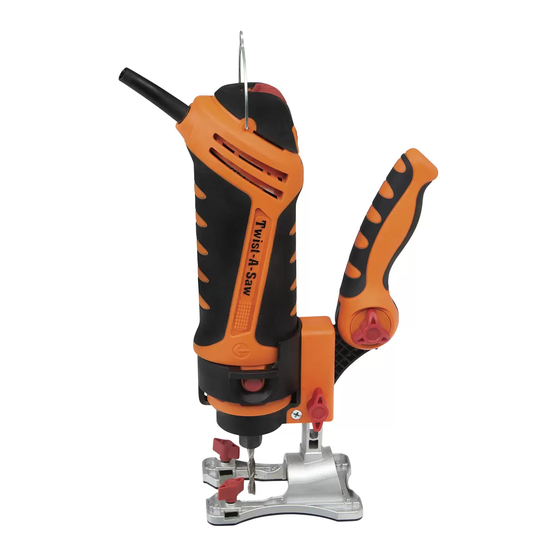
General Parts of the Twist-A-Saw ™ The following diagrams show the labelled parts of the Twist-A-Saw Rotary ™ Tool, Multi-Purpose Handle and Twist-A-Flex Rotary Tool Attachment. ™ Twist-A-Saw Rotary Tool and Multi-Purpose Handle ™ Hanging Loop Comfort Control Grip Locking Knob Comfort Control Grip Spindle Locking... - Page 26 General Twist-A-Saw Circle Cutter ™ ON/OFF Switch Variable Speed Dial Collet Nut Circle Cutting Handle Internal Mounting Pivot Pin Locking Knob Disc Centre External Circle Cutter Guide Pivot Mounting Disc Twist-A-Flex™ Rotary Tool Attachment Flexible Shaft Twist-A-Flex Tail ™ Spindle Locking Hole Twist-A-Flex Head ™...
-
Page 27: Setting Up
Setting up Which parts do I need? Before you set up the Twist-A-Saw , you must first determine which ™ components you need for your task. Part Description Twist-A-Saw The Twist-A-Saw contains the motor, so this will ™ ™ Rotary Tool always be used. -
Page 28: Changing The Collets
Setting up Changing the collets The cutting bits for Twist-A-Saw are secured with the collet nut and collet. ™ There are three sizes of collet depending on which cutting bits you are attaching: The Ø 6.35mm (Ø 1/4”) collet secures the Ø 6.35mm (Ø 1/4”) ✔... - Page 29 Setting up Changing the collets (1) Collet Nut (2) Collet (3) Spindle Page 27...
-
Page 30: Installing Cutting Bits
Setting up Installing cutting bits Follow the steps below to change the cutting bits on your Twist-A-Saw ™ Warning! WARNING Cutting bits and router bits are extremely sharp. Handle with care. Part Action Remove plastic coating on cutting bit, if applicable. Press on the spindle locking button (1). - Page 31 Setting up Installing cutting bits Part Action Ensure the flutes (spirals) of the bit are fully visible outside the collet. Tightening the collet on the flutes can lead to broken bits and possible injury. Once the bit is correctly placed in the collet, press down on the spindle locking button.
-
Page 32: Attaching The Multi-Purpose Handle
Setting up Attaching the Multi-Purpose Handle Always use the Multi-Purpose Handle when operating your Twist-A-Saw ™ Because Twist-A-Saw spins as it cuts it can ‘pull’ or ‘drift’ to the left. ™ Operating the Twist-A-Saw with two hands combats this, giving you greater ™... - Page 33 Setting up Attaching the Multi-Purpose Handle (4) Key (3) Bottom Of The Twist-A-Saw ™ (1) Collar Locking Knob (5) Keyway (2) Multi-Purpose Handle Collar Page 31...
-
Page 34: Adjusting The Comfort Control Grip
Setting up Adjusting the Comfort Control Grip The Comfort Control Grip is adjustable so you can position it to where it is best suited for the job at hand. Position the Comfort Control Grip: horizontally to use Twist-A-Saw as a regular jigsaw ™... - Page 35 Setting up Adjusting the Comfort Control Grip (1) Comfort Control Grip Locking Knob (2) Comfort Control Grip Adjusting the Comfort Control Grip angle Page 33...
-
Page 36: Adjusting The Depth Guide
Setting up Adjusting the Depth Guide The cutting bit should always extend past the depth guide foot by 4mm (3/16”)more than the thickness of the material being cut. Example: If you were to cut 10mm (3/8”) plasterboard, the cutting bit should extend 14mm (9/16”) past the bottom of the depth guide foot, and therefore 4mm (3/16”) through the 10mm (3/8”) plasterboard. -
Page 37: Attaching The Circle Cutter
Setting up Attaching the Circle Cutter Follow the steps below to attach the Circle Cutter. Part Action Fit the Multi-Purpose Handle. Refer to Attaching the Multi-Purpose Handle on page 30. Adjust the Depth Guide depth. Refer to Adjusting the Depth Guide on page 34. Unscrew the internal mounting disc (1) from the external mounting disc (2). - Page 38 Setting up Attaching the Circle Cutter Part Action Loosen the pivot pin knob (7). Slide the knob to set the circle radius and re-tighten. Insert appropriate cutting bit in the collet and tighten. Refer to Installing cutting bits on page 28. Note: To check the circle radius setting, measure from the pivot pin to the outside of the bit.
-
Page 39: Attaching The Fence Guide
Setting up Attaching the Fence Guide Follow the steps below to attach the Fence Guide. Part Action Loosen the adjustable Fence Guide locking knobs (1). There are two: one on each side of the Multi- Purpose Handle foot. Slide the adjustable Fence Guide (2) into the Multi- Purpose Handle foot. -
Page 40: Installing The Vacuum Hose
Setting up Installing the Vacuum Hose Follow the steps below to install the Vacuum Hose attachment. Part Action Insert the Vacuum Hose (1) into the vacuum collar (2). Insert the nozzle of your vacuum cleaner into the Twist-A-Saw vacuum hose dock (3). ™... -
Page 41: Attaching The Twist-A-Flex
Setting up Attaching the Twist-A-Flex ™ Follow the steps below to attach the Twist-A-Flex Rotary Tool Attachment. ™ Part Action Switch Twist-A-Saw OFF and unplug it from the power ™ source. Refer to Turning the Twist-A-Saw on and off on ™... -
Page 42: Installing A Bit In The Twist-A-Flex
Setting up Installing a bit in the Twist-A-Flex ™ Follow the steps below to install a bit in the Twist-A-Flex Rotary Tool ™ Attachment. Part Action Insert the shaft locking pin (1) into the locking hole (2) in the Twist-A-Flex rotary tool head. -
Page 43: Using The Twist-A-Saw
Using the Twist-A-Saw ™ Turning the Twist-A-Saw on and off ™ Follow the steps below to turn your Twist-A-Saw on and off. ™ Part Action When Twist-A-Saw is connected to mains power the power ™ indicator light (1) glows GREEN. The ON/OFF power switch (2) is located on the top of Twist-A-Saw . -
Page 44: Turning The Twist-A-Saw ™ On And Off
Using the Twist-A-Saw ™ Turning the Twist-A-Saw on and off ™ If Twist-A-Saw™ won’t turn on If the power indicator light turns red or starts flashing, or if the Twist-A-Saw™ will not start, refer to Tips and troubleshooting on page 54. Page 42... -
Page 45: Changing The Variable Speed Dial
Using the Twist-A-Saw ™ Changing the Variable Speed Dial The Variable Speed Dial lets you change the speed that the bit turns in increments of 5,000 revolutions per minute (/min). The lowest setting is 5 (5,000/min) and the highest setting is 25 (25,000/min). Follow the steps below to change the Variable Speed Dial. -
Page 46: Making Practice Cuts
Using the Twist-A-Saw ™ Making practice cuts Practice cuts can help avoid costly and disappointing mistakes. Before undertaking your first Twist-A-Saw project, practice cut on scrap material ™ that is the same as the material you will use for that project. This will help you select the speed that will produce the smoothest cut. - Page 47 Using the Twist-A-Saw ™ Making practice cuts Part Action Hold Twist-A-Saw firmly with both hands. Place the edge ™ of the Multi-Purpose Handle foot on the workpiece at a 45° angle. Note: DO NOT let the bit touch the workpiece until the power switch is ON and Twist-A-Saw is up to full speed.
- Page 48 Using the Twist-A-Saw ™ Making practice cuts Part Action When the bit has cut through the workpiece, slowly move Twist-A-Saw in a clockwise direction. Let Twist-A-Saw ™ ™ the work, and use slow and steady pressure as you cut. Note: Always cut in a clockwise direction, except when cutting drywall/plasterboard.
-
Page 49: Cutting Outlet Openings In Drywall/Plasterboard
Using the Twist-A-Saw ™ Cutting outlet openings in drywall/plasterboard Follow the steps below to cut outlet openings in drywall/plasterboard with your Twist-A-Saw ™ Warning! WARNING DO NOT make cut-outs around any opening or fixture that has live electrical wires, or any wall that may have electrical wiring behind it. Make sure circuit breakers have been turned off or fuses removed to disconnect the electrical circuit in the area of work. - Page 50 Using the Twist-A-Saw ™ Cutting outlet openings in drywall/plasterboard Part Action When running at full speed, plunge the bit through the drywall/plasterboard on the mark showing the centre of the outlet box. Follow the cutting pattern shown below. Slowly move the bit to the right until you feel and hear the bit touch the inside edge of the outlet box.
-
Page 51: Using The Circle Cutter
Using the Twist-A-Saw ™ Using the Circle Cutter Follow the steps below to use the Circle Cutter to cut circles with your Twist-A-Saw ™ Part Action Mark the centre of the circle to be cut. Drill a Ø 4.76mm (Ø 3/16”) pilot hole for the centre guide pivot pin. Adjust the cutting bit so that it will extend 4mm (3/16”) past the thickness of the workpiece. - Page 52 Using the Twist-A-Saw ™ Using the Circle Cutter Part Action Place the edge of the Multi-Purpose Handle foot on the workpiece at a 45° angle. Align the centre guide pivot pin with the pilot hole. Switch Twist-A-Saw ™ Note: DO NOT let the bit touch the workpiece until Twist-A-Saw is up to full speed.
- Page 53 Using the Twist-A-Saw™ Using the Circle Cutter Part Action When the bit has cut through the workpiece, slowly move Twist-A-Saw in a clockwise direction. Let Twist-A-Saw ™ ™ the work, and use slow and steady pressure as you cut. Cut the circle, keeping Twist-A-Saw upright and the Multi- ™...
-
Page 54: Using The Twist-A-Flex ™ Rotary Tool Attachment
Using the Twist-A-Saw ™ Using the Twist-A-Flex Rotary Tool Attachment ™ Follow the steps below to use the Twist-A-Flex Rotary Tool Attachment on ™ your Twist-A-Saw ™ Warning! WARNING Always hold on to the Twist-A-Flex rotary tool head when it is turned ™... - Page 55 Using the Twist-A-Saw ™ Using the Twist-A-Flex Rotary Tool Attachment ™ Warning! WARNING • Never bend the Twist-A-Flex rotary tool shaft to a radius of less than ™ Ø 100mm (Ø 4”) when operating, otherwise overheating can occur. • Whenever possible, store the Twist-A-Flex without bends.
-
Page 56: Tips And Troubleshooting
Tips and troubleshooting Choosing the right speed Remember, speed is relevant to what you are cutting. ✔ It’s easy to increase speed, so if in doubt, start slow. ✔ Using the right speed will protect and prolong the life of Twist-A-Saw ™... -
Page 57: Power Indicator Light
Tips and troubleshooting Power indicator light If the power indicator light turns red or starts flashing, use the table below to determine what to do next. Power indicator Reason How to fix light Power indicator Spindle has become Turn the power switch off, light flashes red locked or overloaded unplug the power cord from... -
Page 58: Twist-A-Saw ™ Care
Twist-A-Saw Care ™ Cleaning Remove accumulated dust and debris regularly using a soft DRY ✔ brush. Do not use any liquids or flammable substances to clean your Twist- ✔ A-Saw . These substances may damage the Twist-A-Saw . Use a ™... -
Page 59: Service And Repairs
Twist-A-Saw Care ™ Service and repairs When servicing, use only identical replacement parts. The use of any ✔ other part may create a hazard or cause damage to the product. DO NOT attempt to modify Twist-A-Saw or create accessories. Any ™... -
Page 60: Warranty
Warranty Your warranty is subject to the following conditions: • DO NOT operate the Product with a damaged plug or cord, or if the unit has been dropped, damaged or dropped in water. To avoid the risk of electric shock, do not disassemble or attempt to repair the appliance on your own. -
Page 61: Disposal / Declaration Of Conformity / Manufacturers
Disposal / Declaration Of Conformity / Manufacturers DO NOT DISPOSE OF DECLARATION OF ELECTRIC TOOLS IN CONFORMITY C € THE GARBAGE According to European Directive The manufacturer declare that the product Twist-A-Saw JD3361 is 2012/19/EU, with reference to ™ in compliance with the following waste electronic, electrical standards, normative documents equipment and tools, and its... - Page 62 Technical data Model No .: JD3361 Rated: Voltage 230-240V Speed: 5,000 − 25,000/min Rated Frequency: 50Hz Protection Class: Double Insulation Power: 550Watts Weight: 1kg Made in China Page 60...
- Page 64 ™ Distributed by: MediaShopping S .p .A . Distributed in Central and Eastern Europe by: Viale Europa 44 20093 Cologno Monzese (MI) Italy Topshop International SA www .mediashopping .it www .topshoptv .net Levererad av: Importé en France et distribué par : TVINS SCANDINAVIA AB Best of TV - RAF Inventions sarl Citadellsvägen 23, Box 505...
Need help?
Do you have a question about the Twist-A-Saw Deluxe Kit and is the answer not in the manual?
Questions and answers