Table of Contents
Advertisement
Advertisement
Table of Contents

Related Manuals for ABB PVS800-57-0100kW-A


Summary of Contents for ABB PVS800-57-0100kW-A
- Page 1 ABB solar inverters Hardware manual PVS800-57 central inverters (100 to 1000 kW)
-
Page 2: List Of Related Manuals
List of related manuals Inverter hardware manual Code (English) PVS800-57 hardware manual 3AUA0000053689 Inverter firmware manual PVS800 central inverters firmware manual 3AUA0000058422 and adaptive program application guide 3AUA0000091276 Option manuals and quides Manuals and quick guides for I/O extension modules, fieldbus adapter modules, etc. - Page 3 Hardware manual PVS800-57 central inverters (100 to 1000 kW) Table of contents 1. Safety instructions 4. Mechanical installation 6. Electrical installation 8. Start-up 2014 ABB Oy. All Rights Reserved. 3AUA0000053689 Rev H EFFECTIVE: 2014-07-09...
- Page 5 Update notice The notice concerns the following PVS800-57 Hardware Code: 3AXD50000217960 Rev A Manuals: Valid: from 21.12.2017 until the release of Rev J of the hardware manual Code Revision Language Contents: the main new features and changes which are not 3AUA0000053689 English yet updated to the manual.
- Page 6 NEW bullet point (page 14): Safety in installation and maintenance Electrical safety These warning are for all personnel who do work on the inverter, its input and output cables, the transformer or the photovoltaic generator. WARNING! Obey these instructions to prevent injury or death, or damage to the equipment. You must be a qualified electrician to do installation and service work.
-
Page 7: Table Of Contents
Table of contents List of related manuals ........... 2 1. - Page 8 Door devices ............49 Inverter module (R7i) .
- Page 9 Protecting the photovoltaic generator and DC input cable in short-circuit situations . 79 Protecting the inverter and the AC output cable against thermal overload ..79 Supplying power for the auxiliary circuits ........80 Implementing the low voltage ride-through function .
- Page 10 7. Installation checklist Contents of this chapter ..........97 Checklist .
- Page 11 Replacing the LCL filter ..........120 Capacitors .
- Page 12 CE marking ............147 Compliance with the European Low Voltage Directive .
-
Page 13: Safety Instructions
Safety instructions 11 Safety instructions Contents of this chapter This chapter contains the safety instructions which you must obey when you install and operate the inverter and do maintenance on the inverter. If you ignore the safety instructions, injury or death can occur, or damage can occur to the inverter, photovoltaic generator or adjoining equipment. -
Page 14: Safety In Installation And Maintenance
12 Safety instructions Safety in installation and maintenance Precautions before electrical work These precautions are for all personnel who do work on the inverter, its input and output cables, the transformer or photovoltaic generator. WARNING! Obey these instructions. If you ignore them, injury or death, or damage to the equipment can occur. - Page 15 Safety instructions 13 6. Install temporary grounding as required by the local Diameter of the regulations. Connect connecting knob is the AC and DC 25 mm. busbars to the PE using an appropriate temporary grounding tool. View of AC busbars grounding 7.
-
Page 16: Electrical Safety
14 Safety instructions Electrical safety These warnings are for all personnel who do work on the inverter, its input and output cables, the transformer or photovoltaic generator. WARNING! Obey these instructions. If you ignore them, injury or death, or damage to the equipment can occur. -
Page 17: Grounding
Safety instructions 15 • When the photovoltaic generator cells are exposed to light (even if it is dim), the generator supplies DC voltage to the inverter. Grounding These instructions are for all personnel who are responsible for the grounding of the inverter. -
Page 18: General Safety
16 Safety instructions General safety These instructions are for all personnel who install the inverter and do maintenance work on it. WARNING! Obey these instructions. If you ignore them, injury or death, or damage to the equipment can occur. •... - Page 19 Do not use the ramp with plinth heights over 50 mm.The ramp supplied with the inverter is designed for a plinth height of 50 mm (the standard plinth height of ABB cabinets). Tighten the four fastening bolts of the ramp carefully.
-
Page 20: Printed Circuit Boards
18 Safety instructions • Beware of the cooling fan blades. The fans may continue to rotate for a while after disconnection of the electrical supply. • Beware of hot surfaces. Some parts inside the inverter cabinet, such as heatsinks of power semiconductors, remain hot for a while after disconnection of the electrical supply. -
Page 21: Start-Up And Operation
Safety instructions 19 Start-up and operation These warnings are for all personnel who commission, plan the operation or operate the inverter. WARNING! Obey these instructions. If you ignore them, injury or death, or damage to the equipment can occur. • Close the inverter AC and DC main switches and miniature DC circuit breakers (option +H377) before start. - Page 22 20 Safety instructions...
-
Page 23: Introduction To The Manual
Introduction to the manual 21 Introduction to the manual Contents of this chapter This chapter describes the intended audience and contents of the manual. It contains a flowchart of the steps in checking the delivery, installing and commissioning the inverter. The flowchart refers to chapters/sections in this manual and other manuals. -
Page 24: Related Documents
22 Introduction to the manual Electrical installation describes the electrical installation process of the inverter. Installation checklist contains a list for checking the mechanical and electrical installation of the inverter. Start-up describes the start-up procedure of the inverter. Fault tracing describes the fault tracing possibilities of the inverter. -
Page 25: Terms And Abbreviations
DDCS Distributed drives communication system; a protocol used in optical fiber communication inside and between ABB drives and inverters. Electromagnetic compatibility Frame (size) Relates to the construction type of the component in question. The term is often used in reference to a group of components that share a similar mechanical construction. - Page 26 24 Introduction to the manual Term/Abbreviation Explanation Programmable logic controller PPCS Power plate communication system; a protocol used in the optical fiber link that controls the output semiconductors of an inverter module RAIO Analog I/O extension module RDCO DDCS communication module that can be snapped on the RMIO board to add the available fibre optic channels.
-
Page 27: Operation Principle And Hardware Description
Operation principle and hardware description 25 Operation principle and hardware description Contents of this chapter This chapter gives a short description of the inverter’s operation principle and construction. -
Page 28: Product Overview
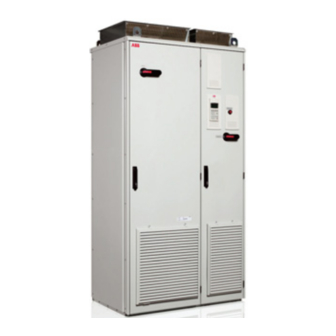
26 Operation principle and hardware description Product overview The PVS800-57 is a central inverter for converting, adjusting and conveying power generated by a solar generator to the electrical power system. The inverter is built in an air-cooled cabinet for indoor use. Cooling air is let in through the gratings at the lower part of the cabinet door. -
Page 29: Block Diagram Of Solar Generator System
Operation principle and hardware description 27 Block diagram of solar generator system A block diagram of a solar generator system where the solar module string arrays are connected to the electrical power system through an inverter is shown below. 1…20 Solar module (photovoltaic module) Solar string Solar array... - Page 30 28 Operation principle and hardware description Example main circuit diagram of the inverter system (R7i) Junction box power supply max. 6 A. Fault current protected. Option +G410. Auxiliary power supply IT network only Option +E216 Grid...
- Page 31 Operation principle and hardware description 29 Symbol Terminal/Component Description/Operation DC input terminals The solar generator is connected to the inverter DC input terminals with busbars or through miniature circuit breakers (option +H377). AC output The AC output terminals connect the inverter to the low-voltage AC power system.
- Page 32 30 Operation principle and hardware description Symbol Terminal/Component Description/Operation Inverter module Converts the DC voltage to AC voltage. The operation is controlled by switching the IGBTs. LCL filter Smooths the current and voltage waveform. Z1.1-3 Common mode filter Reduces common mode voltages and currents in the solar generator and inverter main circuit and AC output.
-
Page 33: Example Main Circuit Diagram Of The Inverter System (R8I)
Operation principle and hardware description 31 Example main circuit diagram of the inverter system (R8i) Junction box power supply max. 6 A. Fault current protected. Option +G410. Auxiliary power supply IT network only Option +E216 Grid... - Page 34 32 Operation principle and hardware description Symbol Terminal/Component Description/Operation DC input terminals The solar generator is connected to the inverter DC input terminals with busbars and fuse links. AC output The AC output terminals connect the inverter to the low-voltage AC power system.
- Page 35 Operation principle and hardware description 33 Symbol Terminal/Component Description/Operation Auxiliary control Hand-operated switch which connects the auxiliary control voltage to voltage switch the inverter. Inverter module Converts the DC voltage to AC voltage. The operation is controlled by switching the IGBTs. LCL filter Smooths the current and voltage waveform.
-
Page 36: Example Main Circuit Diagram Of The Inverter System (2 × R8I)
34 Operation principle and hardware description Example main circuit diagram of the inverter system (2 × R8i) Auxiliary power supply IT network only Option +E216 Grid... -
Page 37: External 100 V Ac, 115 V Ac Or 200 V Ac Auxiliary Power Supply (Options +G396, +G397 And +G398)
Operation principle and hardware description 35 External 100 V AC, 115 V AC or 200 V AC auxiliary power supply (options +G396, +G397 and +G398) Auxiliary power supply from the inverter main circuit (option +G415) 300 V AC / 350 V AC / 400 V AC... -
Page 38: Descriptions Of Symbols
36 Operation principle and hardware description Descriptions of symbols Symbol Terminal/Component Description/Operation DC input terminals The solar generator is connected to the inverter DC input terminals with busbars and fuse links. AC output The AC output terminals connect the inverter to the low-voltage AC power system. - Page 39 Operation principle and hardware description 37 Symbol Terminal/Component Description/Operation AC main switch- Hand-operated switch which connects the inverter to the electrical disconnector power system. The AC main switch-disconnector can be operated at all times. If it is operated during operation, the inverter will trip as the grid disappears.
-
Page 40: Example Main Circuit Diagram Of The Inverter System (3 × R8I)
38 Operation principle and hardware description Example main circuit diagram of the inverter system (3 × R8i) Auxiliary power supply IT network only Option +E216 Grid... -
Page 41: External 100 V Ac, 115 V Ac Or 200 V Ac Auxiliary Power Supply (Options +G396, +G397 And +G398)
Operation principle and hardware description 39 External 100 V AC, 115 V AC or 200 V AC auxiliary power supply (options +G396, +G397 and +G398) Auxiliary power supply from the inverter main circuit (option +G415) 300 V AC / 350 V AC / 400 V AC... -
Page 42: Descriptions Of Symbols
40 Operation principle and hardware description Descriptions of symbols Symbol Terminal/Component Description/Operation DC input terminals The solar generator is connected to the inverter DC input terminals with busbars and fuse links. AC output The AC output terminals connect the inverter to the low-voltage AC power system. -
Page 43: Electrical Power Network Supervision Functions
Operation principle and hardware description 41 Symbol Terminal/Component Description/Operation Grounding contactor The inverter software controls the disconnection of the positive/ (with options +F282 negative pole grounding. See section Positive or negative pole and +F283) grounding (options +F282 and +F283) on page 42. AC main switch Hand-operated switch which connects the inverter to the electrical power system. -
Page 44: Positive Or Negative Pole Grounding (Options +F282 And +F283)
42 Operation principle and hardware description Positive or negative pole grounding (options +F282 and +F283) The positive and negative pole grounding options can be used when solar modules require grounding of inverter DC poles. The grounding of the poles complies with standard IEC 62109-2. -
Page 45: Layout Drawings
Operation principle and hardware description 43 Inverter control unit parameter Description Reduced Charging circuit 16.05 USED MODULES output fuses to be current removed GROUP 2 Middle (U3) and right (U5) 66.7% F20.1-2 inverter modules are used. GROUPS 1 and 2 (default) Left (U1), middle (U3) and right 100% None... -
Page 46: Cabinet Layout Of Frame R7I
44 Operation principle and hardware description Cabinet layout of frame R7i A cabinet of frame R7i is shown below with doors open and shrouds removed. Description Incoming cubicle Inverter module cubicle DC cable lead-throughs Photovoltaic generator connection terminals Auxiliary control voltage connection terminals and switch Ground fault monitoring device (options +Q954 and +Q976) -
Page 47: Cabinet Layout Of Frame R8I
Operation principle and hardware description 45 Cabinet layout of frame R8i A cabinet of frame R8i is shown below with doors open and shrouds removed. Cubicles Auxiliary control cubicle Output cubicle Inverter module cubicle Incoming cubicle External control interfaces 23 RDCU control unit (A41, inverter control unit). -
Page 48: Cabinet Layout Of Frame 2 × R8I
46 Operation principle and hardware description Cabinet layout of frame 2 × R8i A cabinet of frame 2 × R8i is shown below with doors open and shrouds removed. Cubicles Auxiliary control cubicle Output cubicle Inverter module cubicle Incoming cubicles External control interfaces Junction box power supply (option +G410) 115/230 V auxiliary control voltage connection... - Page 49 Operation principle and hardware description 47 Description DC cable lead-throughs DC input terminals (fuse protected) Input DC fuses Connecting knobs for temporary grounding of the DC busbars for work DC main switch Ground fault monitoring device (options +Q954, +Q976 and +Q981) DC contactor Inverter DC fuses Inverter module...
-
Page 50: Cabinet Layout Of Frame 3 × R8I
48 Operation principle and hardware description Cabinet layout of frame 3 × R8i A cabinet of frame 3 × R8i is shown below with doors open and shrouds removed. Cubicles Auxiliary control cubicle Output cubicle Inverter module cubicle Incoming cubicles External control interfaces Junction box power supply (option +G410) 115/230 V auxiliary control voltage connection... -
Page 51: Door Devices
Operation principle and hardware description 49 Description DC cable lead-throughs DC input terminals (fuse protected) Input DC fuses Connecting knobs for temporary grounding of the DC busbars for work DC main switch Ground fault monitoring device (options +Q954, +Q976 and +Q981) DC contactor Inverter DC fuses Inverter module... -
Page 52: Inverter Module (R7I)
50 Operation principle and hardware description Inverter module (R7i) The cooling fan at the base of the inverter module is fed from the auxiliary voltage supply. Description DC (input) connections Output busbars Cooling fan Power connection for cooling fan (X41) Fiber optic connectors Front view with cooling fan removed... - Page 53 Operation principle and hardware description 51 Item Explanation DC (input) connections AC output busbars. They match the quick connector socket mounted in the cubicle. Fiber optic connectors of the AINT board. Connected to the RDCU control unit. Retractable support legs Handle Cooling fan...
-
Page 54: Connections And Interfaces Overview
52 Operation principle and hardware description Connections and interfaces overview The diagram below shows the power connections and control interfaces of the PVS800-57 inverters. CDP312R RDCU RDCU Control Control (A41) (A43) panel panel +24 V DC +24 V DC ExtPower ExtPower SLOT 1 SLOT 1... - Page 55 X20, X21 Reference voltage 24 V DC Analog inputs and outputs (5 pcs) Reserved. Contact ABB, if need to be used. Digital inputs (7 pcs), one input reserved for the optional ground fault monitoring Auxiliary voltage output and input 24 V DC...
-
Page 56: Connection Examples
54 Operation principle and hardware description Connection examples The diagram below shows a connection example for SCADA, PLC or data logger when a Modbus/RTU connection is used. SCADA / Data logger / Inverter 1 RDCU (A43) SLOT 1 SLOT 2 •... -
Page 57: Cdp-312R Control Panel
Operation principle and hardware description 55 The diagram below shows a connection example for SCADA, PLC or data logger when a Modbus/TCP connection is used. SCADA / Data logger / Inverter 1 RDCU (A43) Ethernet switch SLOT 1 SLOT 2 •... -
Page 58: Type Designation Labels
56 Operation principle and hardware description Type designation labels Inverter label The type designation label of the inverter includes the ratings, valid markings, a type designation and a serial number, which allow individual recognition of each inverter. The type designation label is located on the front cover of the inverter cabinet. An example label is shown below. -
Page 59: Inverter Module Label
Operation principle and hardware description 57 Inverter module label The type designation label of the inverter module includes the ratings, valid markings, a type designation and a serial number. The module label is attached to the front panel of the inverter module. -
Page 60: Type Designation Key
Selection Alternatives Product series PVS800 product series (ABB central inverters) Type Cabinet-built central inverter. When no options are selected: IP42 (UL Type 2), AC contactor, DC fuses (100 kW), gPV fuses (250 kW and 315 kW), fuse switch, terminals for 230 V AC external control voltage,... - Page 61 Q951 Emergency stop Q954 Ground fault monitoring in IT (ungrounded) systems Q976 Ground fault monitoring in IT (ungrounded) systems (ABB CM-IWN.5) Q980 Grid monitoring relay, BDEW approved, for 500 kW and 630 kW units Q969 Grid monitoring relay, ENEL approved...
-
Page 62: Types -0500Kw-A To -1000Kw-C
Selection Alternatives Product series PVS800 product series (ABB central inverters) Type Cabinet-built central inverter. When no options are selected: IP42 (UL Type 2), AC main contactor, gPV fuses, AC side switch disconnector, terminals for 230 V AC external control voltage, CDP312 control panel,... - Page 63 Extended warranty 60/66 months Safety options Q954 Ground fault monitoring in IT (ungrounded) systems (BENDER Iso-PV) Q976 Ground fault monitoring in IT (ungrounded) systems (ABB CM-IWN.5) Q981 Ground fault monitoring in IT (ungrounded) systems (ABB CM-IWN.6S) Q969 Grid monitoring relay, ENEL approved...
- Page 64 62 Operation principle and hardware description...
-
Page 65: Mechanical Installation
Mechanical installation 63 Mechanical installation Contents of this chapter This chapter describes the mechanical installation procedure of the inverter. Checking the installation site See section Ambient conditions on page for allowable operating conditions, and section Dimensions, weights and free space requirements on page for requirements for free space around the unit. -
Page 66: Required Tools
64 Mechanical installation Note: For easy maintenance, do not install the inverter on a higher level than the floor in front of it. If the inverter is placed higher, the ramp supplied with the inverter cannot be used when replacing an inverter module. The wall behind the unit must be of non-flammable material. -
Page 67: Moving The Unit
Mechanical installation 65 Moving the unit Move the unit by crane (A), fork-lift or pallet truck (B), or on rollers (C) as shown below. Use the steel lifting bars attached to the top of the cabinet. Insert the lifting ropes or slings into the holes of the lifting bars. -
Page 68: Placing The Unit
66 Mechanical installation Placing the unit Move the cabinet into its final position with an iron bar and a piece of wood at the bottom edge of the cabinet. Place the wooden piece properly in order not to damage the cabinet frame! Overview of the installation process The unit must be installed in an upright vertical position. -
Page 69: Fastening The Cabinet To The Floor
Mechanical installation 67 Fastening the cabinet to the floor The cabinet must be fastened to the floor by using clamps along the edge of the cabinet bottom, or by bolting the cabinet to the floor through the holes inside. Alternative 1 – Clamping ... -
Page 70: Alternative 2 - Using The Holes Inside The Cabinet
68 Mechanical installation Alternative 2 – Using the holes inside the cabinet The cabinet can be fastened to the floor using the fastening holes inside the cabinet, if they are accessible. The recommended maximum distance between the fastening points is 800 mm (31.5”). -
Page 71: Miscellaneous
Mechanical installation 69 Miscellaneous Preventing the recirculation of hot air Prevent hot air circulation outside the inverter by leading the outcoming hot air away from the area where the inlet air to the inverter is taken. Also, ensure that the hot air from the inverter module cubicle cannot enter the adjacent cubicles. -
Page 72: Calculating The Required Static Pressure Difference
= 0.5 • • v = 0.5 • 1.1 • 4.3 = 10 Pa The required pressure in the exit air duct is then, 1.5…2 • 10 Pa = 15…20 Pa, below the pressure in the room. More information: Contact ABB. -
Page 73: Cable Duct In The Floor Below The Cabinet
Mechanical installation 71 Cable duct in the floor below the cabinet A cable duct can be constructed below the middle part of the cabinet. The duct width may not exceed 450 mm. The cabinet weight lies on the 100 mm wide section in front and 50 mm wide section on the back which the floor must carry. - Page 74 72 Mechanical installation...
-
Page 75: Planning The Electrical Installation
ABB does not assume any liability whatsoever for any installation which breaches the local laws and/or other regulations. Furthermore, if the recommendations given by ABB are not followed, the inverter may experience problems that the warranty does not cover. -
Page 76: Requirements For The Transformer
5% total harmonic distortion to withstand possible outside interference from the network. ABB recommends that the transformer is equipped with an off-load tap changer for voltage regulation on the high-voltage side of the winding with two 2.5% step points to the plus and minus directions. -
Page 77: Selecting The Grid Disconnecting Device
Planning the electrical installation 75 Selecting the grid disconnecting device The inverter is equipped with a hand-operated disconnecting device which isolates the inverter and the solar generator from the electrical power system. The disconnecting device does not, however, isolate the inverter AC output busbars from the power system. Therefore, during installation and maintenance work on the inverter, the AC output cables and busbars must be isolated from the electrical power system with a disconnector at the transformer. - Page 78 76 Planning the electrical installation Symmetrical shielded cable is recommended for the AC output cabling; see section Recommended AC output power cable types below. Compared to a four-conductor system, the use of symmetrical shielded cable reduces electromagnetic emission of the whole inverter system.
-
Page 79: Recommended Ac Output Power Cable Types
Planning the electrical installation 77 Recommended AC output power cable types The power cable types that can be used for the inverter AC output are represented below Symmetrical shielded cable with three phase conductors and a concentric PE conductor as shield. The shield must meet the requirements of IEC 61439-1, see above. -
Page 80: Signals In Separate Cables
Relay cable type The cable type with braided metallic screen (eg, ÖLFLEX by LAPPKABEL, Germany) has been tested and approved by ABB. Installation sites above 2000 metres (6560 feet) WARNING! Protect against direct contact when installing, operating and servicing the RMIO board wiring and optional modules attached to the board. -
Page 81: Separate Control Cable Ducts
Planning the electrical installation 79 Separate control cable ducts 230 V 230 V (120 V) 24 V (120 V) 24 V Not allowed unless the 24 V cable is Lead 24 V and 230 V (120 V) control insulated for 230 V (120 V) or insulated cables in separate ducts inside the with an insulation sleeving for 230 V cabinet. -
Page 82: Supplying Power For The Auxiliary Circuits
Supply the inverter with rated auxiliary voltage. Protect the supply according to local regulations with, eg, fuses and/or fault current breakers. Do not connect any additional appliances to the inverter without consulting with ABB. Implementing the low voltage ride-through function The user can define by parameters when the inverter must stay connected to the grid (ie, the depth and length of the grid voltage transient). -
Page 83: Implementing Ground Fault Monitoring In It (Ungrounded) Systems
Note: The insulation monitoring device measures the insulation resistance of the solar generator correctly according to the settings when the inverter is not operating. For disabling the monitoring device during the inverter operation, contact ABB. Safety information The insulation monitoring device is constructed according to state-of-the-art and recognized technical safety rules. -
Page 84: Customer Wiring
82 Planning the electrical installation Customer wiring The insulation monitoring device can be connected to external systems. See the circuit diagrams delivered with the inverter. Start-up See chapter Start-up. More information • Circuit diagrams delivered with the inverter • Manufacturer’s operating manual of the insulation monitoring device Implementing positive or negative pole grounding (options +F282 and +F283) Some solar module types require positive or negative grounding. -
Page 85: Electrical Installation
Electrical installation 83 Electrical installation Contents of this chapter This chapter describes the electrical installation process of the inverter. Warnings WARNING! Only qualified electricians are allowed to do the work described in this chapter. Obey the Safety instructions on the first pages of this manual. If you ignore the safety instructions, injury or death can occur. -
Page 86: Photovoltaic Generator
The EMC filter (option +E216) is not suitable for use in an IT (ungrounded) system. Check that the low-voltage network is of the TN (grounded) type. If not, please contact ABB. WARNING! If the optional EMC filter +E216 is installed on an IT system (an... -
Page 87: Connection Diagram Of A Four-Conductor System
Electrical installation 85 Connection diagram of a four-conductor system Arrange the cables as shown below to get an as equal current distribution as possible. L2 L3 L3 L1 L1 L2 Connect single-core cables without concentric protective shield (armor) as shown below. WARNING! Ground all conductive cable supports, cable clamps and individual conductive items close to cables, such as cable trays. -
Page 88: Dc Input Cable Connection Procedure
86 Electrical installation DC input cable connection procedure 1. Remove the shroud covering the input power terminals. 2. Lead the cable(s) into the inside of the cabinet. If a shielded cable is used, connect the shield to the cabinet grounding busbar with a cable lug. 3. -
Page 89: Ac Output Cable Connection Procedure
Electrical installation 87 AC output cable connection procedure 1. Remove the shroud covering the output power terminals. 2. Lead the cable(s) into the inside of the cabinet. If a shielded cable is used, prepare the cable ends and make the 360° grounding arrangements at the cabinet entry as shown on the next page. - Page 90 88 Electrical installation...
-
Page 91: Connecting The External Power Supply Cable For The Auxiliary Circuit
PVS800-57 Maximum fuse: 16 A Note concerning power supply from IT (ungrounded) systems: Contact ABB for instructions. Equip the power supply for the auxiliary circuit with fault current circuit breakers for ground fault indication and tripping. If the overvoltage protection device of the auxiliary control voltage input causes unnecessary ground fault trippings, the type of the device must be changed. -
Page 92: Connecting The Dc Current Measurement Signals To An External Controller
90 Electrical installation Connecting the DC current measurement signals to an external controller (option +G416) This table shows the terminals for connecting the DC current measurement signals (0…4 V) to an external controller. The terminals for connecting the grounding wires are X50:9 and X50:29. -
Page 93: Connecting The Junction Box Power Supply (Option +G410)
Electrical installation 91 Connecting the junction box power supply (option +G410) Junction box Junction box PVS800-57 230 V The maximum allowed current that can be connected to the power supply is 6 A. Connecting the EMC filter (option +E216) Connect the EMC filter on the network side of the low voltage transformer. PVS800-57 300 V 400 V... -
Page 94: Default I/O Connection Diagram (Rdcu - A43)
92 Electrical installation Default I/O connection diagram (RDCU – A43) The external control cable connections to the RMIO board for the PVS800 solar inverter master control program with default settings are shown below (program version GSXR7360 and later). RMIO Terminal block size: VREF- Reference voltage -10 V DC, 1 kohm <... -
Page 95: Default I/O Connection Diagram (Rdcu - A41)
Electrical installation 93 Default I/O connection diagram (RDCU – A41) The external control cable connections to the RMIO board for the PVS800 solar inverter control program with default settings are shown below (program version ISXR7360 and later). RMIO Terminal block size: VREF- By default, not in use. -
Page 96: Default I/O Connections (Rdio On Rdcu - A41)
94 Electrical installation Default I/O connections (RDIO on RDCU – A41) The default connections of the RDIO-01 digital I/O extension modules inserted on the inverter control unit are shown below. Digital RDIO Description input/output terminal 100 kW and 250 kW 500 kW and 630 kW 875 kW and 1000 kW units... -
Page 97: Connection Procedure
Electrical installation 95 Connection procedure Making 360 degrees grounding at the cabinet lead-through for the control cables 1. Loosen the EMI conductive cushions. 2. Cut adequate holes to the rubber grommets in the lead-through plate and lead the cables through the grommets and the cushions into the cabinet. 3. -
Page 98: Connecting The Cables To The I/O Terminals
96 Electrical installation Note: If the outer surface of the shield is non-conductive: • Cut the shield at the midpoint of the bare part. Be careful not to cut the conductors or the grounding wire (if present). • Turn the shield inside out to expose its conductive surface. •... -
Page 99: Installation Checklist
Installation checklist 97 Installation checklist Contents of this chapter This chapter contains a list for checking the mechanical and electrical installation of the inverter. Checklist Go through the checks below with another person. Obey the Safety instructions given on the first pages of this manual. Check that…... - Page 100 98 Installation checklist Check that… The AC transformer is suitable for use with the inverter. (See section Selecting the transformer, page 73.) The insulation of the assembly is sufficient. (See section Checking the insulation of assembly, page 83.) The AC power system is an IT (ungrounded) system. The AC power cable connections at L1, L2 and L3 and their tightening torques are The DC power cable connections at UDC+ and UDC–...
-
Page 101: Start-Up
Start-up 99 Start-up Contents of this chapter This chapter describes the start-up procedure of the inverter. It also gives some advice for operation. Start-up procedure The functioning of the inverter is first tested in the local control mode with the control panel (CDP312R). -
Page 102: Setting Up The Insulation Monitoring Device
100 Start-up Set up the cabinet heater (option +G300): • Set the maximum temperature with the T65 thermostat (default 10 °C). Note: Especially in very humid conditions when the inverter is installed on the site for a longer period without grid connection keep the cabinet heaters on for several days before commissioning. -
Page 103: Adjusting Grounding Resistance For Positive Or Negative Pole
Check that the DC voltage of the solar generator matches the Note: If the DC voltage differs from value of 01.34 PV MODULE DC MEAS in the Master control the parameter value, do not try to program. start the inverter. Contact ABB. - Page 104 102 Start-up Check that the inverter is in local control mode, ie, letter L is at the top row of the control panel display. If not, press the control 1 L -> 654.0 V panel key STATE STAND BY AC POWER 0.0 kW AC CURR1 Start the inverter by pressing the control panel key...
-
Page 105: Setting Up Fieldbus Control (Option +K454, +K458, +K466, Or +K467)
If you do not have access to InstalledBase, submit a Membership Request on the Installed Base main page. Note that InstalledBase is only for ABB internal or ABB partner use. Note: It is recommended to attach the parameter lists and back- up files of the inverter and master control program to the report as well. -
Page 106: Connecting Drivewindow
USB port Start the DriveWindow program and connect to the inverter by Note: If all connected control units choosing ABB.SMP OPC server. are not seen through the optical ring, check that the node address of each RMIO board is set properly. Connect... -
Page 107: Fault Tracing
Fault tracing 105 Fault tracing Contents of this chapter This chapter describes the fault tracing possibilities of the inverter. LEDs This table describes LEDs of the inverter. Where When the LED is lit RMIO board (A41) Inverter in fault state Green The power supply on the board is OK. -
Page 108: Warning And Fault Messages Displayed By The Cdp-312R Control Panel
106 Fault tracing Warning and fault messages displayed by the CDP-312R control panel The control panel displays the warnings and faults of the inverter control unit that it is currently controlling. Flashing messages WARNING, ID:2 or FAULT, ID:2 on the control panel display indicate a warning or fault at the other control unit. -
Page 109: Maintenance
Note: Long-term operation near the specified maximum ratings or environmental conditions may require shorter maintenance intervals for certain components. The tables below contain user tasks. For tasks to be performed by ABB and more details on the maintenance, consult your local ABB Service representative. On the Internet, go to http://www.abb.com/searchchannels. -
Page 110: Recommended Annual Maintenance Actions By The User
108 Maintenance Recommended annual maintenance actions by the user ABB recommends these annual inspections to ensure the highest reliability and optimum performance. Action Target Air inlet and outlet meshes on the cabinet doors Air filters on the cabinet doors... -
Page 111: Cleaning The Interior Of The Cabinet
Maintenance 109 Cleaning the interior of the cabinet WARNING! Obey the safety instructions, page 11. If you ignore the instructions, physical injury or death, or damage to the equipment can occur. WARNING! Use a vacuum cleaner with an antistatic hose and nozzle. Using a normal vacuum cleaner creates static discharges which can damage circuit boards. -
Page 112: Cleaning The Heatsink
110 Maintenance Cleaning the heatsink The inverter module heatsink fins pick up dust from the cooling air. Check the cleanliness of the heatsink regularly. The inverter runs into overtemperature warnings and faults if the heatsink is not clean. When necessary, clean the heatsink as follows. WARNING! Obey the safety instructions, page 11. -
Page 113: Checking And Cleaning The Power Connections (R8I, 2 × R8I, 3 × R8I)
Maintenance 111 Checking and cleaning the power connections (R8i, 2 × R8i, 3 × R8i) WARNING! Obey the safety instructions, page 11. If you ignore the instructions, physical injury or death, or damage to the equipment can occur. 1. Stop the inverter and do the steps in section Precautions before electrical work page before you start the work. -
Page 114: Fans
If the inverter is operated in a critical part of a process, fan replacement is recommended once these symptoms start appearing. Replacement fans are available from ABB. Do not use other than ABB- specified spare parts. -
Page 115: Replacing The Lcl Filter Cooling Fan (R8I, 2 × R8I, 3 × R8I)
Maintenance 113 Replacing the LCL filter cooling fan (R8i, 2 × R8i, 3 × R8i) WARNING! Obey the safety instructions, page 11. If you ignore the instructions, physical injury or death, or damage to the equipment can occur. 1. Stop the inverter and do the steps in section Precautions before electrical work page before you start the work. -
Page 116: Replacing The Door Fans
114 Maintenance Replacing the door fans WARNING! Obey the safety instructions, page 11. If you ignore the instructions, physical injury or death, or damage to the equipment can occur. 1. Stop the inverter and do the steps in section Precautions before electrical work page before you start the work. -
Page 117: Replacing The Cabinet Roof Fans (R8I)
Maintenance 115 Replacing the cabinet roof fans (R8i) WARNING! Obey the safety instructions, page 11. If you ignore the instructions, physical injury or death, or damage to the equipment can occur. 1. Stop the inverter and do the steps in section Precautions before electrical work page before you start the work. -
Page 118: Replacing The Cooling Fan Of The Inverter Module (R7I)
116 Maintenance Replacing the cooling fan of the inverter module (R7i) WARNING! Obey the safety instructions, page 11. If you ignore the instructions, physical injury or death, or damage to the equipment can occur. 1. Stop the inverter and do the steps in section Precautions before electrical work page before you start the work. -
Page 119: Replacing The Cooling Fan Of The Inverter Module (R8I, 2 × R8I, 3 × R8I)
Maintenance 117 Replacing the cooling fan of the inverter module (R8i, 2 × R8i, 3 × R8i) WARNING! Obey the safety instructions, page 11. If you ignore the instructions, physical injury or death, or damage to the equipment can occur. 1. -
Page 120: Replacing The Inverter Module (Frames R8I, 2 × R8I, 3 × R8I)
Do not use the ramp with plinth heights over 50 mm.The ramp supplied with the inverter is designed for a plinth height of 50 mm (the standard plinth height of ABB cabinets). Tighten the four fastening bolts of the ramp carefully. - Page 121 Maintenance 119 8. Insert the module pull-out ramp under the two bolts at the base of the module and tighten the bolts carefully. 9. Pull the module carefully out of the cubicle along the ramp. Make sure the wires do not catch.
-
Page 122: Inserting The Module Into The Cubicle
5. Loosen the module fastening bolts at the base of the module and remove the pull-out ramp. Flip the module fastening bracket into the down position and tighten the screws. 6. Close the cubicle door. Replacing the LCL filter Contact ABB. -
Page 123: Capacitors
It is not possible to predict a capacitor failure. Capacitor failure is usually followed by a mains fuse failure or a fault trip. Contact ABB if capacitor failure is suspected. Replacements are available from ABB. Do not use other than ABB-specified spare parts. - Page 124 122 Maintenance...
-
Page 125: Technical Data
Technical data 123 Technical data Contents of this chapter This chapter contains the technical data for the inverters. Ratings The inverter ratings are given below. Inverter type Frame Temp Nominal ratings PVS800-57- size Backfeed Inrush N(AC) max(DC) N(AC) N(AC) … current * current 0100kW-A... -
Page 126: Altitude Derating
124 Technical data Altitude derating The inverter load capacity (current and power) decreases if the installation site altitude exceeds 1000 metres (3300 ft). The derating is 1% for every 100 m (328 ft). For the maximum installation site altitude, see section Ambient conditions on page 144. -
Page 127: Temperature Rating Of Types -0315Kw-B And -0630Kw-B
Technical data 125 Temperature rating of types -0315kW-B and -0630kW-B This curve shows the load capacity of inverter types -0315kW-B and -0630kW-B as a function of ambient temperature. The curve is applicable at altitudes below 1000 m (3300 ft). -15 °C -5 °C +20 °C +30 °C... -
Page 128: Temperature Rating Of Types-0500Kw-A, -0875Kw-B And -1000Kw-C
Example1: For inverter types PVS800-57-0100kW-A and PVS800-57-0250kW-A installed at 1800 m (5900 ft), if the maximum ambient temperature is limited to +35 °C (95 °F), the compensated altitude derating factor is 100% - 8 ·... -
Page 129: Type Equivalence Table
Technical data 127 Type equivalence table Inverter type Frame Inverter module(s) used LCL filter(s) used size PVS800-57-0100kW-A PVS800-104-0105kW-A SLCL-05 PVS800-57-0250kW-A PVS800-104-0250kW-A SLCL-16 PVS800-57-0315kW-B PVS800-104-0315kW-B SLCL-16 PVS800-57-0500kW-A 2×R8i 2×PVS800-104-0250kW-A 2×SLCL-16 PVS800-57-0630kW-B 2×R8i 2×PVS800-104-0315kW-B 2×SLCL-16 PVS800-57-0875kW-B 3×R8i 3xPVS800-104-0315kW-B 3xSLCL-17 PVS800-57-1000kW-C 3×R8i 3xPVS800-104-0315kW-B... -
Page 130: Inverter Dc Fuses
128 Technical data Inverter DC fuses Inverter type Fuse information Rated current Bussmann Mersen PVS800-57-0100kW-A 170M6303 PVS800-57-0250kW-A 170M5398 11URD73PA0800 PVS800-57-0315kW-B 170M5398 11URD73PA0800 PVS800-57-0500kW-A 170M5398 11URD73PA0800 PVS800-57-0630kW-B 170M5398 11URD73PA0800 PVS800-57-0875kW-B 170M5398 11URD73PA0800 PVS800-57-1000kW-C 170M5398 11URD73PA0800 DC fuses for 2 DC input connections (option +2H382) ... -
Page 131: Dc Fuses For 10 Dc Input Connections (Option +10H382)
Technical data 129 DC fuses for 10 DC input connections (option +10H382) Inverter type Fuse information Rated current Bussmann PVS800-57-0500kW-A PV-250AF2 PVS800-57-0630kW-B PV-250AF2 PVS800-57-0875kW-B PV-315AF3 PVS800-57-1000kW-C PV-315AF3 DC fuses for 12 DC input connections (option +12H382) Inverter type Fuse information Rated current Bussmann... -
Page 132: Fuses For Inverters Delivered Without Input Dc Fuses (Option +0F291)
200 A 200 A 160 A 160 A 160 A 160 A The table below shows the recommended input DC fuse types. For other fuses, contact ABB. Rated DC fuse Recommended input DC fuses current of the inverter 400 A PV-400AF3... -
Page 133: Miniature Dc Circuit Breakers (Option +H377)
Dimensions of the recommended fuses (mm). 1 mm = 0.0394 in. Size Type code PV-***AF2 PV-***AF3 Miniature DC circuit breakers (option +H377) Inverter type Breaker information PVS800-57-0100kW-A S804PV-S80 Miniature circuit breakers for options +G300 and +G410 Option Breaker +G300 S 202-K6 +G410... -
Page 134: Dimensions, Weights And Free Space Requirements
132 Technical data Dimensions, weights and free space requirements The heights and depths of the cabinet are given below. Inverter type Height Depth PVS800-57-… 0100kW-A 2130 83.84 27.17 0250kW-A 2130 83.84 26.77 0315kW-B 2130 83.84 26.77 0500kW-A 2130 83.84 27.87 0630kW-B 2130 83.84... -
Page 135: Losses, Cooling Data And Noise
Losses, cooling data and noise The inverter is cooled by an internal fan, flow direction from front to top. Inverter type Heat dissipation Cooling air flow Noise Inverter module cubicles Total air flow PVS800-57-0100kW-A 1300 46000 PVS800-57-0250kW-A 2500 88300 3250 115000... - Page 136 0500kW-A or ½” (50 lb·ft) (2…32 lb·ft) 3/8” 0630kW-B 0875kW-B 1000kW-C Terminals of PVS800-57-0100kW-A Terminals of PVS800-57-0250kW-A, -0315kW-B, -0500kW-A, -0630kW-B,- 0875kW-B and -1000kW-C Units with MCB-protected DC input connections (option +H377) Inverter Photovoltaic switches PE busbar type Max. wire size...
-
Page 137: Terminal And Lead-Through Data For The Ac Output Power Cable
Bolt size Tightening torque Screw Tightening torque 0100kW-A 0250kW-A 0315kW-B 70 N·m 30…44 N·m 0500kW-A or ½” (50 lb·ft) (3/8”) 2…32 lb·ft) 0630kW-B 0875kW-B 1000kW-C Terminals of PVS800-57-0100kW-A Terminals of PVS800-57-0250kW-A and -0315kW-B Terminals of PVS800-57-0500kW-A, -0630kW-B, - 0875kW-B and -1000kW-C... -
Page 138: Ac Output Connection Specification
136 Technical data AC output connection specification Voltage Types -0100kW-A, -0250kW-A and -0500kW-A: 300 V AC 3-phase ± 10% Types -0315kW-B, -0630kW-B and -0875kW-B: 350 V AC 3-phase ± 10% Type -1000kW-C : 400 V AC 3-phase ± 10% Allowed electrical system 3-phase IT (ungrounded) system. -
Page 139: Dc Input Connection Data
Technical data 137 Power factor (cos phi 0…1 capacitive or inductive depending on the dimensioning adjustment range The following graphs illustrate the equipment operation with the nominal AC voltage and nominal ambient temperature. See Ratings on page 123. Types -0100kW-A and -0250kW-A Types -0315kW-B, -0500kW-A, 0630kW-B, -0875kW-B, -1000kW-C = 0.9 ·... -
Page 140: Control Unit (Rdcu/Rmio) Connection Data
Auxiliary power connection data Voltage 230 V AC (115 V AC optional) Frequency 50/60 Hz Allowed electrical system TN-S (grounded) system. If IT (ungrounded) system, contact ABB for instructions. Overvoltage category (IEC 62109, IEC 60664-1) Control unit (RDCU/RMIO) connection data Analog inputs RDCU (A43, PVS800 master control program): one programmable differential current input (0 mA / 4 mA …... -
Page 141: Relay Outputs
2 A rms Insulation test voltage 4 kV AC, 1 minute DDCS fiber optic link With optional communication adapter module RDCO. Protocol: DDCS (ABB Distributed drives communication system) 24 V DC power input Voltage 24 V DC ± 10% Typical current consumption... -
Page 142: Isolation And Grounding Diagram
140 Technical data Isolation and grounding diagram (Test voltage: 500 V AC) VREF- AGND VREF+ AGND AI1+ Common mode AI1- voltage between AI2+ channels ±15 V AI2- AI3+ AI3- AO1+ AO1- AO2+ AO2- Jumper J1 settings: DGND1 All digital inputs share a common ground. -
Page 143: Efficiency
Technical data 141 Efficiency All values below are without auxiliary power consumption. The inverter complies with efficiency standards IEC 61683 and EN 50530. Maximum efficiency DC voltage 450 V 600 V 800 V PVS800-57-0100kW-A 98.0 97.3 96.6 PVS800-57-0250kW-A 98.0 97.4 96.9 PVS800-57-0500kW-A 98.6... - Page 144 142 Technical data Maximum efficiency DC voltage 525 V 675 V 825 V PVS800-57-0315kW-B 98.6 98.2 97.7 PVS800-57-0630kW-B 98.6 98.2 98.1 PVS800-57-0875kW-B 98.7 98.3 97.9 European (EURO-eta) DC voltage efficiency 525 V 675 V 825 V PVS800-57-0315kW-B 98.3 97.7 96.8 PVS800-57-0630kW-B 98.4 97.8...
-
Page 145: Degrees Of Protection
Technical data 143 Maximum efficiency DC voltage 600 V 750 V 850 V PVS800-57-1000kW-C 98.8 98.4 98.3 European (EURO-eta) DC voltage efficiency 600 V 750 V 850 V PVS800-57-1000kW-C 98.6 97.8 97.4 PVS800-57-1000kW-C efficiency 100.00 98.00 96.00 94.00 92.00 90.00 88.00 600 V 86.00... -
Page 146: Ambient Conditions
144 Technical data Ambient conditions Environmental limits for the inverter are given below. The inverter is to be used in a heated, indoor, controlled environment. Note: If the installation has ventilation ducts directly to outdoors (eg, a container installation), back flow of moist and dusty air must be prevented. See section Ventilation duct at the air outlet of the cabinet on page 69. -
Page 147: Materials
80 micrometers) on visible surfaces except back panel. Color: RAL 7035 (light beige, semigloss). Air filters on the cabinet For 400 mm wide cubicles: AIR-TEX G-150, 318 mm × 540 mm (ABB code: door 64666533) For 600 mm wide cubicles: AIR-TEX G-150, 518 mm × 540 mm (ABB code:... -
Page 148: Auxiliary Circuit Power Consumption
• The values above do not include the cooling fans of the inverter modules. Their power is taken from the solar generator. • Every additional incoming cubicle increases the auxiliary power consumption by 50 W in PVS800-57-0100kW-A…PVS800-57-0630kW-B and by 25 W in PVS800-57-0875kW-B…PVS800-57-1000kW-C. • The actual consumption depends on the options installed. -
Page 149: Applicable Standards And Requirements
R = 250. For the rest of the applicable standards and grid codes, go to www.abb.com/solar on the Internet. CE marking A CE mark is attached to the inverter to verify that the unit follows the provisions of the European Low Voltage and EMC Directives. -
Page 150: Medium Voltage Network
148 Technical data Medium voltage network The requirements of the EMC Directive can be met as follows: A transformer with static screening between the primary and secondary windings is used to ensure that no excessive emission is propagated to neighboring low-voltage networks. The inverter is installed to an IT (ungrounded) system according to the instructions given in the hardware manual. -
Page 151: Dimension Drawings
Dimension drawings 149 Dimension drawings Contents of this chapter This chapter contains example dimension drawings of the inverter. -
Page 152: Frame R7I
150 Dimension drawings Frame R7i... - Page 153 Dimension drawings 151 AC output:...
- Page 154 152 Dimension drawings...
-
Page 155: Frame R8I
Dimension drawings 153 Frame R8i R8i – 2 DC inputs (option +2H382) or 4 DC inputs (option +4H382):... - Page 156 154 Dimension drawings R8i – 8 DC inputs (option +8H382):...
- Page 157 Dimension drawings 155 R8i – AC output terminals:...
- Page 158 156 Dimension drawings R8i – DC terminals of units with 2 DC inputs (option +2H382):...
- Page 159 Dimension drawings 157 R8i – DC terminals of units with 4 DC inputs (option +4H382):...
- Page 160 158 Dimension drawings R8i – DC terminals of units with 8 DC inputs (option +8H382):...
- Page 161 Dimension drawings 159 R8i – Top view of fastening points: 3AXD50000016935 1) Two DC inputs (option +2H382), four DC inputs (option +4H382) 2) Eight DC inputs (option +8H382)
-
Page 162: Frame 2 × R8I
160 Dimension drawings Frame 2 × R8i 2 × R8i – 4 DC inputs (option +4H382) or 5 DC inputs (option +5H382):... - Page 163 Dimension drawings 161 2 × R8i – 8 DC inputs (option +8H382) or 10 DC inputs (option +10H382):...
- Page 164 162 Dimension drawings 2 × R8i – 12 DC inputs (option +12H382) or 15 DC inputs (option +15H382):...
- Page 165 Dimension drawings 163 2 × R8i – AC output terminals:...
- Page 166 164 Dimension drawings 2 × R8i – DC terminals of units with 4 DC input terminals (option +4H382) or 5 DC input terminals (option +5H382):...
- Page 167 Dimension drawings 165 2 × R8i – DC terminals of units with 8 DC input terminals (+8H382) or 10 DC input terminals (+10H382):...
- Page 168 166 Dimension drawings 2 × R8i – DC terminals of units with 12 DC input terminals (+12H382) or 15 DC input terminals (+15H382):...
- Page 169 Dimension drawings 167 2 × R8i – Top view of fastening points:...
-
Page 170: Frame 3 × R8I
168 Dimension drawings Frame 3 × R8i 3 × R8i – 8 DC inputs (option +8H382) or 10 DC inputs (option +10H382):... - Page 171 Dimension drawings 169 3 × R8i – 12 DC inputs (option +12H382) or 15 DC inputs (option +15H382):...
- Page 172 170 Dimension drawings 3 × R8i – 16 DC inputs (option +16H382) or 20 DC inputs (option +20H382):...
- Page 173 Dimension drawings 171 3 × R8i – AC input terminals:...
- Page 174 172 Dimension drawings 3 × R8i – DC terminals of units with 8 DC input terminals (option +8H382) or 10 DC input terminals (option +10H382):...
- Page 175 Dimension drawings 173 3 × R8i – DC terminals of units with 12 DC input terminals (option +12H382) or 15 DC input terminals (option +15H382):...
- Page 176 174 Dimension drawings 3 × R8i – DC terminals of units with 16 DC input terminals (option +16H382) or 20 DC input terminals (option +20H382):...
- Page 177 Dimension drawings 175 3 × R8i – Top view of fastening points:...
- Page 178 176 Dimension drawings...
-
Page 179: Further Information
Further information More information about ABB products for solar applications on the Internet: www.abb.com/ solar. - Page 180 Contact us www.abb.com/solar 3AUA0000053689 Rev H (EN) EFFECTIVE: 2014-07-09...
Need help?
Do you have a question about the PVS800-57-0100kW-A and is the answer not in the manual?
Questions and answers