Table of Contents

Related Manuals for Elma Elmasonic P

Summary of Contents for Elma Elmasonic P
- Page 1 Operating Instructions Elmasonic P Ultrasonic Cleaning Units english TECHSPAN Australia: P- 1-800 148 791 | info@elma-ultrasonic.com.au | www.elma-ultrasonic.com.au New Zealand: P- 0800 603 603 | info@elma-ultrasonic.co.nz | www.elma-ultrasonic.co.nz...
-
Page 2: Table Of Contents
Content Content General............... 4 Important safety warnings .......... 4 Instructions for the use of the present manual..... 4 Safety instructions for the use of the unit..... 5 Ultrasonic cleaning ............. 6 Interesting facts on cleaning by ultrasound....6 Ultrasonic cleaning process ........7 Product description............. - Page 3 Content Cleaning media ............26 Limitations of use of cleaners containing solvents ..26 Limitations on aqueous cleaners ........27 List of recommended cleaning media ......27 8.3.1 Dental ..............28 8.3.2 Medical ..............28 8.3.3 Optics ..............28 8.3.4 Laboratory ............29 Maintenance............. 30 Maintenance and care..........30 Service life of the transducer tank ......30 Repair ................31 Technical details............
-
Page 4: General
General General The present Operating Instructions are part of the delivered equipment. They must be ready for use at any time and remain with the unit in case of resale. We reserve the right to carry out technical modifications on the unit due to advanced development. -
Page 5: Safety Instructions For The Use Of The Unit
Important safety warnings Safety instructions for the use of the unit Intended use The present Elma ultrasonic cleaning unit has been designed for the treatment of items and liquids only. Do not clean any living beings or plants! User Operation of the unit by authorized and instructed staff only. -
Page 6: Ultrasonic Cleaning
Ultrasonic cleaning Ultrasonic cleaning Today, cleaning by ultrasound is the most modern fine cleaning method. The electric high-frequency energy created by an ultrasonic generator is transformed into mechanical energy by piezo- electrical transducer systems and is then transmitted into the bath. -
Page 7: Ultrasonic Cleaning Process
Product description Ultrasonic cleaning process 1. Fill the ultrasonic tank with water and cleaning concentrate (Section 6.1). 2. Heat up the cleaning liquid, if required for the intended cleaning application (Section 6.2). 3. Degas the cleaning liquid – operation in degas mode (Section 6.4). -
Page 8: Ce Conformity
Product description activatable Degas mode for the quick degassing of • HPLC samples or solvents, and of fresh cleaning liquids Auto Degas mode for an automatic degassing cycle, e.g. • for fresh cleaning liquids ultrasonic power variable for sensitive surfaces •... -
Page 9: Description Of Unit Front Features
Product description Description of unit front features Fig 4.4 Front view / side view Maximum filling level marking marks the recommended upper filling level. This filling level should not be exceeded even with immersed cleaning items. Plastic carrying handles for the safe transportation of the unit even with heated casing. -
Page 10: Description Of Unit Rear Features
Product description Description of unit rear features Fig 4.5 View unit rear when delivered Drain duct to drain the tank (blind plug when delivered) Mains input socket quick and easy unplugging of the mains cable, e.g. for transportation purposes Turning knob for the draining of the tank Fig 4.6 View turning knob for the draining of the tank Vertical position: drain duct open Horizontal position: drain duct closed... -
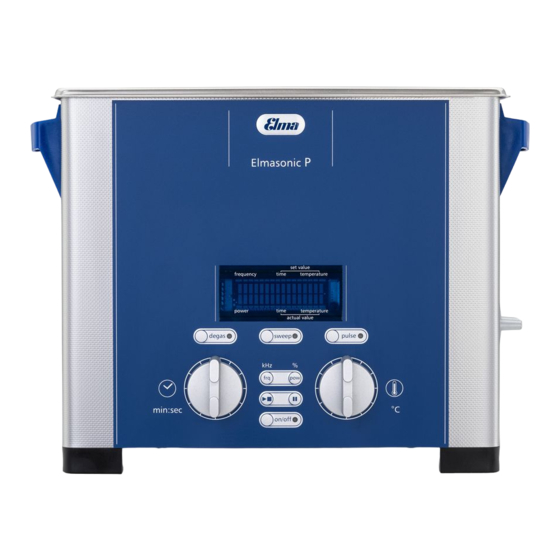
Page 11: Description Of Operating Elements
Product description Description of operating elements Fig 4.7 View operating panel (unit with heating) Turning knob ultrasonic period (min) Possible settings for short-term operation: 1; 2; 3;…10; 10; 15; 20;…50; 60 min (automatic switch-off). --:--) Permanent operation ( for continued operation. Switch-off by hand. -
Page 12: Description Of Display
Product description Description of display Fig 4.8 View display (example) Ultrasonic frequency set value Ultrasonic power set value Indication of the set ultrasonic period in minutes (set value) In case of permanent operation, the display shows --:-- Indication of the remaining operating period in minutes (remaining time) In case of permanent operation, the display shows --:-- Indication of the set cleaning temperature... - Page 13 Product description Intended action What to do Result Display start ultrasonic operation select set time heating is operating set period is indicated – temperature-controlled*; by flashing light until select set ultrasound starts with stirring of cleaning set temperature is temperature at the automatically as soon bath –...
- Page 14 Product description Intended action What to do Result Display switch on heating set temperature heating starts set temperature is indicated (set value operating when set temperature > actual temperature) temperature actual temperature is indicated (actual value temperature) switch off heating by hand turn set temperature heating is switched off actual temperature is to „0“...
- Page 15 Product description Intended action What to do Result Display select ultrasonic switch on ultrasound ultrasound starts selected ultrasonic frequency (the ultrasonic operating at set frequency is indicated press key freq frequency can be ultrasonic frequency in the display field switched between 37 kHz frequency and 80 kHz) set ultrasonic power (the...
-
Page 16: Initial Operation
Initial operation Initial operation Please keep the original packing for possible later service Packing purposes or dispose of it in compliance with the relevant local waste disposal regulations. You can also return the packing to the manufacturer or to your supplier (cost of shipment to be paid by the customer). -
Page 17: Connecting The Unit To The Mains
Initial operation 4. The drain duct is now ready for connection to a customer- provided discharge system. Use a standard hose (dia 1/2”). Push the hose onto the hose nozzle and fix it with the hose clamp included in the delivery. Fig 5.1.1 Drain duct with blind screw Fig 5.2.2 Drain fitted with hose cap (on delivered unit) -
Page 18: Putting Into Operation
Putting into operation Putting into operation Filling of the unit Shut the drain duct before you fill the tank (horizontal position of Shut the drain duct the turning knob for draining the tank – see Section 4.6). Fill the cleaning tank with a sufficient quantity of a suitable Observe filling level cleaning liquid before switch-on. -
Page 19: Heating Up Of The Cleaning Liquid (If Required For The Intended Application)
Therefore, we recommend not to operate the unit at temperatures exceeding 80° C. For the recommended cleaning temperatures please see the product information on the elma clean chemicals. High temperatures! Risk of burning and scalding! Cleaning liquid, ultrasonic tank, housing, cover, basket and... -
Page 20: Automatic Stirring During Heating
Putting into operation Automatic stirring during heating The present unit is equipped with an activatable stirring mode which guarantees a thorough mixing of the cleaning liquid during heating up (only as long as set temperature > actual temperature). Without stirring of the liquid, the generated heat rises to the surface, creating considerable temperature differences within the bath. -
Page 21: Ultrasonic Cleaning Process
Ultrasonic cleaning process Ultrasonic cleaning process Please observe the following instructions before starting the ultrasonic cleaning process. The operator is responsible for the inspection of the cleaning result. Risk of scalding by hot surfaces and cleaning liquid! Ultrasonic energy is physically transformed into heat. CAUTION The unit and the cleaning liquid in the tank heat up during ultrasonic operation even with the heating switched off. -
Page 22: Starting The Cleaning Process Manually
Ultrasonic cleaning process Starting the cleaning process manually Press the on/off key to start the unit. Set the cleaning Set the required cleaning period with the turning knob. period Short period For short period operation set the required cleaning period at operation the turning knob (turn clockwise). -
Page 23: Degas Mode
Ultrasonic cleaning process 4. Activate Degas, Sweep or Pulse mode and select ultrasonic frequency and ultrasonic power if required for the intended application. ■ 5. Keep the key ► pressed (> 2 sec.): The unit starts heating up. During the heating-up process the ultrasound is regularly activated to mix the liquid. -
Page 24: Pulse Mode
Ultrasonic cleaning process Pulse mode Special operating mode to intensify the ultrasonic cleaning effect. Advantageous for the removal of tenacious contaminations. Functioning The ultrasonic effect is increased by 20 % through an increase of the amplitude of the ultrasonic signal. How to proceed ■... -
Page 25: Placement Of Cleaning Items
Ultrasonic cleaning process Placement of cleaning items Caution! The ultrasonic bath has been designed for the ultrasonic treatment of items and liquids only. Do not clean living beings or plants! Do not reach inside the tank during ultrasonic operation! Cell walls can be damaged by prolonged exposure to ultrasonic CAUTION activity. -
Page 26: Cleaning Media
Cleaning media Cleaning media The cleaning chemical to be used must be suitable for the use in an ultrasonic bath to prevent damage to the tank or injuries to the operator. Use the recommended cleaners mentioned in WARNING section 8.3. Observe the restrictions to cleaners containing solvents and aqueous cleaners mentioned in sections 8.1 and 8.2. -
Page 27: Limitations On Aqueous Cleaners
For queries please contact the manufacturer or your supplier. List of recommended cleaning media Elma has a large range of suitable cleaning products on offer developed by chemical engineers in the Elma laboratory. Please contact your supplier to find the most suitable cleaning chemical for your application. -
Page 28: Dental
Cleaning media 8.3.1 Dental elma clean 10 Universal cleaning concentrate for the cleaning of instruments and laboratory equipment made of plastic, ceramic, stainless steel, rubber and glass. elma clean 25 Ready-for-use cleaner for impression spoons: removes dental plaster and alginates. Ready-for-use cleaning bath. -
Page 29: Laboratory
Cleaning media 8.3.4 Laboratory elma lab clean S10 Acid cleaning concentrate for glass, ceramics, metal incl. light and non-ferrous heavy metals, plastic. Removes mineral deposits, lime, lime soap and non-ferrous heavy metal oxides, mineral grease and oil. elma lab clean S20 Strong acid cleaning concentrate for stainless steel, glass and plastic. -
Page 30: Maintenance
Care of transducer Lime deposits on the stainless-steel tank can be cleaned gently tank e.g. with elma clean 40 or elma clean 115C (operate the unit with concentrate + water). Grid of air fan Check regularly the grid of the air fan at the bottom of the unit (not existent in all units). -
Page 31: Repair
Maintenance Repair Repair and maintenance works which require the unit to be Opening by connected and opened must be carried out by authorised and authorised specialised personnel only. specialised personnel only Risk of electric shock due to live parts inside the unit! Pull the mains plug before opening the unit! DANGER The manufacturer cannot be held responsible for any damage... -
Page 32: Technical Details
Technical details Technical details P 30 H P 60 H P 70 H P 120 H P 180 H P 300 H Tank max. 2.75 5.75 12.75 18.0 28.0 capacity (L) Tank service 12.9 20.6 capacity (L) Tank internal 240x137x 300x240x 327x300x 505x300x20... - Page 33 Technical details P 30 H P 60 H P 70 H P 120 H P 180 H P 300 H Ultrasonic 480/400 720/600 1320 1320 1520 peak performance max. (W) Heating power 1200 Sound < 70 pressure level (dB) 37 / 80 kHz Ultrasonic <...
-
Page 34: Trouble Shooting
Trouble shooting Trouble shooting Problem Possible cause Trouble shooting casing damaged external cause, transport return unit to supplier or • • damage manufacturer mains cable damaged external cause, transport provide original replacement • • damage mains cable from supplier or manufacturer Error: 1 mains voltage too low... - Page 35 • • Error: 4 if error occurs again, return unit to supplier / manufacturer TECHSPAN Australia: P- 1-800 148 791 | info@elma-ultrasonic.com.au | www.elma-ultrasonic.com.au New Zealand: P- 0800 603 603 | info@elma-ultrasonic.co.nz | www.elma-ultrasonic.co.nz...
Need help?
Do you have a question about the Elmasonic P and is the answer not in the manual?
Questions and answers