Table of Contents
Advertisement
Advertisement
Table of Contents

Summary of Contents for Truvelo ProLaser 4
- Page 1 ProLaser 4 OPERATOR’S MANUAL ProLaser 4 UK Operator’s Manual Ver 1.3 Feb16...
-
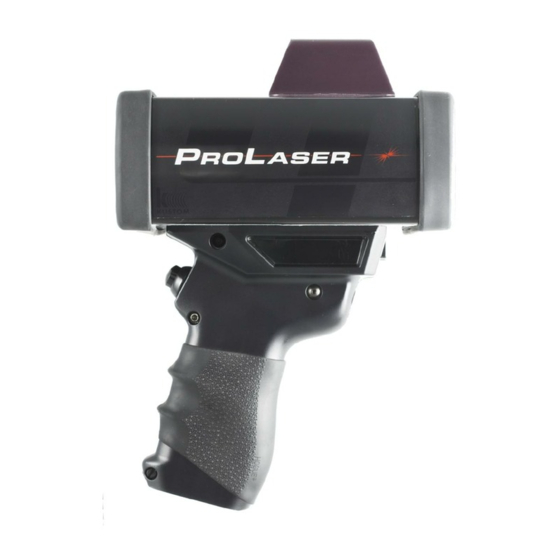
Page 2: System Components
Soft bag PLEASE NOTE OPERATIONAL RANGE The ProLaser 4 has a maximum range restricted to 750 metres for use in the UK. The minimum range is 3 metres. Speed range 0 to 200mph When selecting a roadside location please take account of Health and Safety considerations for operator safety. - Page 3 4). Position the reticle on the target and track the vehicle. 5). While holding the trigger, the speed and range continually update. A “single shot” mode will not update as you track. ProLaser 4 UK Operator’s Manual Ver 1.3 Feb16...
- Page 4 Listening to the “chirp” indicating reflection of laser pulses is helpful when using overhead wires. Rotate the ProLaser 4 so that it is at right angles to its normal operating position (positioned on its side) and repeat the process to verify vertical alignment.
- Page 5 Head-Up Display (HUD): displays the aiming reticle, speed and range of a target. Type A – USB Host Port: this port is for future development and is not used at this time. Type B – USB Device Port: provides a means to physically connect the ProLaser 4 to a Windows PC.
- Page 6 H Head-Up Display (HUD) C Weather button Type A - USB port (not used) D Menu button Type B - USB port Speed/up button Trigger Down/volume button Figure 1-1. ProLaser 4 Controls ProLaser 4 UK Operator’s Manual Ver 1.3 Feb16...
- Page 7 The Power Button performs two functions. It turns the unit On and Off and is used to set the brightness of the rear display. If the ProLaser 4 is off, a single press and release of the Power Button will turn the unit ON.
- Page 8 Inclement Weather feature. The Weather icon displays on the rear display as shown above whenever the unit is set for inclement weather. The Weather Mode prevents the ProLaser 4 operating below 60 metres and enables it to operate more efficiently in adverse weather conditions. In Speed or Range mode press and hold the Weather Button for three seconds to set Inclement Weather mode.
- Page 9 Continuous/ Single Enforcement Limit The ProLaser 4 menu operation is covered in detail in Chapter 3 “Using the ProLaser 4 Menu System”. Speed/Up Button The Speed/Up Button performs two functions. It sets the unit to either Speed or Range mode and navigates between screens and options in the Menu mode.
- Page 10 Rear Display in text format. Head-up Display (HUD) The HUD performs two critical functions in the operation of the ProLaser 4. First, it provides the aiming reticle by which the instrument is aimed at the desired target.
- Page 11 After the trigger is released, the HUD remains on for 15 seconds and then dims to save power. Lock Mode The ProLaser 4 flashes the Lock Mode icon on the rear display when the unit is in Lock Mode. Pressing the Tick Button after releasing the trigger locks the current range and speed readings on the rear display.
- Page 12 Figure 2-12. "Replace Batteries" Warning Message Set-up Two factors should be considered when setting up to use the ProLaser 4. They are (1) the location of the instrument relative to the road, and (2) the actual setup in or around the patrol car.
- Page 13 The narrow beam width of the ProLaser 4 makes precise target identification possible, but it may be difficult to aim at long ranges if operated handheld. For those situations, using a monopod, tripod, or shoulder stock to assist in stabilising the instrument is helpful.
- Page 14 Audio Volume The audible tone provides feedback to assist the user in aiming the ProLaser 4. The Aiming Tone is activated when the trigger is pulled and a staccato or chirping tone is heard when no valid target is in range, such as aiming the unit at the sky.
- Page 15 The Enforcement Limit Mode of the ProLaser 4 is used to set a minimum enforcement speed. In other words, the ProLaser 4 will only record the target vehicle’s speed if the speed of the vehicle is above the Enforcement Limit setting. By default this is 20mph. Each time you restart ProLaser 4 it will revert back to this default value.
- Page 16 Using the ProLaser 4 The ProLaser 4 should be oriented as close to parallel to the traffic flow as the setup location will permit. Aim the ProLaser 4 at the desired target, and pull the trigger. Four dashes "----" will immediately be displayed in the HUD directly above the aiming reticle, indicating that the laser pulses are being transmitted and the range and speed processing circuits are operating.
- Page 17 ProLaser 4 External Connections The ProLaser 4 is equipped with two USB ports, Type A and Type B. The USB ports are located on the right side of the handle, at the top, just under the body of the ProLaser 4. The USB ports are hidden behind a flexible rubber cover that hinges at the front.
- Page 18 Automatic Power Off The ProLaser 4 will automatically initiate a power down if there is no activity detected for approximately 15 minutes. An audio chirp sounds to alert the user that the unit is powering down. ProLaser 4 UK Operator’s Manual Ver 1.3 Feb16...
- Page 19 This chapter provides a detailed description of the menu system of the ProLaser 4. Menu Mode Menu mode provides access to additional set-up and operating features of the ProLaser 4. Enter this mode after the unit has been powered up and has completed a self test. Pressing the menu button enables the user to refine the set-up for a particular situation.
- Page 20 The Set Min Range distance is set in the same manner. The minimum range default is 3 metres. The Min or Max Range value can be set by using the ProLaser 4 to range to a target. At the Set Max Range display, aim the unit at a stationary target and pull the trigger until a range is displayed.
- Page 21 With these settings, any target that provides an adequate signal return is displayed, up to a maximum range of 750 metres. The distance to the target must be greater than 3 metres for the ProLaser 4 to display a reading in either Speed or Range Mode. Each time the ProLaser 4 is powered up, the maximum range control setting will default to its MAX setting.
- Page 22 HUD On or Off, and to set the type of reticle that will be used. The default setting is On. Press the tick button to access the HUD Options screen. ProLaser 4 UK Operator’s Manual Ver 1.3 Feb16...
- Page 23 The operator must use the Up or Down Button to move the focus brackets to the desired reticle selection, and press the Tick Button to select that reticle for use. Figure 3-12. HUD Reticle Screen ProLaser 4 UK Operator’s Manual Ver 1.3 Feb16...
- Page 24 Note: Press and hold the Tick Button for two seconds to save the new time and date. Enforcement Limit Menu The Enforcement Limit feature on the ProLaser 4 allows the user to set a minimum speed setting for enforcement. This feature prevents capturing vehicle speed data from vehicles that are travelling at or below the minimum speed setting.
- Page 25 This message displays for two minutes, then the unit will power down. The ProLaser 4 uses four AA alkaline batteries. The user will be notified of the need to replace the batteries via a warning message on the Rear Display.
- Page 26 Chapter 4: Regulatory Compliance General Description The ProLaser 4 is a Home Office approved device and therefore meets all the necessary environmental and safety standards. This includes Class 1 eye safety. However, sensible precautions should still be taken. A person should not stare directly into the laser beam.
- Page 27 Target tracked after acquisition, Acquisition time(secs) A + sign before the speed means an approaching vehicle. A – sign before the speed means the vehicle is departing. See Appendix 2 for download instructions using Hyperterminal ProLaser 4 UK Operator’s Manual Ver 1.3 Feb16...
- Page 28 Connecting your ProLaser 4 to your PC In order for your PC to communicate with your ProLaser 4, you will need to install USB drivers onto your PC. These drivers are available from Truvelo. The first time you connect a ProLaser 4 to your PC you will have to follow the installation procedure: 1) Copy the directory containing the supplied drivers to the target PC.
- Page 29 If you wish to delete all records from the memory, you need to use the command eraseevents. At the end of your Hyperterminal session, disconnect properly by clicking the “disconnect” icon. When the count-up timer disappears to be replaced by “disconnected” - it is safe to unplug your ProLaser 4 from your PC.
- Page 30 A held speed will be retained in the display, but it will be cleared by a repeat trigger pull. This is exactly what you would get with the ProLaser III. It is possible to lock a held speed by pressing the tick button. ProLaser 4 UK Operator’s Manual Ver 1.3 Feb16...
- Page 31 Tick Button ..........8 Count-Up timer ......... 22 USB Device Port ........17 Distance ........... 20 Using the ProLaser 4 Menu System ..19 Down/Volume Button ....... 10 Voltage Alert and Warning ...... 11 Enforcement Limit menu ......24 Voltage Level and Shutdown ... 11 & 25 Enforcement Limit Mode ......
- Page 32 ProLaser 4 UK Operator’s Manual Ver 1.3 Feb16...
Need help?
Do you have a question about the ProLaser 4 and is the answer not in the manual?
Questions and answers