Table of Contents
Advertisement
Quick Links
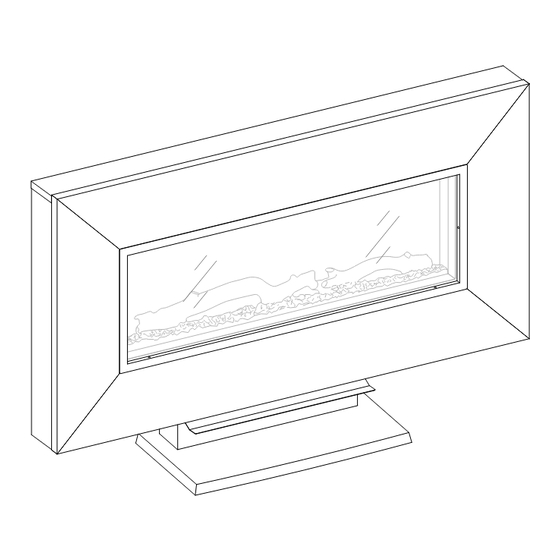
Wintercrest Wall Mount Fireplace
Model # WINWMFP
ADULT ASSEMBLY REQUIRED
If you have any questions regarding assembly or if parts are missing, DO NOT return this item to
the store where it was purchased. Please call our toll-free customer service number and have
your instructions and parts list ready to provide the model name, part name or factory number:
Pacific Standard Time: 8:30 a.m. - 4:30 p.m., Monday - Friday
Or visit our website www.baysidefurnishings.com
Or e-mail your request to : parts@baysidefurnishings.com
THIS INSTRUCTION BOOKLET CONTAINS IMPORTANT SAFETY INFORMATION.
PLEASE READ AND KEEP FOR FUTURE REFERENCE.
®
Bayside Furnishings
877-494-2536
Page 1
Date 2014-08-30 Rev. 3 Factory: ZHOPAI
LOT NUMBER:
DATE PURCHASED:
Factory No. 16366
/
/
Advertisement
Table of Contents

Related Manuals for Bayside Furnishings WINWMFP

Summary of Contents for Bayside Furnishings WINWMFP
- Page 1 LOT NUMBER: DATE PURCHASED: Wintercrest Wall Mount Fireplace Model # WINWMFP ADULT ASSEMBLY REQUIRED If you have any questions regarding assembly or if parts are missing, DO NOT return this item to the store where it was purchased. Please call our toll-free customer service number and have...
-
Page 2: Important Safety Instructions
Do not place any cloth or decorations over the heater outlet of the fireplace, or otherwise obstruct the heater outlet of the fireplace, as CAUTION this may cause a fire and serious injury may result. SAVE THESE INSTRUCTIONS ® Bayside Furnishings Page 2 Factory No. 16366... -
Page 3: Grounding Instructions
Modifications not approved by the party responsible for compliance could void user’s authority to operate the equipment. This Class B digital apparatus complies with Canadian ICES-003. ® Bayside Furnishings Page 3 Factory No. 16366... -
Page 4: Pre-Installation
Pre-Installation ELECTRICAL SPECIFICATIONS Model No. WINWMFP Voltage 120 V Frequency 60 Hz Watts 1400 W HARDWARE LIST (1) 1/4” x 1-1/4” Bolt (2) Large Lock Washer (3) Large Flat Washer (6+1 extra) (6+1 extra) (6+1 extra) (4) 5/32” x 1” Bolt... -
Page 5: Parts List
(Pre-attached on the Firebox H) N- ‘L’-shaped Bracket (1) O- Decorative Rocks (1) P- Decorative Glasses (1) (For Flat Wood Frame only) Q- Cable Channel (2) R- Remote Control with Batteries (1) S- Glass Front (1) ® Bayside Furnishings Page 5 Factory No. 16366... -
Page 6: Installation - Wall Mount
NOTE: If installing the Mounting Bracket (I) to a wall stud, there is no need to drill the holes in the wood and no need for the plastic wall anchors. It is recommended to install the mounting bracket to at least one wooden stud. ® Bayside Furnishings Page 6 Factory No. 16366... - Page 7 Ask a friend to hold the Electric Firebox (H) into place and secure it to the Mounting Bracket (I) by refitting the two small screws which were removed in step 2. As shown. ® Bayside Furnishings Page 7 Factory No. 16366...
- Page 8 NOTE: It is recommended that you use two people at this stage to prevent to the Glass Front (S) or the Electric Firebox (H). Secure the Glass Front (S) to the Electric Firebox (H) by fastening two M4 x 8 mm Screws (8) on both sides. As shown. ® Bayside Furnishings Page 8 Factory No. 16366...
- Page 9 Align and attach Left and Right Side Rails (C and D) to the Wood Front Frame (A) by inserting six 1-1/4” Bolts (1) with the Large Washers (2 and 3) through the cleat holes and securely screw into place. As shown above. ® Bayside Furnishings Page 9 Factory No. 16366...
- Page 10 NOTE: It is recommended that you use two people at this stage to prevent damage to the wood cover or the Electric Firebox (H). Secure the Metal Brackets (E and F) to the Electric Firebox (H) by fastening two M4 x 8 mm Screws (8) on both sides. As shown. ® Bayside Furnishings Page 10 Factory No. 16366...
- Page 11 Channels (Q), as shown. With all cables in place, snap the arc cover onto the Cable Channel (Q) to provide a neat appearance. You can paint the channel to match the wall color, if desired. ® Bayside Furnishings Page 11 Factory No. 16366...
-
Page 12: Installation - Table Top
Fasten the Deflector (L) to the Front Brace (K) with two M4 x 8 mm Screws (8). As shown. Slide the Front Brace assembly onto the Table Top Support (J) and rest it onto the Table Top Base (G). As shown. ® Bayside Furnishings Page 12 Factory No. 16366... - Page 13 Decorative Glasses (P) along the insert window ledge at the front of the Electric Firebox (H). Repeat steps 12 through 19 on the Wall Mount configuration to install the Glass Front (S) or Wood Front onto the Electric Firebox (H). ® Bayside Furnishings Page 13 Factory No. 16366...
-
Page 14: Operation
3 different color settings continuously. When using Remote Control (R), you need to press the button 7 to enter the color rotation mode. Reference the table for more detailed information. ® Bayside Furnishings Page 14 Factory No. 16366... - Page 15 To turn on heating mode, press and hold the control panel heater button for 10 seconds, the ember bed will flash 6 times and the heat function will be restored. ® Bayside Furnishings Page 15 Factory No. 16366...
-
Page 16: Care And Maintenance Instructions
A Touch-up Pen has been provided to repair any small nicks or scratches that may occur during assembly or shipping. ELECTRIC FIREBOX PARTS LIST Part Name Part Number Flame Generator Drive Motor WINWMFP-FGDM Heater WINWMFP-H Blower WINWMFP-B Log Set WINWMFP-LS... -
Page 17: Quality Guarantee
Should this product be defective in workmanship or materials, or fail under normal use, we will repair or ® replace it for a period of up to one (1) year from date of purchase. Every Bayside Furnishings product is designed to meet your highest expectations. We guarantee that you will immediately see the value of our fine furniture.
Need help?
Do you have a question about the WINWMFP and is the answer not in the manual?
Questions and answers