Table of Contents
Advertisement
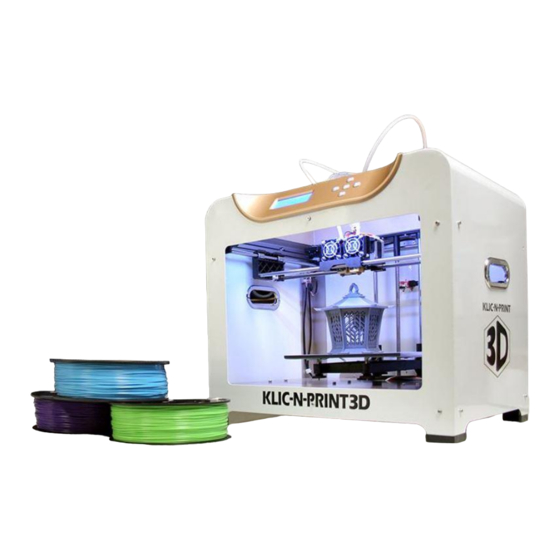
Quick Links
Advertisement
Table of Contents

Summary of Contents for KLIC-N-PRINT 3D KLIC-N-PRINT 3D
- Page 1 KLIC-N-PRINT 3D User Manual http://knp3d.com/ November 17, 2014...
-
Page 2: Table Of Contents
Table of Contents Table of Contents ............................2 Introduction ............................6 1.01 User Manual Options ........................6 1.02 Safety ............................7 1.03 Warranty ............................7 1.04 Support ............................7 1.05 Unpacking ............................. 8 1.06 Contents ............................8 1.07 Other Tools and Supplies ......................8 1.08 Parts of the KNP3D ........................ - Page 3 4.05.6 Scale ........................... 29 4.05.7 Split ............................. 30 4.05.8 View/Cut ..........................30 4.05.9 Settings ..........................31 4.05.10 File Info ..........................31 4.06 More Information on Slic3r ......................31 More About Printing ..........................32 Important – Read This! ........................ 32 5.01 5.02 Preheat ............................
- Page 4 Maintenance ............................49 7.01 Build Plate Surface Check ......................49 7.02 Build Plate Leveling/Tramming ....................49 7.03 Extruder Cleaning ........................49 7.04 Cleaning the Rods and Checking the Belts ................50 7.05 Filament Check and Storage ....................... 50 7.06 Checking the Frame ........................50 7.07 Miscellaneous..........................
- Page 5 C8 – Bot Statistics ..........................68 C9 – Filament Odometer ........................68 C10 – Profiles (for Preheating) ......................68 C11 – Jog Mode ..........................69 C12 – General Settings ........................69 C13 – Monitor Mode after Print Begins ....................70 C14 –...
-
Page 6: Introduction
1. Introduction Thank you for purchasing a KNP3D! At KNK USA we are committed to providing the very best customer support for our products. If you are new to 3D printing, remember that it’s not like using a regular printer. It’s not meant to be fast and it’s not meant to be used as a production machine. -
Page 7: Safety
If you need additional assistance after reading this manual, please visit our forum at http://knkusa.com/forums/. Click on the KLIC-N-Print 3D category listed in the right side menu. We are also available by filling out a contact form at: http://knp3d.com/contact-us/... -
Page 8: Unpacking
1.05 Unpacking When unpacking the KNP3D we recommend placing the box on the floor. Open the top of the box and remove the cartons that surround the printer. Next, remove the printer by lifting it by the top metal frame. Do NOT remove the printer by lifting it by the cables. -
Page 9: Parts Of The Knp3D
Plastic Heat Bed Tape – Used to cover the build plate when printing with ABS Artist’s Palette Knife or Metal Spatula – Used to remove printed object from the build plate Plastic Scraper – Used to apply tape to the build plate; aids in removing wrinkles ... - Page 10 Extruder Levers (2) Extruder Fans (2) Nozzles (2) Z Threaded Rod Interior of KNP3D Extruder Cable Filament Guide Tubes (2) Filament Guide Mounts (4) Filament Spool Spool Holders (2) Power Outlet and Power Switch USB Port Reset (do not press unless instructed to do so.) Back of KNP3D...
-
Page 11: Setting Up
2. Setting Up 2.01 Hardware Setup Install the extruder: (1) Start by manually turning the large threaded screw counterclockwise to lower the build plate all the way down. (2) Open the box which contains the extruder and remove it from the plastic sleeve. Once positioned, bolt will The other bolt will pass pass through the mount and... - Page 12 Attach the spool holders: (1) Open the two long boxes that were on the bottom of the shipping carton to locate two spool holders. (2) On the back of the KNP3D locate the two holes for mounting these holders. (3) Install by unscrewing the outermost nut on the spool holder and then inserting the holder into the hole and tightening the nut from inside the KNP3D.
-
Page 13: Software Setup
(3) Turn off the power when not using the printer. Unplug from your power outlet if the printer will not be used for a long period of time. 2.02 Software Setup There are a few pieces of software you’ll need in order to create files that the KNP3D uses: 2.02.1 Slic3r ... -
Page 14: Knp3D Converter
2.02.2 KNP3D Converter KNP3D Converter is a post processing application. This will take the gcode files from Slic3r and convert them into x3g, a format the KNP3D understands. Download KNP3D Converter from this link: http://knp3d.com/software/ Windows Installation: ... -
Page 15: Control Panel
2.03 Control Panel When you initially power up the KNP3D, a welcome screen will appear for a few seconds, followed by the Main Menu: To maneuver through the menu, press the buttons on the panel to the right of the display: Move up the menu. - Page 16 For this process, you’ll need a single sheet of printer paper or even just a Post It note. (1) Turn on the power to the KNP3D. Place the sheet of paper on the build plate. (2) On the control panel, select Utilities and then select Level Build Plate. The current temperatures of the extruders and platform (build plate) will appear: (3) The extruder head will first move over to the right side and the build plate will rise up.
-
Page 17: Loading Filament
2.05 Loading Filament (1) Before loading the filament, be sure to disconnect the guide tube from the top of the extruder by pulling the plastic tubing out of the hole in the acrylic plate. (2) Feed the filament into the bottom of the guide tube until it comes out the other end. If you plan to use only one filament, the right side is considered the default. - Page 18 (9) You will most likely see a different color for the first few seconds. Not to worry. Every machine is tested with a randomly selected colored filament before it’s packaged for shipment. Once the proper color filament starts streaming out of the nozzle, allow it to continue feeding through for another 5 - 8 seconds.
-
Page 19: Your First Print
3. Your First Print 3.01 Overview of the 3D Printing Process 3D printing on a KNP3D uses an additive manufacturing process called Fused Filament Fabrication, allowing users to turn computer-designed 3D models into physical objects. Any 3D program which will export in .stl, .obj. or .amf format can be used. The following are several programs to consider, if you are new to designing in 3D: ... -
Page 20: Load Profiles Into Slic3R
We recommend you follow all of the steps in this chapter as a way to test your KNP3D. You can use either of the free PLA filaments that were shipped with your KNP3D. PLA (Polylactic Acid) is a popular filament to use because it readily sticks to the build plate, has a pleasant odor when heated, and is less likely to warp than the other commonly used thermoplastic, ABS (acrylonitrile butadiene styrene). - Page 21 Click on Add and select the test file you downloaded. File name will Select the appear here. same profiles shown here. Top view of file - Thin gray border is the skirt that will be printed first. Click on Export G- Code when ready File information (3) On the right side, the profiles to be used in this print will need to be selected.
- Page 22 Insert the SD card here with the label facing forward. (11) From the KNP3D control panel, select Print from SD and then select the KNP3DCube.x3g file. (12) Your KNP3D should begin its first print after the build plate and extruder reach the preset temperature.
-
Page 23: More About Slic3R
4. More About Slic3r 4.01 Important – Read This! Here’s a list of the key things to check when using Slic3r: Do not automatically upgrade to the latest version of Slic3r without seeing an announcement by KNK Forum. It’s important that any changes made in Slic3r not impact the KNP3D in USA at the User unexpected ways. -
Page 24: Slic3R Tabs
4.02 Slic3r Tabs Notice the four tabs across the screen: Plater, Print Settings, Filament Settings, and Printer Settings: Each of these tabs accesses certain settings that will, at one time or another, need to be changed from the defaults. Some of these settings may remain constant once changed. Others will need to be adjusted depending on the particular object being printed or filament being used. -
Page 25: Changing And Saving Settings
A profile can contain settings for just one tab or for more than one tab: For example, one could have a profile of settings pertaining to ABS which was set up under Filament Settings. One might also set up Print Settings more suited for ABS than for PLA. These two profiles could be saved under separate names - ABS Print and ABS Filament. - Page 26 is a great way to not only learn the function of that setting, but also to better understand the 3D printing process itself. Also take note that Appendix B and the Slic3r User Manual cover these settings in more detail. ...
-
Page 27: Plater
(7) Now let’s assume you also want to make a Filament Settings change. For example you might want to raise or lower the temperature. Click on that tab and then select the PLA profile: Change the Extruder Select PLA Temperatures to 210 and 200. -
Page 28: Delete And Delete All
You are not limited to adding and printing only one file at a time. For example, in the screen shot below, two different STL files have been imported using the Add button. Both files will be printed and the two files together can be saved as a single STL file by clicking on the Export STL button on the right side. -
Page 29: Rotate
4.05.5 Rotate There are three icons used for rotating: ° The first two rotate buttons will rotate a highlighted object in 45 degree increments, counterclockwise and clockwise as indicated by the icons. The Rotate button allows you to input the exact degree of rotation desired. ... -
Page 30: Split
4.05.7 Split Split is used to separate individual objects within an imported file. For example, let’s suppose the bat and “Boo” were created together in a 3D design program and imported as a single STL file. Then let’s also suppose you only want to print the bat. By highlighting the file and clicking on Split, the two objects are now separate: Two objects are listed after applying Split. -
Page 31: Settings
Another application for the Cut function is when your object is too large for the build plate or shaped where the bottom will not have sufficient contact area with the build plate to insure a good print. The Cut function can be used to dissect the file into two or more sections for printing. Then, after the individual parts are printed, they can be glued together. -
Page 32: More About Printing
5. More About Printing 5.01 Important – Read This! Here’s a list of the key things to remember when printing: panic button is the left arrow key on the control panel. If something goes awry during a print, press it and an option to Cancel the print will appear: After pressing left arrow key, option to Cancel Print appears. -
Page 33: Pausing The Print
If you wish to preheat the Left Tool, then move down in the above menu and press K to turn on the left extruder. Once you select Start Preheating, the screen will change to show the current temperature and target temperature: Current and target temperatures are shown during preheat. -
Page 34: Pause At Zpos
In Pause mode you have a number of options, as shown above in the far right photo. Scrolling down will take you to second page of options. These options are covered in other sections of the manual, as relevant. ... -
Page 35: Cold Pause
5.03.3 Cold Pause Cold Pause is used to pause the printing process for an extended period of time. The KNP3D will remain powered on, however all heaters, stepper motors, and LED lights will be shut down. To access the Cold Pause option during a print, press the left arrow to bring up the following menu. Press the down arrow repeatedly to scroll to the third page of this menu. -
Page 36: Changing The Extrusion Temperature During A Print
5.04.2 Changing the Extrusion Temperature During a Print Once the print has begun, press the left arrow to bring up the following menu. Then use the down arrow to scroll to the second page. Select Change Temperature: Scroll to and press K to enter Change Temperature screen. -
Page 37: Changing Filament During A Print
(5) When the extruder reaches the set temperature, the KNP3D will play a little tune, prompting you to load or unload the filament. The feeder inside the extruder will begin to push the filament back out. The display will show: (6) If you are trying to clear a clog and get the filament flowing again, then immediately go back to Loading Filament on the control panel and proceed with those steps. -
Page 38: Printing With Abs And Other Filaments
Once the extruder is in the desired location, press K. Then press the down arrow to go to the second page of the menu and select Filament Loading. Press K to go to Filament Loading. Proceed with the instructions in Section 5.05 for unloading the current filament. Then load the next filament using the steps in Section 2.05. -
Page 39: Pva Support
5.07.2 PVA Support PVA support material uses slightly lower printing temperatures than PLA. Click on the Filament Settings tab and change the profile for PLA to: IMPORTANT: Remember to click on the Save icon, but this time call these settings “PVA”. Refer to Section 4.04 for details on saving a profile: Click here to save the Input a new name and... -
Page 40: Skirt And Brim
Select this option to have KNP3D immediately begin a repeat of the last print. Option 2 – If you’ve already turned off the KNP3D, then just turn it back on and select the file again from the SD card. ... - Page 41 To use the Support function in Slic3r, click on the Print Settings tab and then, on the left side, select Support Material. Then check the box next to “Generate support material”: Slic3r will then determine where support material might be needed for that design. After exporting the .gcode file, you may wish to turn off that setting or you can save it as a new print setting and name it something appropriate.
-
Page 42: Two Color Printing
5.11 Two Color Printing To use both extruders during a print, it will be necessary to combine two .STL files into a single file. But even before doing that, the two files need to have the objects positioned so that, when combined, the different parts will print in the correct locations relative to one another. - Page 43 Then click on Settings Highlight file name (2) Select the top file, indicated as “0” and you’ll see that part turn green in the 3D preview. This helps you to make sure that the part that will printed on the default extruder is correct: Select the first part Click here to...
-
Page 44: Ooze Prevention
Change from 0 to 1. (5) Then repeat with the other part by clicking on “1” under Object, clicking on the green “+” icon, and then changing from 0 to 2 for the left side extruder. Second part is selected Selected part turns green. -
Page 45: Using The Left Extruder Only
Check this box. Save the change under a new profile name, such as “Two Color Default” (or whatever you prefer). Refer to Section 4.04 for details on saving profiles. Proceed with the Export G-code step, making sure you have the correct profiles selected (note that under Filaments, you now need two profiles selected. -
Page 46: Printing A Solid Object As A "Vase
5.13 Printing a Solid Object as a “Vase” The Spiral Vase feature in Slic3r will print a shape with solid bottom, but otherwise hollow. This is a quick way to turn any solid shape into a vase. Print Settings > Layers and Perimeters ... - Page 47 In the following example, three folders have been set up. Within “My Files”, two additional subfolders have been created: “Fun Files” and “Craft Files”. Then “Craft Files” is opened to a list of files, as shown. Files inside “Craft Files” Top level menu on SD Card Subfolders under My Files ...
-
Page 48: Post Processing
6. Post Processing 6.01 Removing the Object After the printing has stopped, wait a few minutes for the object to cool. If you attempt to remove the shape too soon, it can warp or be damaged. To remove the printed object from the build plate, use a sharp flat tool, such as a thin metal spatula or an artist’s palette knife. -
Page 49: Maintenance
7. Maintenance We suggest the following procedures in order to keep your printer in good operating condition. Note that the recommended frequency of these procedures is listed in each section. In some cases, the frequency depends on how much the printer is being operated: H: high usage (printing every day) M: medium usage (printing once or twice per week L: low usage (printing occasionally) -
Page 50: Cleaning The Rods And Checking The Belts
On the control panel, select Utilities > Filament Loading > Unload Right (or Unload Left) and allow to run for a few seconds. Then go back and select Load Right. This process may need to be repeated several times. ... -
Page 51: Miscellaneous
the skirt, which will print first, will have rounded corners. Wait for the square itself to print before judging whether or not the printer is out of alignment. http://knp3d.com/manual/Test-Files/3-inch-Square.x3g http://knp3d.com/manual/Test-Files//75-mm-Square.x3g 7.07 Miscellaneous Frequency - as needed Watch for and discard loose filament strands falling onto the floor. These could cause choking in pets and/or small children. -
Page 52: Appendix A Troubleshooting
Appendix A Troubleshooting The KNP3D starts printing without dispersing any filament. Verify that the filament is loaded properly by going to Utilities>Load Filament. Refer to Section 2.05 for additional instructions. _______________________________________ The Kapton tape on the build plate has torn. ... - Page 53 When the print begins, the build plate doesn’t rise and the printing process begins anyhow. Go back to Slic3r and verify that that correct profile is selected. This can happen if the wrong G- Code Flavor is selected under Printer Settings > Firmware Flavor. It needs to be set to Sailfish (Makerbot).
- Page 54 The tape on the build plate won’t stay down during the print. It curls up after a few minutes of printing. Cut the tape a little larger than needed and then pinch the excess at the corners, just beneath the plate.
-
Page 55: Appendix B Slic3R Settings
Appendix B Slic3r Settings There will be situations in which changing settings within Slic3r is needed. This appendix contains screenshots from the various settings windows in Slic3r with an indication of which settings are typically adjusted. As you try different settings, you may wish to save these as new profiles, especially if you plan to use them frequently or if you will want to return to the original profile before the changes were made. -
Page 56: B1 Print Settings
B1 Print Settings Print Settings are related to the print itself, such as the layer height, fill density, and a host of different speeds. This tab will be used each time a different type of printing is needed, such as changing the quality of the print or adjusting settings related to the type of model. -
Page 57: Print Settings > Infill
Print Settings > Infill 1. Can lower to 10, but use 25 – 35 for stronger objects (KU); use ≥ 20% to support flat ceilings and use 40% when more mechanical strength is needed (SM); use 10 – 20% for display objects (TB); If object is really small, may need to increase so that there’s enough material present (JH) 2. -
Page 58: Print Settings > Speed
Print Settings > Speed 1. Perimeters: Normally use 40 – 50 but lower to 30 if Layer height is 0.1.(KU); always slower than Infill speed (SM) 2. Small Perimeters: Decrease if there are small holes, islands, or small details (SM) (AR) 3. -
Page 59: Print Settings > Skirt And Brim
Print Settings > Skirt and brim 1. Use 2 (KU); Use 1 or 2 (PL) (RR); Use 2 but increase if switching from a dark colored filament to a light one (JH) 2. Use 6 (KU); Use 2 – 5 (PL); Use 6 (RR); Use 2 (JH) 3. -
Page 60: Print Settings > Notes
Print Settings > Notes 1. Use the Notes window for making any comments about the profile, such as what types of shapes print well with these settings. Maybe even list some specific file names you’ve used with this profile. Print Settings > Output Options 1. -
Page 61: Print Settings > Multiple Extruders
Print Settings > Multiple Extruders 1. These are set to 2 when using the left extruder only. (KU) (Note: this is already set in the “Left Extr Only” profiles.) When printing with a support material loaded into the left side, set the third and fourth settings only to 2. -
Page 62: B2 Filament Settings
B2 Filament Settings Filament Settings are related to the filament material, such as diameter, extrusion temperature, cooling options. These settings will normally remain the same unless you change to a different type of filament, such as switching from PLA to ABS. Filament Settings >... -
Page 63: B3 Printer Settings
B3 Printer Settings Printer Settings are related to the KNP3D itself, such as the bed size, firmware type, and number of extruders. Printer Settings > General No changes recommended. Printer Settings > Custom G-code A small change was made for the “Left Extr Only” profile. Otherwise, no changes needed unless you wish to study on your own and try out. -
Page 64: Printer Settings > Extruder 1 (Or Extruder 2)
Printer Settings > Extruder 1 (or Extruder 2) 1. Only change if installing a different sized nozzle (KU). 2. Set within the firmware. KNK USA will advise if you are installing a different sized nozzle.(KU) 3. Usually 1 – 2 mm (SM); Can have a strong effect on print quality, increase if stringing is present, usually ≤... -
Page 65: Appendix C Control Panel - Utilities
Appendix C Control Panel - Utilities Map of the Menus on the KNP3D Control Panel While Idle Refer to location in parenthesis for information on each function. -
Page 66: Map Of The Control Panel Menus During Printing
Map of the Control Panel Menus During Printing C1 – Utilities Menu Page 1 On the control panel, select Utilities on the main menu: Check current Load or Unload Filament temperatures. Refer to Refer to Section 2.05 Section C6. Level the build plate Change preheat settings Refer to Section 2.04... -
Page 67: C3 - Utilities Menu
C3 – Utilities Menu Page 3 To access the following additional settings, press the down arrow on the control panel after accessing the menu shown in Section C2: Set up preheat profiles. Do not change unless a Refer to Section C10. different sized nozzle is used. -
Page 68: C8 - Bot Statistics
C8 – Bot Statistics This function presents info on the KNP3D’s and filament usage. To access Bot Statistics, select from page 2 of the Utilities menu (refer to Section C2). Total hours of Duration of last print (assuming printing to date KNP3D has not been powered off) Length of filament... -
Page 69: C11 - Jog Mode
Selecting Display Config will bring up a window with these settings. The down arrow will need to be used to access the Z Offset and temperatures: C11 – Jog Mode This function allows one to use the arrow keys on the key panel to move the extruder head or build plate to a different position. -
Page 70: C13 - Monitor Mode After Print Begins
Extruder Hold OFF (or ON) Leave set to OFF; for use with 3mm printers only HBP Installed YES (or NO) Heated Bed Plate installed? Leave set to "YES" Tool Offset Sys NEW (or OLD) Leave set to NEW; needed for dual extrusion printers Check SD Leave set to YES;... -
Page 71: Appendix D Specifications
Appendix D Specifications Printer Size: 22.4” x 19.7” x 23.2” (570 mm x 500 mm x 590 mm) Printer Weight: 39.7 lbs. (18 kg) Print Size: 6” x 6” x 9” (152 mm x 152 mm x 229 mm) Technology: Fused Filament Fabrication Number of Extruders: 2 Nozzle Diameter: 0.4 mm Minimum Layer Thickness: 50 microns (0.00196”) -
Page 72: Acknowledgements
Acknowledgements This user manual was started by Chad Youngblut (VP at KNK USA) and I thank him for his initial contributions. He’s also an invaluable teacher and friend. Thank you to Ron Smith at KNK USA for his wealth of information on Slic3r settings and other useful tips for successful printing.
Need help?
Do you have a question about the KLIC-N-PRINT 3D and is the answer not in the manual?
Questions and answers