Table of Contents
Advertisement
Quick Links
Advertisement
Table of Contents

Subscribe to Our Youtube Channel
Related Manuals for Loopcomm LP-2396K


Summary of Contents for Loopcomm LP-2396K
-
Page 1: User Manual
User Manual LP-2396K Outdoor 2.4GHz Wireless AP/CPE/Bridge... -
Page 2: Table Of Contents
2.3 IP Surveillance ........................14 3. Software Configuration ........................15 3.1 System Requirements ......................15 3.2 Easy Installation ........................15 3.3 Get started with LP-2396K ....................16 4. Software Features ..........................17 4.1 Operation Mode ........................17 4.1.1 Access Point ....................... 17 4.1.2 Client .......................... -
Page 3: Introduction
Website: www.loopcomm.com Notice This document is issued to guide users how to install and operate LP-2396K Outdoor Long Range 802.11b/g/n Wireless AP/CPE/Bridge. Please read the document carefully to avoid any damage which is caused by inappropriate use excluding from the warranty. -
Page 4: Product Introduction
1.1 Product Introduction Loopcomm LP-2396K is an Outdoor Long Range 2.4GHz Wireless AP/CPE/Bridge that provides wide coverage of network connection in existing environment. It can operate up to 300Mbps data rate by supporting IEEE 802.11b/g/n standard and with full WEP, WPA/WPA2 data security, Wireless LAN Access Control List and TKIP/AES encryption, It keeps the data transmission safe in any network connection mode. -
Page 5: Package Content
1.2 Package Content The package content includes the following items, shown from left to right in the below figure. LP-2396K DC 24V/1A Power adapter Power cord User Manual CD Cable Tie Quick Installation Guide (QIG) -
Page 6: Product Features
Remotely enable system reset by PoE Adapter. 1.4 Application 1.4.1 Wireless ISP (WISP) Mode LP-2396K can operate as station (client) in WISP mode to remotely receive broadband signal from WISP outdoor AP (base station) of Internet Service Provider (ISP). -
Page 7: Bridge Mode
Since the antenna characteristics for LP-2396K is directional with high gain design, it can transmit RF signal for several miles. Based on this point, LP-2396K is greatly used to bridge at long distance transmission for point to point applications like IP surveillance, networking... -
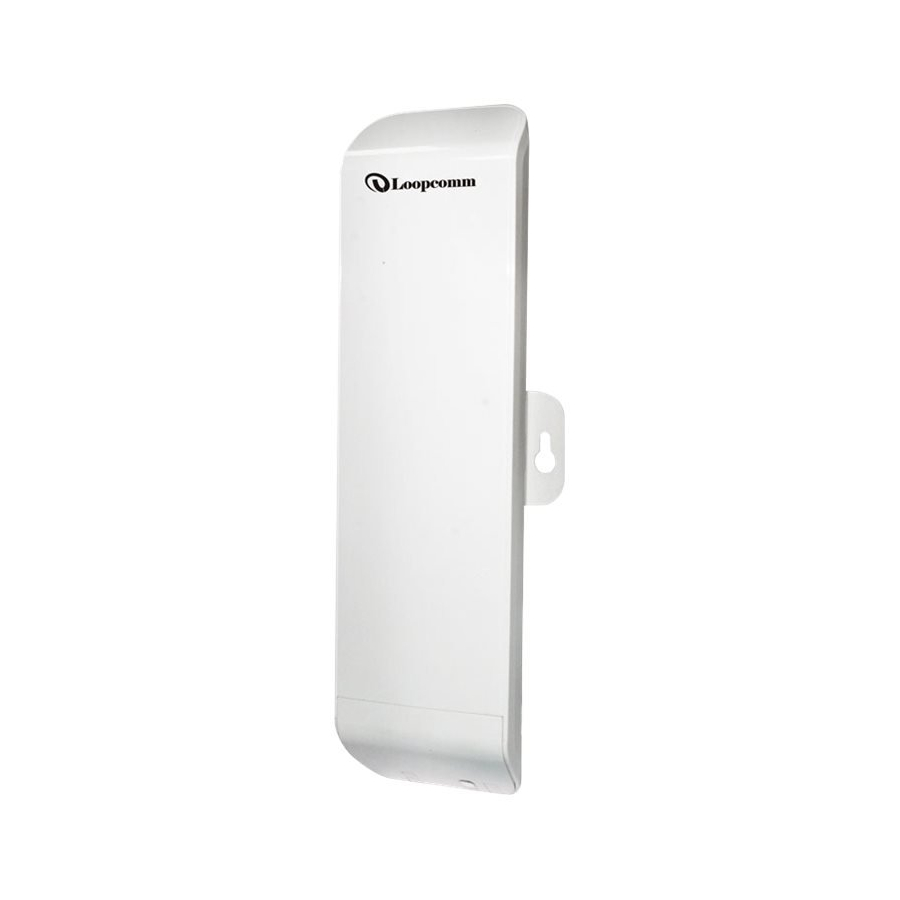
Page 8: Product Outline Introduction
1.5 Product Outline Introduction 1.5.1 Front view 1.5.2 Back view... -
Page 9: Led Indication
1.5.3 LED Indication LED Indicator Status Description The LP-2396K is powered ON. The LP-2396K is powered OFF. Main Port linked. No connection. Blink Data is being transmitted or received on the Main Ethernet port. Secondary Port linked. No connection. Blink Data is being transmitted or received on the Secondary Ethernet port. -
Page 10: I/O Interface
Earth Ground electrical damage. Note. LP-2396K built in PoE pass through function on Secondary Ethernet port. It means the Secondary Ethernet port is able to provide 24V power for a secondary device if this function enabled on Web Configuration (Please refer to the statement on Advanced Setting of Radio... -
Page 11: Mounting Options
1.5.5 Mounting Options Pole Mount Use cable tie and make it pass through the one of middle holes to fix and tie on the pole. Wall Mount Please fix the screws into the wall and hang LP-2396K on the corresponding screws. -
Page 12: Hardware Installation
2. Connect the Main Ethernet port of LP-2396K with a RJ-45 cable. Note. LP-2396K built in PoE pass through function on Secondary Ethernet port. It means the Secondary Ethernet port is able to provide 24V power for a secondary device if this function enabled on Web Configuration (Please refer to the statement on Advanced Setting of Radio menu). - Page 13 8. Reset button: It allows user to remotely reset the system of LP-2396K. Note. 1. There is no software driver or utility installation needed. 2. RJ-45 8P8C Ethernet cable is required. 3. It takes about 60 seconds to complete the boot up sequence after LP-2396K powered up.
-
Page 14: Ip Surveillance
Example – Scenario for IP surveillance The following figure indicates the basic setup to implement IP surveillance with a pair of LP- 2396K. The remote monitoring image can be delivered to local NVR via the high powered, long distance transmission by LP-2396K. -
Page 15: Software Configuration
3.2 Easy Installation Network Connection Setup: The default IP of LP-2396K is 192.168.1.200. You have to make sure your computer is on the same network segment as LP-2396K before connecting to LP-2396K Configuration. Example: In the Windows 7 operating system 1. -
Page 16: Get Started With Lp-2396K
3.3 Get started with LP-2396K 1. Open Web browser and enter 192.168.1.200 in the URL field of Web browser. 2. Enter “admin” as default user name, and “admin” as default password. After successful login , you can see the Loopcomm web page. -
Page 17: Software Features
4. Software Features 4.1 Operation Mode In Operation Mode you will find wireless and WAN settings. The LP-2396K wireless settings are dependent on the wireless operation mode you choose. To access wireless settings, click on the “Setup” button. In Operation Mode there are 6 types, they are 4.1.1 Access Point... - Page 18 Fields Description Regulatory Domain Select the country from pull down menu. Network SSID It is the wireless network name. User can use the default SSID or change it. (Special characters cannot be used). Enable Wireless Enable Wireless Option Disable SSID Broadcasting SSID will be hidden, only users who know the SSID can associate with this network.
- Page 19 Site Survey You could configure AP Client parameters here. Click Rescan to browse more networks then select the SSID and press associate then close the page. Note: Enter the SSID Password, if necessary. Security Settings Security settings allow you to use encryption to secure your data. There are 4 Encryption Modes in Security Settings.
- Page 20 Fields Description Select Encryption Select the Encryption Mode from the pull down menu. Pre-Authentication Select Pre-Authentication as Personal or Enterprise. Encryption Type TKIP: Temporal Key Integrity Protocol (TKIP) for data Encryption. TKIP utilizes a stronger encryption method and incorporates Message Integrity Code (MIC) to provide protection against hackers.
- Page 21 Fields Description RADIU Server IP Address Enter the RADIU Server’s IP Address provided by your ISP. RADIU Server Port Enter the RADIUS Server’s port number provided by your ISP. RADIU Server Password Enter the RADIUS Server’s Password provided by your ISP. EAP Reauthorization EAP- Session timeout interval for 802.1x re-authorization setting.
- Page 22 Advanced Settings Fields Description RTS/CTS Threshold Determines the packet size of a transmission and, through the use of an AP, helps control traffic flow. The range is 0-2347 bytes. Beacon Interval Beacons are the packets sending by Access point to synchronize the wireless network.
- Page 23 Aggregation A part of the 802.11n standard that allows sending multiple frames per single access to the medium by combining frames together into one larger frame. It creates the larger frame by combining smaller frames with the same physical source, destination end points, and traffic class (QoS) into one large frame with a common MAC header Aggregated Frames Number Determines the number of frames combined in the new larger frame.
- Page 24 Access Control This page allows administrator to have Access Control by entering MAC address of client stations. When this function is Enabled, MAC address can be added into access control list and only those clients whose wireless MAC address are in the access control list will be able to connect or disconnect the internet.
-
Page 25: Client
4.1.2 Client It acts as a wireless client, to connect a remote segment to an existing WLAN Note: Depending on the mode you choose, applicable settings will be enabled/disabled automatically. Press setup, then below Screen is displayed. Press OK to continue, then below page is displayed. - Page 26 Fields Description Regulatory Domain Select the country from pull down menu. Remote AP SSID Select Site Survey option then it will Scan & displays the SSID List, Choose one SSID from the list. Enable Wireless Enable Wireless Option Disable SSID Broadcasting SSID will be hidden, only users who know the SSID can associate with this network.
- Page 27 Site Survey You could configure AP Client parameters here. Click Rescan to browse more networks then select the SSID and press associate then close the page. Note: Enter the SSID Password, if necessary. Security Settings Security settings allow you to use encryption to secure your data. There are 4 Encryption Modes in Security Settings.
- Page 28 Fields Description Select Encryption Select the Encryption Mode from the pull down menu. Pre-Authentication Select Pre-Authentication as Personal or Enterprise. Encryption Type TKIP: Temporal Key Integrity Protocol (TKIP) for data Encryption. TKIP utilizes a stronger encryption method and incorporates Message Integrity Code (MIC) to provide protection against hackers.
- Page 29 Fields Description RADIU Server IP Address Enter the RADIU Server’s IP Address provided by your ISP. RADIU Server Port Enter the RADIUS Server’s port number provided by your ISP. RADIU Server Password Enter the RADIUS Server’s Password provided by your ISP. EAP Reauthorization EAP- Session timeout interval for 802.1x re-authorization setting.
- Page 30 Advanced Settings Fields Description RTS/CTS Threshold Determines the packet size of a transmission and, through the use of an AP, helps control traffic flow. The range is 0-2347 bytes. Beacon Interval Beacons are the packets sending by Access point to synchronize the wireless network.
- Page 31 Maximum Aggregated Size Determines the size (in bytes) of the larger frame. Tx/Rx ChainMask Displays the number of independent spatial data streams the device is transmitting (TX) and receiving (RX) simultaneously within one spectral channel of bandwidth. Multiple chains increase data transfer performance significantly. WMM Capable Enable the feature to access or Disable it.
- Page 32 Access Control This page allows administrator to have Access Control by entering MAC address of client stations. When this function is Enabled, MAC address can be added into access control list and only those clients whose wireless MAC address are in the access control list will be able to connect or disconnect the internet.
-
Page 33: Wds Access Point
4.1.3 WDS Access Point It acts as the main base station for a Wireless Distribution System mesh network Note: Depending on the mode you choose, applicable settings will be enabled/ disabled automatically. Press setup, then below Screen is displayed. Press OK to continue, then below page is displayed. - Page 34 Changing the distance value will change the ACK (Acknowledgement) timeout value accordingly, so it means the distance should be set as real distance between LP-2396K and other device for accurate transmission performance. Save and Restart It saves the new settings and restarts.
- Page 35 Site Survey You could configure AP Client parameters here. Click Rescan to browse more networks then select the SSID and press associate then close the page. Note: Enter the SSID Password, if necessary. Security Settings Security settings allow you to use encryption to secure your data. There are 4 Encryption Modes in Security Settings.
- Page 36 Fields Description Select Encryption Select the Encryption Mode from the pull down menu. Pre-Authentication Select Pre-Authentication as Personal or Enterprise. Encryption Type TKIP: Temporal Key Integrity Protocol (TKIP) for data Encryption. TKIP utilizes a stronger encryption method and incorporates Message Integrity Code (MIC) to provide protection against hackers.
- Page 37 Fields Description RADIU Server IP Address Enter the RADIU Server’s IP Address provided by your ISP. RADIU Server Port Enter the RADIUS Server’s port number provided by your ISP. RADIU Server Password Enter the RADIUS Server’s Password provided by your ISP. EAP Reauthorization EAP- Session timeout interval for 802.1x re-authorization setting.
- Page 38 Advanced Settings Fields Description RTS/CTS Threshold Determines the packet size of a transmission and, through the use of an AP, helps control traffic flow. The range is 0-2347 bytes. Beacon Interval Beacons are the packets sending by Access point to synchronize the wireless network.
- Page 39 Aggregated Frames Number Determines the number of frames combined in the new larger frame. Maximum Aggregated Size Determines the size (in bytes) of the larger frame. Tx/Rx ChainMask Displays the number of independent spatial data streams the device is transmitting (TX) and receiving (RX) simultaneously within one spectral channel of bandwidth.
- Page 40 Access Control This page allows administrator to have Access Control by entering MAC address of client stations. When this function is Enabled, MAC address can be added into access control list and only those clients whose wireless MAC address are in the access control list will be able to connect or disconnect the internet.
-
Page 41: Wds Client
4.1.4 WDS Client It acts as a remote base station in a Wireless Distribution System mesh network Note: Depending on the mode you choose, applicable settings will be enabled/ disabled automatically. Press setup, then below Screen is displayed. Press OK to continue, then below page is displayed. - Page 42 Fields Description Regulatory Domain Select the country from pull down menu. Remote AP SSID Select Site Survey option then it will Scan & displays the SSID List, Choose one SSID from the list. Enable Wireless Enable Wireless Option Disable SSID Broadcasting SSID will be hidden, only users who know the SSID can associate with this network.
- Page 43 Site Survey You could configure AP Client parameters here. Click Rescan to browse more networks then select the SSID and press associate then close the page. Note: Enter the SSID Password, if necessary. Security Settings Security settings allow you to use encryption to secure your data. There are 4 Encryption Modes in Security Settings.
- Page 44 Fields Description Select Encryption Select the Encryption Mode from the pull down menu. Pre-Authentication Select Pre-Authentication as Personal or Enterprise. TKIP: Temporal Key Integrity Protocol (TKIP) for data Encryption. TKIP utilizes a Encryption Type stronger encryption method and incorporates Message Integrity Code (MIC) to provide protection against hackers.
- Page 45 Fields Description RADIU Server IP Address Enter the RADIU Server’s IP Address provided by your ISP. RADIU Server Port Enter the RADIUS Server’s port number provided by your ISP. RADIU Server Password Enter the RADIUS Server’s Password provided by your ISP. EAP Reauthorization EAP- Session timeout interval for 802.1x re-authorization setting.
- Page 46 Advanced Settings Fields Description RTS/CTS Threshold Determines the packet size of a transmission and, through the use of an AP, helps control traffic flow. The range is 0-2347 bytes. Beacon Interval Beacons are the packets sending by Access point to synchronize the wireless network.
- Page 47 Aggregation A part of the 802.11n standard that allows sending multiple frames per single access to the medium by combining frames together into one larger frame. It creates the larger frame by combining smaller frames with the same physical source, destination end points, and traffic class (QoS) into one large frame with a common MAC header Aggregated Frames Number Determines the number of frames combined in the new larger frame.
- Page 48 Access Control This page allows administrator to have Access Control by entering MAC address of client stations. When this function is Enabled, MAC address can be added into access control list and only those clients whose wireless MAC address are in the access control list will be able to connect or disconnect the internet.
-
Page 49: Ap Router
4.1.5 AP Router It connects an external network (WAN) with an internal network (LAN/WLAN), to allow cross-communication Note: Depending on the mode you choose, applicable settings will be enabled/ disabled automatically. Press setup, then below Screen is displayed. Press OK to continue, then below page is displayed. Note: In AP router secondary port will be WAN Port by default. - Page 50 Fields Description Regulatory Domain Select the country from pull down menu. Network SSID It is the wireless network name. User can use the default SSID or change it. (Special characters cannot be used). Enable Wireless Enable Wireless Option Disable SSID Broadcasting SSID will be hidden, only users who know the SSID can associate with this network.
- Page 51 Transmit Distance Changing the distance value will change the ACK (Acknowledgement) timeout value accordingly, so it means the distance should be set as real distance between LP- 2396K and other device for accurate transmission performance. Save and Restart It saves the new settings and restarts. Security Settings Security settings allow you to use encryption to secure your data.
- Page 52 Fields Description Select Encryption Select the Encryption Mode from the pull down menu. Pre-Authentication Select Pre-Authentication as Personal or Enterprise. Encryption Type TKIP: Temporal Key Integrity Protocol (TKIP) for data Encryption. TKIP utilizes a stronger encryption method and incorporates Message Integrity Code (MIC) to provide protection against hackers.
- Page 53 Fields Description RADIU Server IP Address Enter the RADIU Server’s IP Address provided by your ISP. RADIU Server Port Enter the RADIUS Server’s port number provided by your ISP. RADIU Server Password Enter the RADIUS Server’s Password provided by your ISP. EAP Reauthorization EAP- Session timeout interval for 802.1x re-authorization setting.
- Page 54 Advanced Settings Fields Description RTS/CTS Threshold Determines the packet size of a transmission and, through the use of an AP, helps control traffic flow. The range is 0-2347 bytes. Beacon Interval Beacons are the packets sending by Access point to synchronize the wireless network.
- Page 55 Aggregation A part of the 802.11n standard that allows sending multiple frames per single access to the medium by combining frames together into one larger frame. It creates the larger frame by combining smaller frames with the same physical source, destination end points, and traffic class (QoS) into one large frame with a common MAC header Aggregated Frames Number Determines the number of frames combined in the new larger frame.
- Page 56 Access Control This page allows administrator to have Access Control by entering MAC address of client stations. When this function is Enabled, MAC address can be added into access control list and only those clients whose wireless MAC address are in the access control list will be able to connect or disconnect the internet.
- Page 57 WAN Port Settings There are three options DHCP, Static Mode, PPPoE for Internet connection on WAN port. DHCP (Auto Config) Fields Description WAN Connection Type Select DHCP from pull down menu Host Name Enter the Host Name of DHCP server. The default value is empty. Save Click Save to change the new settings.
- Page 58 PPPoE (ADSL) Fields Description WAN connection Type Select PPPoE from pull down menu User Name If you select the PPPoE support on WAN interface, Enter the user name to login the PPPoE server Provided by ISP Password If you select the PPPoE support on WAN interface, Enter the password to login the PPPoE server Provided by ISP Verify Password Enter the same password again for verification.
- Page 59 Remote Management Fields Description Remote Management Select Enable or Disable for remote management function. Ping from WAN Select Disable or Enable for Ping permit from WAN. Save Click Save to change the new settings. Cancel Click cancel to clear the entered settings. DHCP Server Settings Fields Description...
- Page 60 DMZ Settings You may setup a De-Militarized (DMZ) to separate internal network and internet. Fields Description DMZ Settings Enable or Disable the DMZ function. DMZ IP Address To support DMZ in your firewall design, Enter IP address of DMZ host that can be access from the WAN interface.
- Page 61 IP Filtering Settings The IP filtering feature allows you to deny specific IP address which cannot connect to internet. Fields Description Filtering Enable/Disable the function to IP Filter Protocol Specify protocol, TCP&UDP, TCP or UDP. IP Address Enter the specific IP Address to be denied. Comment Make a comment for the IP Filtering policy.
- Page 62 Port Filtering Settings The Port filtering feature allows you to deny specific Ports which cannot connect to internet. Fields Description Filtering Enable/Disable the function to Port Filter Protocol Specify the protocol TCP&UDP, TCP or UDP. Port Range Enter the specific Port range to be denied. Comment Make a comment for the Port Filtering policy.
- Page 63 Bandwidth Control Bandwidth controls the transmission speed of IP address and MAC address. Router can use bandwidth control to limit the Internet connection speed of IP address or MAC address. Fields Description Quality of Service Enable/Disable the function Type The two type options are IP Address and Mac address Local IP Address If you select IP Address, then Enter the IP Address of the device/PC connected to the router.
-
Page 64: Wireless Isp
4.1.6 Wireless ISP A Wireless Internet Service Provider (WISP) is an internet Service Provider with a network based on wireless networking. Note: Depending on the mode you choose, applicable settings will be enabled/ disabled automatically. Press setup, then below Screen is displayed. Press OK to continue, then below page is displayed. - Page 65 Fields Description Regulatory Domain Select the country from pull down menu. Remote AP SSID Select Site Survey option then it will Scan & displays the SSID List, Choose one SSID from the list. Enable Wireless Enable Wireless Option Disable SSID Broadcasting SSID will be hidden, only users who know the SSID can associate with this network.
- Page 66 Data Rate Defines the data rate (in Mbps) at which the device should transmit wireless packets. You can fix a specific data rate between MCS 0 and MCS 7 (or MCS 15 for 2x2 chain devices). Transmit Power Defines the maximum average transmit output power (in dBm) of the device. The transmit power level maximum is limited according to country regulations.
- Page 67 Security Settings Security settings allow you to use encryption to secure your data. There are 4 Encryption Modes in Security Settings. They are WEP, WPA, WPA2, and WPA-Mixed. Functions are same for all Modes, below example is for WEP and WPA Encryption. Fields Description Select Encryption...
- Page 68 Fields Description Select Encryption Select the Encryption Mode from the pull down menu. Pre-Authentication Select Pre-Authentication as Personal or Enterprise. Encryption Type TKIP: Temporal Key Integrity Protocol (TKIP) for data Encryption. TKIP utilizes a stronger encryption method and incorporates Message Integrity Code (MIC) to provide protection against hackers.
- Page 69 Fields Description RADIU Server IP Address Enter the RADIU Server’s IP Address provided by your ISP. RADIU Server Port Enter the RADIUS Server’s port number provided by your ISP. RADIU Server Password Enter the RADIUS Server’s Password provided by your ISP. EAP Reauthorization EAP- Session timeout interval for 802.1x re-authorization setting.
- Page 70 Advanced Settings Fields Description RTS/CTS Threshold Determines the packet size of a transmission and, through the use of an AP, helps control traffic flow. The range is 0-2347 bytes. Beacon Interval Beacons are the packets sending by Access point to synchronize the wireless network.
- Page 71 Aggregated Frames Determines the number of frames combined in the new larger frame. Number Maximum Aggregated Size Determines the size (in bytes) of the larger frame. Tx/Rx ChainMask Displays the number of independent spatial data streams the device is transmitting (TX) and receiving (RX) simultaneously within one spectral channel of bandwidth.
- Page 72 Access Control This page allows administrator to have Access Control by entering MAC address of client stations. When this function is Enabled, MAC address can be added into access control list and only those clients whose wireless MAC address are in the access control list will be able to connect or disconnect the internet.
- Page 73 WAN Port Settings There are three options DHCP, Static Mode, PPPOE for Internet connection on WAN port. DHCP (Auto Config) Fields Description WAN Connection Type Select DHCP from pull down menu Host Name Enter the Host Name of DHCP server. The default value is empty. Save Click Save to change the new settings.
- Page 74 PPPoE (ADSL) Fields Description WAN connection Type Select PPPoE from pull down menu User Name If you select the PPPoE support on WAN interface, Enter the user name to login the PPPoE server provided by ISP. Password If you select the PPPoE support on WAN interface, Enter the password to login the PPPoE server provided by ISP.
- Page 75 Remote Management Fields Description Remote Management Select Enable or Disable for remote management function. Ping from WAN Select Disable or Enable for Ping permit from WAN. Save Click Save to change the new settings. Cancel Click cancel to clear the entered settings. DHCP Server Settings Fields Description...
- Page 76 DMZ Settings You may setup a De-Militarized (DMZ) to separate internal network and internet. Fields Description DMZ Settings Enable or Disable the DMZ function. DMZ IP Address To support DMZ in your firewall design, Enter IP address of DMZ host that can be access from the WAN interface.
- Page 77 IP Filtering Settings The IP filtering feature allows you to deny specific IP address which cannot connect to internet. Fields Description Filtering Enable/Disable the function to IP Filter Protocol Specify protocol, TCP&UDP, TCP or UDP. IP Address Enter the specific IP Address to be denied. Comment Make a comment for the IP Filtering policy.
- Page 78 MAC Filtering Settings The MAC filtering feature allows you to deny MAC address which cannot connect to internet Fields Description Filtering Select Enable or Disable the Mac Filtering function. Mac Address Enter the specific MAC address to be denied. Comment Make a comment for the filtering policy.
- Page 79 Bandwidth Control Bandwidth controls the transmission speed of IP address and MAC address. Router can use bandwidth control to limit the Internet connection speed of IP address or MAC address. Fields Description Quality of Service Enable/Disable the function Type The two type options are IP Address and Mac address Local IP Address If you select IP Address, then Enter the IP Address of the device/PC connected to the router.
-
Page 80: System Configuration
4.2 System Configuration Select the System Configuration menu from the top of your screen to access IP. The system configuration includes Device IP Settings, Time Settings, Password Settings, System Management, Ping Watchdog, Firmware Upgrade, Configuration Save and Restore, Factory Default, Reboot System. 4.2.1 Device IP Settings All settings besides Wireless and WAN functions are in this category. -
Page 81: Time Settings
4.2.2 Time Settings System Configuration ->Time Settings It synchronizes the date & time of PC to device. Enable NTP (Network time protocol) for clock synchronization to device. If NTP is not enabled then user must enter the date and time manually. -
Page 82: Password Settings
4.2.3 Password Settings This settings helps to change password to restrict from unauthorized access. To change password, please go to “System Configuration” -> “Password Settings” menu. Fields Description Current Password Enter the password of the device. New Password Enter your new password to which you want to change. Re-enter New Password For confirmation, enter the new password again. -
Page 83: System Management
4.2.4 System Management System Configuration -> System Management In this page, administrator can change the management parameters and disable/enable management interface. Fields Description Device Name Enter the Device Name POE Pass Through It allows Secondary Ethernet port to provide 24V power for a secondary device when it’s enabled. -
Page 84: Ping Watchdog
4.2.5 Ping Watchdog System Configuration -> Ping Watchdog This menu allows to configure system to reboot on kernel panic, when an IP address does not respond, or in case the system has locked up. Software watchdog timer is used to provide the last option, so in very rare cases (caused by hardware malfunction) it can lock up by itself. -
Page 85: Firmware Upgrade
4.2.7 Save and Restore System Configuration -> Configuration Save and Restore You can save system configuration settings to a file, and later download it back to the LP-2396K by following the steps. Save: Press Save button to save the current configuration settings of the device to the Management Host or click the Browse button to locate the configuration file, Restore: click the RESTORE button to restore the system configuration from the specified file. -
Page 86: Factory Default
4.2.8 Factory Default System Configuration -> Factory Default This Feature is used to reset the current configuration setting to the factory default configuration settings. Click YES to go ahead and restore the configuration to the factory default. 4.2.9 Reboot Whenever you use the Web configuration to change system settings, the changes are initially placed in temporary storage. -
Page 87: Schedule Reboot
4.2.10 Schedule Reboot Fields Description Schedule Reboot Enable/Disable the feature to access Reboot Time Enter the Time to reboot Reboot Plan Select the option weekday or every day to reboot Weekday Select the number of days to reboot Apply changes Click it to save the changed settings Reset Click it to erase the saved settings. -
Page 88: Tools
4.3 Tools There are two features in Tools they are Network Ping & Network Traceroute 4.3.1 Network Ping Network Ping is used to provide a basic connectivity test between the requesting host and a destination host. This is done by using the Internet Control Message Protocol (ICMP) which has the ability to send an echo packet to a destination host and a mechanism to listen for a response from this host. -
Page 89: Network Traceroute
4.3.2 Network Traceroute Once the Network Ping has been used to determine basic connectivity, the Network traceroute can used to determine more specific information about the path to the destination host including the route the packet takes and the response time of these intermediate hosts. If you execute the Traceroute command on a source device, it sends IP packets toward the destination with Time To Live (TTL) values that increment up to the maximum specified hop count. -
Page 90: Device Status
It is used to monitor the status of the device. It provides information on device status, wireless information, LAN Information, wireless client table and system log. 4.4.1 Device Information Device Status Device Information It presents the status of LP-2396K Firmware devices, memory utilization and ARP Table. -
Page 91: Wireless Information
This page shows the wireless information of LP-2396K device, such as current operation mode, wireless traffic, error packets, device SSID, Band, channel, and encryption used, Transmit Power. 4.4.3 LAN Information This page shows the LAN information of LP-2396K device, such as Physical Address, IP Address, Network Mask, Default Gateway and DHCP details. -
Page 92: Internet Information
4.4.4 Internet Information 4.4.5 Wireless Client Table This feature displays the currently connected MAC address of Wi-Fi clients... -
Page 93: System Log
4.4.6 System LOG This page is used to view system logs. The System Log displays the system activities, login, and system error report. 4.5 LOGOUT Please make sure to Logout after you finish all settings. -
Page 94: Compliance
Unauthorized antennas, modifications, or attachments could damage the TI Navigator access point and violate FCC regulations. Any changes or modifications not expressly approved by the party responsible for compliance could void the user's authority to operate this equipment. Copyright © 2014 Loopcomm Technology Inc. All rights reserved.
Need help?
Do you have a question about the LP-2396K and is the answer not in the manual?
Questions and answers