Table of Contents
Advertisement
Quick Links
Advertisement
Table of Contents

Subscribe to Our Youtube Channel
Related Manuals for ZKTeco STP10

Summary of Contents for ZKTeco STP10
- Page 1 User Manual STP10/20 Smart Time Recorder Version: 1.0 Date: Jan, 2018 XXXX 用 手册 I...
-
Page 2: About This Manual
About This Manual This manual introduces the operation of user interfaces and menu functions of Smart Time Recorder. The pictures in this manual may not be exactly consistent with those of your product; the actual product's display shall prevail. -
Page 3: Table Of Contents
Contents 1 Appearance ................................. 1 2 Main Menu ................................2 3 User Management .............................. 3 3.1 Adding User ................................3 3.2 Searching User ..............................3 3.3 Editing User ................................4 3.4 Deleting a User ..............................4 4 Clock Core Setting .............................. 5 4.1 Needle Printer Setting ............................ -
Page 4: Appearance
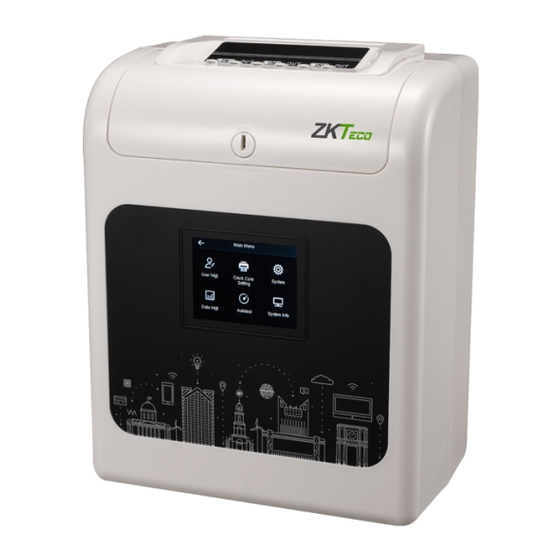
1 Appearance Front view Device case lock Touch screen Fingerprint sensor & Card reader STP10 STP20 Top view Card hole Print directional button (Note: It has 6 columns from left to right, which is corresponding to the print columns of paper card; the button glows red light while printing the column.)... -
Page 5: Main Menu
Autotest: To automatically test different module’s functions, including the LCD, voice, fingerprint sensor and clock RTC test. System Info: To check device capacity, device and firmware information. Note: Some functions such as COMM. and Attendance Search that STP10 Smart Time Recorder may not have. Smart Time Recorder User Manual... -
Page 6: User Management
3 User Management 3.1 Adding User Including adding super admin and normal user. User Management>New User to enter New User setting interface. Settings include inputting User ID, name, choosing User Role and Verification Mode, registering Fingerprint and Badge Number, setting Password . Add a Super Admin: Choose “Super Admin”... -
Page 7: Editing User
User Management>All User to enter All Users interface. Input “User ID” or “User Name” in , the corresponding user will be shown. 3.3 Editing User After a user is chosen through 3.2 Searching User, select [Edit] to enter user editing interface. Or in the initial interface press User Mgt. -
Page 8: Clock Core Setting
4 Clock Core Setting 4.1 Needle Printer Setting Clock Core Setting>Needle Printer Setting. Adjust the print position of the words in table cell. The adjustment range is “1~20". The default is10. Printer Level Tolerance Adjust print position in level. The smaller the number is, the more left print position will be and vice-versa. Print Vertical Tolerance Adjust print position in vertical. -
Page 9: Ribbon Setting
Clock Core Setting>Shifts Setting>Shifts Operation>Schedule Shifts. Set the working period and the time for late arrival and early leaving. It can set maximum of three periods. The default Round IN/OUT time is 5 minutes. The start and end time of Shift 1 is corresponding to column 1 and 2. The start and end time of Shift 2 is corresponding to column 3 and 4, and so on. - Page 10 Handle Buckle Film Reading Print Head Ribbon Spin Button Ribbon Setting>Enable Red Color Printing. #### #### #### #### #### #### Printed in red Smart Time Recorder User Manual...
-
Page 11: Paper Card Setting
4.4 Paper Card Setting Clock Core Setting>Paper Card Setting>Paper Card Sides Identify. Open it and it can identify the paper card side. If the paper card side is wrong, the printer won’t draw the paper in. Card Side Identification Paper Card Setting>Verification Mode, can choose Verified then Punch or None Verification. - Page 12 example: Week Time Date Time Printing Contents Setting>First Row Contents Setting, can set the first row content of each column. Smart Time Recorder User Manual...
-
Page 13: Communication
5 Communication 5.1 PC Connection Comm key Settings To improve security of data, Comm Key for communication between the device and PC needs to be set. If a Comm Key is set in the device, the correct connection password needs to be entered when the device is connected to the PC software, so that the device and software can communicate. - Page 14 WIFI Connection Communication>Wireless Network>WIFI, open it, the device will search available WIFI in the network range. Select an available WIFI and input password. When the WIFI is connected successfully, the initial interface will display the logo. Add WIFI Network Manually ...
-
Page 15: System
6 System 6.1 Language System>Language, Chinese and English are supported now. 6.2 Date Time System>Date Time to enter the date/time setting interface. It includes setting date, time, 24-hour time, date format and daylight saving time and so on. When resetting to factory settings, the date format can be restored (YYYY-MM-DD). ... -
Page 16: Voice
To meet the demand of DST, a special option can be customized. Make the time one hour forward at XX (hour) XX (day) XX (month), and make the time one hour backward at XX (hour) XX (day) XX (month). System > Date Time > Daylight Saving Time to enable Daylight Saving Time. Daylight Saving Mode: Daylight Saving Time Mode, by date/time mode and by week/day mode for selection. -
Page 17: Bell Schedules
6.4 Bell Schedules System>Bell Schedules>New Bell Schedule, can set Bell Status, Bell Time, Repeat, Bell Type, Ring Tone and Internal bell delay. Internal Bell: built-in bell in device; External Bell: connect other bell device. External bell should select the relay NC2. (System>Bell Schedules>Options>NC2) Music output needs an active speaker device to connect it to the horn and bell control, the connection method is similar to bulb switch. -
Page 18: Fingerprint
System>Attendance to enter Attendance setting interface. Duplicate Punch Period (m): Within a set time period (unit: minutes), the duplicated attendance logs will not be reserved (value ranges from 1 to 999999 minutes). When the value is set to None, all duplicated attendance logs will be reserved. -
Page 19: Usb Upgrade
6.7 USB Upgrade Insert the U disk with upgrade file into the device’s USB port, and press System > USB Upgrade to complete upgrade operation. Notes: If upgrade file is needed, please contact out technical support. Firmware upgrade is not recommenced under normal circumstances. -
Page 20: Data Management
7 Data Management 7.1 Delete Data To manage data in the device, which includes delete all data, delete admin role, delete attendance data, and delete backup data. Date Management>Delete Data to enter the Delete Data settings interface. Delete All Data: To delete all user information, fingerprints and attendance logs etc. Delete Admin Role: To make all Administrators become Normal Users. -
Page 21: Download
Notes: The operations of Restore from Device are the same as that of Restore from USB Disk. 7.4 Download Before uploading/downloading data from/to the USB disk, insert the USB disk into the USB slot first. Data Management>Download to enter the USB Download interface. Time period is required to choose only in downloading Attendance Data. -
Page 22: Attendance Search
8 Attendance Search When users verify successfully, attendance records are saved in the device. This function enables users to check attendance logs. Attendance Search > enter User ID (if no ID is entered, all user records will be searched) > select Time Range, the corresponding attendance logs will then be shown. -
Page 23: Autotest
9 Autotest To automatically test whether all modules in the device function properly, which include the LCD, voice, fingerprint sensor and clock RTC (Real-Time Clock). Press Autotest to enter the Autotest interface. Test All: To test LCD, voice, fingerprint sensor and clock RTC. During the test, touch the screen to continue to the next test, while press ←... -
Page 24: System Information
10 System Information Check data capacity, device and firmware information. Press System Info to enter the System Info interface. Device Capacity Device Info Firmware Info Device Capacity: To display the number of registered users, administrators, passwords, fingerprints, badges, attendance logs, also to check the total storage of users, fingerprints, badges, attendance records. Device Info: To display the device name, serial number, MAC address, fingerprint algorithm, platform information, MCU version, manufacturer and manufacturer date. -
Page 25: Attendance Process
11 Attendance Process In None Verification mode, users just put in the paper card. The device will print automatically according to the indicator light position. In Verified then Punch mode, users need to complete the verification first. Then it prompts to insert the paper card. ... -
Page 26: Troubleshooting
12 Troubleshooting Faults Probable Causes Remedial Actions Can’t draw card 1) Power cut 1) Wait for the power recovering 2) Bad contact of power 2) Check the outlet 3) Putting or pulling card vigorously 3) Check the size of card and the method in or out Print color is too light Ribbon is consumed completely... -
Page 27: Daily Precautions
13 Daily Precautions Don’t thump it or lean on it. Don’t put it in dusty environment or exposed to the sun or rain. Don’t keep close to high temperature environment and don’t use organic solvents and oil-or-fat to wipe the device case. - Page 28 ZK Building, Wuhe Road, Gangtou, Bantian, Buji Town, Longgang District, Shenzhen China 518129 Tel: +86 755-89602345 Fax: +86 755-89602394 www.zkteco.com © Copyright 2018. ZKTeco Inc. ZKTeco Logo is a registered trademark of ZKTeco or a related company. All other product and company names mentioned are used for.
Need help?
Do you have a question about the STP10 and is the answer not in the manual?
Questions and answers