Advertisement
Quick Links
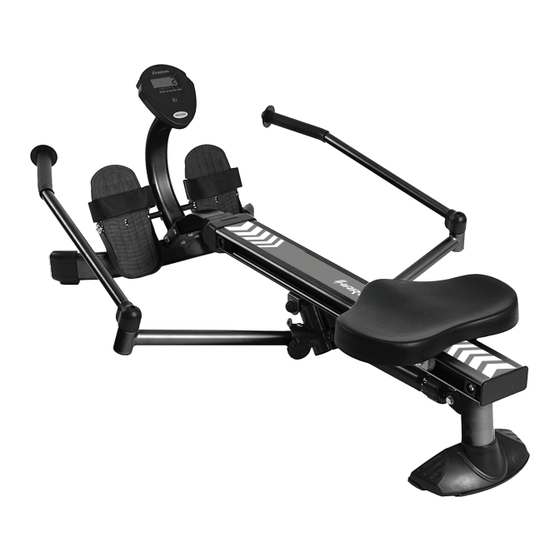
ASSEMBLY MANUAL
RM-1
Hydraulic Resistance
Rowing Machine
e
Thank you for your purchase of this Harvil Product
We work around the clock and around the globe to ensure that Harvil products
maintain the highest possible quality. However, in the rare instance that your
product is defective or missing parts, contact your retailer to submit parts
requests or warranty claims. Please read the warranty information at the back
of these assembly instructions for further details.
IMPORTANT! PLEASE READ THESE ASSEMBLY INSTRUCTIONS
IN ENTIRETY BEFORE ASSEMBLING YOUR PRODUCT
The information contained in this manual is subject to change without notice.
RM-1
1
Advertisement

Related Manuals for Harvil RM-1

Summary of Contents for Harvil RM-1
- Page 1 Rowing Machine Thank you for your purchase of this Harvil Product We work around the clock and around the globe to ensure that Harvil products maintain the highest possible quality. However, in the rare instance that your product is defective or missing parts, contact your retailer to submit parts requests or warranty claims.
- Page 2 6. It is recommended that you place this exercise Hydraulic Rower Machine on an equipment mat. 7. Set up and operate the Harvil Hydraulic Resistance Rowing Machine on a solid level surface. Do not position the equipment on loose rugs or uneven surfaces.
-
Page 3: Center Beam
Right Handlebar Pedal Seat Pedal Strap Extension Arm Left Stand Cap Center Beam Front Stabilizer Left Handlebar Rear Support Pivot Connector Extension Arm Stabilizer Shock THE FOLLOWING TOOLS ARE REQUIRED FOR ASSEMBLY: Allen Wrench (5mm) Allen Wrench (5mm) Wrench (13mm) RM-1... - Page 4 PRODUCT PARTS DRAWING FRONT BACK RM-1...
-
Page 5: Table Of Contents
Left Stand Cap Right Stand Cap Meter Post Pedal Shaft Pedal Spacer Pedal Pedal Strap Large Washer (M8) Meter Grommet Extension Wire Sensor Wire Magnet Seat Seat Carriage Roller Round Plug (25mm) Nut Cap (M10) Screw, Round Head (M2.9 x 10mm) RM-1... - Page 6 Bolt, Hex Head (M10 x 1.5 x 120mm) Washer (M6) Washer (M8) Washer (M10) Spring Washer (M8) Nylon Nut (M8 x 1.25) Nylon Nut (M10 x 1.5) Allen Wrench (5mm) Wrench (13mm) Owner’s Manual Warning Label Screw, Round Head (M3.5 x 15mm) RM-1...
- Page 7 Some fasteners may be already attached to the parts. Part No. and Description Screw, Round Head (M5 x 0.8 x 12mm) Bolt, Button Head (M8 x 1.25 x 15mm) Bolt, Button Head (M8 x 1.25 x 25mm) Large Washer (M8) Washer (M8) Nylon Nut (M8 x 1.25) RM-1...
- Page 8 Key Rib in the STABILIZER CAP(5) aligns with the slot in the REAR SUPPORT(4), then press the STABILIZER CAP(5) onto the REAR SUPPORT(4). Turn the Main Frame Assembly to the normal upright position and make sure the STABILIZER PAD(6) is secured to the STABILIZER CAP(5). Key Rib RM-1...
- Page 9 STABILIZER(28) together with BUTTON HEAD BOLTS(M8x1.25x15mm)(51) and WASHERS(M8)(59). Please do not tighten any of these bolts until all six bolts are attached. NOTE: Be careful not to damage the EXTENSION WIRE(38) when assembling the METER POST(32). STEP 3 Connect the EXTENSION WIRE(39) to the SENSOR WIRE(40). RM-1...
-
Page 10: Pedal Shaft
(M8)(36) at both ends of the PEDAL SHAFT(32). You need to use two Allen Wrenches to tighten the BUTTON HEAD BOLTS(M8x1.25x15mm)(51) at both ends of the PEDAL SHAFT(32) at the same time. STEP 5 Remove the LOCKING KNOBS(13) from the PIVOT CONNECTOR(10). RM-1... -
Page 11: Extension Wire
Install two AA batteries into the METER(37), the batteries are not included. See page 12 for detailed battery installation instructions. Connect the EXTENSION WIRE(39) to the METER(37). Attach the METER(37) to the plate on the METER POST(31) with ROUND HEAD SCREWS(M5x0.8x12mm)(49). RM-1... -
Page 12: Seat
CENTER BEAM(1) with BUTTON HEAD BOLTS(M8x1.25x25mm)(53). Also, please verify that the other SEAT STOPPERS(3) at the front end of the CENTER BEAM(1) are assembled at the factory. STEP 9 Press the CENTER BEAM CAP(2) into the back end of the CENTER BEAM(1). RM-1... - Page 13 2. Use the same type of battery. Do not mix an alkaline battery with another type of battery. 3. Rechargeable batteries are not recommended. 4. Ultimate disposal of battery should be handled according to all state and federal laws and regulations. 5. Do not dispose of batteries in fire. RM-1...
-
Page 14: Roller
4. It is the sole responsibility of the user/owner to ensure that regular maintenance is performed. 5. Worn or damaged components must be replaced immediately or the equipment removed from service until repair is made. 6. Keep your equipment clean by wiping it off with an absorbent cloth after use. RM-1... -
Page 15: Rm-1
The Seat will move and the Seat Carriage may pinch your hand or ngers. 3. To avoid damage to the electronics, remove the batteries before storing the equipment for one year or more. Folding the Harvil Hydraulic Resistance Rowing Machine Follow the following process to fold the equipment as illustrated for easy storage. -
Page 16: Rm-1
* For cardiorespiratory training benefits, the American College of Sports Medicine recommends working out within a heart rate range of 55% to 90% of maximum heart rate. To predict the maximum heart rate, the following formula was used: 220 - Age = predicted maximum heart rate RM-1... - Page 17 A proper cool-down slowly lowers your heart rate and allows blood to return to the heart. Your cool-down should include the stretches listed above and should be completed after each strength training session. RM-1...
- Page 18 Harvil reserves the right to make substitutions to warranty claims if parts are unavailable or obsolete. Harvil shall not be liable for loss of use of the product or other consequential or incidental costs, expenses or damages incurred by the consumer of any other use. The user assumes all risk of injury resulting from the use of this product.
Need help?
Do you have a question about the RM-1 and is the answer not in the manual?
Questions and answers