Advertisement
Table of Contents
- 1 Table of Contents
- 2 Accessories
- 3 User Manual
- 4 Operation Interface Introduction
- 5 LED Light
- 6 Battery Charging Introduction
- 7 Insert and Take out Storage Card
- 8 Menu Interface Introduction
- 9 Zoom In/Out
- 10 Clear Screen
- 11 Playback Mode
- 12 Delete and Protect File
- 13 Play Back Video Footage on TV
- 14 Technical Specification
- Download this manual
WASPcam 9905
Sports camera
Please read through this user manual before using the product and keep the manual for
future use.
Please operate the camera on basis of full understanding of the manual.
Any alteration of product appearance and specification below are without further notice.
Contents
Camera Precaution.....................
Accessories...........................
Camera Mounting Description
Capture Mode
Open webcam
......
......
...
.........
Advertisement
Table of Contents

Related Manuals for Wasp WASPcam 9905

Summary of Contents for Wasp WASPcam 9905
-
Page 1: Table Of Contents
WASPcam 9905 Sports camera User Manual Please read through this user manual before using the product and keep the manual for future use. Please operate the camera on basis of full understanding of the manual. Any alteration of product appearance and specification below are without further notice. -
Page 2: User Manual
Precaution Pls be well noted with the following guidelines before you use this camera, * Pls refer to manual instruction and operate the camera correctly. Illegal operation may cause damage to camera internal components. * Do not fall or hit the camera, it may damage the internal components. * For your safety, please keep the camera from the children and animals, in order to avoid accident * Do not place the camera in a damp or dusty location for extended periods of time. -
Page 3: Operation Interface Introduction
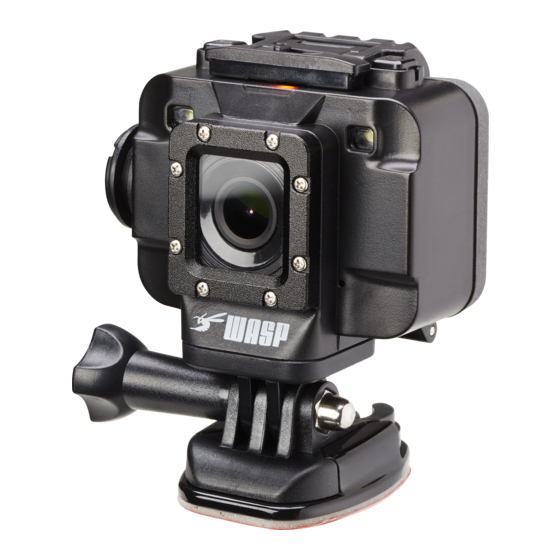
Operation Interface Introduction 1) Interface Introduction 1, Lens 2, Led night 3, Power key 4, REC key 5, LCD screen 6, Mode key 7, Menu key 8, OK key 9, LED on/off key 10, Left key 11, Right key 12, Working indicator 13, Charge indicator 14, USB port 15, HDMI port... -
Page 4: Led Light
Power on/off camera 1, Turn on Press “ ” key for 3 secs, with one beeping sound, the working indicator light up, and “welcom” show on screen. Camera starts up and enter standby(default is record mode) . On the top of LCD screen it displays the record icon,anti-shaking icon, remaining recording time of card icon;... -
Page 5: Insert And Take Out Storage Card
Insert and take out storage card 1, Insert the card: open the lock of back cover, press the card slot at right direction, put the card according to the right direction, then lock the card slot. 2, Take out the storage card . 1) Turn off the camera 2) open the lock of back cover, press the card slot at right direction, then take out the card. - Page 6 Format: SD card Default: Cancel / ok Version:FWVer:2.0/20141031 Under power on, press twice “menu” key to enter system setting, press key to choose remote: and select Remote match, LCD show” wat remote match” , and camera enter pairing status already, At this time, press both buttons on remote controller to start pairing, Pairing success: LCD show :”Remote match OK”...
- Page 7 Status/LED Red LED indicator Blue LED indicator 1 time/sec frequence Standby Flickers about 5sec Light on 3 secs Status inquiry Recording then off Light on 3 secs power off then off matching Long light Long light Matching operation Light on 3 secs Light on 3 secs success then off...
- Page 8 Capture mode: signal/3s Timer/ 10s Timer/30s Timer Auto photo:off/3seconds/5seconds/10seconds resolution: 12M/10M/5M Sequence: off/ on Quality: Fine/Normal/Economy Sharpness: Strong/ Normal/Soft White Balance: Auto/Daylight/Cloudy/Tungsten/Fluorescent/Underwater Color: color/B&W/ Sepia ISO: Auto//100/200/400 Exposure: +0.0,-1/2,-1.0,-3/2,-2.0 Quick Review:Off/2seconds/5seconds The default is recording mode after power on, press “menu” key to enter capture setting , now camera is the preview status,on the top of LCD screen display Photo, anti-shaking,and the photos amount icon, on the left display white-balance, Exposure, ISO icon, on the right will show size, memory, battery icon.
- Page 9 4. Quick Review:Off/2seconds/5seconds press “menu” key to enter camera setting , press key to choose Quick Review and select the time, press OK key to confirm, press REC key will photo 1pcs and auto preview 2sec(according to the time you set), then back to photo standby mode;...
-
Page 10: Zoom In/Out
refer to Video setting), “Motion Detecting”and icon showed on the screen, press once key to enter motion detection. If Object is moving, camera will auto record 30sec(according to the time you set) and stop, If no object is moving, it will stop recording automatically., If there is always object moving, it will detect the object circularly according to the time you set. -
Page 11: Play Back Video Footage On Tv
to choose “Delete all” or “Delete Current”, press” OK ” key to confirm, Press to “Cancel” or “ok” deleting the file. Press "ok" to confirm delete mode will Press exit. 2.Protect Files Under standby mode, press twice“ MODE ” button to enter into playback mode, Press select “protect to choose file, Press "MENU"... -
Page 12: Technical Specification
Technical specification Sensor: 3M CMOS Video Resolution: 1080P30FPS/1080P25FPS/720P60FPS/720P50FPS /720P30FPS/720P25FPS/VGA120FPS Image size: 12M/8M/5M Storage: TF card, support up to 32G Lens 160° Video format: Image format: WIFI: 802.11b/g/n Remote: 2.4G remote control Audio: Built in MIC, speaker Port: USB、HDMI、TV OUT Power: Li-ion rechargeable battery 1050mAh Screen: 1.5 inch TFT... - Page 13 IC Statement This device complies with Industry Canada’s licence-exempt RSSs. Operation is subject to the following two conditions: (1) This device may not cause interference; and (2) This device must accept any interference, including interfe The term “IC: “ before the certification/registration number only signifies that the Industry Canada technical specifications were met.
Need help?
Do you have a question about the WASPcam 9905 and is the answer not in the manual?
Questions and answers