Advertisement
Advertisement
Table of Contents

Summary of Contents for EXS viva pro
- Page 1 EXS Logo User Manual...
-
Page 2: Table Of Contents
Table of Contents 1. Introduction………..…………………..………..2 Preparation……………..……………………... … 3. Charging…………………………………………. 7 4. Memory Card……………………………………. 10 5. Quick Start………….…………….……………… 12 6. Operation Mode…………………….…………… 14 7. File Transfer……………………………………… 18 8. Playback…………………………………………. 20 9. Wireless Function……………………………….. 21 10. Advanced Settings……….……………………... 22 11. Firmware Update..………………………………. 25 12. -
Page 3: Introduction
1. Introduction Thank you for purchasing EXS viva pro Wearable Sport Camera. The following information will help you to use camera to its full capabilities. Before you install and operate the product, please take a few minutes to read through this manual. It provides proper instructions for you to install and operate the product. -
Page 4: Preparation
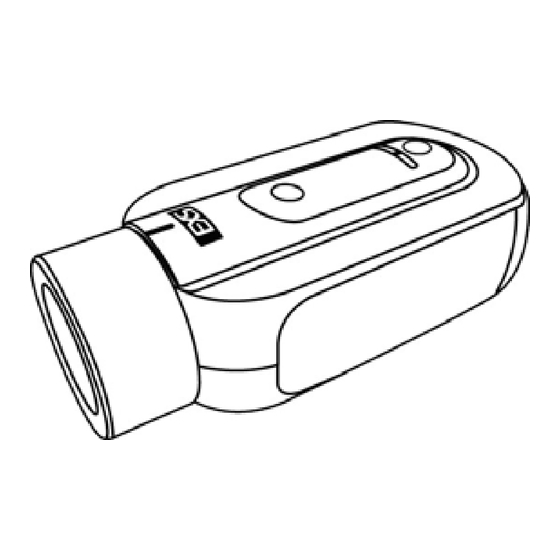
2. Preparation Component & Accessories in the Box EXS viva pro Camera Battery User Manual microSD Card USB Cable Safety Leash (Optional) Tripod Mount Flat Board Mount... - Page 5 Part Names...
- Page 6 Operation Indication Operation Light Behavior Buzzer 【3 Short Beeps】 Power On [Power/ Record Light] Press and hold [Power/ Record Button] Blink in Green for 2 seconds and release 【5 Short Beeps】 Power Off [Power/ Record Light] Press and hold [Power/ Record Button] for 2 seconds and release 【1 Short Beep】...
-
Page 7: Charging
Operation Light Behavior Buzzer Charging [Charging Light] On in Orange Charging Completed [Charging Light] Battery Normal [Battery Light] Battery Low [Battery Light] On in Red Battery Empty [Battery Light] Auto Power Off Blink in Red SD Card Normal [SD Card Light] SD Card Capacity Low [SD Card Light] On in Red... - Page 8 3. Charging 1. Take out the rear cover of the camera. 2. Open the battery cover and insert the supplied Li-ion rechargeable battery. Make sure the contact points of the battery are matching to the polarities indicated in the battery compartment.
- Page 9 3. Plug the mini USB end of the supplied USB cable to the mini USB port of the camera and plug the other end of the USB cable to the USB port of PC / Mac, AC adaptor or car charger.
- Page 10 4. The [Charging Light] of the camera remains orange on when camera is charging. 5. The [Charging Light] will be off when the battery is fully charged. Note 1: The [Battery Light] is on in red when the battery power is low. Note 2: If the battery power is almost empty, the [Battery Light] blinks in red, and the camera emits【5 Short Beeps】then automatically power off.
-
Page 11: Memory Card
4. Memory Card Insert Memory Card 1. Turn off the camera. 2. Take out the rear cover of the camera. 3. Insert Class 10 or above speed microSD card with the correct direction into the microSD card slot of the camera. Note1: When power on with no microSD card inserted, the camera emits【3 Long Beeps】and the [SD Card Light] blinks in red, and the camera emits【5 Short Beeps】then automatically power off. - Page 12 Format Memory Card Use a nib or needle to press the [Format Button] about 2 seconds then release after a beep when camera is on. The [SD Card Light] blinks in red during formatting and then off when completed.
-
Page 13: Quick Start
5. Quick Start Power On Press and hold the [Power/ Record Button] for 2 seconds then release. The camera emits【3 Short Beeps】and the [Power/ Record Light] blinks in green. The camera is now on and ready. Start Recording When camera is on and ready, press and release the [Power/ Record Button] to start recording. - Page 14 Stop Recording During camera is recording, press and release the [Power/ Record Button] to stop recording, the camera emits【2 Short Beeps】 and the [Power/ Record Light] blinks in green. The camera is now ready for another recording. Power Off When camera is on, press and hold the [Power/ Record Button] for 2 seconds then release, the camera emits【5 Short Beeps】and the [Power/ Record Light] is off.
- Page 15 6. Operation Mode Video Mode 1. Set the Operation Mode to 1. Please refer to the appendix in this manual on how to set the modes and other settings. 2. To start recording, when camera is on and ready, press and release the [Power/ Record Button], the camera emits 【1 Short Beep】and the [Power/ Record Light] is on in green while recording.
- Page 16 Photo Mode 1. Set the Operation Mode to 2. 2. To take a photo, when camera is on and ready, press and release the [Power/ Record Button], the camera emits【1 Short Beep】and the [Power/ Record Light] is on in green while taking and saving photo file.
- Page 17 Photo Timelapse Mode 1. Set the Operation Mode to 3. 2. In Photo Timelapse Mode, the camera takes photos at predefined time intervals of 3, 10, or 60 seconds. 3. To take timelapse photos, when camera is ready and on, press and release the [Power/ Record Button] to start, the camera emits【1 Short Beep】when taking a timelapse photo at every defined time interval.
-
Page 18: Operation Mode
Mode Switch 1. The camera can be quickly switched to two pre-defined operation modes via the Mode Switch located at the back of the camera body. 2. By default, [Mode Switch 1] is set to Video Mode at 1080P30 and [Mode Switch 2] to Video Mode at 1080P60. 3. -
Page 19: File Transfer
7. File Transfer File Transfer via USB Cable 1. Turn off the camera and take out the rear cover. 2. Plug the mini USB end of the supplied USB cable to the mini USB port of the camera. 3. Plug the other end of the USB cable to PC / Mac. 4. - Page 20 File Transfer via Card Reader 1. Turn off the camera and take out the rear cover. 2. Take out the microSD card. 3. Insert the microSD card to a compatible card reader and connect the card reader to PC / Mac. 4.
-
Page 21: Playback
8. Playback Video file playback from PC / Mac The video file can be played by QuickTime or Windows Media Player with PC / Mac. Windows Vista / 7 / 8: The videos can be viewed by the built-in Windows Media Player or downloaded QuickTime. Windows XP: The videos can be viewed by the Windows Media Player Version 11 or downloaded QuickTime. -
Page 22: Wireless Function
The camera emits【5 Short Beeps】and the [Wireless Light] is off. The wireless function is now off. Note1: Before using EXS App to control camera, make sure to connect your camera via WLAN setting in your smartphone or tablet. Note2: Default camera’s WLAN name is "EXS_xxxxxxxx”, and password is “12345678”. - Page 23 10. Advanced Mode Allow user to manipulate the camera with its full functionalities via a camera configuration file located on microSD card which is automatically generated by camera.
- Page 24 Modify camera setting 1. Turn off the camera and take out the rear cover. 2. Take out the microSD card and insert the microSD card to a compatible card reader and connect the card reader to PC / Mac. 3. Open the camera configuration file “msg.txt” located on the root path of microSD card via a text editor.
- Page 25 Adjust Date and Time 1. Turn off the camera and take out the rear cover. 2. Take out the microSD card and insert the microSD card to a compatible card reader and connect the card reader to PC / Mac. 3.
-
Page 26: Firmware Update
11. Firmware Update Firmware Update Steps 1. Turn off the camera and take out the rear cover. 2. Take out the microSD card and insert the microSD card to a compatible card reader and connect the card reader to PC / Mac. 3. - Page 27 Verify Firmware Version 1. Turn off the camera and take out the rear cover. 2. Take out the microSD card and insert the microSD card to a compatible card reader and connect the card reader to PC / Mac. 3. Firstly delete the “msg.txt” camera configuration file. 4.
-
Page 28: Mount Install
12. Mount Install Tripod Mount 1. Follow the designated direction to slide Tripod Mount into the camera mounting slot. 2. Push the Tripod Mount to the end of the camera mounting slot and make sure it is tightly locked. 3. Now, screw in a monopod or tripod in the screw hole of the Tripod Mount. - Page 29 Flat Board Mount 1. Follow the designated direction to slide Tripod Mount into the camera mounting slot. 2. Push the Tripod Mount to the end of the camera mounting slot and make sure it is tightly locked. 3. Push the Tripod Mount to the end of the Flat Board Mount. Push in the latch of the Flat Board Mount and make sure it is tightly locked.
- Page 30 5. Put and compress the Flat Board Mount on the flat board and keep it for at least 24 hours to make sure the adhesive has firmly stuck on the flat board. 6. Once mounted with camera, rotate the camera lens barrel to the proper position for recording.
-
Page 31: Appendix
13. Appendix Specification Item Specification Image Sensor Sony 16.7M (4768x3516) CMOS Image DSP Ambarella A7L Lens 8G+IR, F2.3, f2.93 mm Video Format 1080p: 1920x1080@ 25 / 30 / 50 / 60 fps 720p: 1280x720@ 25 / 30 / 50 / 60 / 100 / 120 fps 480p: 848x480@ 25 / 30 / 50 / 60 / 100 / 120 / 200 / 240 fps Photo Format 4608x2592 @ 16:9... - Page 32 Default Setting of Camera Configuration File Type: EXS viva pro Version: Vxxx.xxx UPDATE: N FORMAT P1: 1 P1_AE: 0 P1_AWB: 0 P1_EV: 6 P1_SHRP: 3 P1_CTST: 64 P1_PQAL: 0 P1_VRES: 1 P1_VQAL: 0 P1_VTLP: 0 P1_APO: 0 P1_WAPO: 0 P1_VOS: 0...
- Page 33 P2: 1 P2_AE: 0 P2_AWB: 0 P2_EV: 6 P2_SHRP: 3 P2_CTST: 64 P2_PQAL: 0 P2_VRES: 0 P2_VQAL: 0 P2_VTLP: 0 P2_APO: 0 P2_WAPO: 0 P2_VOS: 0 P2_FOV: 0 P2_UPDN: 0 P2_AREC: 0 P2_PTLP: 10 P2_MICM: 0 P2_MICG: 8 DT: 2013/01/01 00:45:28...
- Page 34 ------------------------------------------ P1/P2 (Operation Mode) : 1 ~ 3 (1)Video (2)Photo (3)Photo Timelapse AE (AE meter) : 0 ~ 2 (0)Center (1)Average (2)Spot AWB (AWB Mode) : 0 ~ 6 (0)Auto (1)Incandescent (2)Indoor (3)Daylight (4)Sunny (5)Cloudy (6)Flash EV (EV Bias) : 0 ~ 12 (0)-2EV (3)-1EV (6)0EV (9)+1EV (12)+2EV SHRP (Sharpness) : 1 ~ 5 (1)Soft (3)Standard (5)Hard...
- Page 35 (0)Off (60)1Mins (180)3Mins (300)5Mins WAPO (Wireless Auto Power Off when idle) : 0 & 60~ 300 (When connected with EXS App, WAPO will not be activated) (0)Off (60)1Mins (180)3Mins (300)5Mins VOS (Video Output System) : 0 ~ 1 (0)NTSC (1)PAL...
- Page 36 Federal Communications Commission (FCC) Statement 15.21 You are cautioned that changes or modifications not expressly approved by the part responsible for compliance could void the user’s authority to operate the equipment. 15.105(b) This equipment has been tested and found to comply with the limits for a Class B digital device, pursuant to part 15 of the FCC rules.
- Page 38 Trademark Information QuickTime , Mac , and iOS are trademarks of Apple Inc. or its related companies. Android is trademark of Google Inc. or its related companies. ® ® ® ® ® Windows , Windows XP , Windows Vista , Windows 7 , Windows 8 , Windows Media ®...
Need help?
Do you have a question about the viva pro and is the answer not in the manual?
Questions and answers