Table of Contents
Advertisement
Quick Links
USER MANUAL
Thank
Thank y
Thank
Thank
Thank y
Thank you for choosing our product. Please thoroughly go through user manual befor operation and
hank you fo
ank yo
ank
nk y
nk
k k
k
k
k y
k you f
y y y y
y y o
y y y y y
y y y y y y y y y
yo
yo
yo o
y y y y
yo o
y y y
yo
yo
y y y y
yo
yo o
y y o
y y y y
yo
y y y
y y o
y y o
y
yo o
y y y y y y y y y y y
y y o
yo
y y y o o
y y y y
yo
y y y y o o
y y y y
yo o o
yo o
y y o
yo
y y o o u u f f f f
y u u
y
y
o
o o
o o o o
ou u
ou
o o
ou u
o o
ou u
o o o o o u u u u
o o o u u u
ou
o
o o o o u u
o o u
o o o o
o o o
ou u
o o o f f
ou u
ou o fo
o f f f
o o o o
o o
o o u
ou u u
u u u u
u u u u
u u u u f f f f f
u u u u u
u u o o fo f f f f
u u f f f o
u
u o f f f o fo o
u u
u
u u u u u
u u
u
u u u u u u u u u u u u u
u u u u u
u u
u
o o fo o fo fo f f o o o fo o f f o f
f f o fo fo f f o o o fo o f f o f f
f f f f f
f f
f f f f o fo f f o f f
f f f f f
f f f
for or r o o
f f o
f
fo c
fo c c
f r r r r r
f r
fo fo o o r r r r r or r r o o r o o o o
fo
fo
r r r or o o o o
or o o o o
o o r r r c
or h h
o
or h h h h h h
or r r c c c h
r r r r r r
r
r r c c c h
r h
r h h h h h
r
c
ch h
c c c h
ch h o
ch h o
c c c h
ch h o
c c h
ch
c
ho
ho
ho o
ho
h h h h
h
h h h h h
h h h h h h
h h h
h h h h
h
ho o o o
h h
oo
oo i
oo i i
o
oo o s
os
os s i i
osi i
osi i
s s i i
in n
i
i i i
ng
ng g
g
g
our
o o o o u
ou p
o o u p p p p
our product
o
ou
ou
o
ou
u u r pr
u
ur r
u u r r r p
ur
r r
r r p p p r
r p p p r pr r o
r product Ple
p p r p p p p
pro o
pr pr r o o o duct Please
p p od
pr r o o o d
pr r p p r p p p p
p
pr
pr
product. Please thoroughly go t
product. Please thoroughly go throug
r pr r pr p p
pr pro ro ro
pr d d d
pr p p
o ro o r r o
ro
o o o o r r o
o o ro o r r o
o o o ro o r r o o
o o ro o r r o r r
ro o u u
od d d u u u c
od d d u u ct Please thoroughl
od
od d
o o o d
o o
od d
od
od d d u u u c c
od d
od d
o o d
o o d
o o o uct P
od d
od d
od
o o o o o
od c
od
o o
od
od
od
o
od d uct Please thoro
od
oduct. Please thoroughly go through user manu
oduct. Please thoroughly go through user
d d
d
d d
d d d d
d
d d d
du
d d
d d d
d d d d
d d u
d d
d d u
d d d d
du
d
du u
d d d d d
d d u u
d d d c c
du
du
du
du u
d d d
uct P
uc
uc
uc
u u u
u
u u u u
u u u u
u u u u u u
u
uc c
u u u
u u c
u u u
u
u u c c
u
u
u u u
u
uct Ple
u
ct Ple
t ct c c c
ct c
c
c
c
c c t. Plea
c c
ct ct c c c
ct ct c c c
t
t. Pleas
kee
k k e
k
k k e
k k
k
ke
k
ke
k
kee
k k e
ke
ke
ke
ke
ke
k k k
ke
keep it well for future reference. All photoes here are for reference only, and specifications are subject
k k
ee
ee
e
ee
ee
ee
e
e
toes
toes he
t t oes her
oes
oes here
oes he e e
es here a
es h
es here are for reference only, and specifica
es her
es here
s here are for reference only and
s here are for reference only, and specifications are s
s here
here are for reference only, and specifications are subject
here
h
h
to the phisycal product.
UAL
r manual befo
befor operat
eration and
f
f
nd
Advertisement
Table of Contents

Related Manuals for Guide Sensmart D384M

Summary of Contents for Guide Sensmart D384M
- Page 1 USER MANUAL Thank you for choosing our product. Please thoroughly go through user manual befor operation and Thank y Thank y Thank Thank Thank hank you fo ank yo nk y k you f y u u y y o o u u f f f f y y y o o y y o yo o o...
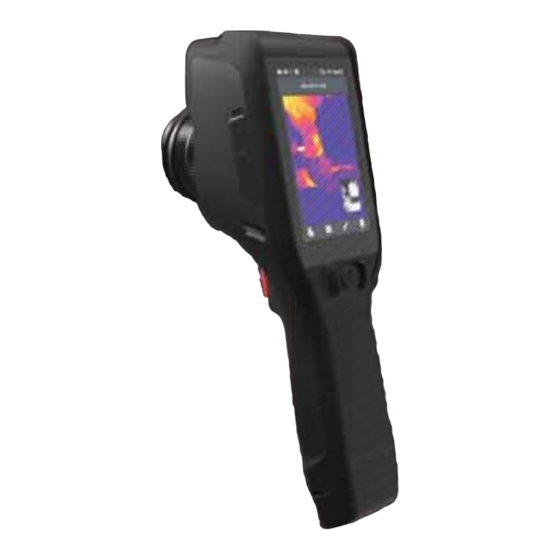
- Page 2 This product is a tool-like handheld thermographic IR camera. It has 110,592/27,648 effective infrared pixels, laser, illuminator and 500W-pixel visible lens. It can be connected to the PC, TF card, mobile devices (IPHONE or Android devices) and HDMI display, meeting the demands of use in different occasions.
- Page 3 the interference by one or more of the following measures: may cause damage to the device. -Reorient or relocate the receiving antenna. -Increase the separation between the equipment and receiver. following must be strictly observed: -Connect the equipment into an outlet on a circuit different from that to which the receiver is connected.
-
Page 4: Table Of Contents
Contents Please avoid long-time contact to the overheating device. Chapter 1 List of Items..............use the original battery and charging wire provided by our company. Chapter 2 Overview of Component..........power prompt. shut down. Chapter 3 Overview of Mainframe.........., it indicates that the battery has been run out. The device can be A A glance at functional areas........ - Page 5 Resizing of analysis object........Center temperature cursor........Real-time temperature curve of object....Temperature measurement range......Function analysis of moving object......Switch of temperature unit........Color palette switching........... Switch of distance unit........... Manual adjustment of brightness/contrast..... Alarm setting............Analysis on temperature difference....... High temperature alarm.........
- Page 6 Installing optional lens........... Watermark setting..........Installing high-temperature lens......Connection settings........... External connection............ WIFI switch............Wireless AP setting..........Latest Version IOS/Android Acquisitions....Chapter 8 Troubleshooting Guide..........Bluetooth..............About updates............. FAQs................Program upgrade........... Firmware upgrade..........Storage space............Formatting TF card..........Data synchronization..........Restore default settings.........
- Page 7 Standard Items Thermal imager, Lithium battery×2, Adapter (including the adapter plug), USB cable, Hand strap, HDMI cable, Capacitive screen gloves, Quick Start Guide User Manual, Product CD, TF card (16GB), Charging Dock, Tripod interface Optional Accessories: Lithium battery, Camera Pouch, Charging Dock, Optional lens, Tripod interface, Sun shade, Bluetooth headset...
-
Page 8: Chapter 1 List Of Items
List of Items List of Items Only some designated D models include the external battery changer and the tripod mount interface as part of the standard package... -
Page 9: Chapter 2 Overview Of Component
Chapter 2 Overview of Components... - Page 10 Overview of Components Overview of Components...
- Page 11 Chapter 3 A Glance at Functional Areas of the Device A glance at functional areas Gallery Shortcut menu...
-
Page 12: Chapter 3 Overview Of Mainframe
Overview of Mainframe Overview of Mainframe A A glance at functional areas B Gallery: 1. Click the [ browsing interface. Then click the selected image to enter the image editing interface. 2. Click the [Edit] button at the bottom to enter the editing area of analysis Enter “Real-time Display area Gallery... -
Page 13: C Shortcut Menu
Overview of Mainframe Overview of Mainframe Shutter compensation: double click the real-time image area, the system will C Shortcut menu: automatically conduct shutter compensation operation, and pop up a prompt message. Provide shortcut operations in real-time image, mainly including IR mode switching, camera mode switching, illuminator switching, laser switching, wireless AP hotspot switching, zoom adjustment, USB real-time video;... -
Page 14: Chapter 4 Observation
Chapter 4 Observation Electronic zooming Temperature measurement Image mode switching... -
Page 15: Temperature Measurement
Observation Observation Image mode switching Temperature measurement Enter the real-time video, click - IR mode, click the infrared mode button in 1. Under the real-time image state, click the shortcut menu [ ] at the bottom shortcut menu several times so as to conduct multi-mode switch operations right of the screen;... -
Page 16: Chapter 5 Shooting
Observation 3. Align the center cursor with the measured object. Then manually rotate the lens focusing ring counterclockwise or clockwise to adjust the focal length (The electric focusing model can automatically focus via the left or right target in the center of the screen as much as possible, and keep the target relatively static). -
Page 17: Adding Annotation
Photo shooting Photo shooting Under the real-time image state, press the [Shoot] button on the device to 3. Under the interface frozen state, press the freeze or shoot the current scene, and save the image. [shoot] button again to save the frozen image Enter system settings –shooting setting to directly set key function to shooting, automatically. -
Page 18: Adding Shooting Annotation
Photo shooting Photo shooting Adding shooting annotation Adding text annotation 1. Select the adding text annotation [T] button. 2. Enter the input area of the annotation text and enter valid annotation information, such as XXXX. 3. After text information input is completed, press [Return] button. The system will pop up the text annotation saving dialog box, click [OK] to save it. -
Page 19: Video Recording
Photo shooting Video Recording 1. Before shooting, aim at the target, and make the target image clearly manually or automatically (only some models support automatic focusing) 2. Click shortcut menu button at the bottom, the current interface will 2. The bottom button function as brush, eraser and color selector, the user immediately switch to recording mode after clicking the camera mode;... -
Page 20: Resizing Of Analysis Object
Real-time analysis Real-time analysis Adding /removing analysis object Resizing analysis object 1. In the real-time image state, click the rightmost button [ ] of the shortcut menu, you can enter the adding analysis object menu interface, as shown below; 2. It provides temperature measurement of various analysis object, such as lines, rectangles, circles and spots. -
Page 21: Function Analysis Of Moving Object
Real-time analysis Real-time analysis 3. When the analysis objects are selected, move the objects by the “up”, “down”, Function analysis of moving object 1. Click button [ ] to enter the interface for adding analysis objects; be refreshed synchronously; Color palette switching 1. -
Page 22: Manual Adjustment Of Brightness/Contrast
Real-time analysis Real-time analysis Manual adjustment of brightness/contrast Analysis on temperature difference 1. Under real-time menu state, double-click After adding at least two analysis objects, click the button for temperature the maximum temperature or the minimum difference mode [ ]. It is required to manually select two analysis objects so temperature at the right side of the screen as to calculate the temperature difference. -
Page 23: File Browsing
File browsing Picture analysis 1. Local pictures and videos: under real-time menu state, click the gallery Picture editing button [ 1. On the picture preview interface, click any picture to enter the interface for picture editing. storage. 2. Click the button [ ], the system will enter the editing mode automatically. -
Page 24: Picture Zoom In/Out
Picture analysis Picture analysis Picture zoom in/out PDF generation 1. In the real-time image state, click the gallery button [ ] at middle of shortcut menu; As shown below. zoomed in. -
Page 25: Pdf Printing
Picture analysis Picture analysis PDF printing Video playback 1. Connect to the wireless printing network (wireless printing) by system 1. Enter the gallery interface, click “picture”- settings-connection settings interface; “local video” to successfully enter the local 2. Enter the gallery interface, select one picture, and carry out printout of a 3. -
Page 26: Video Analysis
Picture analysis Picture analysis Video analysis 4. Click the “ ” button at top left corner to play the video, and click the “ ” button to pause. 1. Enter the settings-system settings interface, 5. After clicking the shortcut menu button, the system will pop up a tool menu switch the video format to “irgd”... -
Page 27: Isotherm
Isotherm Isotherm 1. Under real-time menu state, click the gallery Above isotherm button [ 1. Call out the main editing menu, and enter interface; the object-isotherm; 2. On the picture browsing interface, select one 2. Click the icon [ ] to enter the above IR picture for editing;... -
Page 28: Level And Spn Functions
LEVEL and SPN functions Customized emissivity 1. On the real-time imaging interface, click the temperature data area at top 1. Enter the main editing menu, and select the or bottom of the color palette (the yellow box area as shown in Fig. 1), to enter option of parameter-[material];... - Page 29 Chapter 6 System Settings System settings Local settings Connection settings About upgrade...
-
Page 30: Chapter 6 System Settings
System settings System settings On the real-time video interface, click the setting button at bottom of the Switch of temperature unit screen to enter the interface of system settings. The setting interface is used It can be used to switch the degree between to modify the main parameters of the system, including temperature unit, centigrade and Fahrenheit... -
Page 31: Alarm Setting
System settings System settings Alarm setting Control the alarm temperature and range. The 1. Turn on the temperature alarm switch, set the defaulted state of alarm is off state. alarm temperature range into low temperature The alarm temperature range shall be obtained and the alarm temperature to 30 . -
Page 32: Scheduled Shutdown
System settings System settings Scheduled shutdown Volume Set the option of schedule shutdown; the default Adjust the volume of device, or turn it into value is “never”. Options of shutdown after 5min, silent mode. 10min, 30min or 60min and “never” are provided. Vibration feedback Scheduled sleep Start/stop the vibration feedback function. -
Page 33: Automatic Lens Recognition
System settings System settings Automatic lens recognition Temperature marker on full screen As defaulted, the automatic lens recognition Control the high/low temperature tracking mode function is turned on, and the program will on the real-time image. The defaulted value is automatically recognize the corresponding “no display”... -
Page 34: Local Settings
Local settings Local settings Photo shooting setting Video format Photo shooting mode, including three modes The system provides two optional video of “freezing / photographing”, “photographing” formats of “MP4” and “irgd” for users. Video and “freezing”. Freezing / shooting mode: press the shoot information, and can be analyzed. -
Page 35: Time/Date
Local settings Local settings Time/date Watermark setting Set the date and time of system manually. 1. Enter watermark setting and enable some date watermark, emissivity watermark, distance temperature watermark; 2. Return to the real-time picture and take a sample picture at random; 3. -
Page 36: Connection Settings
Connection settings Connection settings 3. Click “More” button [ ] to enter the WIFI WIFI switch address setting interface. If the symbol of [ ] occurs at the top of main screen, it indicates that the Ignore a network: slightly click “More” button device has been linked to the wireless local area network. -
Page 37: Bluetooth
Connection settings About upgrade Bluetooth Program upgrade (Only certain models of device support this 1. Put APK program upgrade patch under the route of Computer/IrCamera/ function) Internal storage/GCameraExt/Update, as shown below: 1. Enter the “System settings -- Connection settings -- Bluetooth” interface, turn on the Bluetooth switch, activate Bluetooth function and search device;... - Page 38 About upgrade About upgrade prompt. Restart the device after successful upgrading, as shown below: prompt. Restart the device after successful upgrading, as shown below: below:...
-
Page 39: Storage Space
About upgrade About upgrade Storage space Formatting TF card Mainly display the residual capacity of internal storage and basic information For formatting, select a slot of memory card and then select “Yes”. Note that all photos and of external TF card. In addition, users may customize storage option setting, other data on the memory card will be deleted including internal storage and storage of external TF card;... -
Page 40: Restore Default Settings
About upgrade Restore default settings 1. Enter “system settings -- information -- restore all settings” and click “Restore settings” tag. 2. The device will be restored to the factory state through the function. Please be careful. Chapter 7 Connection with External Devices Port connection Installing memory card and lens External connection... -
Page 41: Port Connection
Port connection Port connection The device can be connected to external devices through HDMI cable and USB Connect to the computer through USB cable, open “My Computer” and view the cable. Micro HDMI interface File Format Storage Path Micro HDMI interface is mainly used to be connected to an external HD display. IrCamrea/SD card/DCIM/GCamera/ SD card Images... - Page 42 Port connection Port connection 3. Click “USB real-time video” at the device to activate the function of USB real- 5. Click “Video analysis” and select “DSeries” in the choice box of device model. time video, as shown below: Select “USB” in the popped dialog box of connection setting, as shown below: software from computer will display real-time infrared image and analyze correspondingly, as shown below: as shown below:...
-
Page 43: Installing Memory Card And Lens
Installing memory card and lens Installing memory card and lens The device may use a TF card and images and videos taken can be recorded Removing memory card on the device or TF card. The device supports a TF card with capacity of 32GB 1. -
Page 44: Installing Optional Lens
Installing memory card and lens Installing memory card and lens Installing optional lens Installing high-temperature lens 1. Install the lens: press the lens 1. Install the lens: insert the high- disassembling button and align the temperature lens to the threaded red point at the back of lens with neck of standard lens and rotate the red point on the device;... -
Page 45: External Connection
External connection Wireless AP setting 1. Call out the shortcut menu interface at the bottom of the main screen, directly click [Hotpot] AP button to activate wireless AP function. 2.The status bar will automatically display that AP function has been activated. Conduct signal search through the wireless network card. - Page 46 FAQs Problems Causes Action su ie t atter a a it e ar e a t e use t e atter a e out t e atter ut it i to t e atter oor atter o ta t Failure to start a i a ai a i stall i la e...
- Page 90 :12345678...
Need help?
Do you have a question about the D384M and is the answer not in the manual?
Questions and answers