Summary of Contents for Timitoo TEK-608A
-
Page 1: Operating Instructions
Operating Instructions TEK – 608A Broadband Modem with Ultrasonic Sensor V1/072017... -
Page 2: Table Of Contents
Contents 1 Introduction ..................... 3 2 Contents of Package ................3 3 Modem User Interface ................4 3 Installing the Broadband Modem............5 4 Preparing the Tank .................. 6 4 Define Tank Height .................. 6 Activating the Sensor................7 6 Fitting the Sensor ..................7 7 Interacting with the Modem via a Browser .......... -
Page 3: Introduction
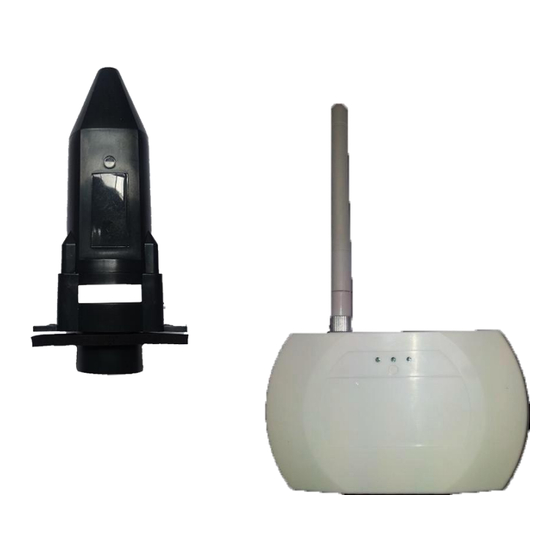
1 Introduction The TEK-608A is a Broadband modem, allowing to connect up to 4 Ultrasonic Tank Monitoring Sensors and transmit the data to the Timitoo Tank Monitoring Website. In this online application the level of the tanks can be read in a diagram, showing the consumption over time, as well as the current level and remaining days of supply. -
Page 4: Modem User Interface
3 Modem User Interface The TEK-608A has a simple user interface of 3 LEDs (Yellow, Green and Red) and a momentary push button. Black Amber Green Magnet location Button Power Ethernet The table below describes the functions and a brief summary of the LED lights of the TEK-608A broadband modem. -
Page 5: Installing The Broadband Modem
6: File download failed 7: RF self-test failed Amber + LED’s On solid indicate unit is Amber + Green double flash Green attempting to connect to the server. to indicate a successful connection to the server. Amber + All three LED’s on solid indicate the Indicates a sensor is being Green + unit is powering up. -
Page 6: Preparing The Tank
4 Preparing the Tank To avoid errors, the Tank Gauge Transmitter must sit in a vertical position on top of the tank and have a direct perpendicular line of sight to the liquid level in the tank, through the bottom ultrasonic cone, without any interference from i.e. -
Page 7: Activating The Sensor
5 Activating the Sensor Remove the sensor from packaging Recycle the power on the modem and it will enter the “Learn mode” for two minutes. Hold the black dots of the modem and the black dot on the sensor together. ... -
Page 8: Interacting With The Modem Via A Browser
NOTE: Mounting Adapter supplied must only be used. 7 Interacting with the Modem via a Browser Once the TEK-608A Broadband modem has been connected to the power supply and to the networks router, the System Dashboard page can be viewed in a web-browser. - Page 9 The dashboard shows the status of the connection to the internet server, as well as which sensors that are connected. Each sensor that was matched in the previous process shows up named “Sensor 1” to “Sensor 4” automatically. Setup Wizard On the Setup Wizard Page, the name of the sensor transmitter can be renamed and a new more descriptive name can be provided.
- Page 10 If the transmitter sensor serial number is already known and is already active, the number may be typed in using the “Type in sensor serial” option. It is however more typical to use the “Activate Sensor” option. When the “Activate Sensor” option is selected and the “Next” button is clicked, the Broadband modem is set to the “Learn Mode”...
- Page 11 Once successfully paired the page will show a registration form for the details of the tank. The name of the sensor and the serial number will be pre-filled. The transmitter sensor is now matched with the Broadband modem. The screen will not be showing that data is being received from the newly matched sensor: Once the transmitters are matched the data is received and forwarded on to the online monitoring.
-
Page 12: Online Setup
9 Online Setup Once the system is up and running the tanks must be registered with the online monitoring service. Please contact your seller about the different options on how to activate the system for your use. 10 Troubleshooting Problems typically only arise with the modem and the connectivity of the sensors, or the connectivity to the server. -
Page 13: 4: Unable To Connect To Server
4: Unable to connect to Server The system cannot connect to the server. The Broadband modem might be blocked from external Internet access or the Router is down and cannot receive any outside addresses. The routers DHCP service might not be up to date. Try to restart the router, check internet access via a browser and restart the broadband modem. -
Page 14: Specifications
2. The battery can be accessed by removing 4 self-tapping screws from the base of the unit. 3. Remove the old battery noting the orientation (+ mark facing upwards) and replace with a new battery (3V-CR2450) 4. Re-assemble, ensuring the O-Ring is undamaged and secured in position. -
Page 15: Warranty Registration
Do not replace batteries in a potentially explosive atmosphere. Do not discard batteries in a pressurized container. Warranty Registration Please register your product for warranty at: https://www.tankmonitoring.net/warranty-registration.html Support Timitoo Tank Monitoring Solutions 4620 St. Charles Ct. Flower Mound, TX 75022 http://www.tankmonitoring.net support@tankmonitoring.net (817) 778 4050 Page 15...

Need help?
Do you have a question about the TEK-608A and is the answer not in the manual?
Questions and answers