Table of Contents
Advertisement
PRINTER'S INSTRUCTIONS:
INSTR,INSTL,NTBZ48 - P/N: 10006660 B - INK: BLACK - MATERIAL: 20 LB. MEAD BOND - SIZE: 8.500" X 5.500" - TOL. +/- 0.125"- SCALE: 1-1 - FOLDING: ALBUM FOLD: BINDING:
SADDLE STITCH
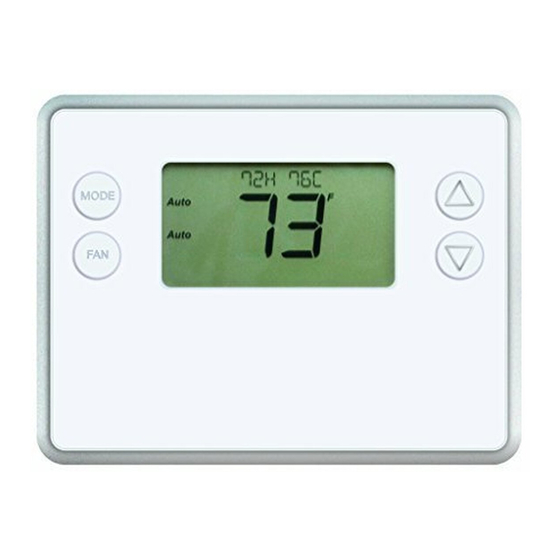
Model NTBZ48
Smart Battery Powered Z-Wave
Thermostat
Installation & Operation Guide
Off
MODE
74
F
Auto
FAN
Advertisement
Table of Contents

Subscribe to Our Youtube Channel
Related Manuals for NuTone NTBZ48


Summary of Contents for NuTone NTBZ48
- Page 1 PRINTER’S INSTRUCTIONS: INSTR,INSTL,NTBZ48 - P/N: 10006660 B - INK: BLACK - MATERIAL: 20 LB. MEAD BOND - SIZE: 8.500” X 5.500” - TOL. +/- 0.125”- SCALE: 1-1 - FOLDING: ALBUM FOLD: BINDING: SADDLE STITCH Model NTBZ48 Smart Battery Powered Z-Wave Thermostat Installation &...
-
Page 2: Table Of Contents
Table of Contents Typical Wiring for Standard Gas/Electric HVAC System . . . . . . . . . . . . . . . . . . . . . . . . . . . . . . . . . . . . . .2 Typical Wiring for Heat Pump HVAC System . -
Page 3: Installation Instructions
• Box Contents Installation Outline • 1─Z-Wave Thermostat • • 1─Sheet Adhesive Wiring Labels • Step 2 Install NTBZ48 Thermostat • • Step 3 Setup Thermostat to match System Type • • Step 4 Install into Z-Wave Network Copyright © 2016 Broan-NuTone LLC... -
Page 4: Typical Wiring For Standard Gas/Electric Hvac System
FAN: GAS HEAT HEATING R TO RH AND COOLING 1 STAGE HEATING R TO RC. NOTE! THE RC-RH 1 STAGE COOLING JUMPER MUST BE CUT ON THE THERMOSTAT BOARD. NO SETUP CHANGE REQUIRED FOR THIS CONFIGURATION 2 Copyright © 2016 Broan-NuTone LLC... -
Page 5: Typical Wiring For Heat Pump Hvac System
Y2 Y1 G R C R W1 O POWERED SYSTEMS INTERNAL R=R JUMPER R = R ARE JUMPERED TOGETHER INTERNALLY THERMOSTAT BACK PANEL NOTE: IF HEATING IS OCCURING WHEN COOOLING IS EXPECTED, OR VICE-VERSA, CHANGE THE CHANGEOVER TYPE TO THE OPPOSITE SETTING. Copyright © 2016 Broan-NuTone LLC... -
Page 6: Thermostat Power
NOT work as a Z-Wave repeater. CAUTION: Do not install batteries and temporarily power the thermostat from 24VAC to include onto a Z-Wave network. Shortened battery life may occur when 24VAC power is removed. 4 Copyright © 2016 Broan-NuTone LLC... -
Page 7: Remove Existing Thermostat
For more information, see the U.S. Environmental Protection Agency website at: http://www.epa.gov/osw/hazard/wastetypes/universal/mce.htm For Canada: Environment Canada and Disposing of Mercury Products at: https://www.ec.gc.ca/mercure-mercury/default. asp?lang=En&n=F111AAC6-1. Copyright © 2016 Broan-NuTone LLC... -
Page 8: Install The Back Panel
1 . Use the two (2) wall anchors and two (2) Phillips screws (provided) to mount the back panel . 2 . Level as needed . ANCHORS (2) PROVIDED PHILLIPS SCREWS (2) PROVIDED Figure 4. Mounting the Back Panel 6 Copyright © 2016 Broan-NuTone LLC... -
Page 9: Standard Hvac System Connections
Connect to the W1 terminal NOTES: Ensure that the appropriate wires are screwed into the terminal blocks firmly. Gently pull on the wires to confirm the connection. Push all excess wiring back into the wall opening . Copyright © 2016 Broan-NuTone LLC... -
Page 10: Dual Transformer Systems
IMPORTANT! FOR SEPARATE RC/RH SYSTEMS, THE INTERNAL RC=RH JUMPER MUST BE CUT ON THE BACK OF THE THERMOSTAT’S PRINTED CIRCUIT BOARD— (See Figure 8). Figure 8. Internal RC=RH Jumper RC=RH JUMPER CUT JUMPER FOR DUAL TRANSFORMER SYSTEMS ONLY 8 Copyright © 2016 Broan-NuTone LLC... -
Page 11: Heat Pump Hvac System Connections
B setting (See page 13). NOTES: Ensure that the appropriate wires are screwed into the terminal blocks firmly. Gently pull on the wires to confirm the connection. Push all excess wiring back into the wall opening . Copyright © 2016 Broan-NuTone LLC... -
Page 12: Mount The Thermostat
Mount the Thermostat Install the thermostat body/front panel onto the wall mounted base by firmly pressing in place until it snaps all around the edges . The NTBZ48 is now ready to program . Figure 11. Attaching Front Panel to Back Panel... -
Page 13: Thermostat Setup Menus
MRT expires. Changing the Mode to OFF will cancel the MRT and the system will turn off immediately. The MRT can be adjusted in the Advanced Settings menu of the thermostat. NOTE: The MRT delays are shown by flashing heat or cool icons on the display. Copyright © 2016 Broan-NuTone LLC... -
Page 14: Entering Menu Mode
The following menu items are displayed in order . • SETUP (user preference settings) • SYSTEM (HVAC system setup) • Z-WAVE (install/uninstall from Z-Wave network) • CLOCK (set time and day) • INFO (firmware versions and Z-Wave network information) 12 Copyright © 2016 Broan-NuTone LLC... -
Page 15: System Menu
“changeover with cool” system . If there was a brown wire connected to a “B” terminal, then this is a “change over with heat” system. Set the Changeover setting accordingly. NOTE: If heating comes on when cooling is expected or vice versa, switch the “Changeover Type” to the opposite setting. Copyright © 2016 Broan-NuTone LLC... -
Page 16: Z-Wave Installation
Low power inclusion or low power exclusion is not possible . CAUTION: Do not install batteries and temporarily power the thermostat from 24VAC to include onto a Z-Wave network. Shortened battery life may occur when 24VAC power is removed. 14 Copyright © 2016 Broan-NuTone LLC... -
Page 17: Clock Menu
• SYSTEM TYPE displays current System Type setting. • If System Type = Standard, FAN TYPE displays current Fan Type setting. • If System Type = Heat Pump, CHANGEOVER TYPE displays current Change Over setting. Copyright © 2016 Broan-NuTone LLC... -
Page 18: Advanced System Settings Menu
Sets the system blower delay off time after a heat call 0-9 seconds 0 (off) Off Delay ends (fan purge) . Cool Blower Sets the system blower delay off time after a cool call 0-9 seconds 0 (off) ends (fan purge) . Off Delay 16 Copyright © 2016 Broan-NuTone LLC... - Page 19 Stage 2 turns off at setpoint - Delta Stage 2. Threshold Restore Restores all settings to factory defaults. Y or N Defaults Press Yes to restore defaults . Press No to exit and not restore defaults . Copyright © 2016 Broan-NuTone LLC...
-
Page 20: Thermostat Operation
“1” = Stage 1 heating or cooling is ON. “2” = Stage 2 heating or cooling is ON. “3” = Stage 3 heating (Aux Heat) is ON. For Heat Pump systems only: “Heat-E” = Emergency heat mode active. 18 Copyright © 2016 Broan-NuTone LLC... -
Page 21: Setting The System Mode
CAUTION! Emergency Heat should only be used for emergencies until the HVAC system can be repaired . Running the system in Emergency Heat mode is commonly the most expensive mode since only the electric heat strips are being used instead of the more efficient heat pump compressor. Copyright © 2016 Broan-NuTone LLC... -
Page 22: Setting The Heating Or Cooling Temperature Setpoint
The same is true for raising the heating setpoint above the cooling setpoint. The thermostat will “push” the cooling setpoint up to maintain the 3 degree separation. 20 Copyright © 2016 Broan-NuTone LLC... -
Page 23: Setting The Fan Mode
Use the FAN button to select the HVAC system’s fan mode. • Auto: Fan automatically operated by the HVAC system (normal setting). • On: Manual Fan mode. Fan stays on until mode is changed back to Auto, independent of the heating or cooling system operation. Copyright © 2016 Broan-NuTone LLC... -
Page 24: User Customization
• SENSOR CALIBRATION: Change the temperature calibration by ± 7 degrees. Press the UP or DOWN arrow buttons to change to the desired display temperature. • STATUS LINE: Sets Status Line to Setpoints or Clock mode . 22 Copyright © 2016 Broan-NuTone LLC... -
Page 25: Clock Menu
INFO Menu The INFO menu displays information about the thermostat. Use the buttons to scroll through the various items . • MODEL NTBZ48 . • VERSION Thermostat firmware version. • ZWAVE Z-Wave firmware version. • NODE ID Z-Wave Node ID . -
Page 26: Specifications
• Consult the dealer or an experienced radio/TV technician for help Any changes or modifications not expressly approved by the party responsible for compliance could void the user’s authority to operate the equipment. 24 Copyright © 2016 Broan-NuTone LLC... -
Page 27: Industry Canada Notices
Limited Warranty WARRANTY PERIOD AND EXCLUSIONS: Broan-NuTone LLC (the “Company”) warrants to the original consumer purchaser of its product (the “Product”) that the product will be free from material defects in the Product or its workmanship for a period of one (1) year from the date of original purchase . - Page 28 The most current limited written warranties for the Company’s products can be found at www NuTone com Broan-NuTone LLC 926 West State Street, Hartford, WI 53027 www NuTone com Toll Free (855) 249- 0610 If you must send the Product or part to the Company, as instructed by the Company, you must properly pack the Product or part—the Company is not responsible for damage in transit...
Need help?
Do you have a question about the NTBZ48 and is the answer not in the manual?
Questions and answers